

Simprosys Google Shopping Feed
Pre-Installation & Setup
Initial App Configuration
Product Submission Controls
Product Attributes and Optimization
Automated Feed Rules
Troubleshooting & Issue Fixes
Advanced Setup Made Easy
Google Merchant Center Setup
Tracking Tags Setup (Google Ads & Google Analytics 4)
Google Ads & Campaign Setup
Multi-Country & Market Setup
Promotions and Discounts
Microsoft Advertising Integration
Meta (Facebook) Integration
Pinterest Integration
How to Enable Server-side Google Analytics 4 tracking using GTM
Mar 24, 2026
We’re excited to introduce Server-Side Tracking for Google Analytics 4 (GA4) using Google Tag Manager, now available through the Simprosys Google Shopping Feed app. This setup helps you capture more reliable analytics data by reducing the impact of browser restrictions and tracking limitations that often affect traditional client-side tracking.
As an online store owner, understanding how visitors interact with your store is essential for growing your business. You need visibility into the entire customer journey, from the moment someone lands on your site to when they complete a purchase. Knowing which traffic sources or ads drive sales helps you make smarter decisions and invest confidently in what works. Server-side GA4 tracking improves the accuracy of this data.
Traditionally, website tracking relied on third-party cookies stored in the visitor’s browser. This approach, known as client-side or browser-side tracking, has become less reliable due to browser privacy features and ad-blocking tools that block third-party cookies, which can result in missing or incomplete data.
Server-side tracking offers a dependable alternative. Instead of using third-party cookies and processing tracking directly in the visitor’s browser, server-side tracking uses first-party cookies to load the script in the browser, and it routes key activity through a secure server. This allows visitor actions to be captured more accurately, even when browsers limit third-party cookies or restrict tracking.
With Google Tag Manager, this setup runs in the background once enabled and requires no custom coding. As a result, you get more reliable analytics data and a clearer view of how your store is performing.
This guide walks you through the entire setup process, step by step.
Prerequisites for Setup
To ensure a smooth setup, make sure you have the following access:
1. Google Analytics Access: A Google account with "Administrator" access to your Google Analytics 4 property.
2. GTM Admin Access: Admin access to an existing GTM account to import and manage a Web container.
3. Domain Login: Admin Access to your domain provider (like GoDaddy or Cloudflare) to add DNS records
Once these are in place, you’re ready to proceed with the setup.
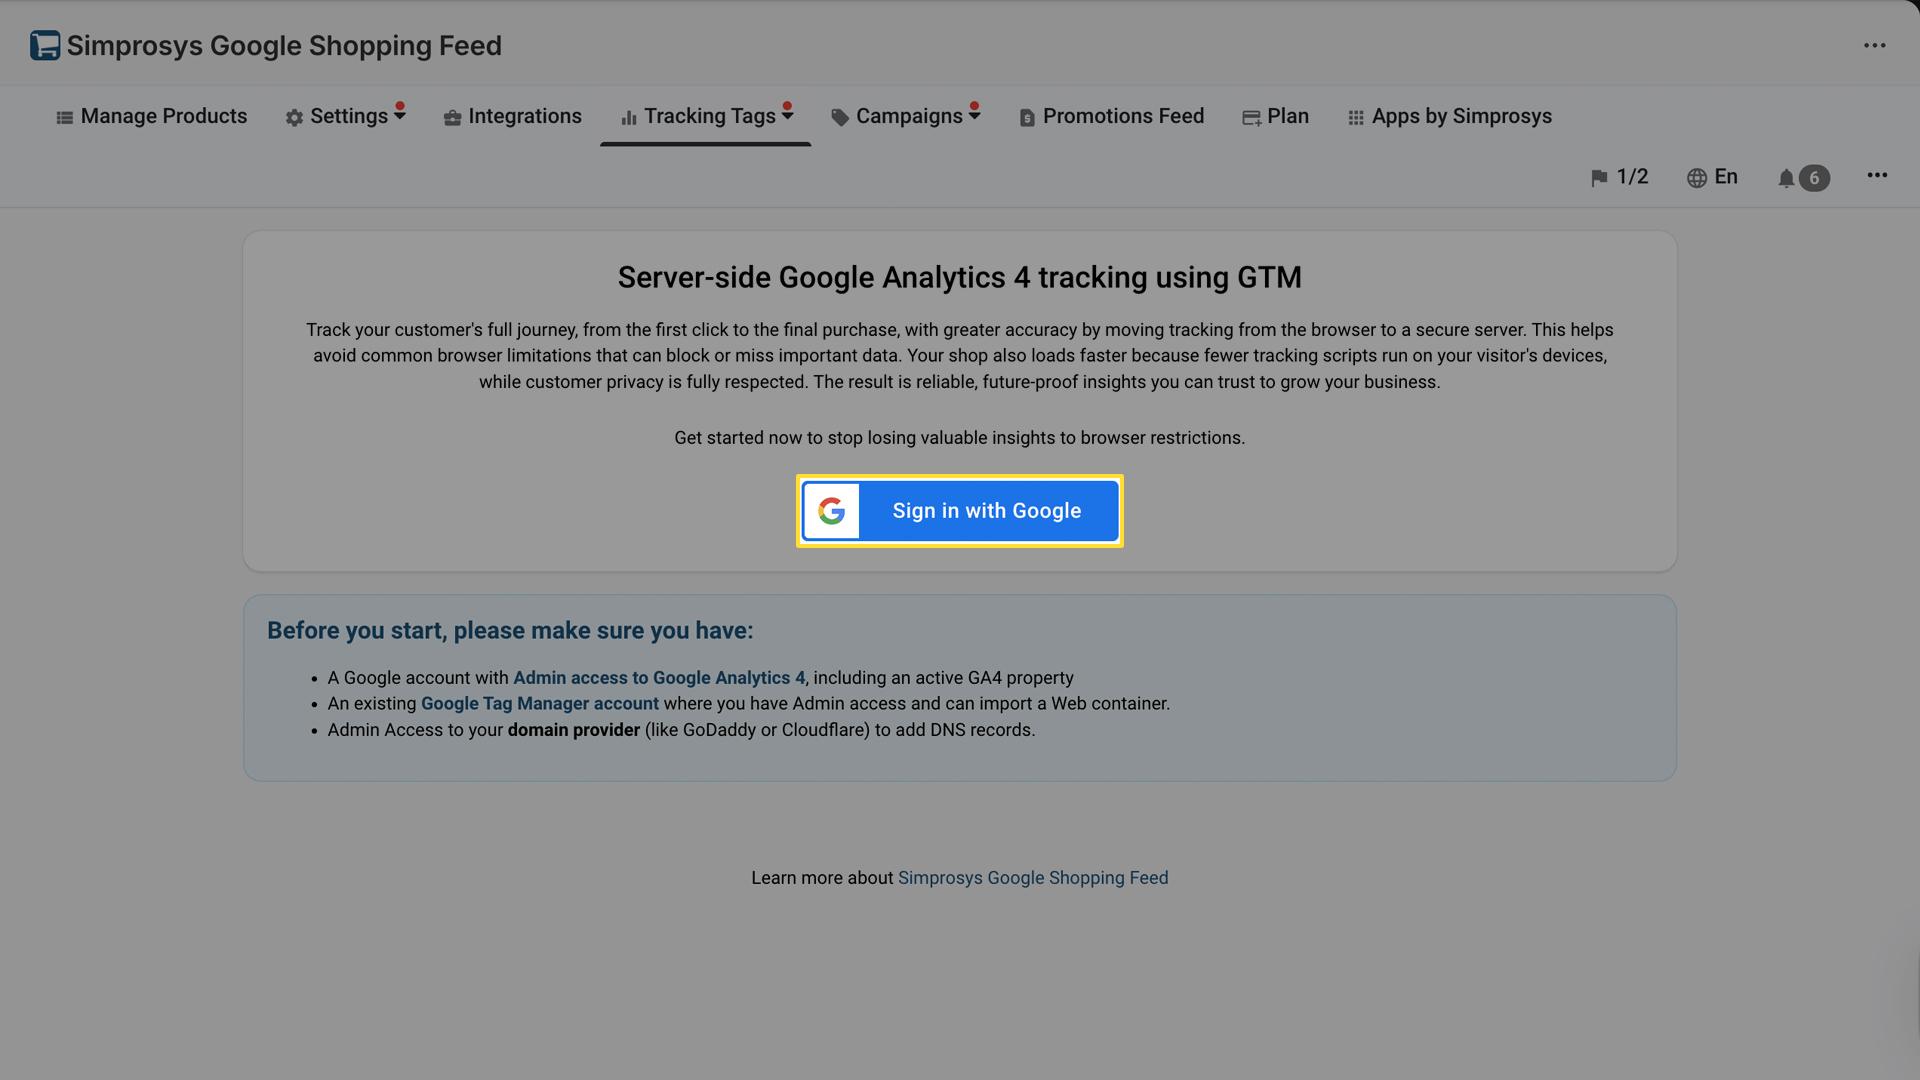
To begin the setup, log in to the app from your Shopify store admin. From the main menu, go to Tracking Tags section and select “Server-side GA4 Tracking Using GTM”
Step 1: Sign in with Google
To continue, you need to authorize the app to access your Google accounts securely.
1. Click the Sign in with Google button on the feature landing page.
2. A Google sign-in window will appear. Log in using the Google account that has admin access to both Google Analytics and Google Tag Manager.
3. Grant the required permissions to complete the connection.
Note: This access is used only to configure tracking tags. Your password is never visible or stored.
Step 2: Configure Your Tracking Setup
Once you’re signed in, select the Google Analytics and Google Tag Manager accounts you want to use for tracking. This step ensures that your store data is sent to the correct destinations.
You’ll also choose how conversion values (such as purchase amounts) are tracked and, if applicable, link your Google Ads account to enable better measurement and reporting. Also select how to measure sales values and link your ads for better performance.
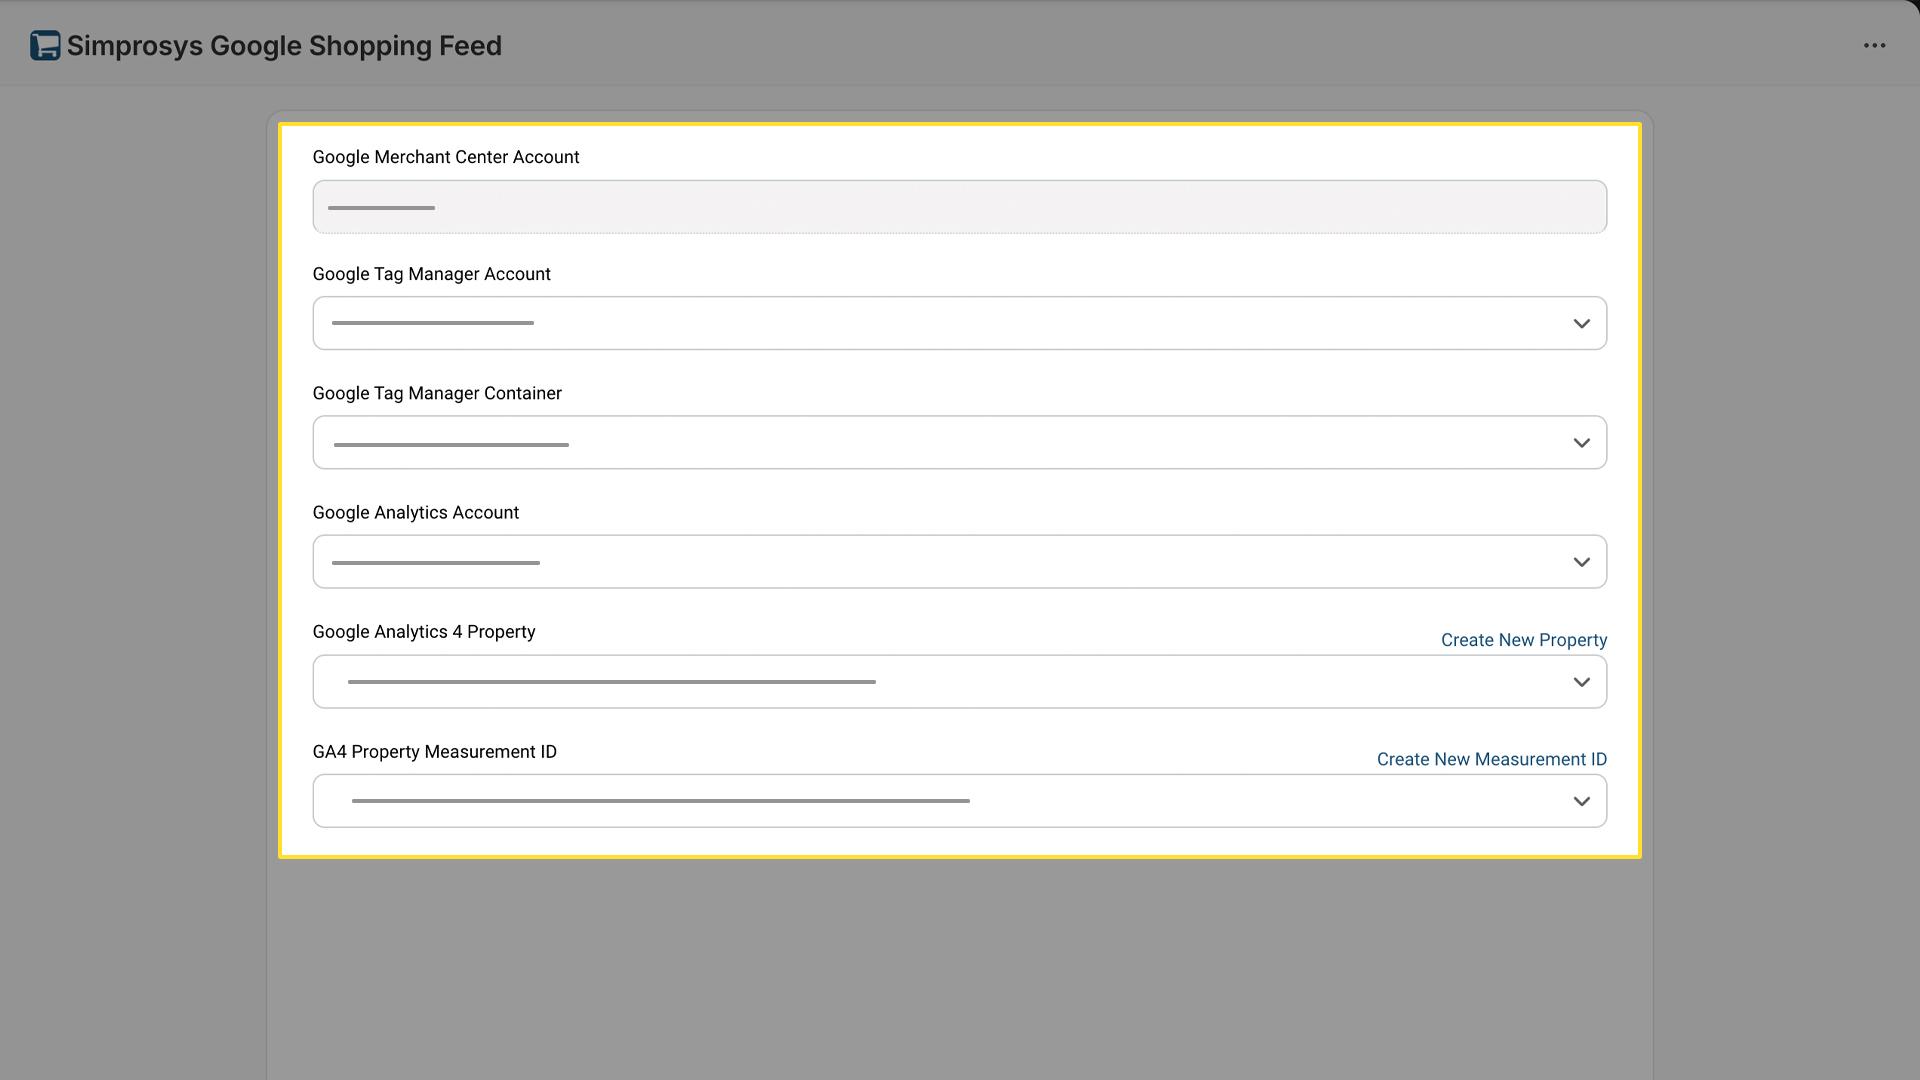
Start by selecting:
1. Google Tag Manager account from the dropdown.
2. The specific container in Google Tag Manager where the tracking will live.
3. Your Google Analytics account.
4. Google Analytics 4 property you want to use.
5. Measurement ID for that property.
Next, select how conversion values should be tracked. You have two options:
- Order Subtotal: Tracks only the product cost, excluding shipping, taxes, and discounts.
- Order Total: Tracks the final amount paid by the customer, including shipping, taxes, and discounts.
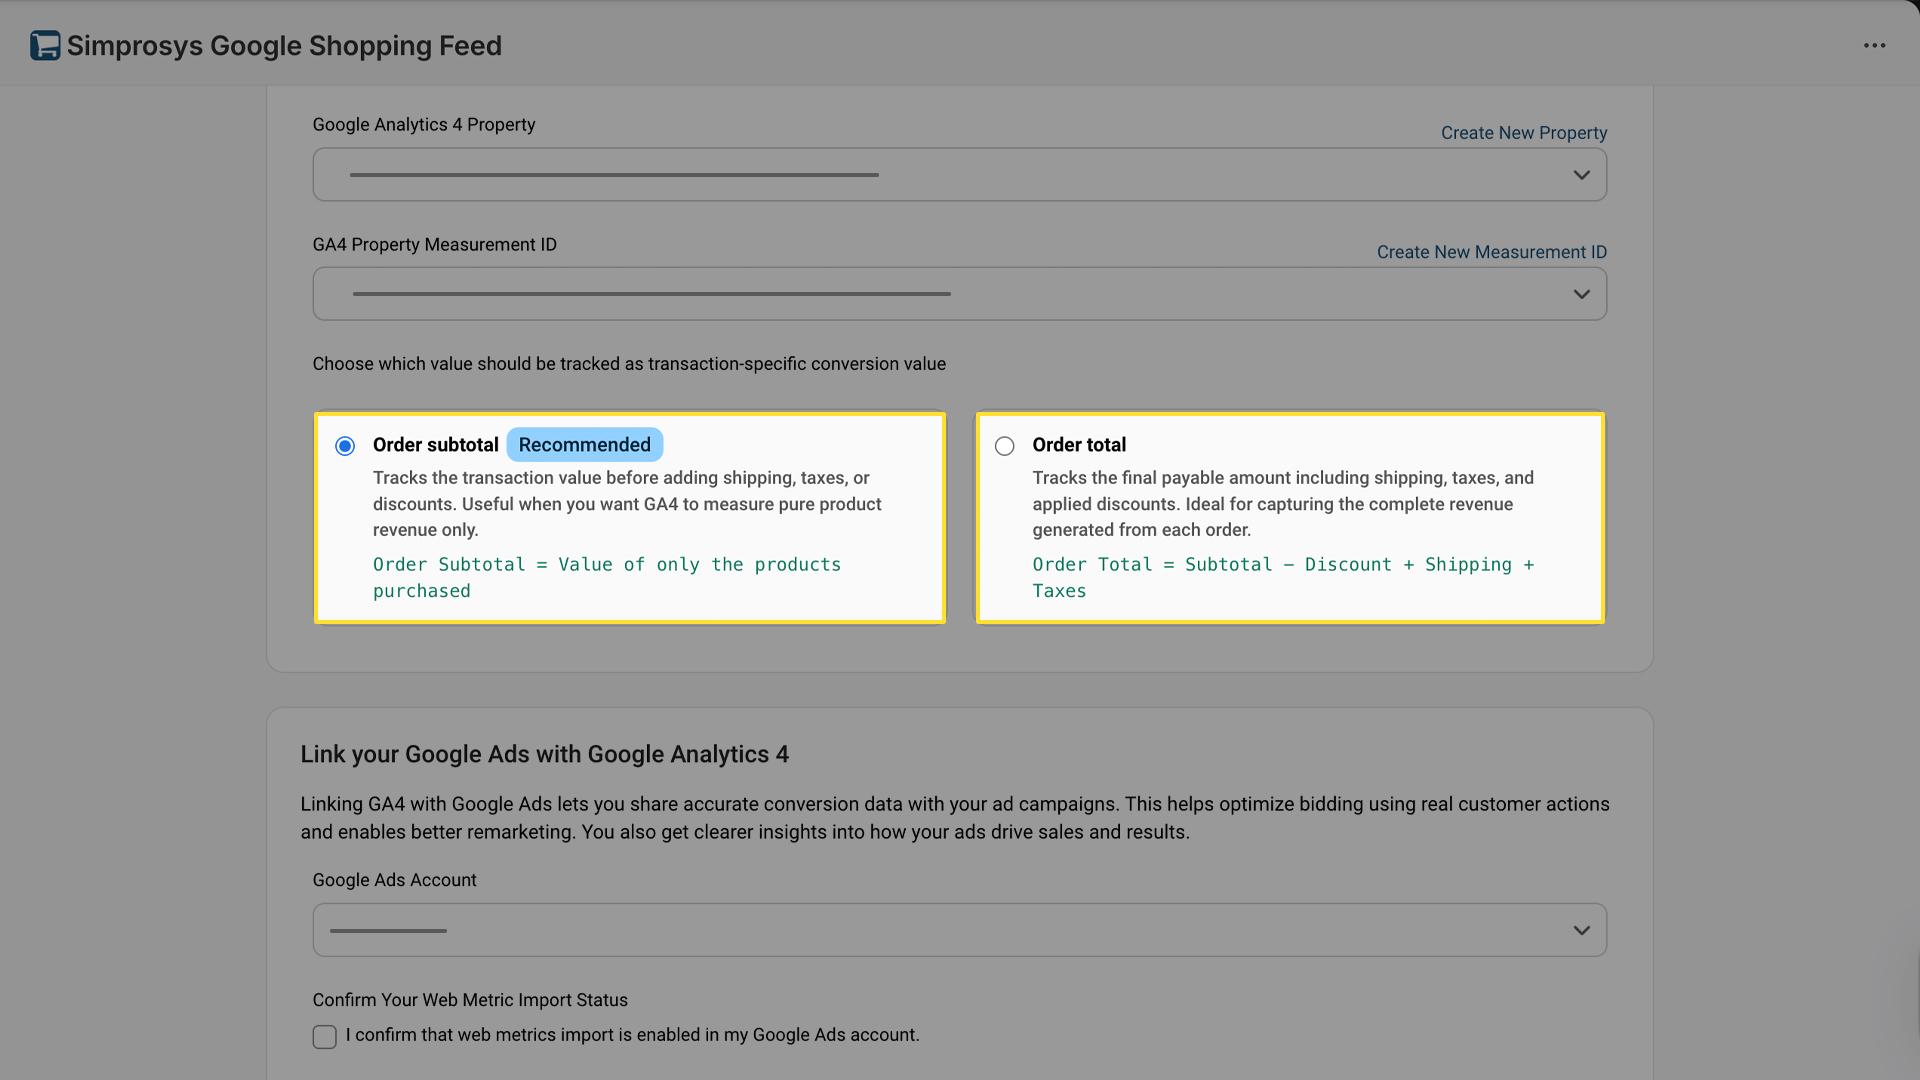
Step 3: Link Google Ads with Google Analytics 4
If you run Google Ads campaigns, linking Google Ads with GA4 is recommended. If the accounts are already linked, proceed to the next step.
Linking these accounts allows GA4 conversion data and audiences to be shared with Google Ads. This helps optimize your campaigns using on-site actions and gives clearer insight into which ads drive conversions and sales.
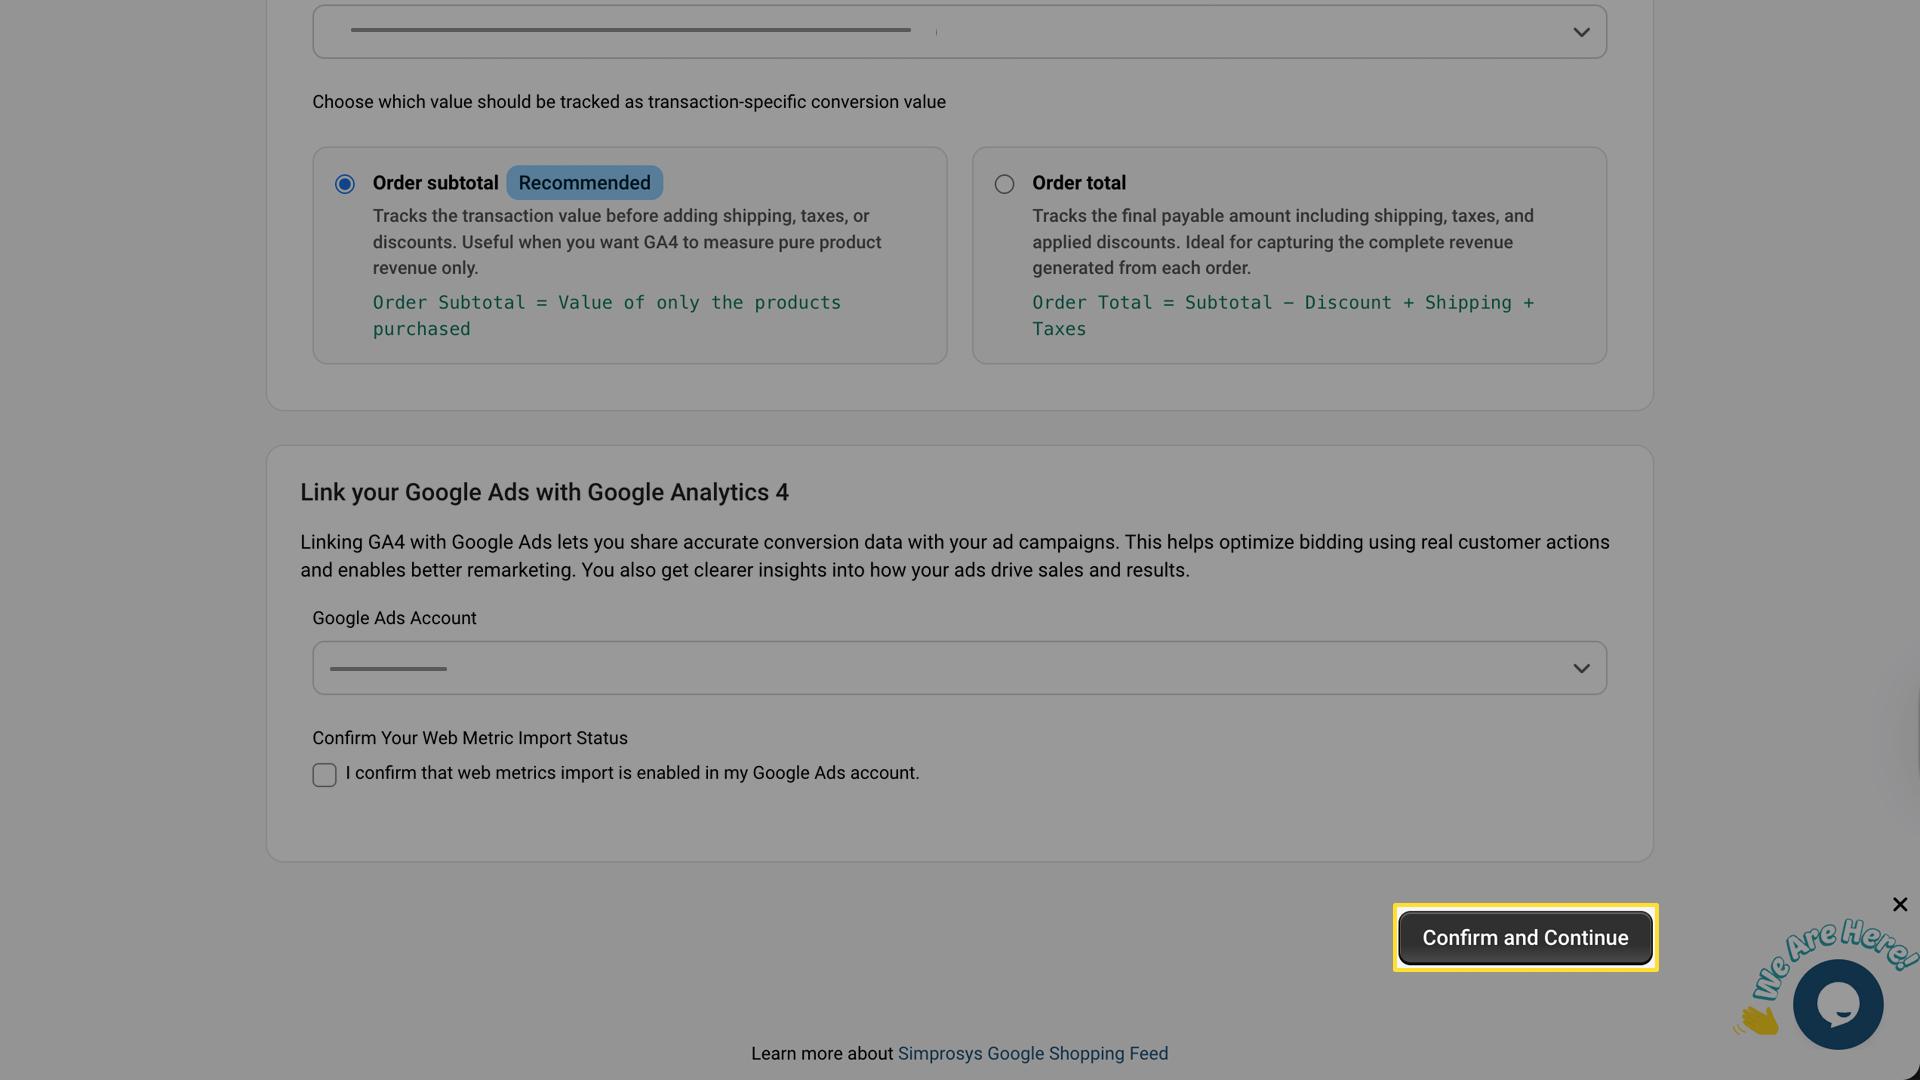
Before confirming this step, make sure web metrics import is enabled in your Google Ads account. This setting must be enabled manually, as the app cannot enable it for you.
To enable Import app and web metrics in Google Ads, follow these steps:
1. Log in to your Google Ads account.
2. Click the Tools icon in the top navigation.
3. Open Data manager.
4. Click + Connect product and select Google Analytics (GA4).
5. Choose your Google Analytics 4 property and click Next.
6. Enable the following options:
- Import app and web metrics
- Import Google Analytics audiences
7. Review the settings and click Link to complete the process.
Once completed, return to the app and check the confirmation box (as shown above). Data typically starts flowing within an hour, though larger accounts may take longer. It usually takes about an hour for data to start flowing, but larger accounts may take longer due to processing time.
Step 4: Install the GTM Container
To simplify the setup, the app generates a pre-configured container file for you. It includes all the required tags, triggers, and variables, so you don’t need to create them manually.
Download the container file.
Click the Download Container File button in the app and save the file.

Import the Container into Google Tag Manager and Verify Setup.
Import the downloaded container file into your Google Tag Manager account to complete this step.
For detailed instructions, refer to our step-by-step guide covering the import process, selecting the correct options, and publishing the container.
Once completed, verify the setup to ensure tracking is working correctly.
Step 5: Update Your Domain Settings (DNS)
This is the final and most critical step. Add the required DNS records in your domain provider account to authorize the tracking server.
Why this is required:
This step creates a secure connection between your website and the tracking server, allowing data to be tracked reliably without affecting your storefront.
The app will display the DNS records (typically CNAME) with the required host names and values, as shown in the image below.
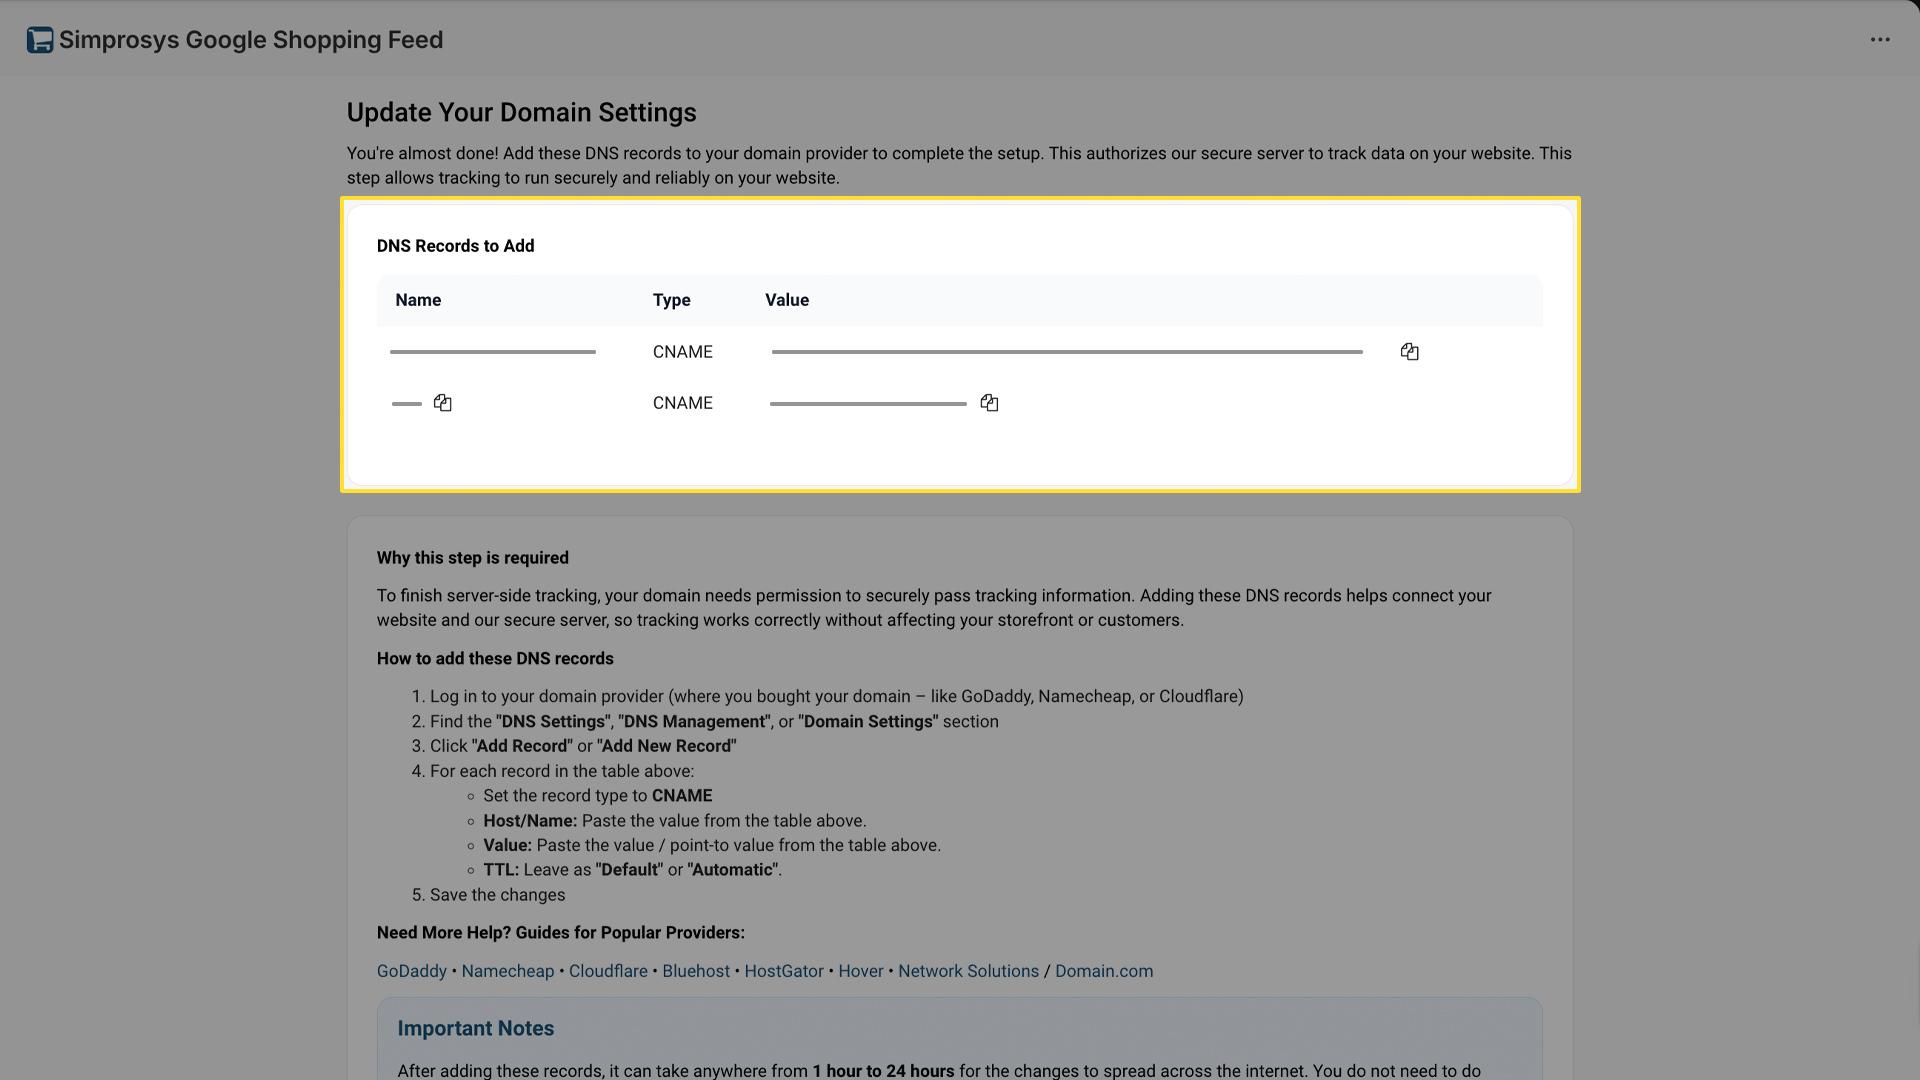
How to Add the Records
1. Log in to your domain provider (such as GoDaddy, Namecheap, or Cloudflare)
2. Open DNS Settings or DNS Management.
3. Click to add a new record.
4. For each record shown in the app:
- Set the Type to CNAME
- Enter the Host/Name from the table
- Enter the Value/Points from the table
5. Save your changes.
If needed, you can refer to the in-app guides for popular domain providers such as GoDaddy • Namecheap • Cloudflare • Bluehost • HostGator • Hover • Network Solutions/Domain.com
Important: Please allow some time after saving these changes. It can take up to 24 hours for the DNS updates to take effect. No further action is required; tracking will start automatically once the setup is complete. You’ll receive an email confirmation once everything is verified.
What Happens Next
After completing these steps, you’ll see a success page in the app confirming that the setup is complete.
Allow some time for the DNS changes to take effect, then check your Google Analytics 4 reports to start seeing more complete and reliable data.
You can reach out to support@simprosys.comfor any further information.
Previous article

Next article
Simprosys Google Shopping Feed
Pre-Installation & Setup
Initial App Configuration
Product Submission Controls
Product Attributes and Optimization
Automated Feed Rules
Troubleshooting & Issue Fixes
Advanced Setup Made Easy
Google Merchant Center Setup
Tracking Tags Setup (Google Ads & Google Analytics 4)
Google Ads & Campaign Setup
Multi-Country & Market Setup
Promotions and Discounts
Microsoft Advertising Integration
Meta (Facebook) Integration
Pinterest Integration


