

Proviews ‑ Product Reviews Q&A
Legal Policies
Setup & Configuration
Additional Information
Installation Processes
Feature Policies & Guidelines
Widget Settings of Proviews – Product Reviews Q&A
Jun 12, 2026
Proviews offers three powerful widgets to display your reviews across your storefront. Each widget is accessible from Main Navigation → Widgets. This guide covers the setup and configuration for all three.
- Star Ratings
- Reviews Carousel
- All Reviews Page
1. Star Ratings
The Star Ratings widget shows your product's average rating and review count in three key locations — building instant shopper trust before they even open a product page.
Product Pages: Appears below the product title on the product detail page.
Collection Pages: Appears inside product thumbnails, helping shoppers compare at a glance.
Search Results Page: Appears alongside products in search results, influencing decisions at the discovery stage.
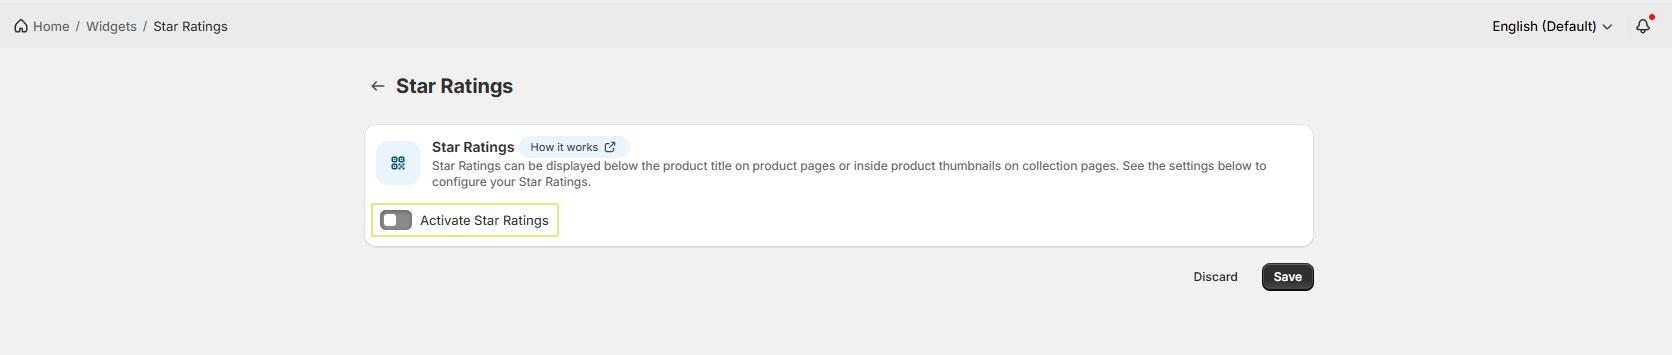
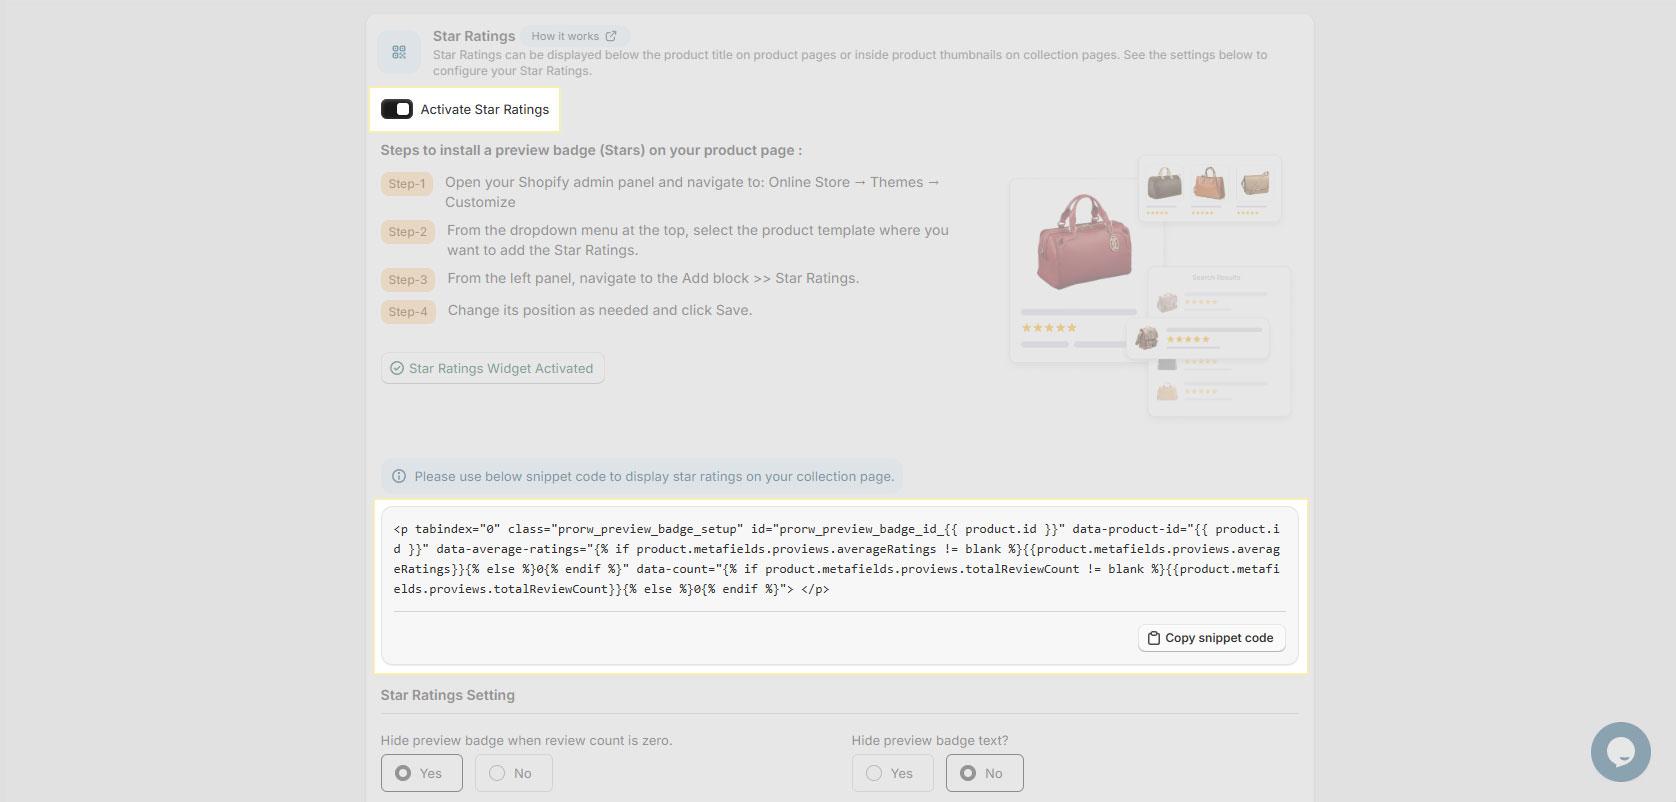
Step 1 – Activate Star Ratings
- Log in to Proviews and go to Widgets → Star Ratings.
- Toggle ON the Activate Star Ratings switch.
Step 2 – Add Star Ratings to Your Product Page
- In Shopify admin, go to Online Store → Themes → Customize.
- From the dropdown at the top of the Theme Editor, select the product template where star ratings should appear.
- In the left panel, click Add block and select Star Ratings.
- Drag the block to your preferred position and click Save.
Step 3 – Add Star Ratings to Your Collection Page
- In Proviews, go to Widgets → Star Ratings and click Copy snippet code.
- In Shopify admin, go to Online Store → Themes → Edit Code.
- Open your collection product card template (commonly product-card.liquid or card-product.liquid).
- Paste the snippet at your preferred location and click Save.
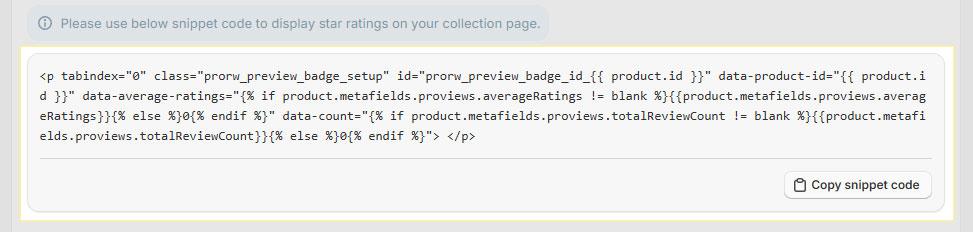
Tip: Always use the Copy snippet code button in Proviews — avoid typing the snippet manually to prevent errors.
Step 4 – Add Star Ratings to Your Search Results Page
- In Proviews, click Copy snippet code on the Star Ratings page.
- In Shopify admin, go to Online Store → Themes → Edit Code.
- Open your search results product card template (commonly search-product-card.liquid or card-product.liquid).
- Paste the snippet at your preferred location and click Save.
Tip: Unsure which file controls your search results? Search for the keyword search in the Shopify code editor to locate the correct template quickly.
Note: The search results snippet is identical to the collection page snippet. If your theme uses a shared product card component, adding the snippet once may cover both locations automatically.
Step 5 – Configure Settings & Customize Text
Fine-tune how star ratings behave and what text they display:
| Setting | Options | Description |
| Hide preview badge when review count is zero | Yes / No | Select Yes to hide the badge on products with no reviews, keeping your storefront clean. |
| Hide preview badge text | Yes / No | Select Yes to show star icons only, without any text label or review count. |
| No Review text | Custom text | The label shown on the badge when a product has no reviews yet (e.g., "No reviews"). |
| Product Group text | Custom text | The label format shown when a product belongs to a group displaying a combined rating (e.g., "[N] review(s)"). |
Once configured, click Save to apply all changes. Settings take effect immediately — no theme code changes are needed.
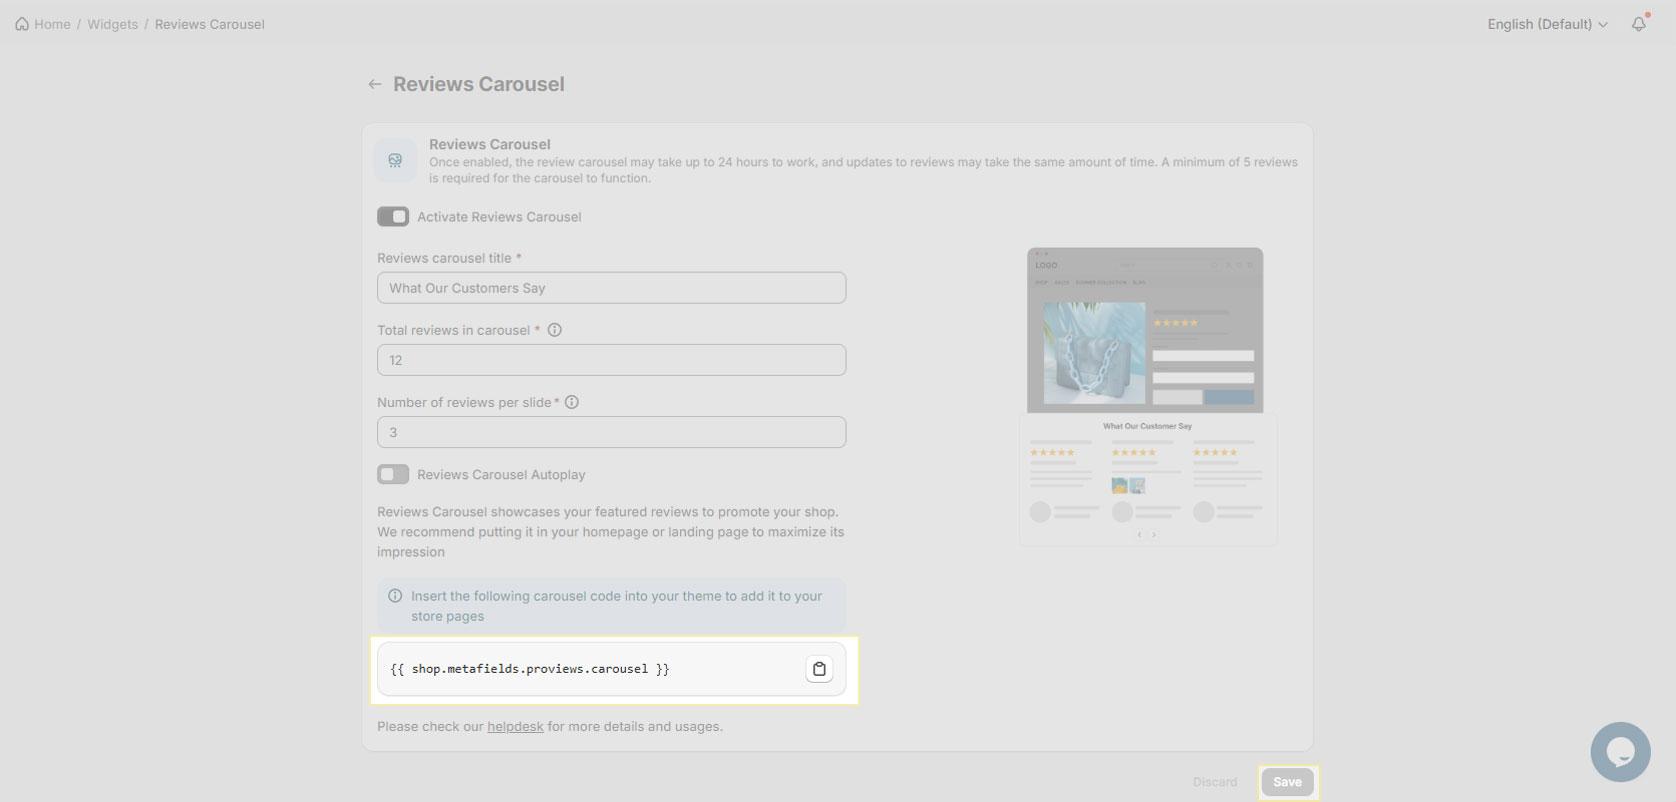
2. Reviews Carousel:
The Reviews Carousel embeds a scrollable review widget on any store page. Place it on your homepage or landing pages to give shoppers compelling social proof the moment they arrive.
Minimum 5 Reviews Required: The carousel needs at least 5 published reviews to function.
Allow Up to 24 Hours: After activation, the carousel may take up to 24 hours to appear. Review updates take the same time to reflect.
Step 1 – Activate & Configure the Carousel
- Log in to Proviews and go to Widgets → Reviews Carousel.
- Toggle ON the Activate Reviews Carousel switch.
- Configure the carousel settings using the table below, then click Save.
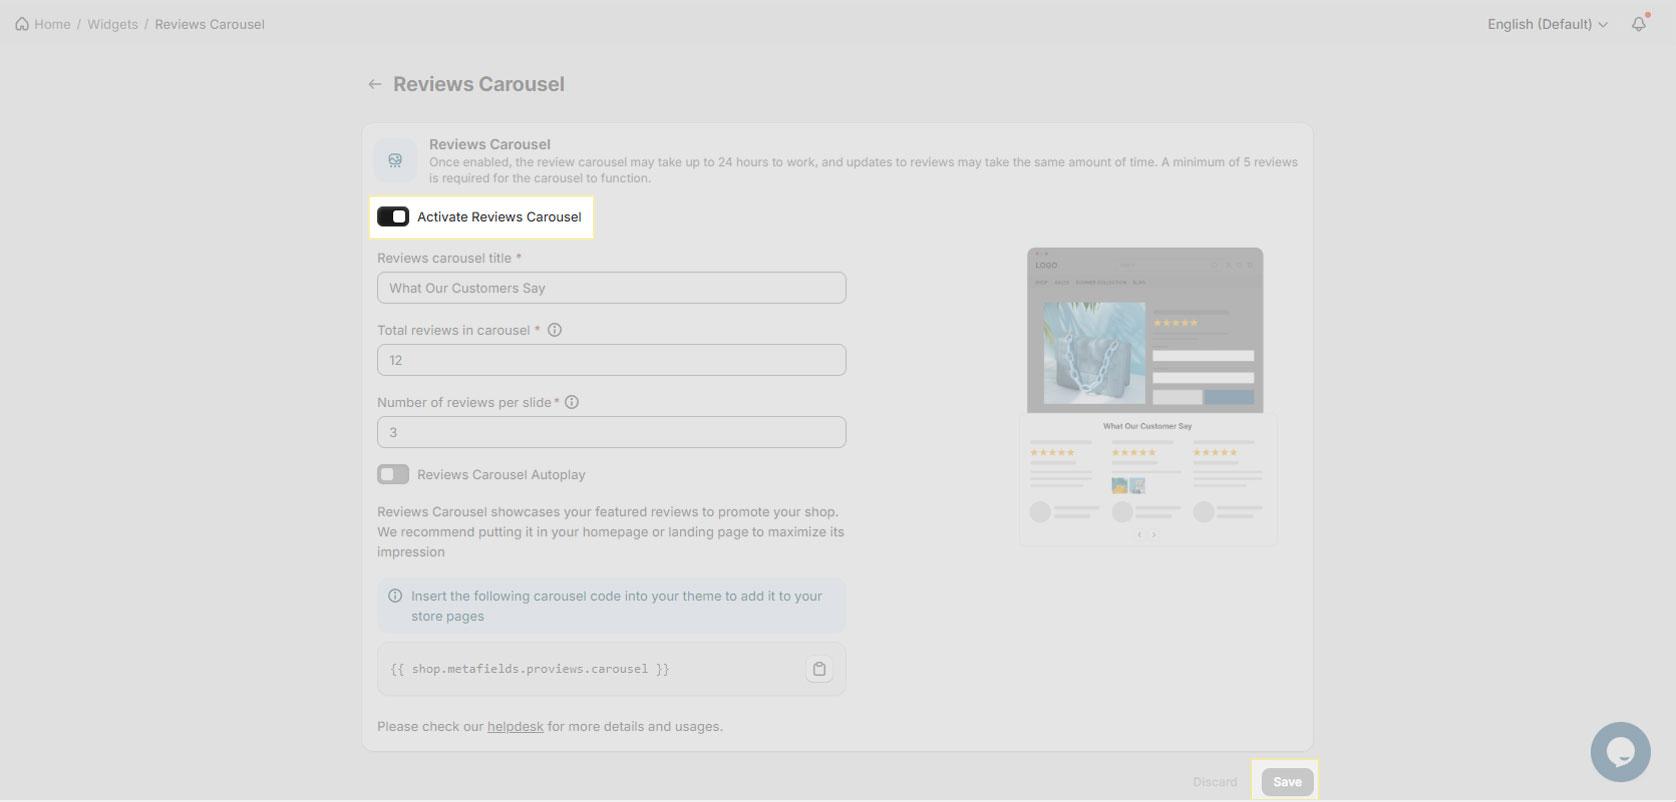
| Setting | Description | Recommended |
| Carousel Title | The heading displayed above the carousel on your storefront. | "What Our Customers Say" |
| Total Reviews in Carousel | The total number of featured reviews loaded into the carousel pool. | 12 (default) |
| Reviews Per Slide | How many review cards appear at once on each slide. | 3 (use 1–2 for mobile-first stores) |
| Autoplay | Automatically advances slides without shopper interaction. | On |
Step 2 – Embed the Carousel on Your Store Pages
- On the Reviews Carousel page, click the copy icon to copy the embed snippet.
- In Shopify admin, go to Online Store → Themes → Edit Code.
- Open the template file for your target page (e.g., index.liquid for the homepage).
- Paste the snippet at your preferred location and click Save.
“{{ shop.metafields.proviews.carousel }}”
Note: Paste the same snippet into multiple template files to display the carousel on more than one page — no extra Proviews configuration is needed.
Reminder: If the carousel does not appear within 24 hours, confirm that at least 5 reviews are published and that the snippet is saved correctly in your theme.
3. All Reviews Page:
The All Reviews Page widget creates a single, browsable page showcasing every published product review — giving shoppers a complete view of your store's reputation and boosting confidence before purchase.
Before you begin: At least one published review is required for this page to display content. Confirm that at least one approved review exists in Proviews before proceeding.
Step 1 – Enable Review Types & Choose a Layout
Select which review types to display and choose your preferred layout:
Product Reviews: Includes product-specific reviews. This is the primary review type and is enabled by default.
Site Reviews: Toggle ON to also include store-level reviews alongside product reviews.
Tip: Enable Site Reviews if you collect store-wide feedback — it gives shoppers a more complete picture of your overall store experience.
Two Column: Displays reviews in a two-column grid. Best for wide layouts — shows more reviews per screen.
Minimal: Displays reviews in a single-column list. Clean and compact — ideal for narrower or streamlined layouts.
Step 2 – Embed the Widget on Your Store Page
- On the All Reviews Page settings, click the copy icon to copy the widget snippet.
- In Shopify admin, go to Online Store → Pages and open or create the page (e.g., "Customer Reviews").
- Switch the content editor to HTML / code view and paste the snippet into the page body.
- Click Save. The All Reviews widget now renders on that page.
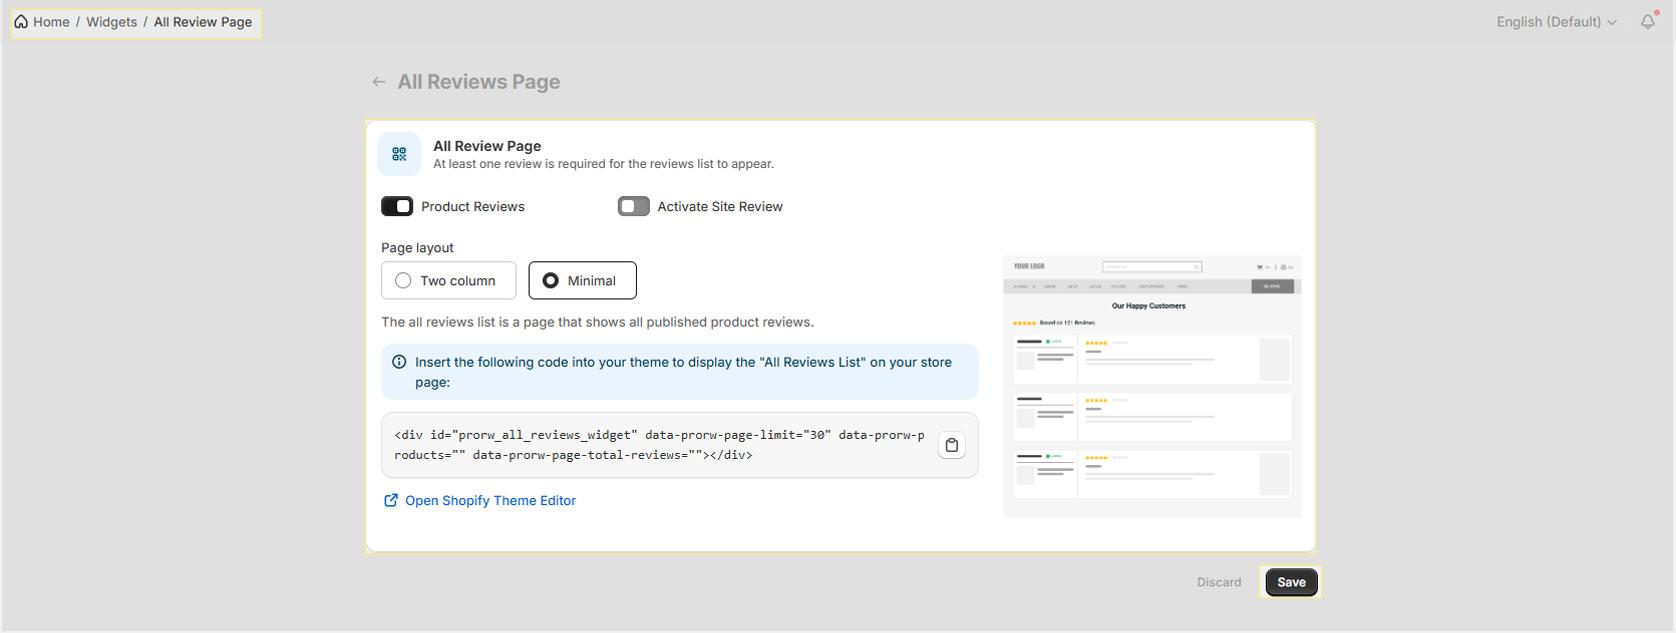
You can also click Open Shopify Theme Editor directly from the Proviews settings page to navigate there immediately.
Note: The data-prorw-page-limit attribute sets how many reviews load per page (default: 30). Adjust this value directly in the snippet to show more or fewer reviews per page.
Reminder: If the page appears empty after setup, confirm that at least one review is published and approved in Proviews.
Need Help?
Click “Help Me” and our chatbot will appear. You can then ask questions or request assistance in real time.
For email support, feel free to reach out to us at support@simprosys.com.
Previous article

Next article
Proviews ‑ Product Reviews Q&A
Legal Policies
Setup & Configuration
Additional Information
Installation Processes
Feature Policies & Guidelines


