Proviews ‑ Product Reviews Q&A
Legal Policies

Setup & Configuration
Additional Information
Installation Processes
Feature Policies & Guidelines


Email Branding Configuration in Proviews – Product Reviews Q&A
Aug 21, 2026
Overview
Email Branding lets you send all Proviews review request emails from your own subdomain — removing Proviews and Simprosys branding entirely and replacing it with your store's identity. The result is a more professional, trust-building customer experience from inbox to storefront.
Remove All Branding: Eliminates all Proviews and Simprosys references from outgoing emails.
Send from your own domain: Emails go out from your subdomain (for example, reviews.yourstore.com) for a fully professional appearance.
Build consistent trust: Uniform branding at every touchpoint strengthens customer confidence and recognition.
Setup Flow
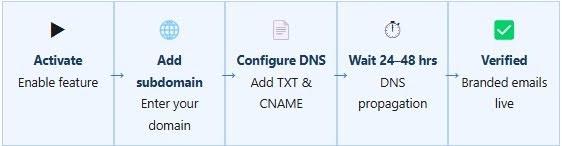
Step 1 – Turn on Email Branding
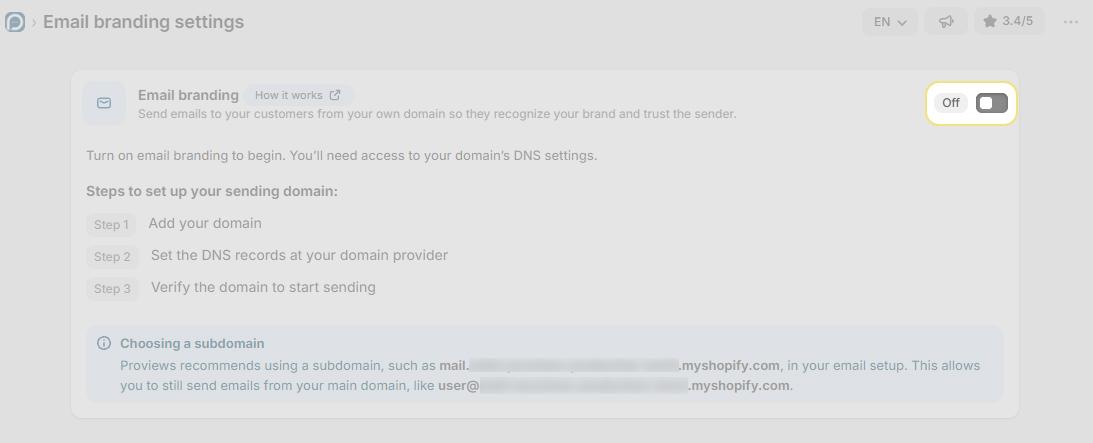
1. In Proviews, select Email Branding from the left sidebar.
2. Toggle ON the Activate Email Branding switch to enable the feature.
Turn on Email Branding
Before you start: you'll need access to your domain's DNS settings to complete setup.
Step 2 – Add and choose your sending domain
1. Add the domain you want Proviews to send email from. We recommend a dedicated subdomain — for example, mail.yourstore.com — rather than your root domain. This keeps your regular email (like user@yourstore.com) working exactly as it does today, with no conflicts.
2. Once added, your domain appears under Sending domains with a Pending status until its DNS records are verified.
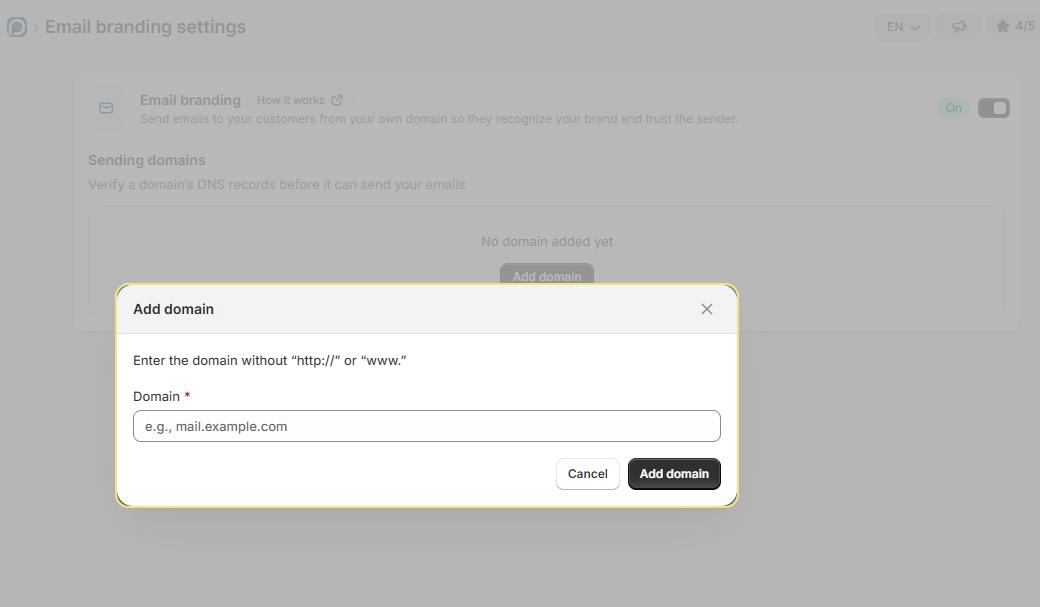
Format note: Enter only the subdomain — do not include http://, https://, or www. For example, enter reviews.shop.com, not
Step 3 – Configure DNS Records
1. Next to your domain, open DNS configurations to view the records Proviews needs.
2. Select your DNS provider — GoDaddy, Amazon Route 53, NameCheap, Rackspace, Digital Ocean, and others are listed — for step-by-step instructions.
3. Add the required TXT record for email sending, and the recommended CNAME record to track clicks and email opens. Use Copy to copy each host and value exactly as shown.
4. Click Refresh DNS status at any time to check your progress.
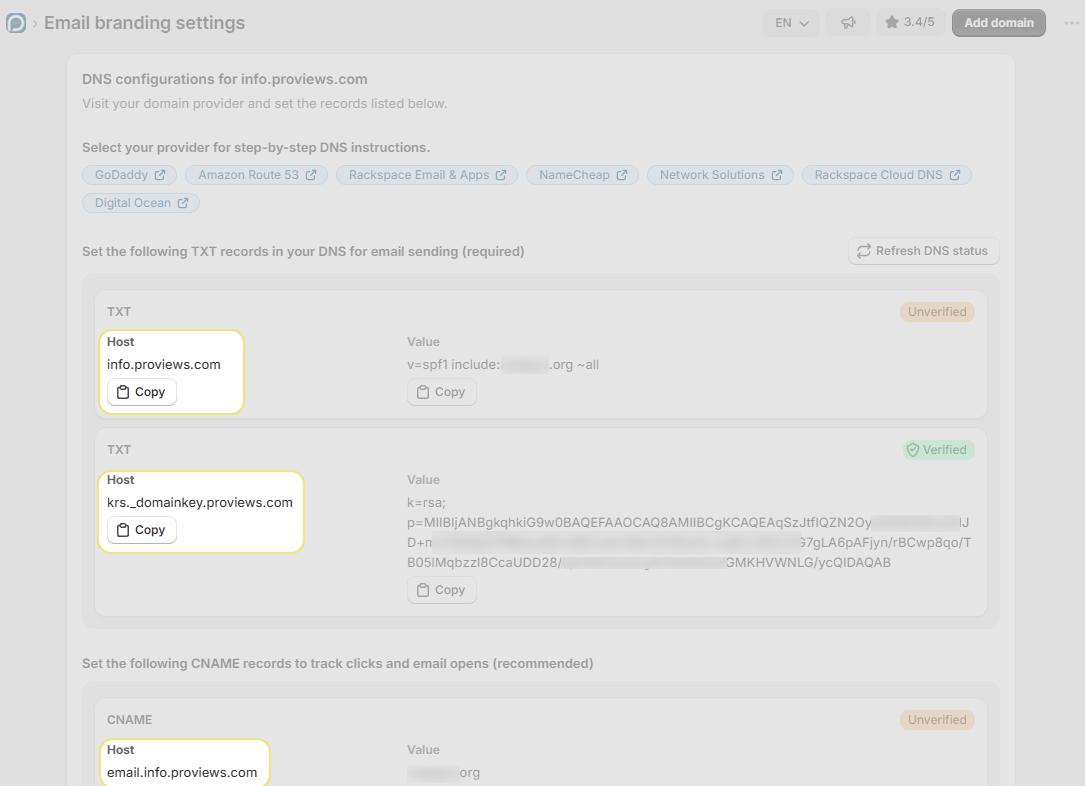
Terminology varies by provider. Some providers use different field names — for example, "Name" instead of "Host," or "Target" instead of "Value." Check your provider's guide if you're unsure which field maps to which.
DNS changes take 24–48 hours to propagate. Your domain's status stays Pending during this window — that's expected.
Step 4 – Verify Your Domain
1. After DNS propagation completes, click Verify DNS next to your domain.
2. Once verification succeeds, each record's status updates to Verified.
When every record shows Verified, your setup is complete. Every review request, reply, and notification now sends from your own domain, with no Proviews or Simprosys branding anywhere in sight.
Need help with DNS?
Our team can walk you through setup over live support, or you can book a session with our support team.
Prefer to add the records yourself? Use the guides below for your DNS provider:
| Provider | Guides |
| GoDaddy | Add a TXT record, Add a CNAME record |
| Namecheap | Add a TXT and CNAME record |
| Cloudflare | Add a TXT and CNAME record |
| Amazon Route 53 | Add a TXT and CNAME record |
| DigitalOcean | Add a TXT and CNAME record |
| Hostgator | Add a TXT and CNAME record |
| Rackspace | Add a TXT record |
| Hostinger | Add a TXT record, Add a CNAME record |
| Bigrock | Add a TXT and CNAME record |
Need help?
Click “Help Me” and our chatbot will appear. You can then ask questions or request assistance in real time.
For email support, feel free to reach out to us at support@simprosys.com
Previous article

Next article
Proviews ‑ Product Reviews Q&A
Legal Policies
Setup & Configuration
Additional Information
Installation Processes
Feature Policies & Guidelines