
Simprosys Product Feed for WooCommerce
Pre-Installation

Plugin Setup

Product Submission Controls

Product Attributes & Optimization

Automated Feed Rule

Troubleshooting & Issue Fixes

Advanced Setup Made Easy

Google Merchant Center Setup & Integration

Tracking Tag Setup (Google Ads & Google Analytics 4)

Google Ads & Campaign Setup

Multi-Country

Promotions Feed

Microsoft Advertising Integration & Campaign Setup

META (Facebook) Integration

WooCommerce Store Access & Setup

Step By Step Integration Guide to link Google Merchant Center with our plugin.
Dec 31, 2025
Please refer to this help doc to go through the entire process in detail to know how to integrate our plugin Simprosys Product feed for WooCommerce with "WooCommerce Store". Step 1. Open your WooCommerce store, locate the option “Plugin > Add New”, in the search bar, and search for our plugin “Simprosys Product Feed for WooCommerce”. Proceed with “Install Now” and “Activate” the plugin. 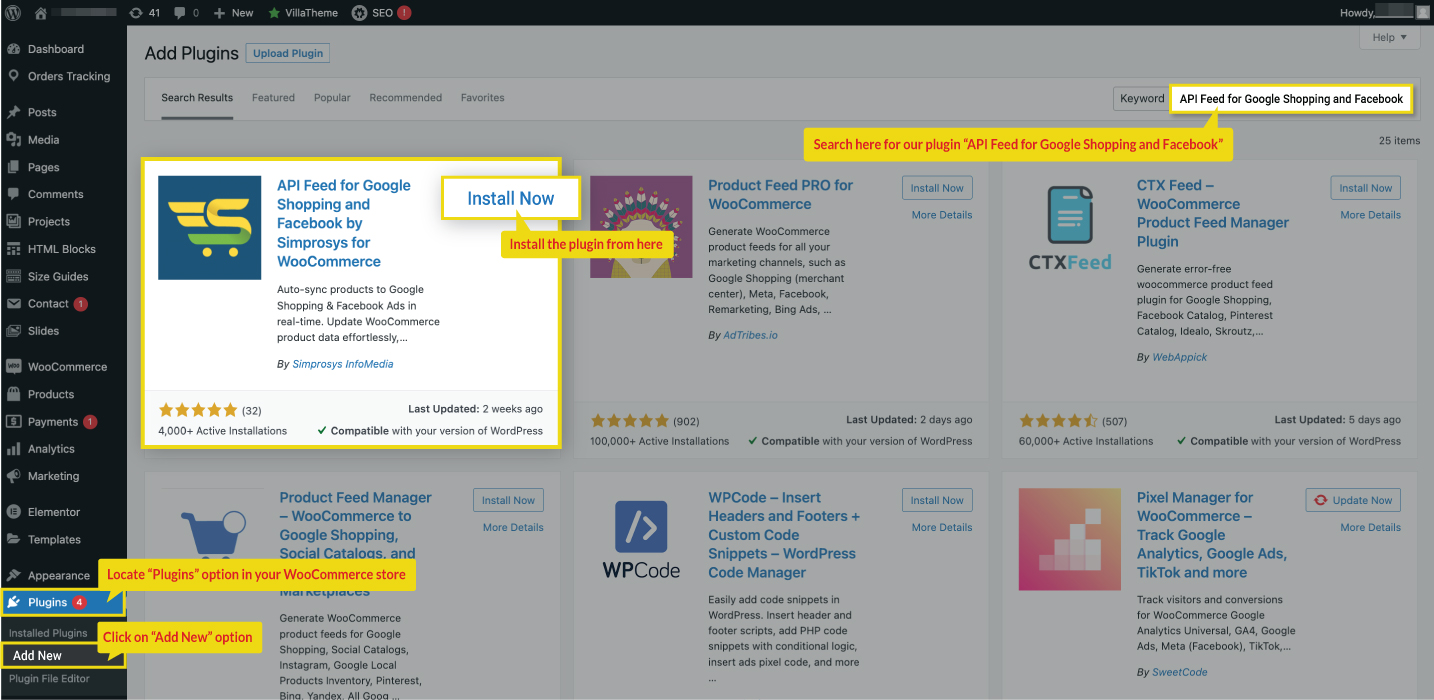
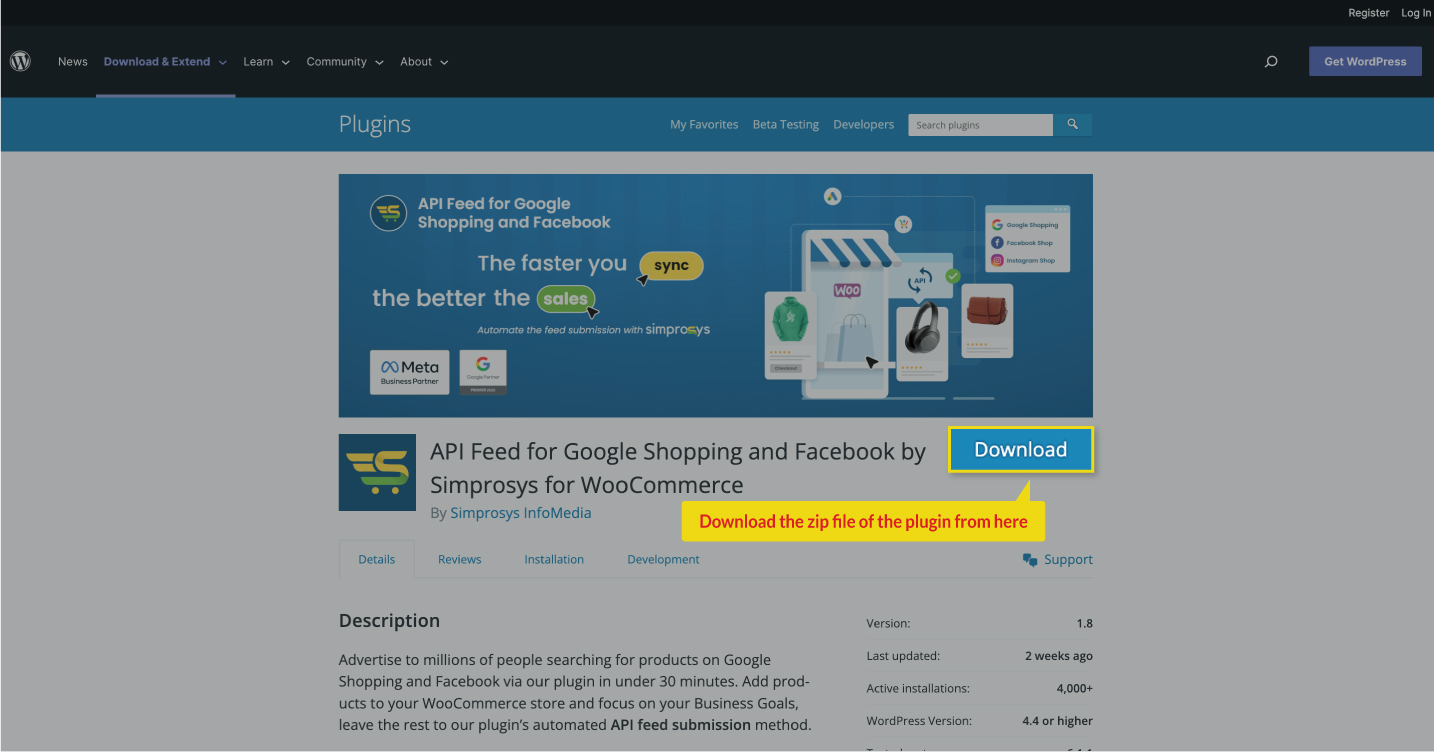
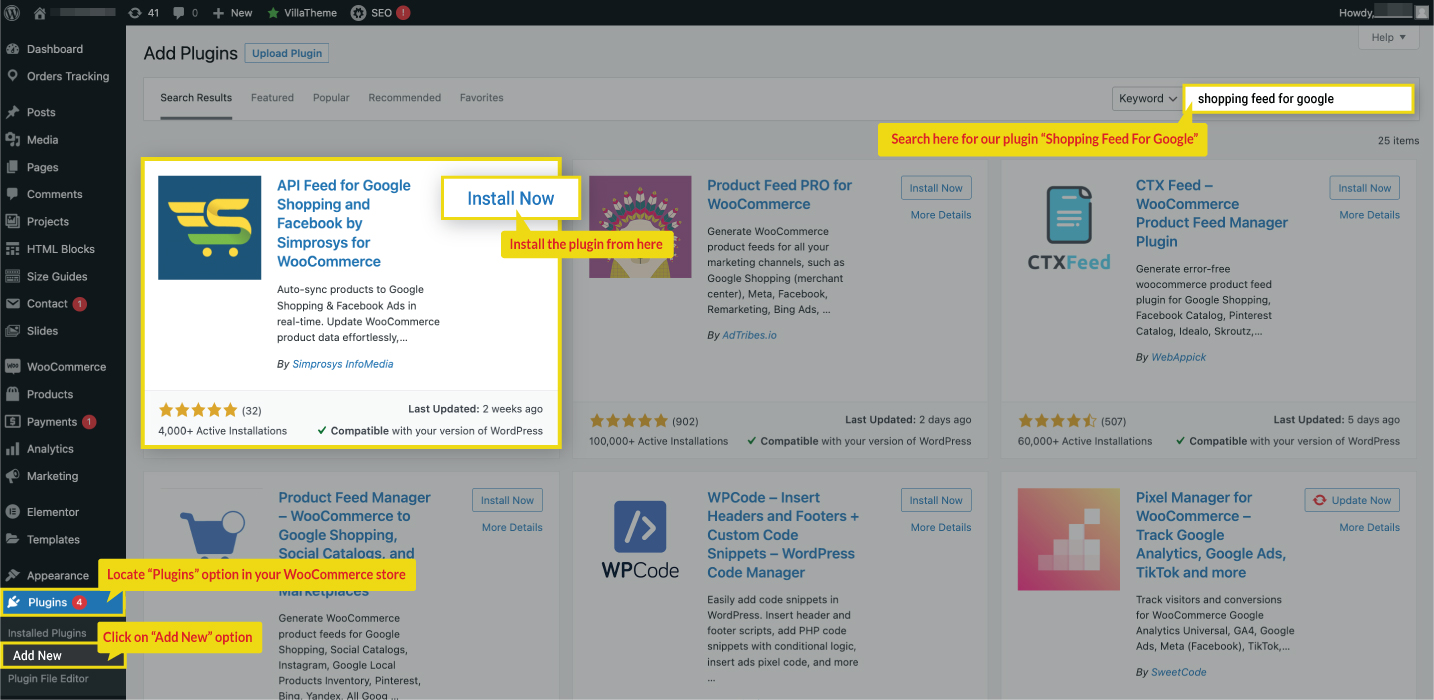 OR A. Access the URL: https://wordpress.org/plugins/shopping-feed-for-google/ to download our plugin “Simprosys Product feed for WooCommerce” and Proceed to download the zip file of the plugin.
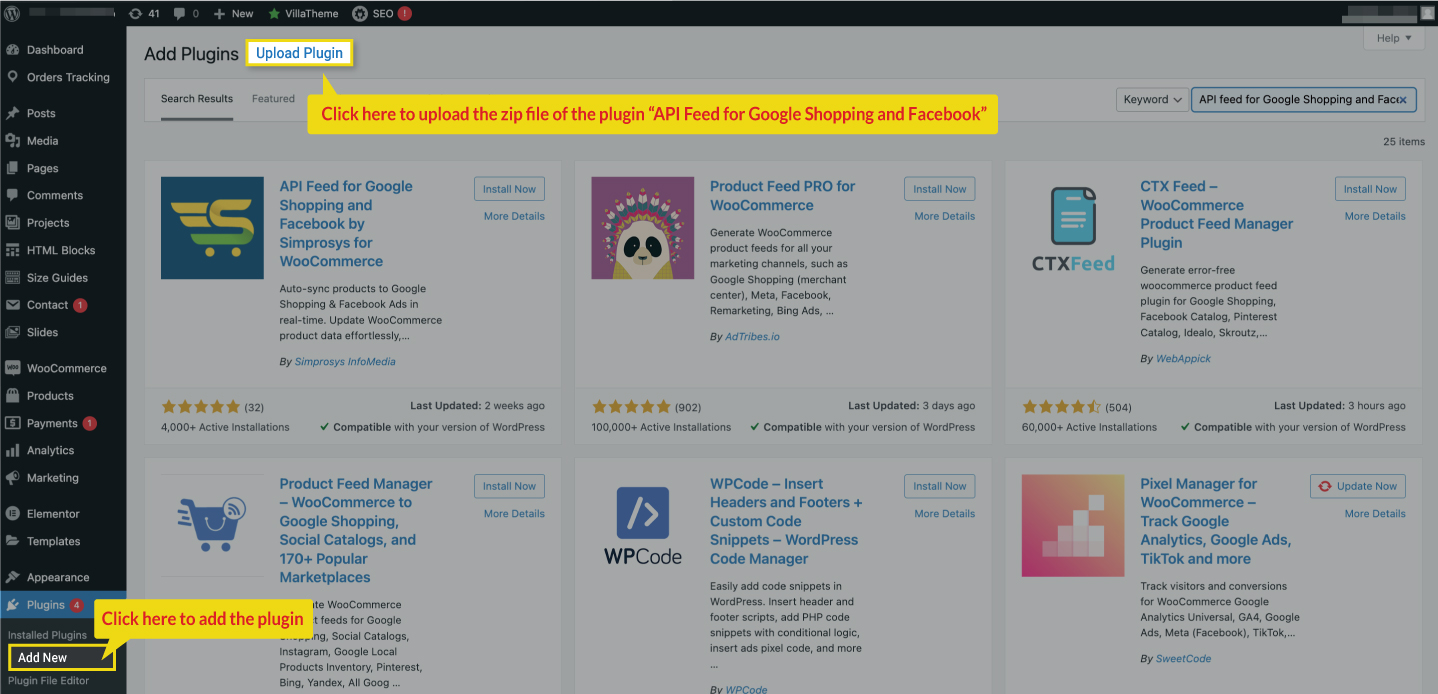
  B. Open your WooCommerce store and search for the option “Plugin > Add Plugin” and upload the downloaded zip file of the plugin. Once you choose the file, proceed with the “Install Now” option.
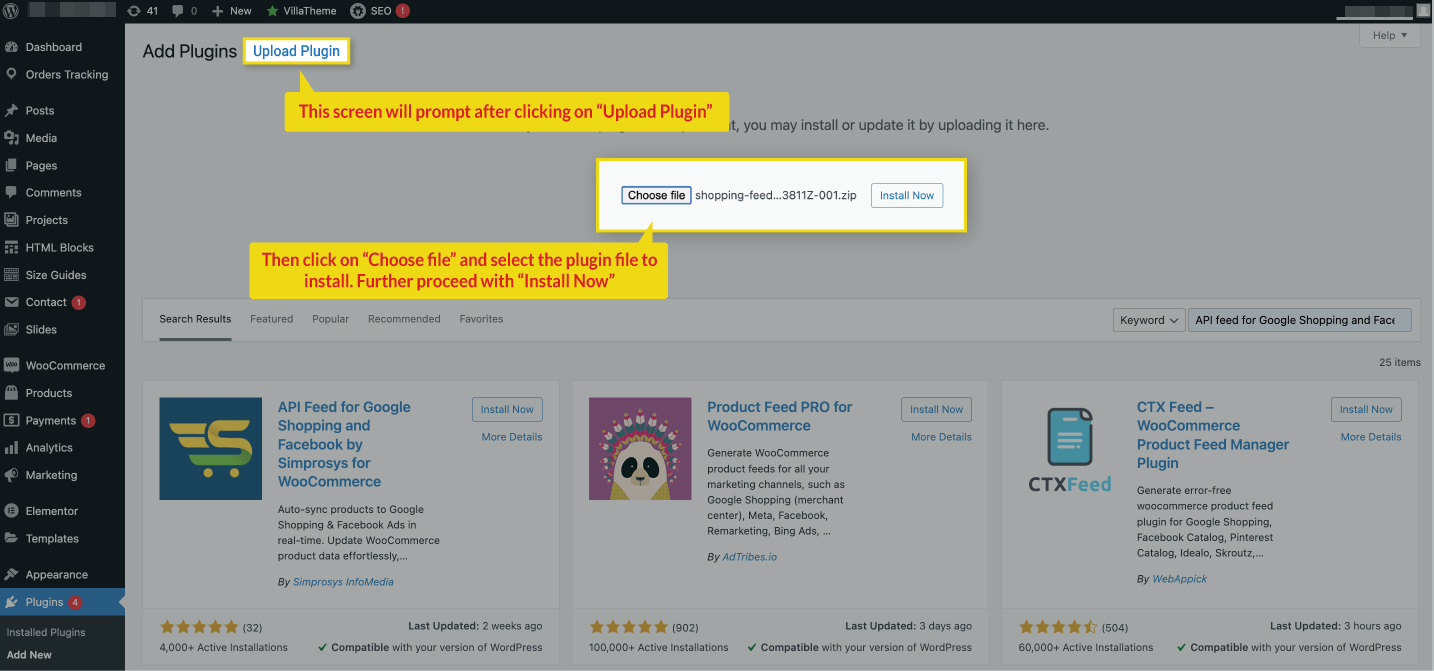 C. After approving the installation of the plugin, proceed to “Activate Plugin”.
 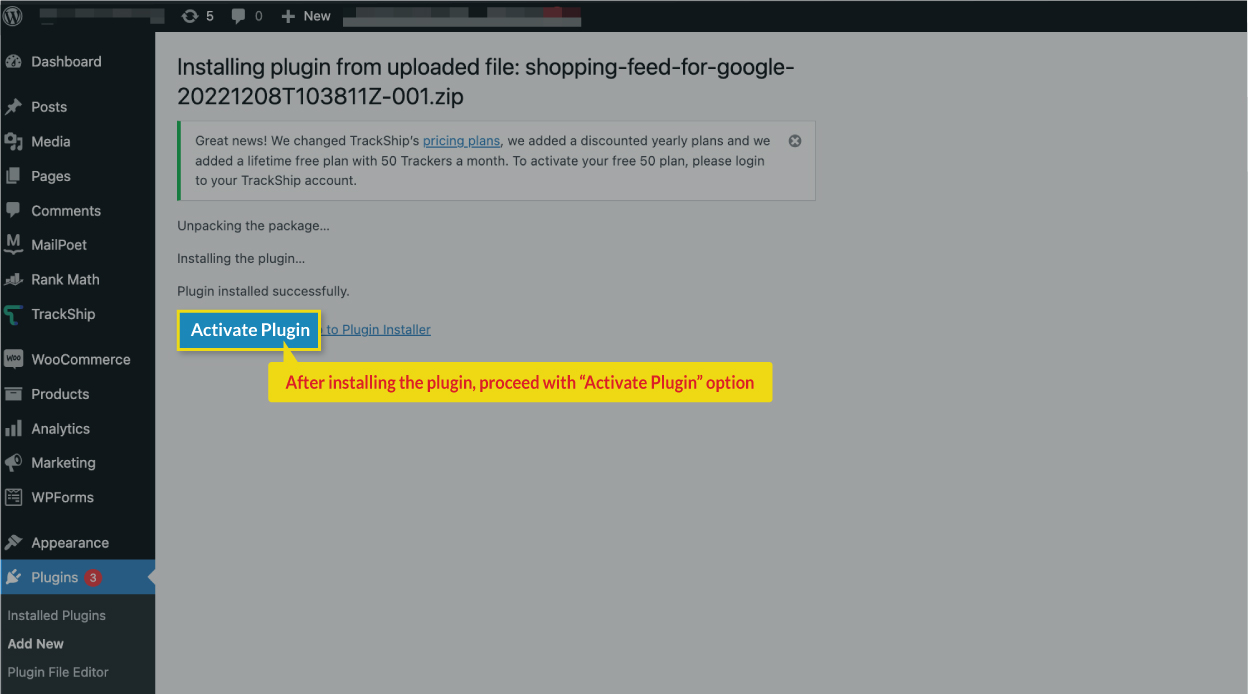 D. Upon completing the installation and activation of the plugin you will be asked to log in to the Merchant Dashboard.
  Step 2. Once you are redirected to our plugins interface, proceed to log in with Google Merchant Center account details.
  Step 3. Enter the email address from which you have created your Google Merchant Center account and proceed.
  Step 4. Once you have entered the appropriate email id associated with your Google Merchant Center account you’ll be prompted to select the Merchant Center Account Id from the dropdown in our plugin. You might see multiple Merchant Center Id in the dropdown if you've used the same email id to create multiple Google Merchant Center accounts, so please select the appropriate option from the dropdown.
  Step 5. Once you have connected your Google Merchant Center Account with the plugin, you will be asked to proceed to the next step and manage the feed settings configurations based on your requirements.
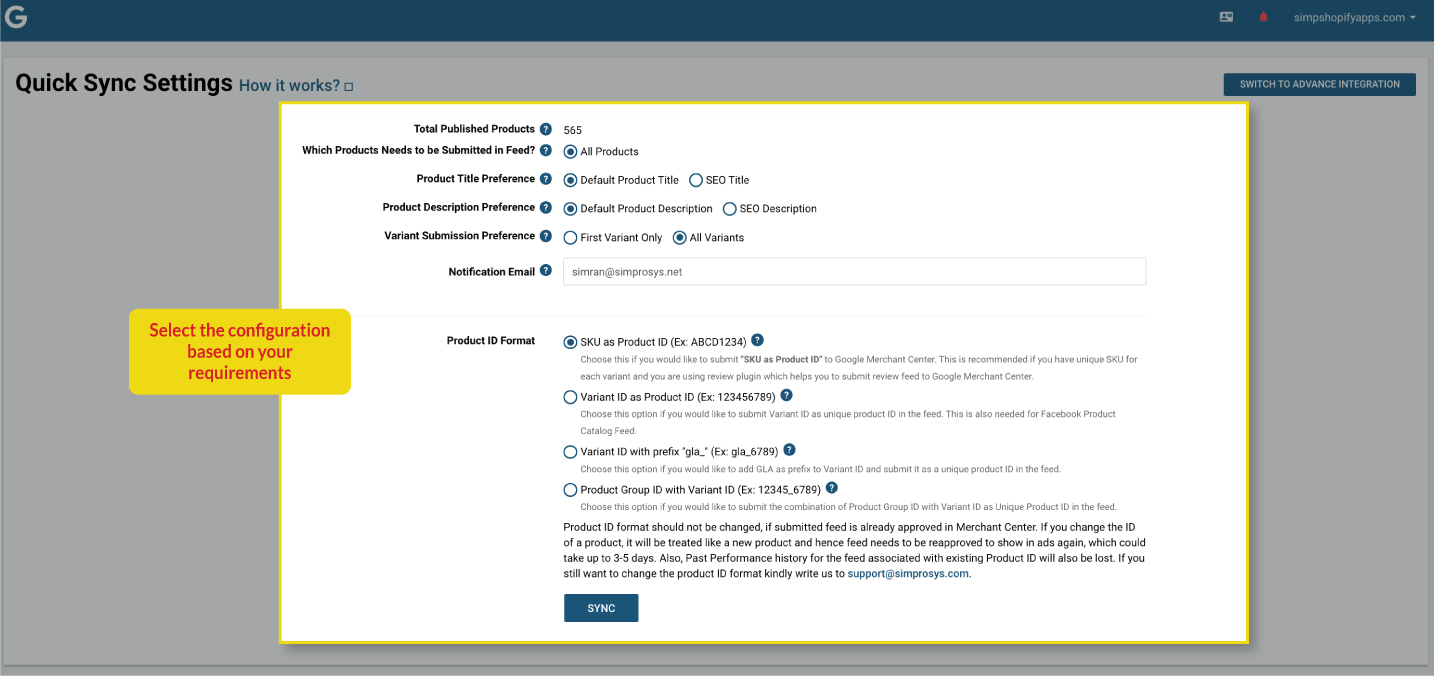
  Step 6. Please select the Product Id format wisely under Google Sync Settings. Once selected from here, you won’t be able to change it from your end. You’ll have to reach out to our support team to get it changed.
  Step 7. Once you complete the steps you will have to press the SYNC button and the plugin will start fetching products data as per the configuration selected by you.
  Step 8. There is one more option to complete the integration which is “Switch to Quick Integration”. This option allows you to complete the integration by selecting only a few options from the settings and then proceeding with SYNC button.

We hope it is going to be helpful. If you have any queries, you can write to us at support@simprosys.com, and we will definitely help you.
Simprosys Product Feed for WooCommerce
Pre-Installation

Plugin Setup

Product Submission Controls

Product Attributes & Optimization

Automated Feed Rule

Troubleshooting & Issue Fixes

Advanced Setup Made Easy

Google Merchant Center Setup & Integration

Tracking Tag Setup (Google Ads & Google Analytics 4)

Google Ads & Campaign Setup

Multi-Country

Promotions Feed

Microsoft Advertising Integration & Campaign Setup

META (Facebook) Integration

WooCommerce Store Access & Setup

