

Simprosys Product Feed for WooCommerce
Pre-Installation
Plugin Setup
Product Submission Controls
Product Attributes & Optimization
Automated Feed Rule
Troubleshooting & Issue Fixes
Advanced Setup Made Easy
Google Merchant Center Setup & Integration
Tracking Tag Setup (Google Ads & Google Analytics 4)
Google Ads & Campaign Setup
Multi-Country
Promotions Feed
Microsoft Advertising Integration & Campaign Setup
META (Facebook) Integration
WooCommerce Store Access & Setup
Billing & Payments
Google Local Inventory Setup
How to Enable Google Enhanced Conversion Tracking from our plugin?
Dec 31, 2025
In this help document, we’ll guide you on how to enable Google's Enhanced Conversion Tracking feature for the Web from our plugin.
Google has taken a significant step towards improving the precision of conversion measurement by introducing enhanced conversion tracking. This feature enables merchants to obtain first-party customer data like email addresses, names, home addresses, and phone numbers when a customer completes a conversion on their website.
This data is then captured in the conversion tracking tags, hashed, and the hashed data is sent to Google to enhance the conversion measurement. With enhanced conversion tracking, Google can keep track of conversions that may have been missed with traditional tracking code implementations.
Note: Please make sure you have set up the conversion tracking from our plugin.
Let's get started with the process.
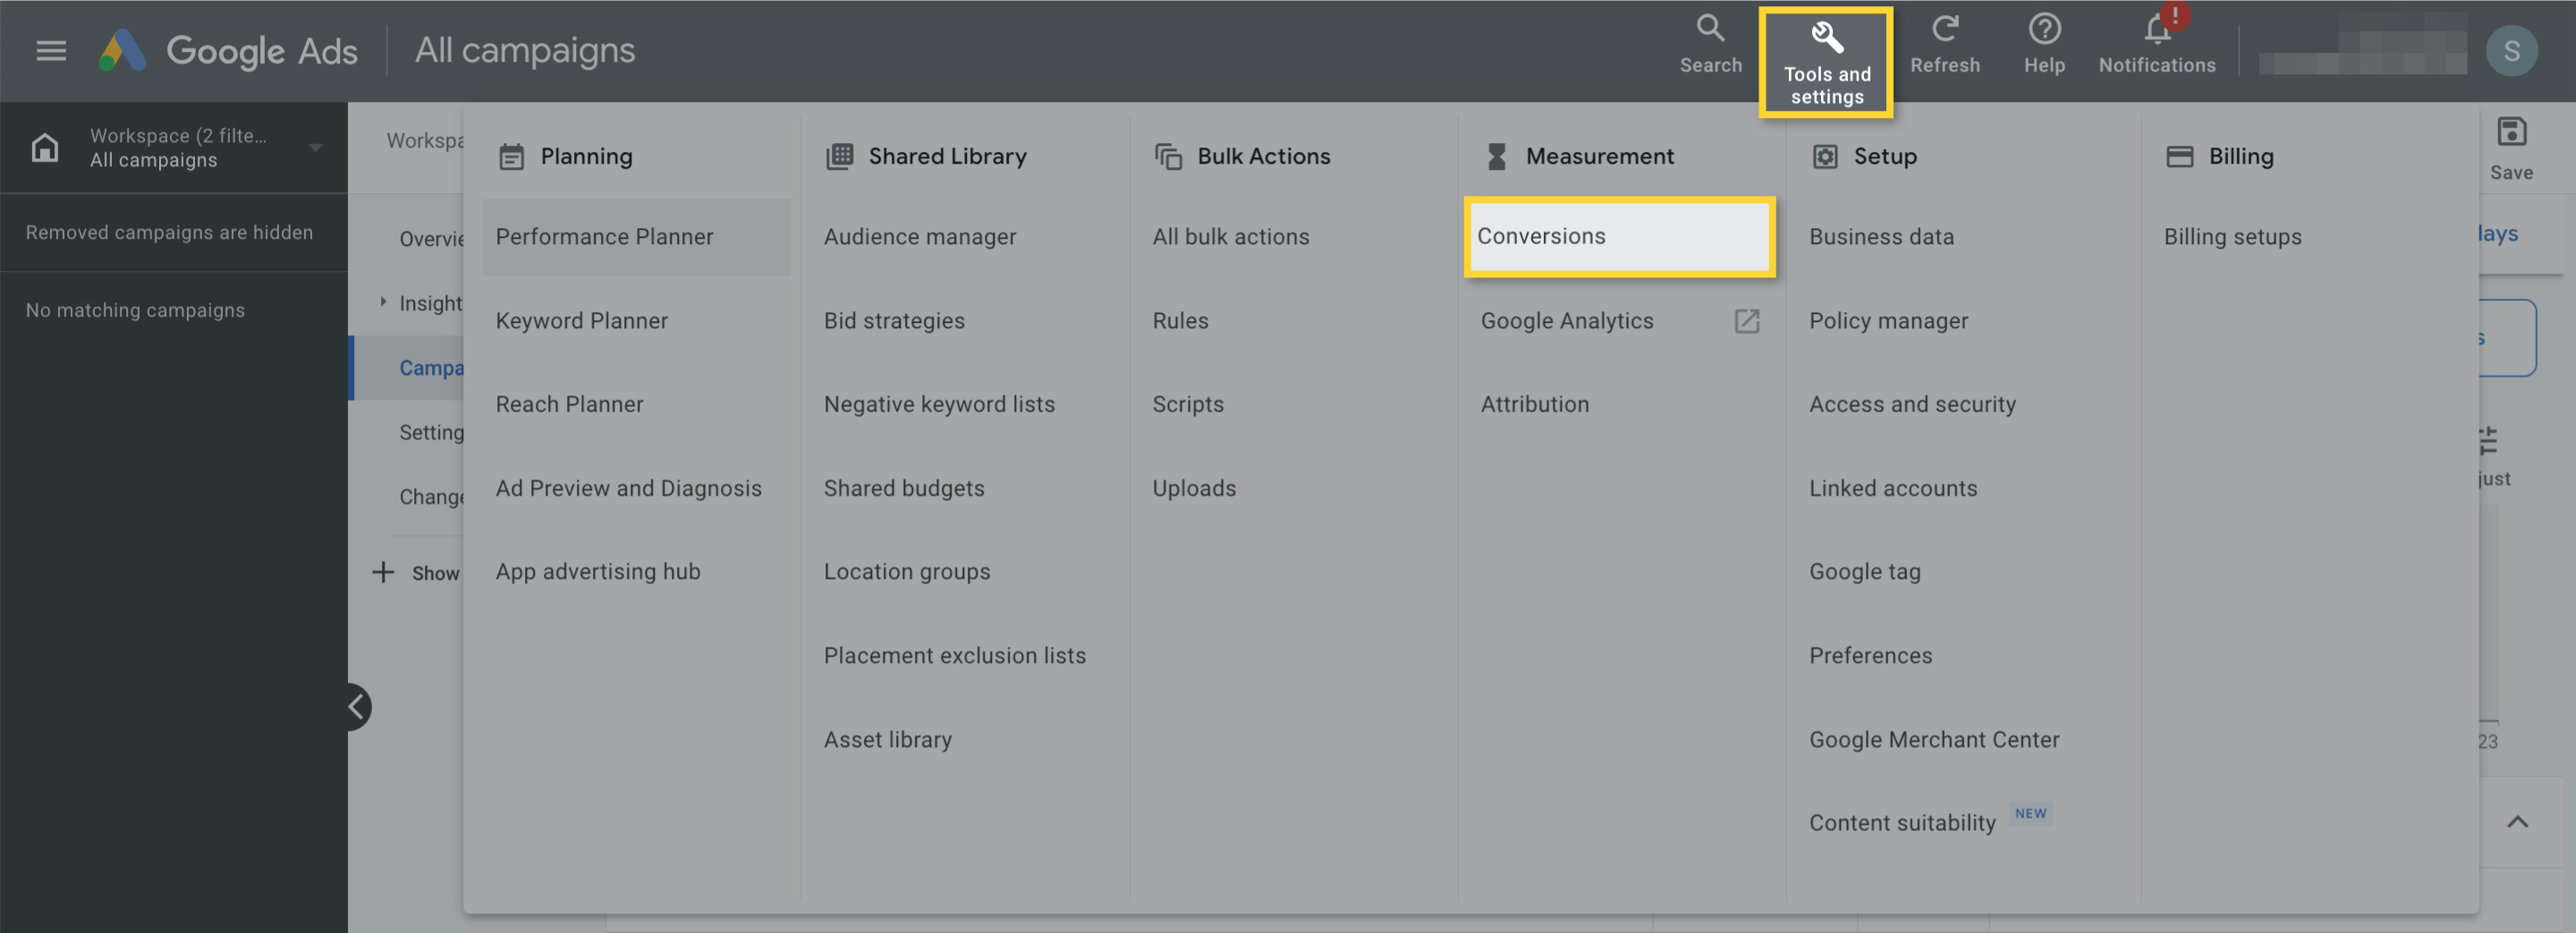
1. Click on the Tools and Settings icon > select Conversions.
 2. There you will see a list of conversion actions that you have enabled for tracking purposes.
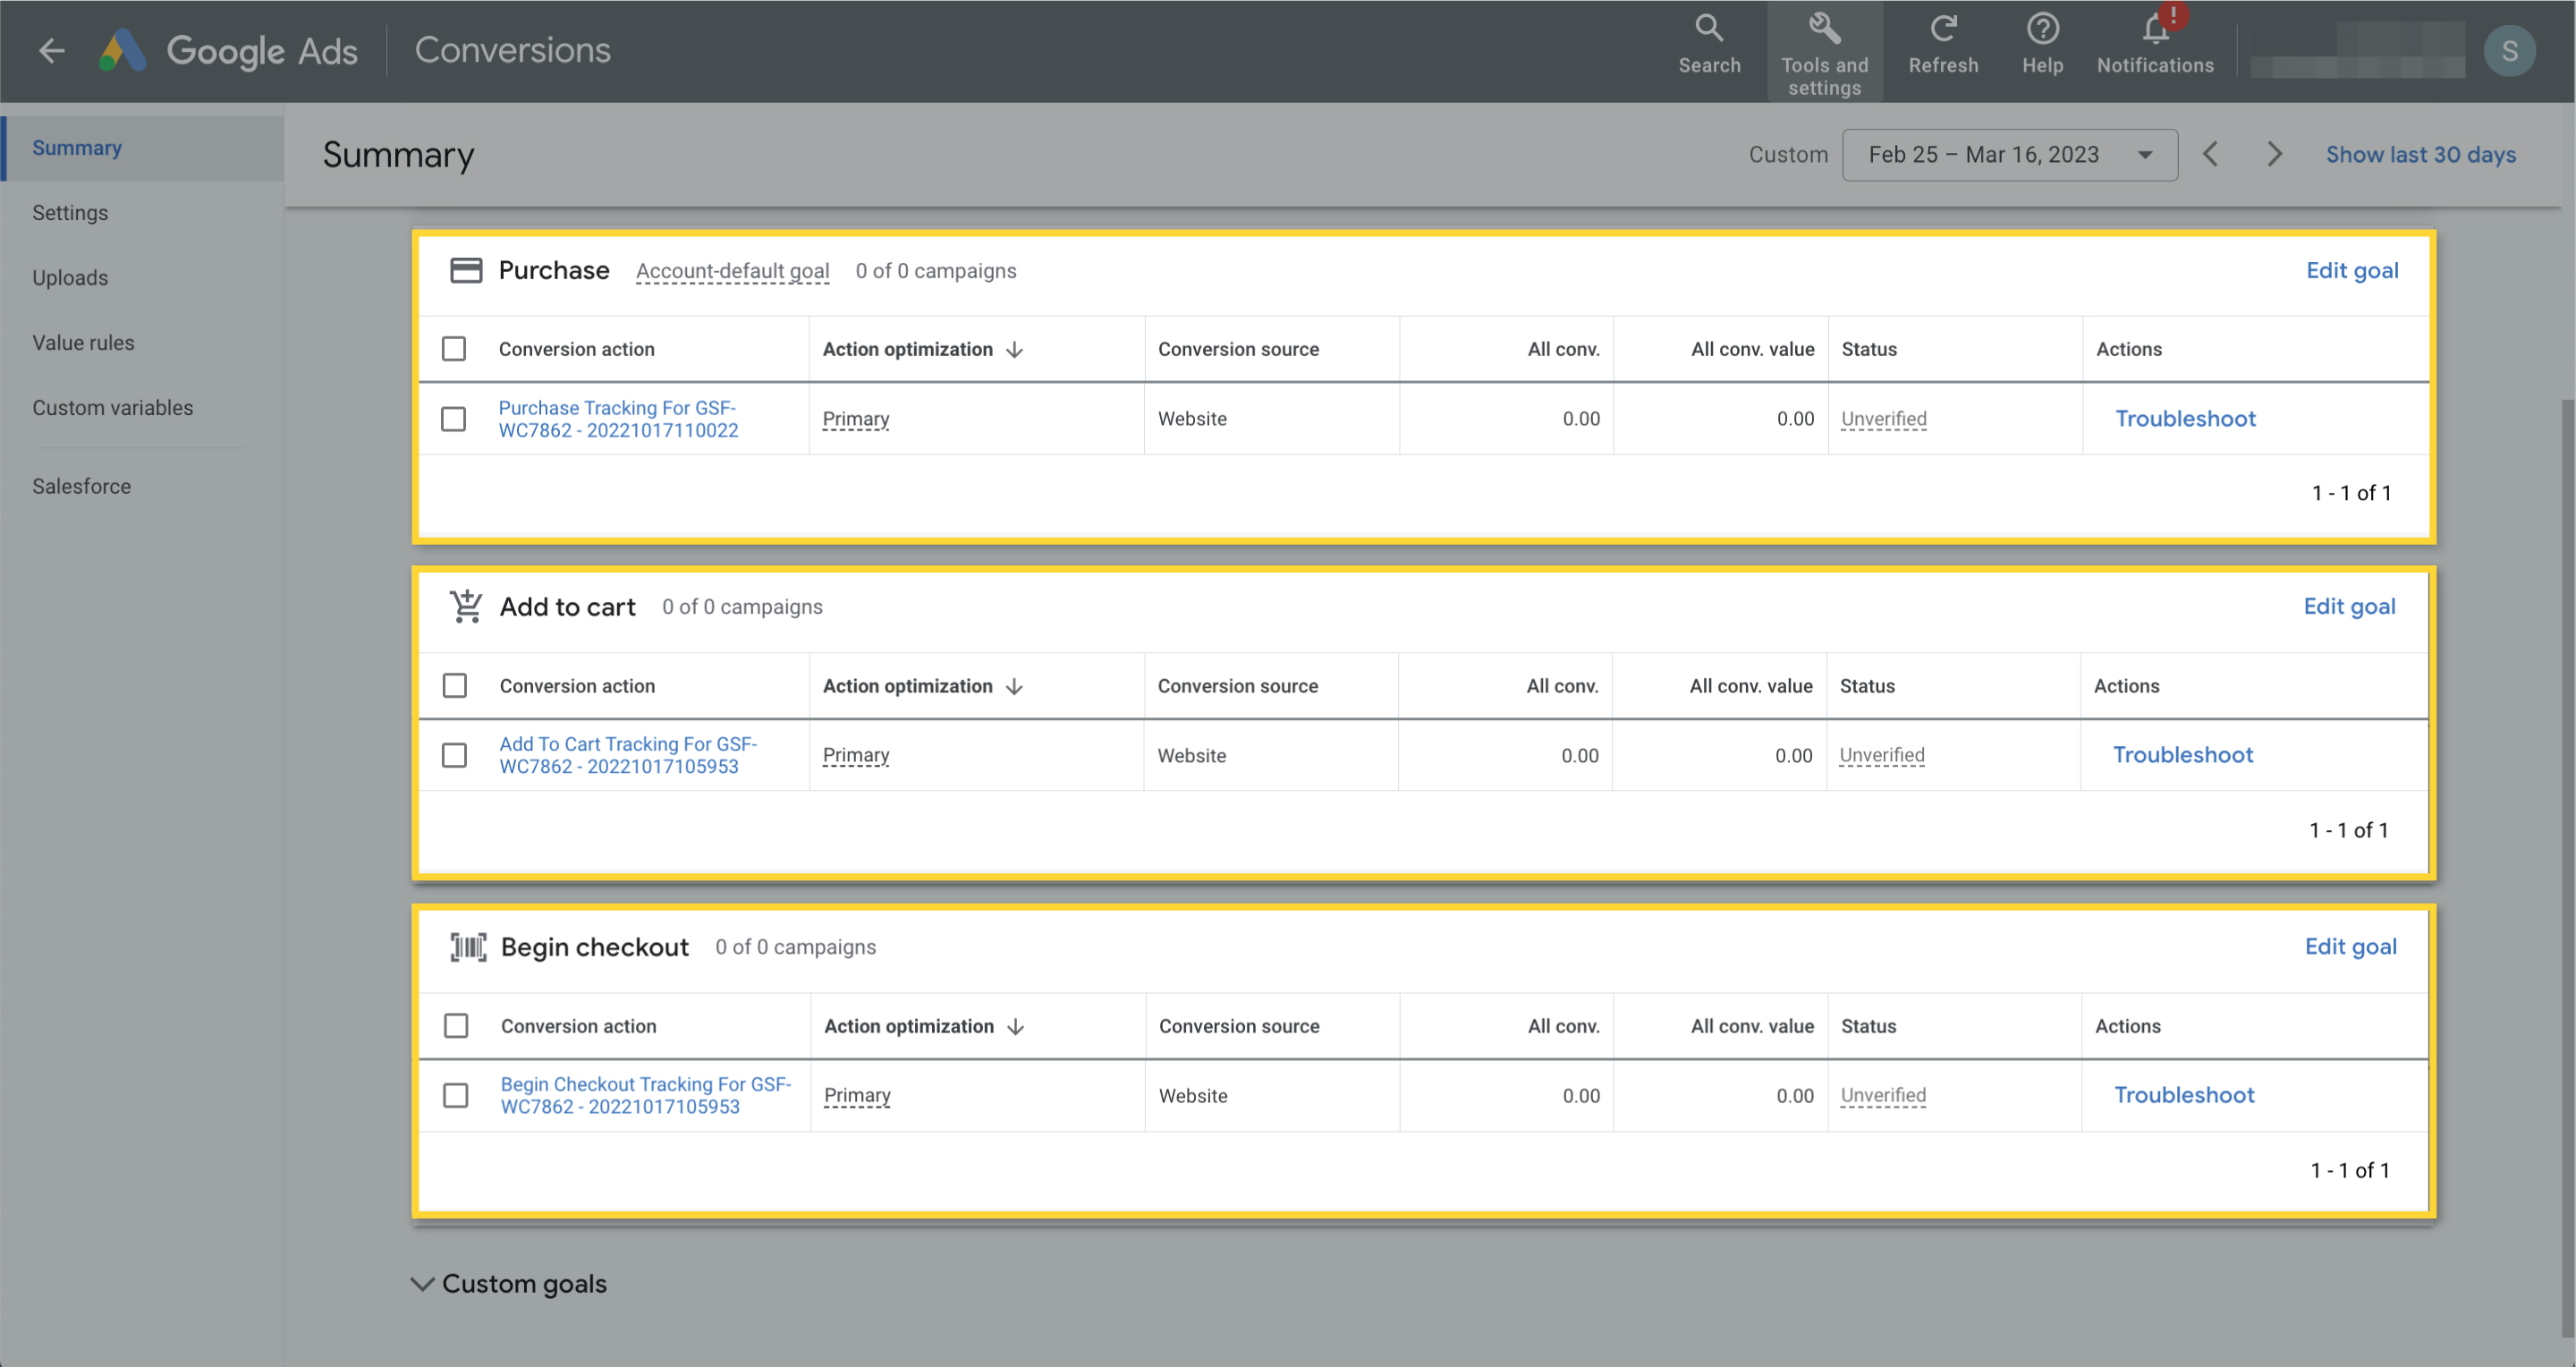 3. Click on the Purchase Conversion action here after verifying the purchase action label from the plugin interface.
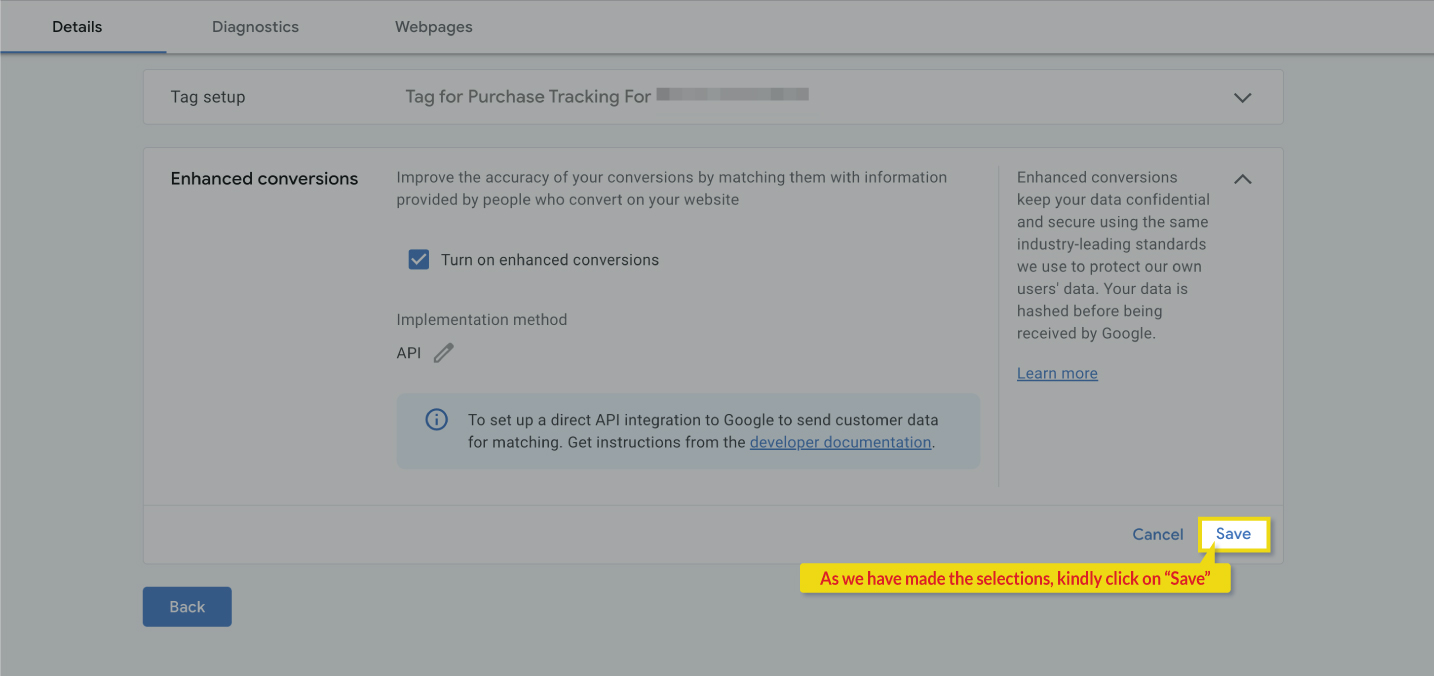
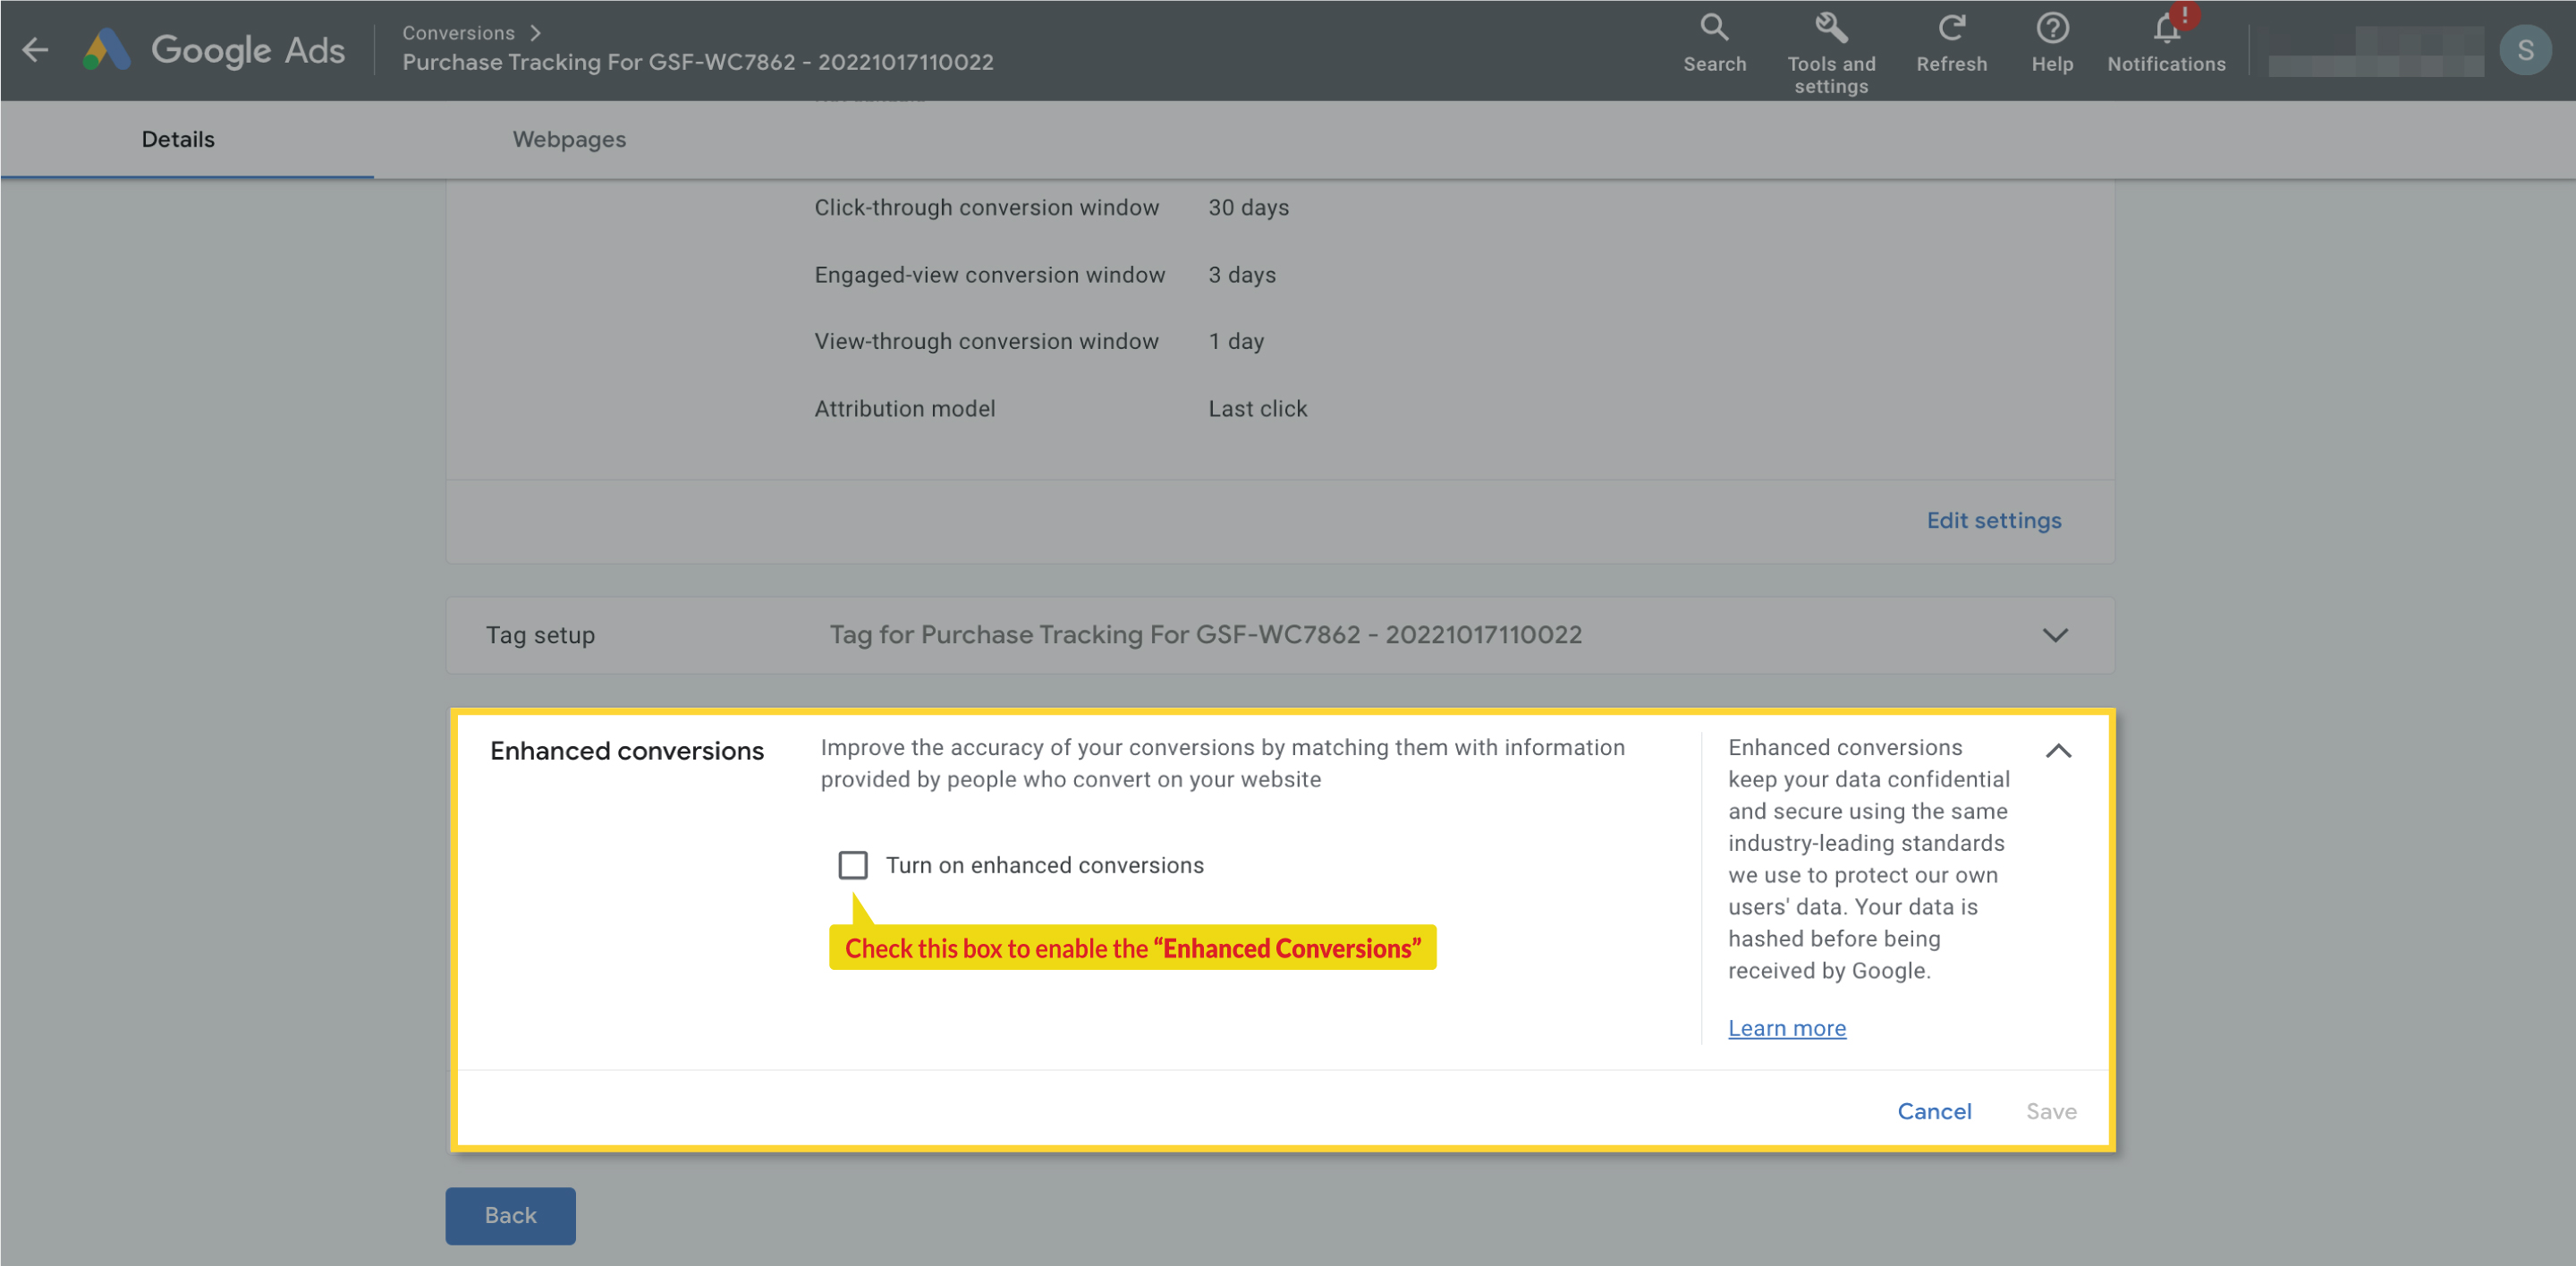 4. Scroll down to the Enhanced Conversions section and check the "turn on Enhanced Conversions" checkbox, then select API option to proceed.
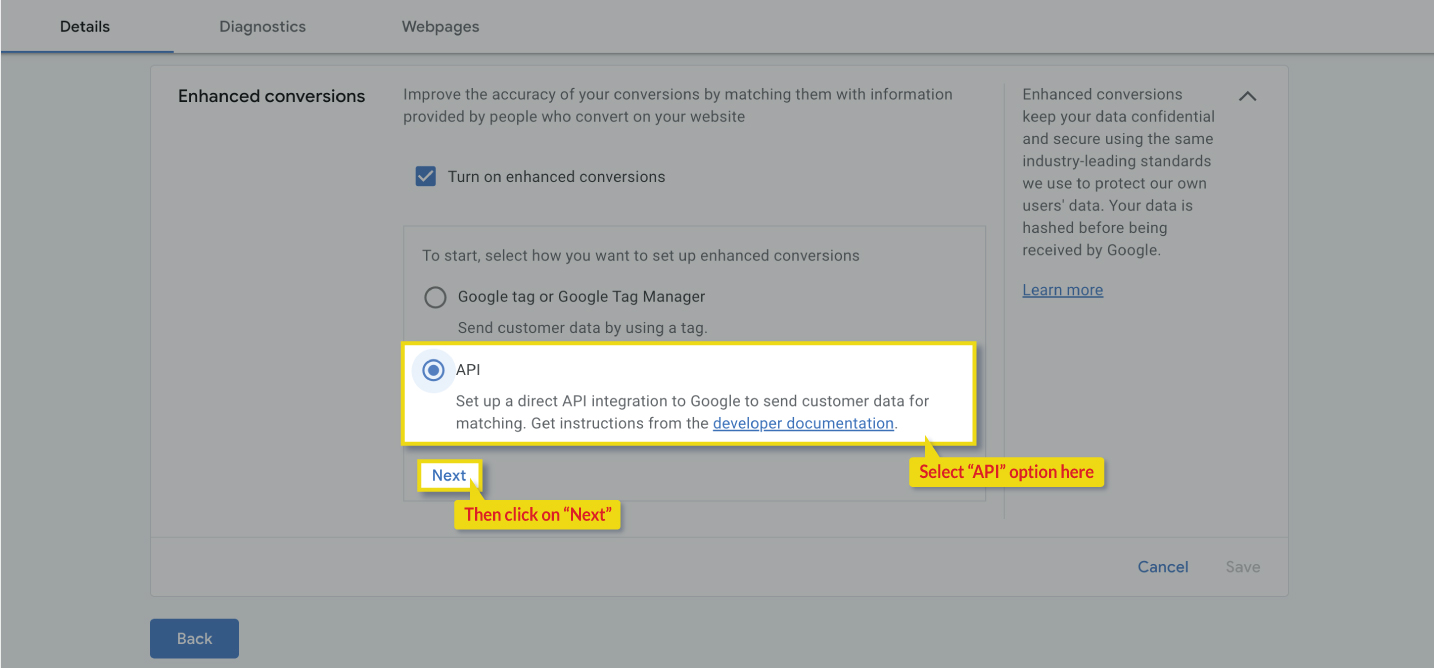 5. After making these selections, click on “save”.
6. To enable this feature from our plugin, navigate to “Tracking Tags > Google Dynamic Remarketing & Conversion Tracking”
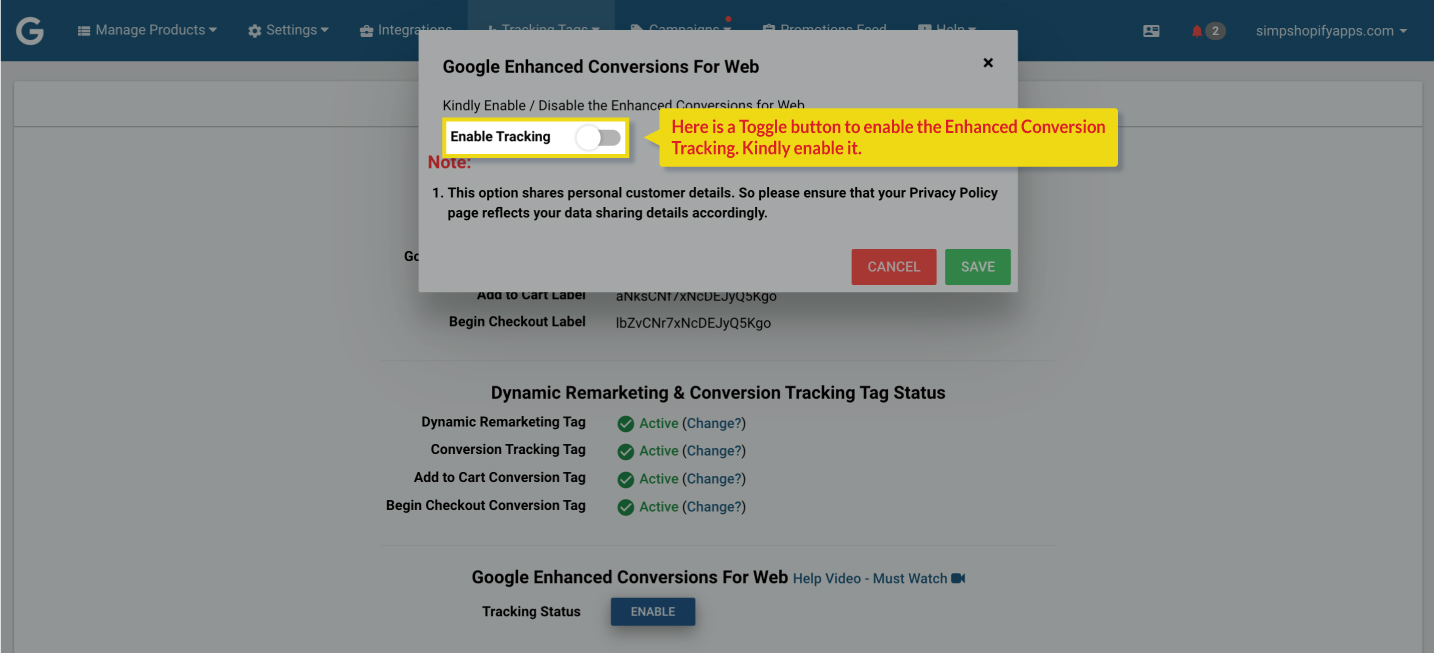
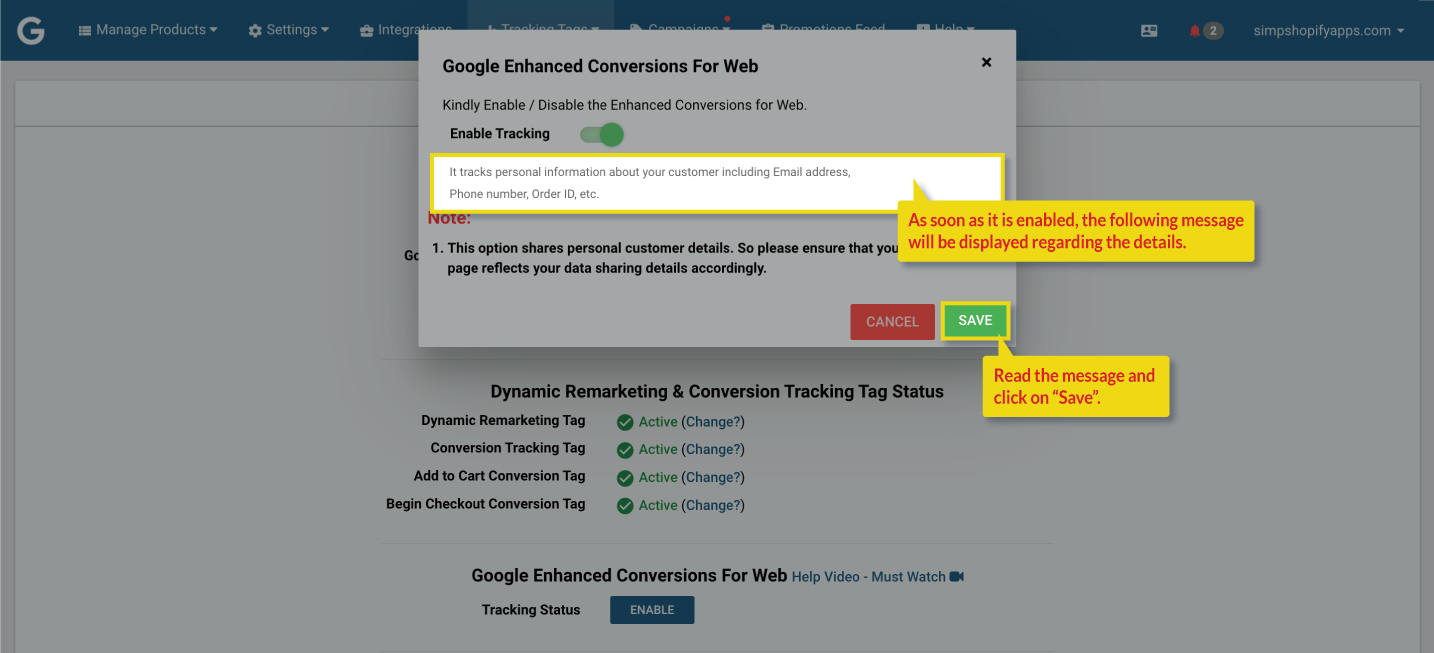
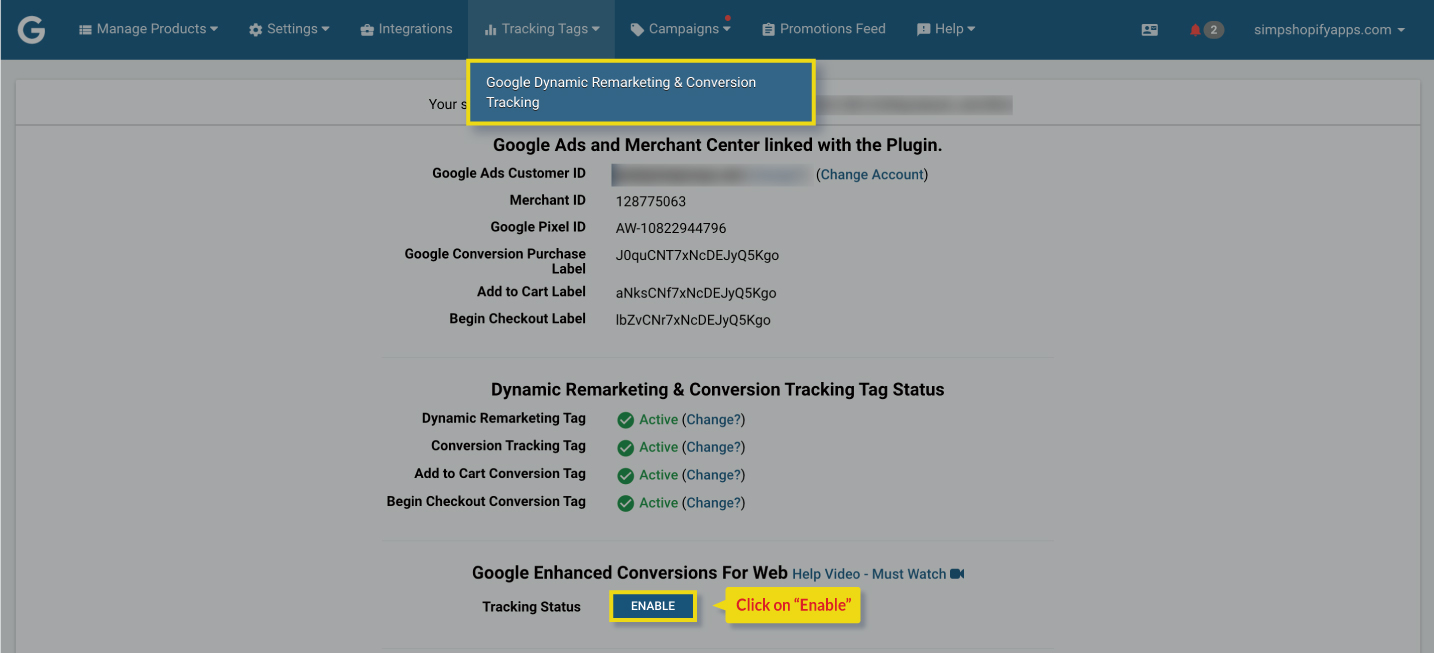 7. Click on “Enable” under the Google Enhanced Conversions for Web.
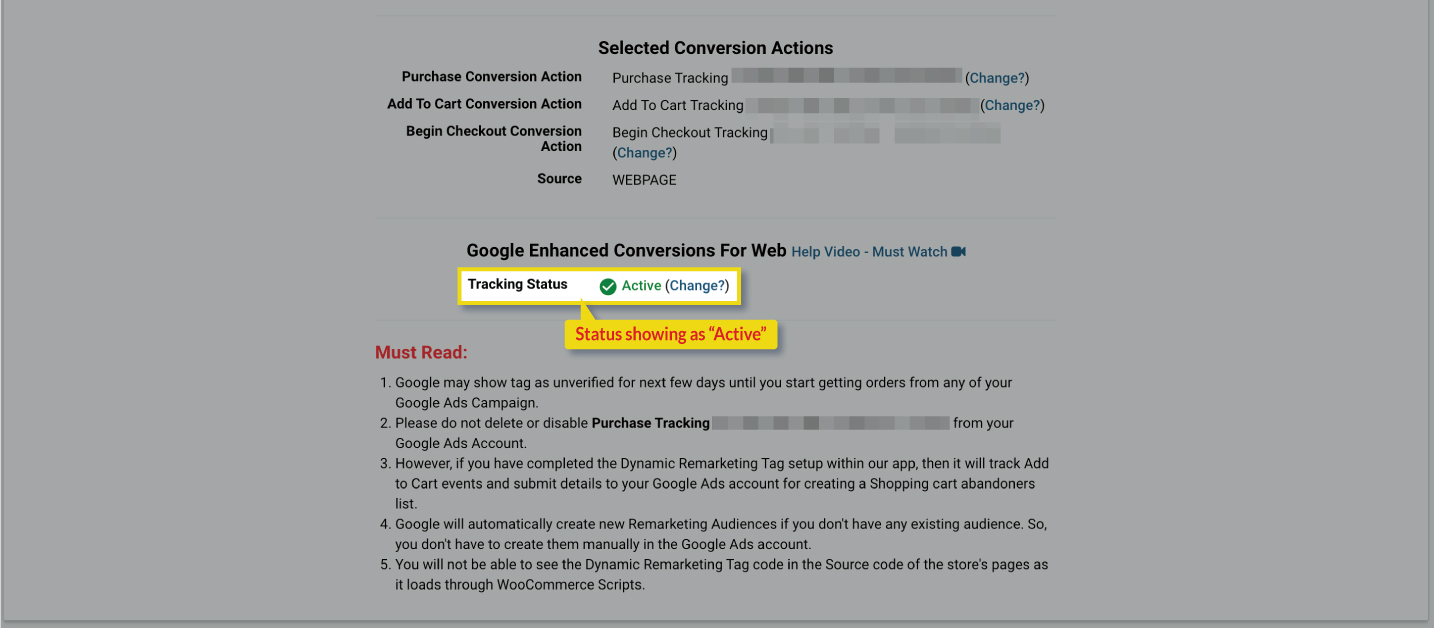
When your status is set to Active, enhanced conversion tracking becomes enabled, leading to improved tracking accuracy through Google's
Marketing platform.
It is important to note that it may take approximately 2 to 3 weeks for Google to gather and analyze the data for enhanced conversions.
We hope that you have found this document to be informative.
If you have any questions regarding any of these options, please feel free to contact us at support@simprosys.com, and we will be more than happy to assist you.
Previous article

Next article
Simprosys Product Feed for WooCommerce
Pre-Installation
Plugin Setup
Product Submission Controls
Product Attributes & Optimization
Automated Feed Rule
Troubleshooting & Issue Fixes
Advanced Setup Made Easy
Google Merchant Center Setup & Integration
Tracking Tag Setup (Google Ads & Google Analytics 4)
Google Ads & Campaign Setup
Multi-Country
Promotions Feed
Microsoft Advertising Integration & Campaign Setup
META (Facebook) Integration
WooCommerce Store Access & Setup
Billing & Payments
Google Local Inventory Setup


