Simprosys Google Shopping Feed
Initial App Configuration

Troubleshooting & Issue Fixes

Tracking Tags Setup (Google Ads & Google Analytics 4)

Product Optimization & Automated Feed Rules

Advanced Setup Made Easy

Legal Pages

How to set up Shipping Settings in Google Merchant Center (Classic) for Shopline?
Jan 30, 2026
In this doc, we will be covering the details to set up the shipping settings in Google Merchant Center.
Note: Our app does not sync the shipping settings from the Shopline store. So you have to set up the shipping settings separately in Google Merchant Center, the same as you have set up in the Shopline store.
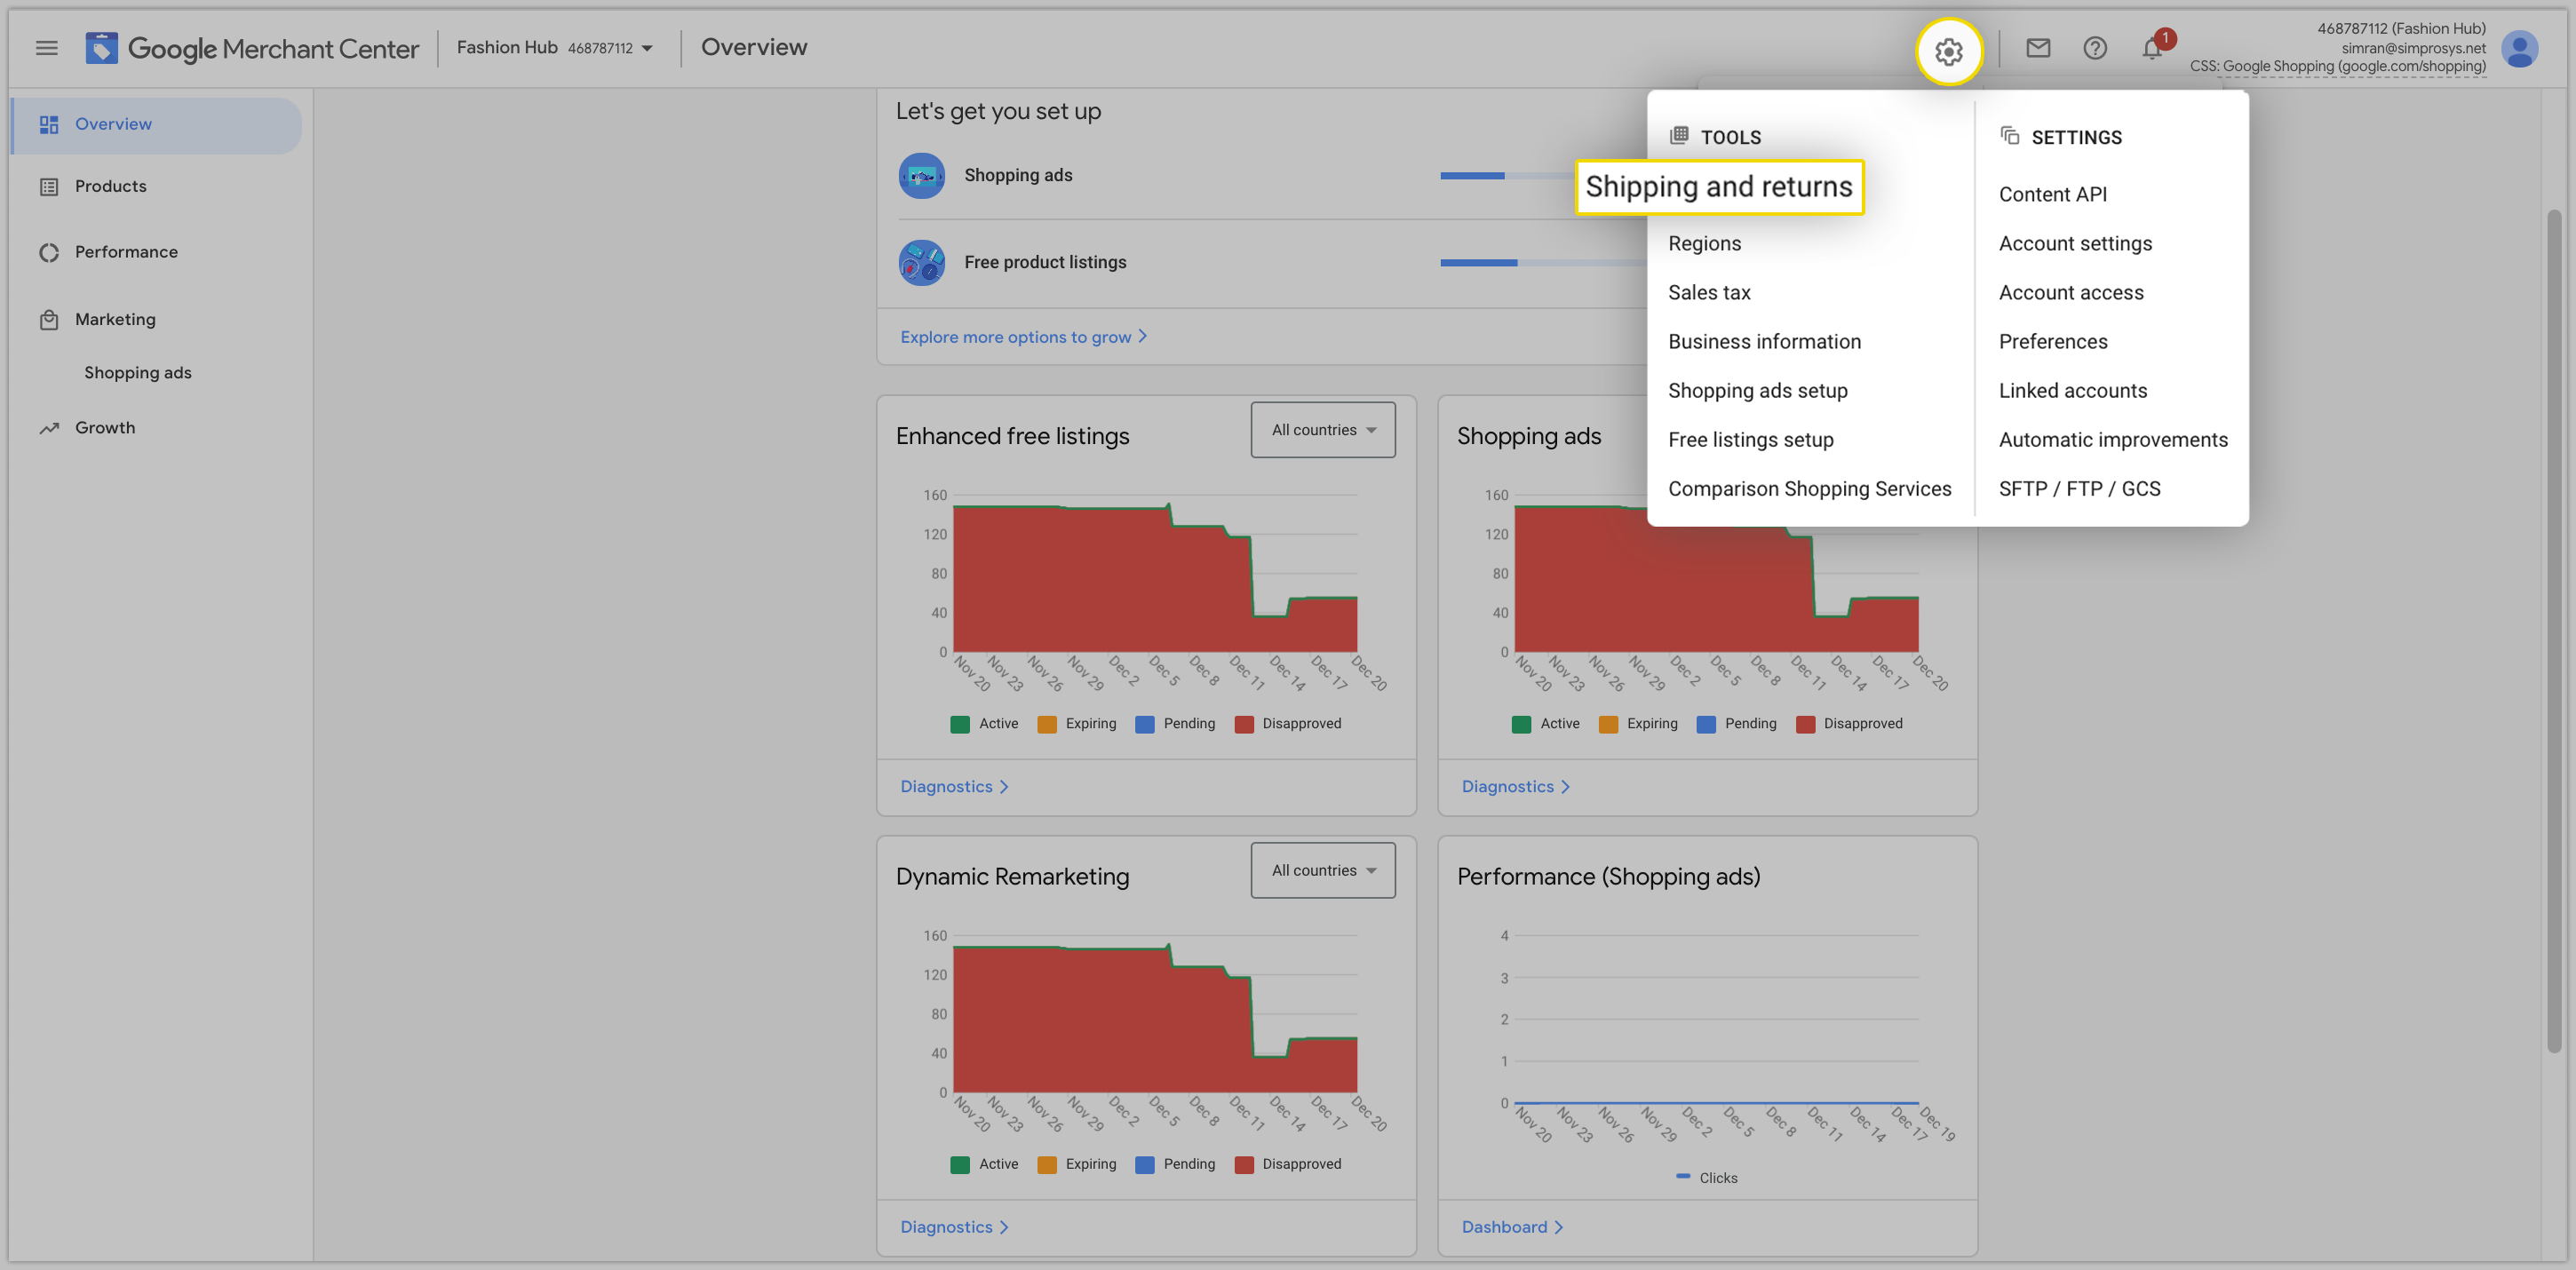
To setup the Shipping settings in Google Merchant Center navigate to settings option > Shipping and Returns


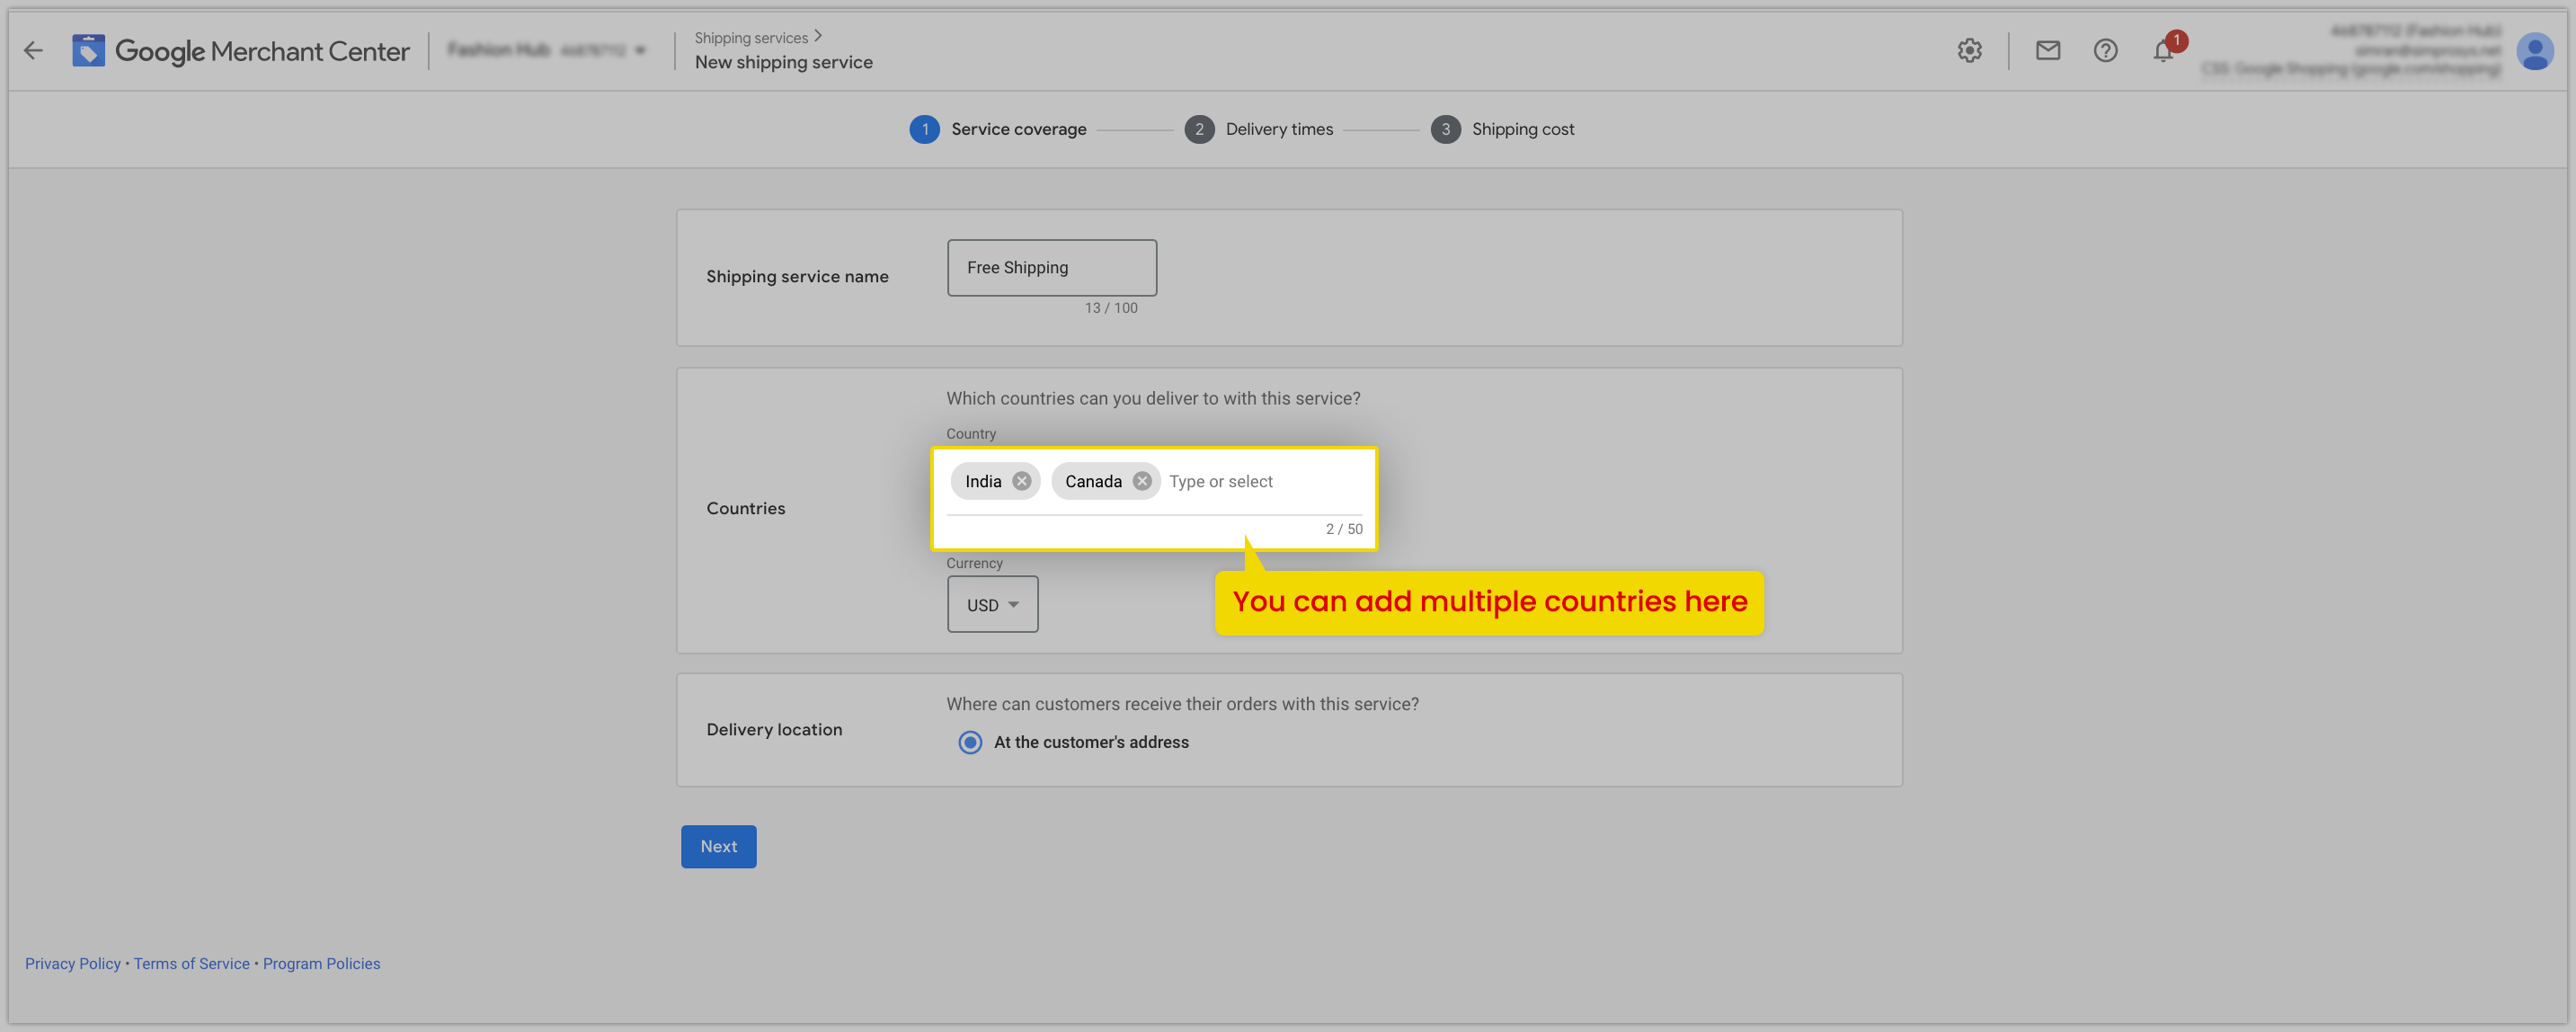
Add Shipping services name (you can keep this as per your convenience which is easy to remember as this name will not be shown to customers anywhere) and select the countries for which you are submitting feed if the shipping charges are the same for them and proceed with “Next”.
Shipping settings for multiple countries can be achieved with the same setup.
In the below screenshot, you can see that multiple countries can be selected if you want to set up the same shipping settings.
The criteria for this would be, if the countries have the same shipping rates then you can include the additional countries else you can create separate shipping services for each country.
It will ask to select the Delivery times.
It helps Google to display the estimated delivery time in Shopping Ads results based on the combination of Handling time and Delivery time you will provide here, so please add it wisely. Once you have entered the details click on “Next”.

Now, the next part will be adding shipping costs which have further options as stated below:
- Free Shipping Over a Certain Amount
- Free Shipping
- Range-based
- Flat Rate
- Carrier-based
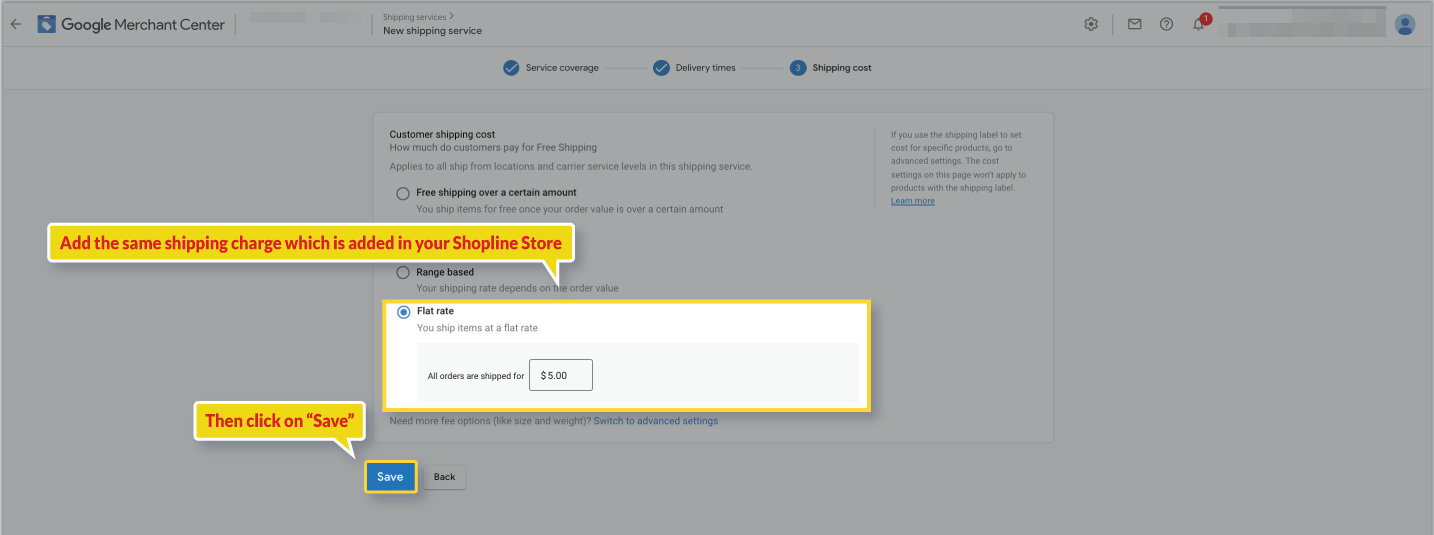
Add the shipping cost the same you have selected in your Shopline store.
The initial steps are the same for all the shipping settings such as assigning shipping service names, selecting countries, and currency.
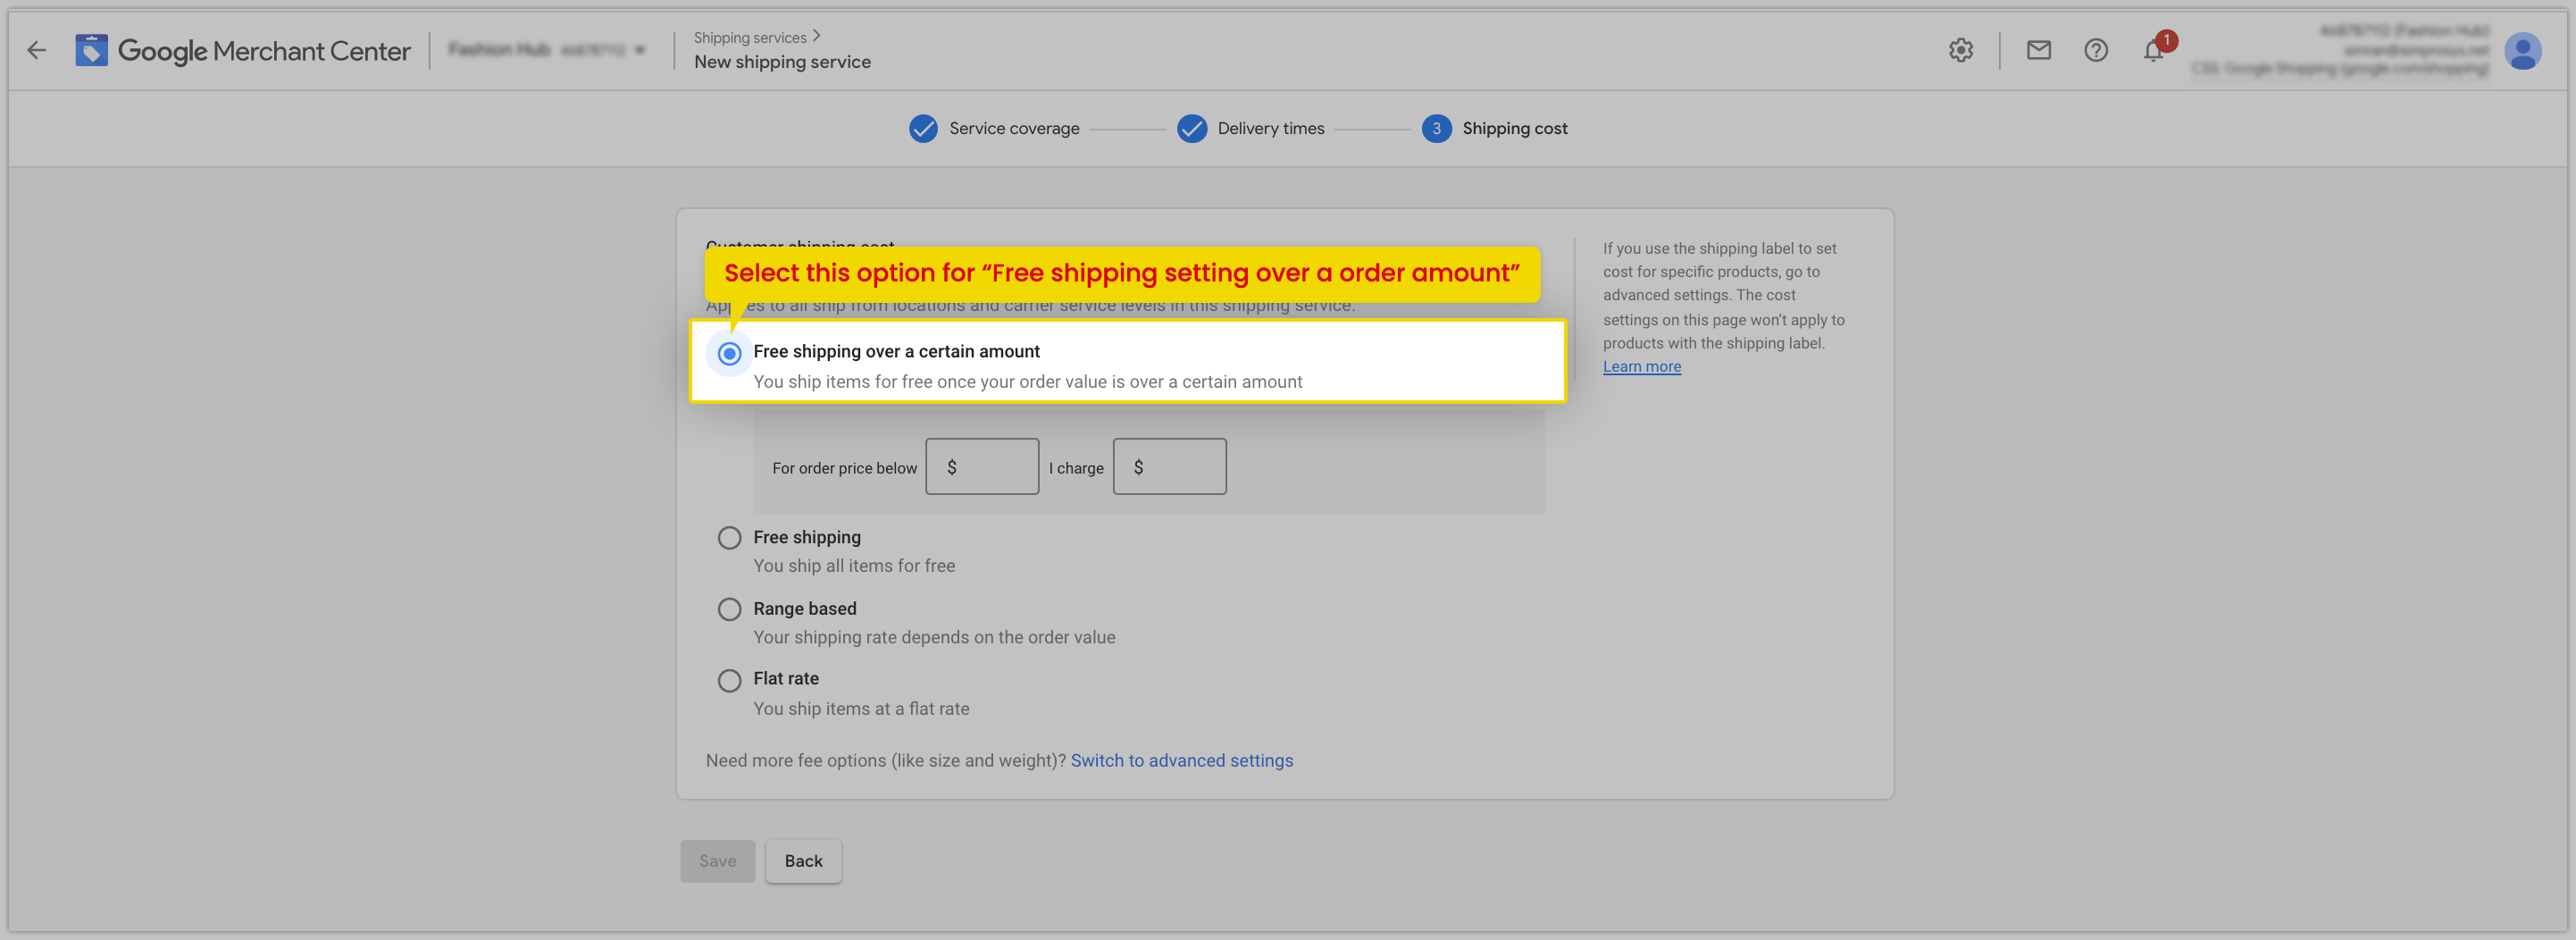
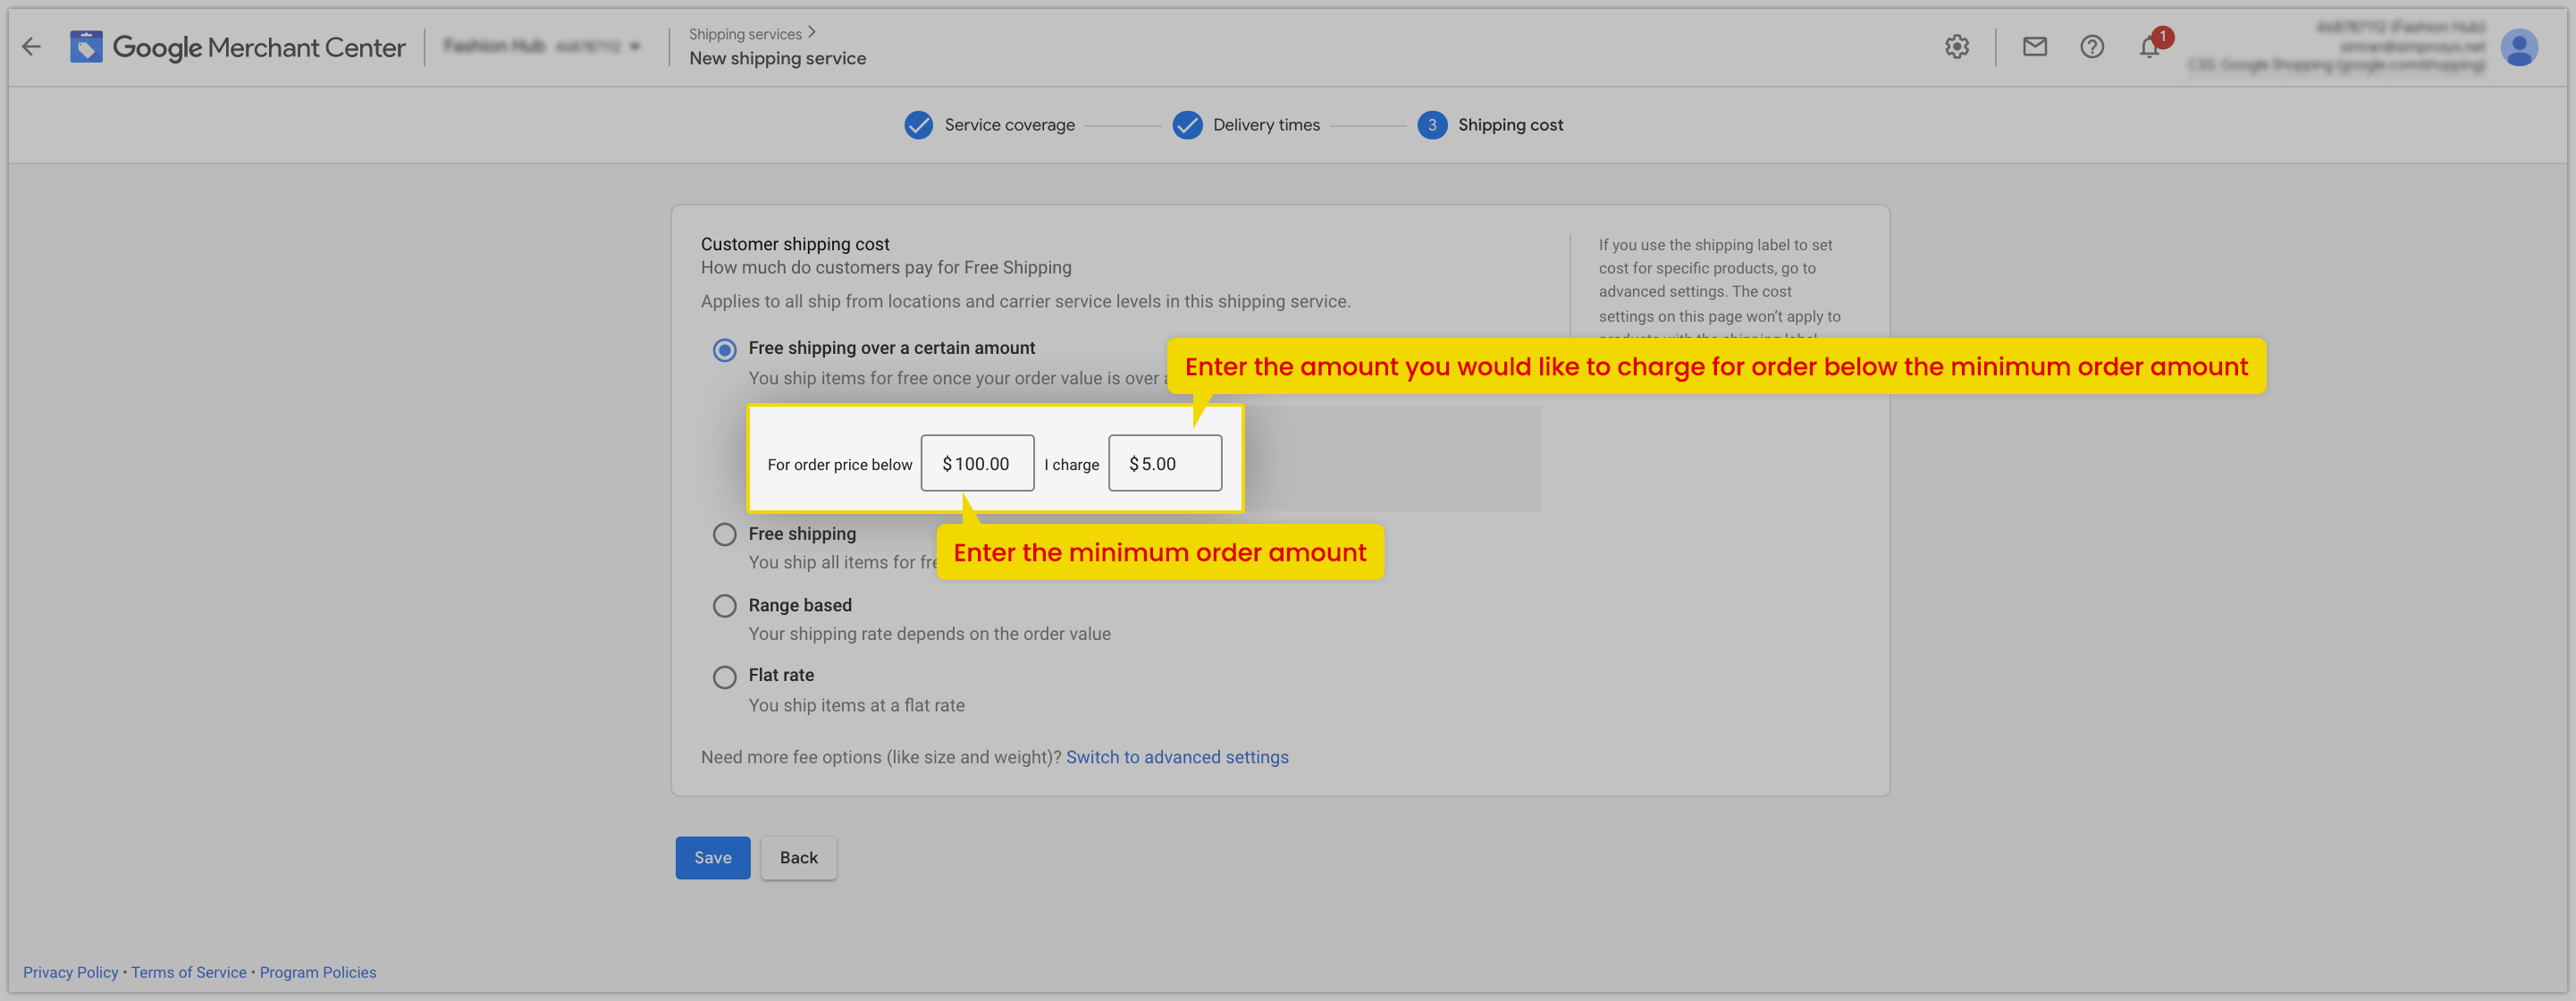
Free Shipping Over a Certain Amount: This shipping setting should be the same as the “a minimum order amount” shipping settings in the Shopline store.
Check the below steps to create the shipping settings in Google Merchant Center.
Free Shipping: This option works when you want to keep free shipping for the products. Further steps are detailed below:
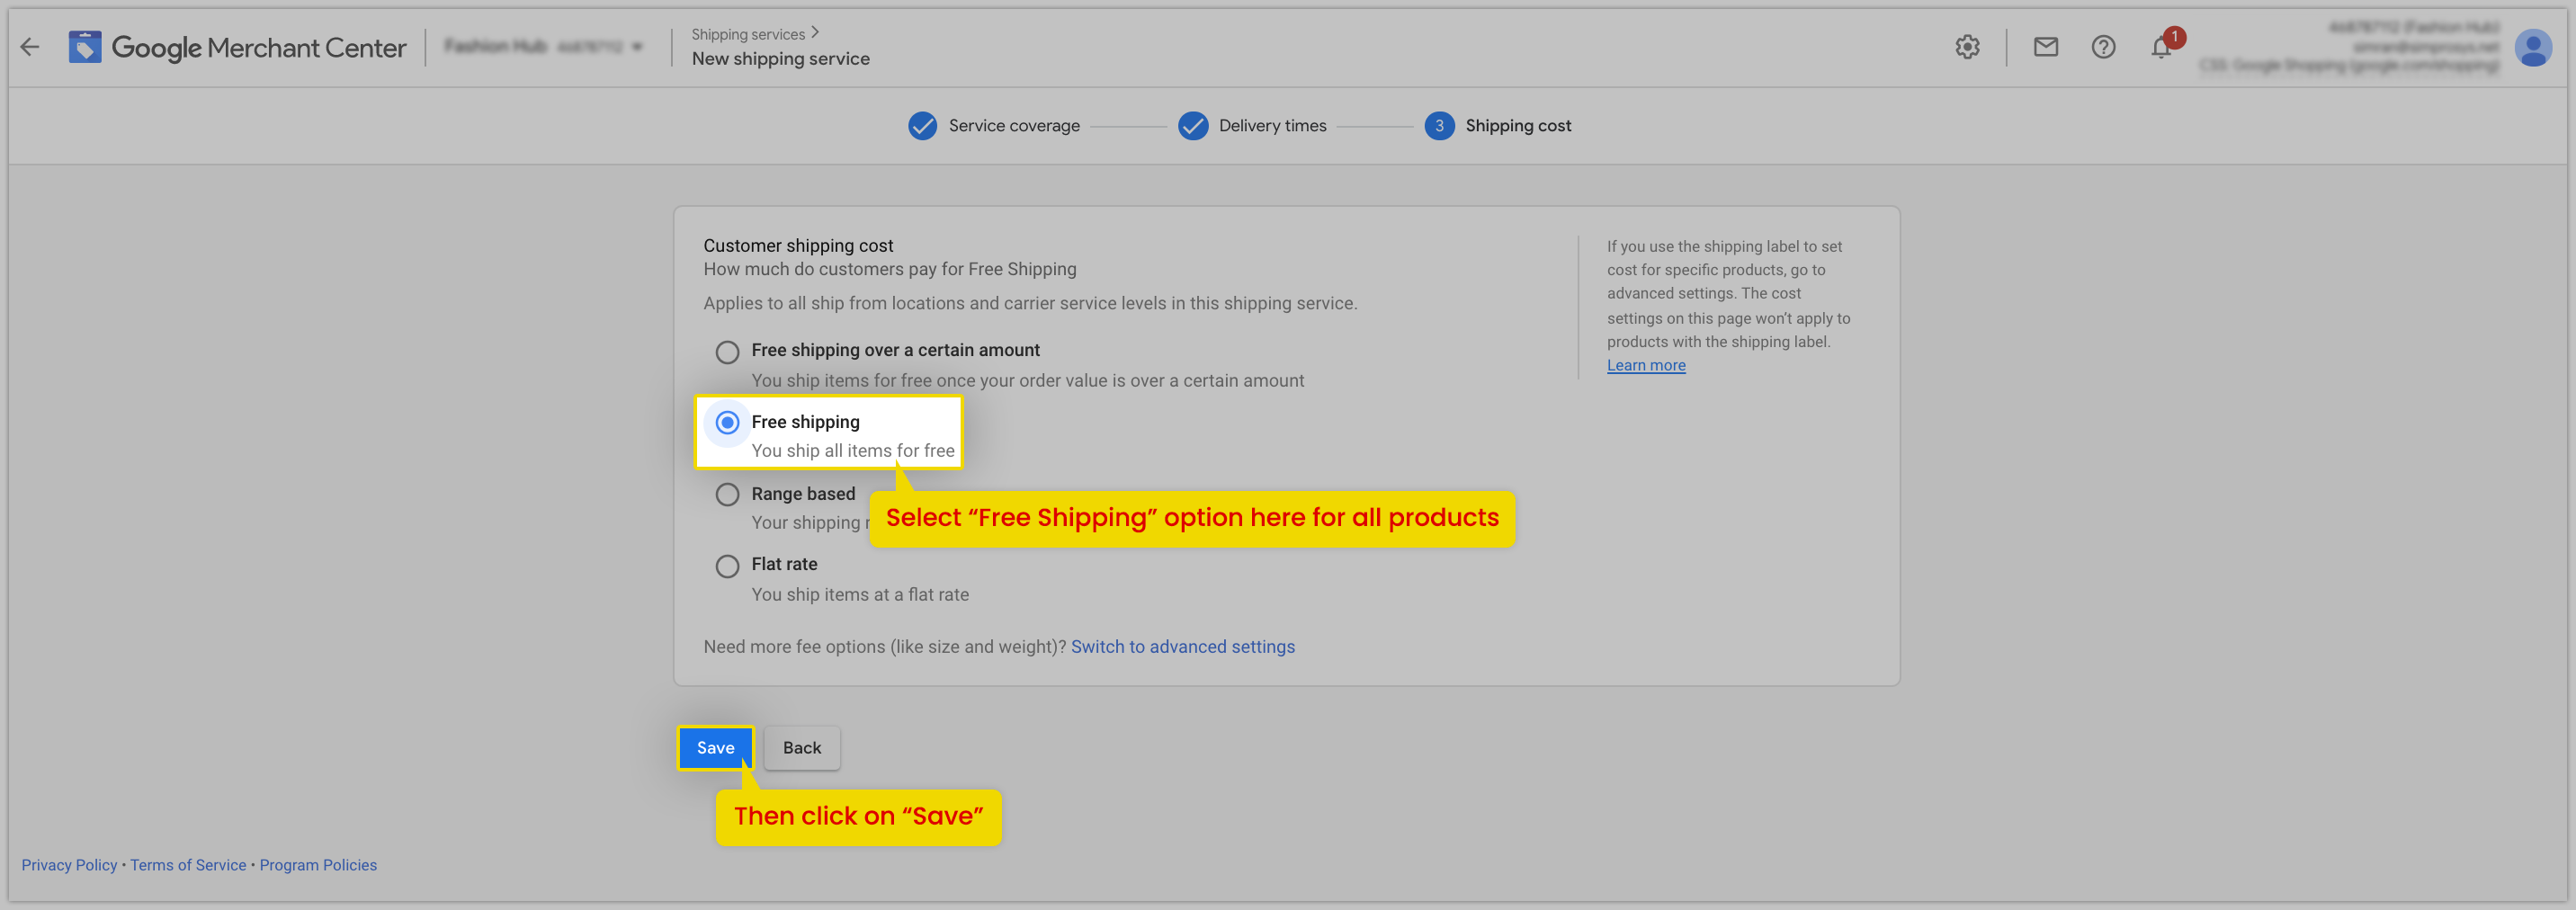
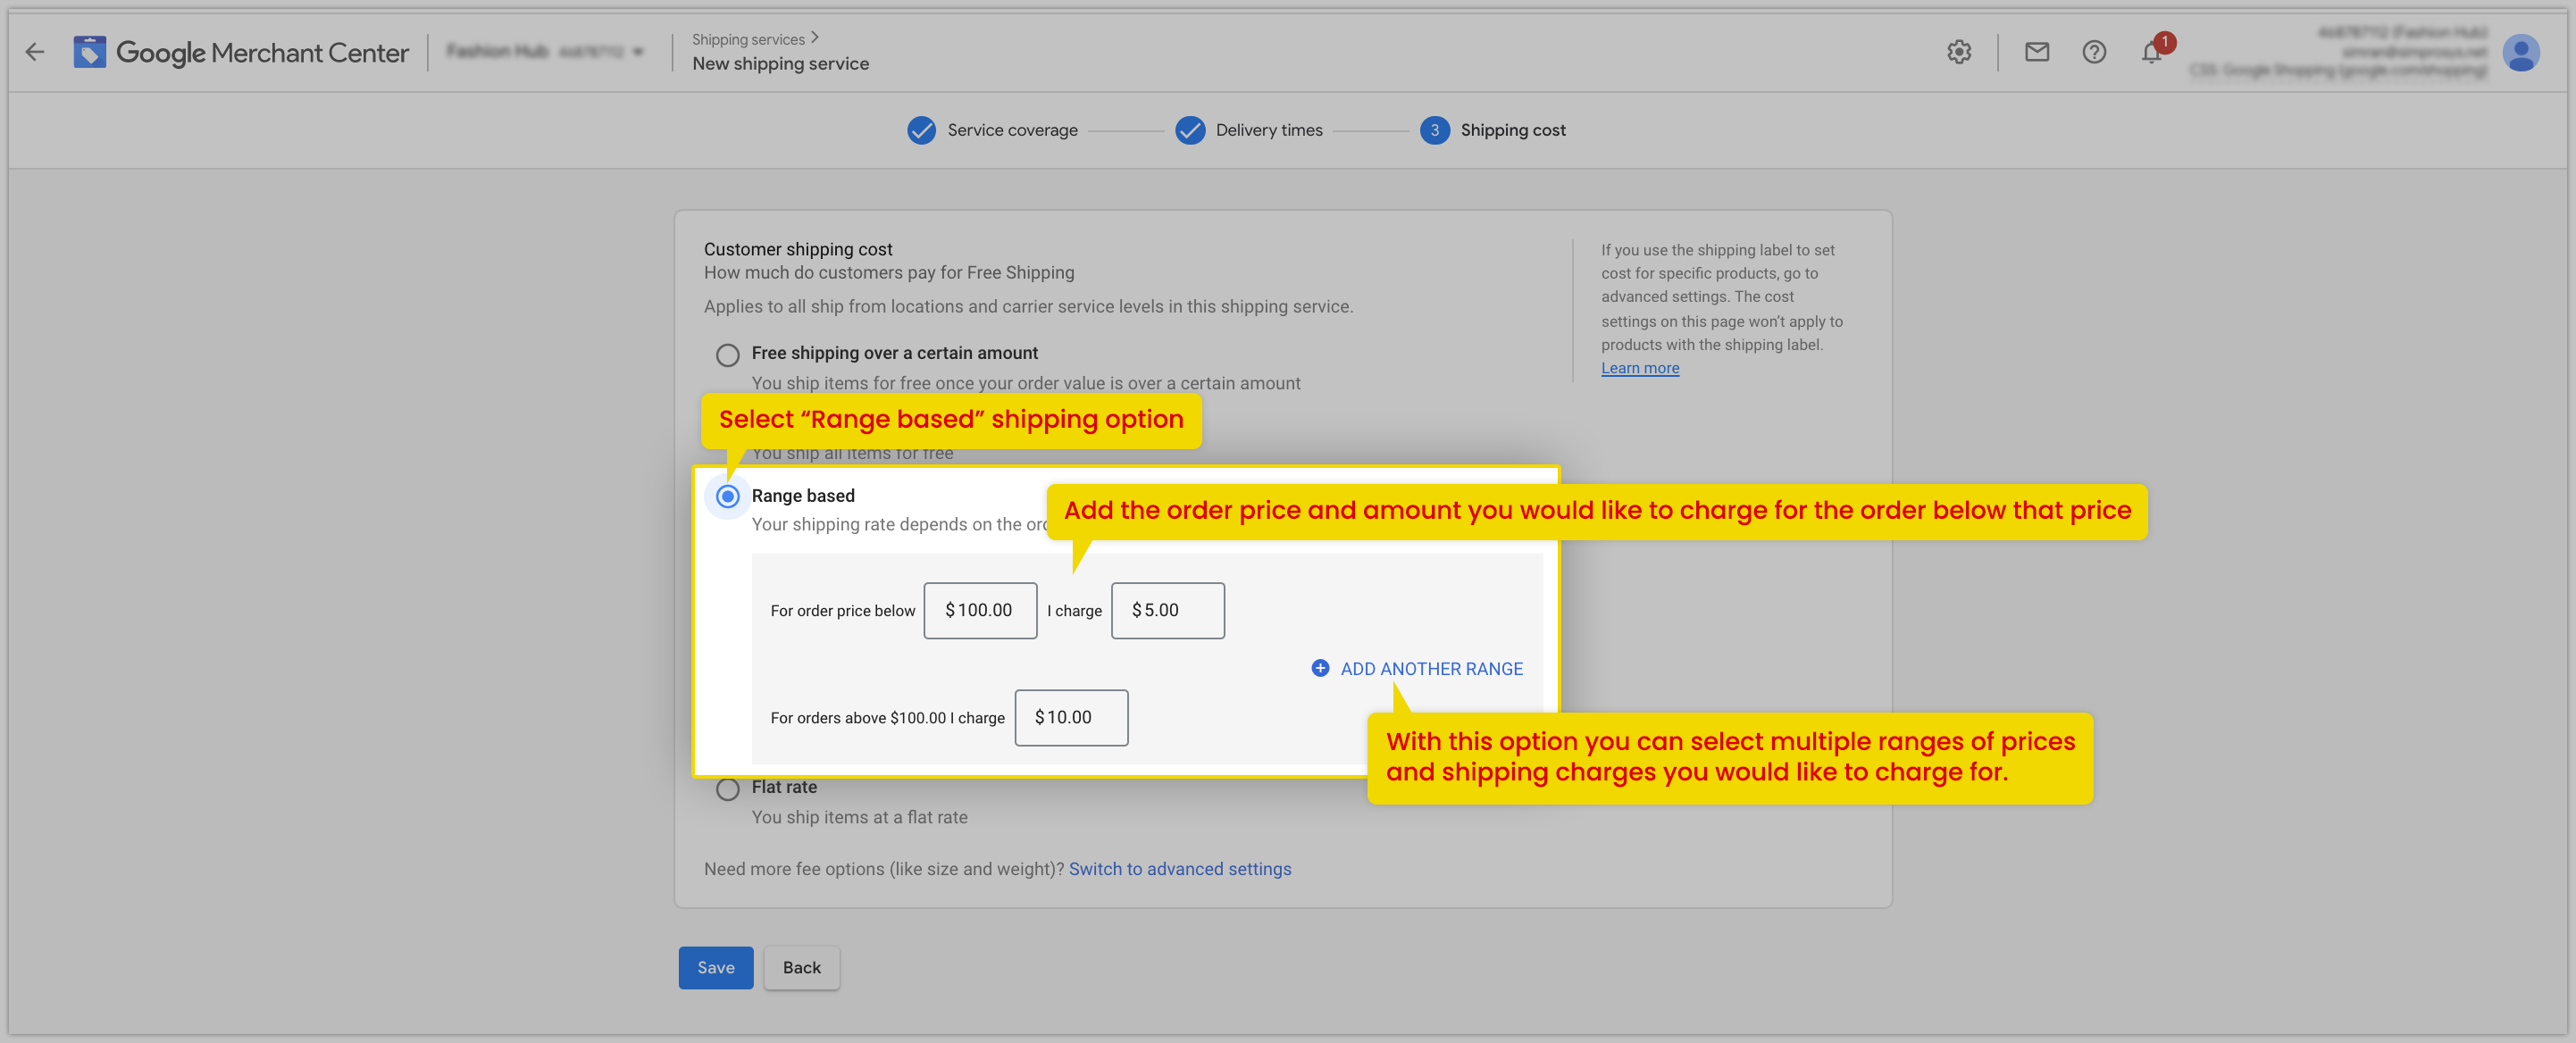
Range Based: This shipping setting helps when you have shipping charges based on different price ranges.
Flat Rate: In the “Flat Rate” as it is the same method selected in the Shopline store.
Carrier-based: This shipping setting is used when you want to charge shipping based on the carrier-calculated rate. There are two scenarios to set up the carrier-based shipping settings.
The first scenario will help you link the Partner for Shipping and Delivery time. This will help Google to calculate the estimated delivery time for each location automatically. That Google uses to display Shopping Ads Result to customers.
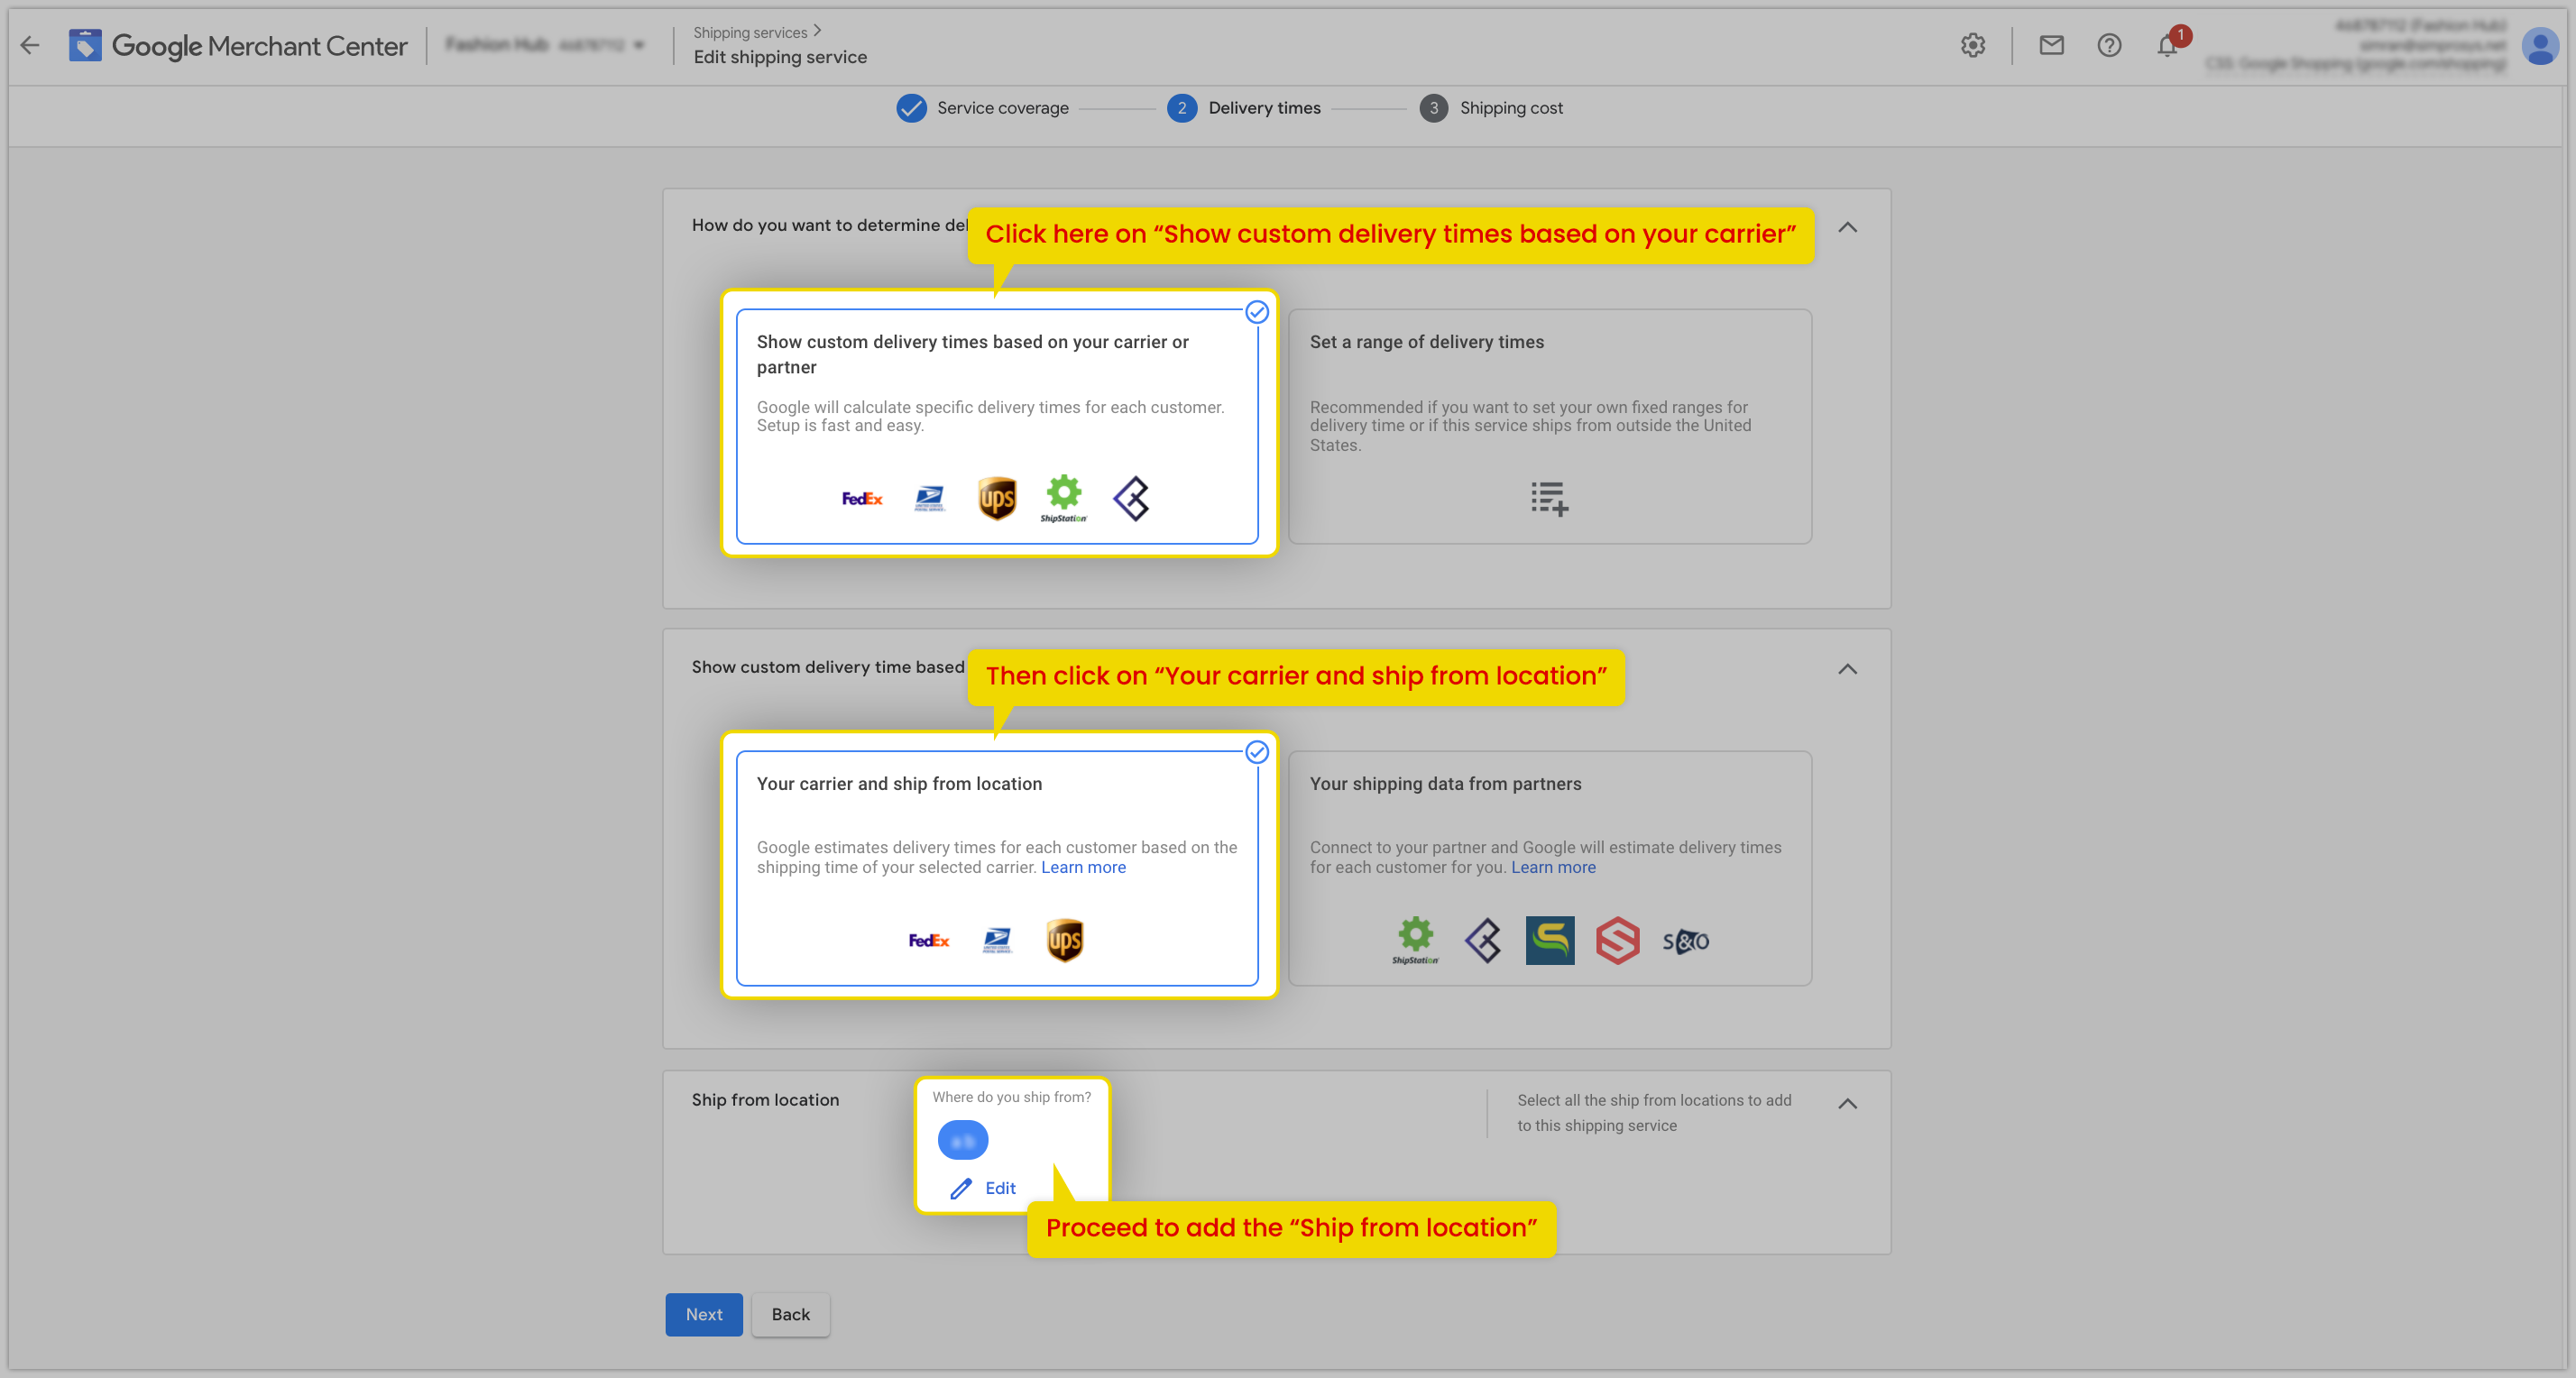
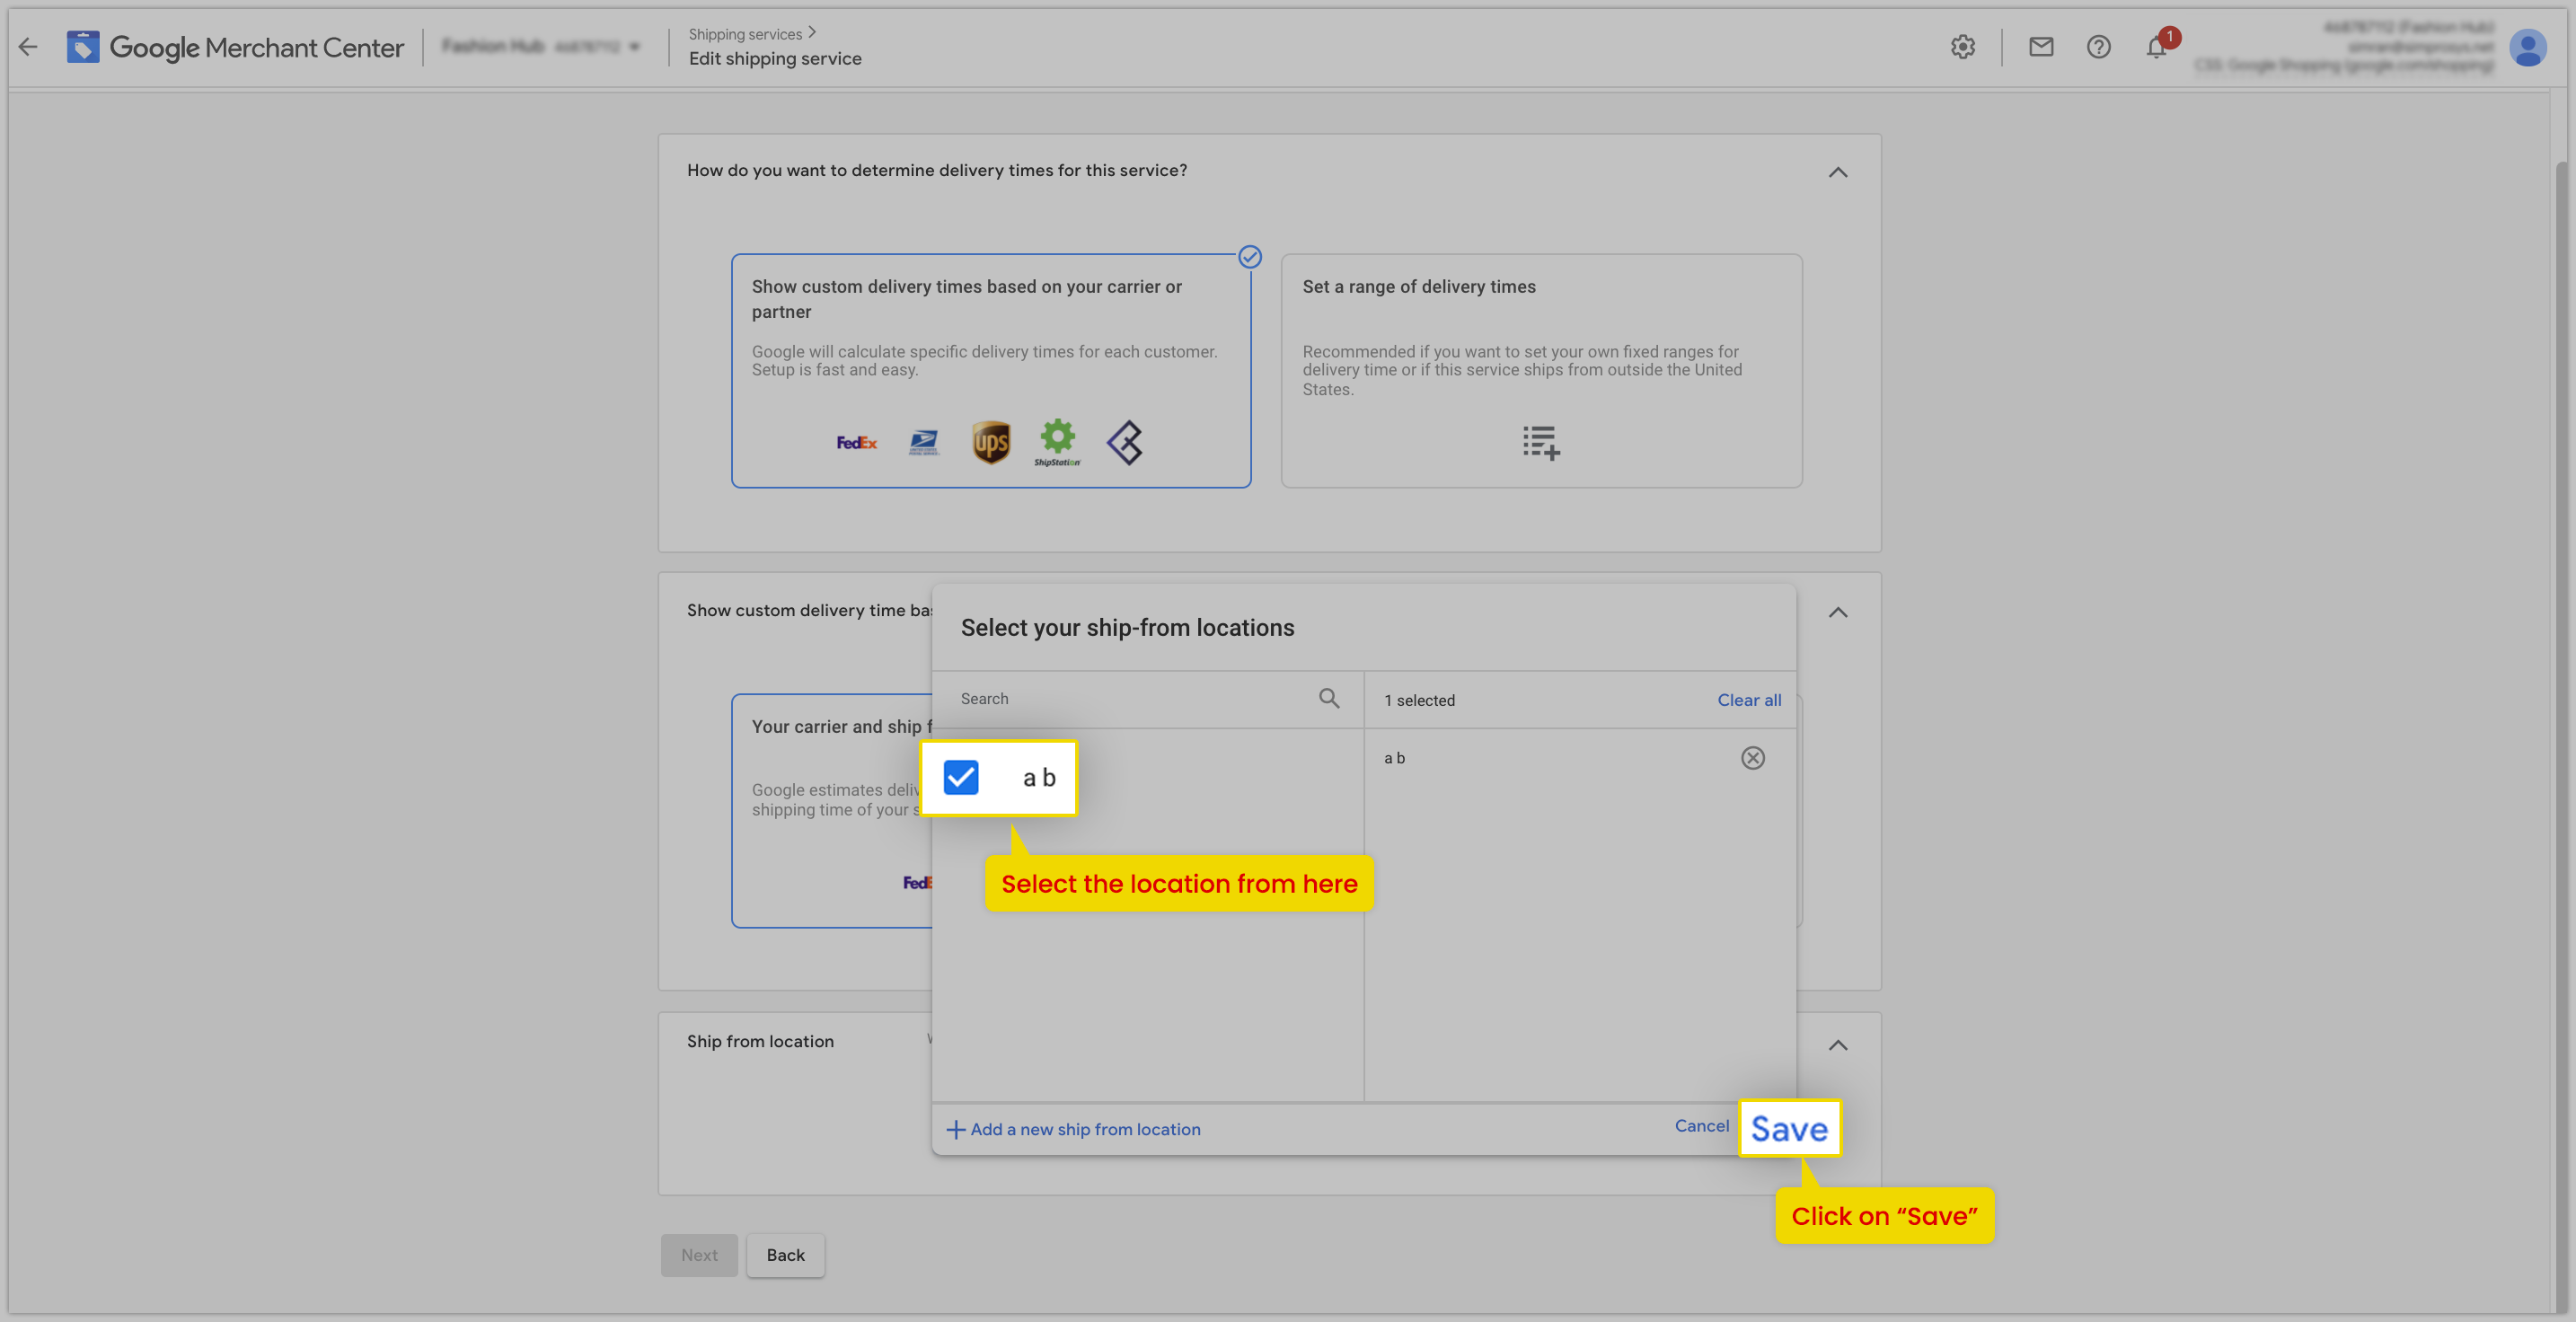
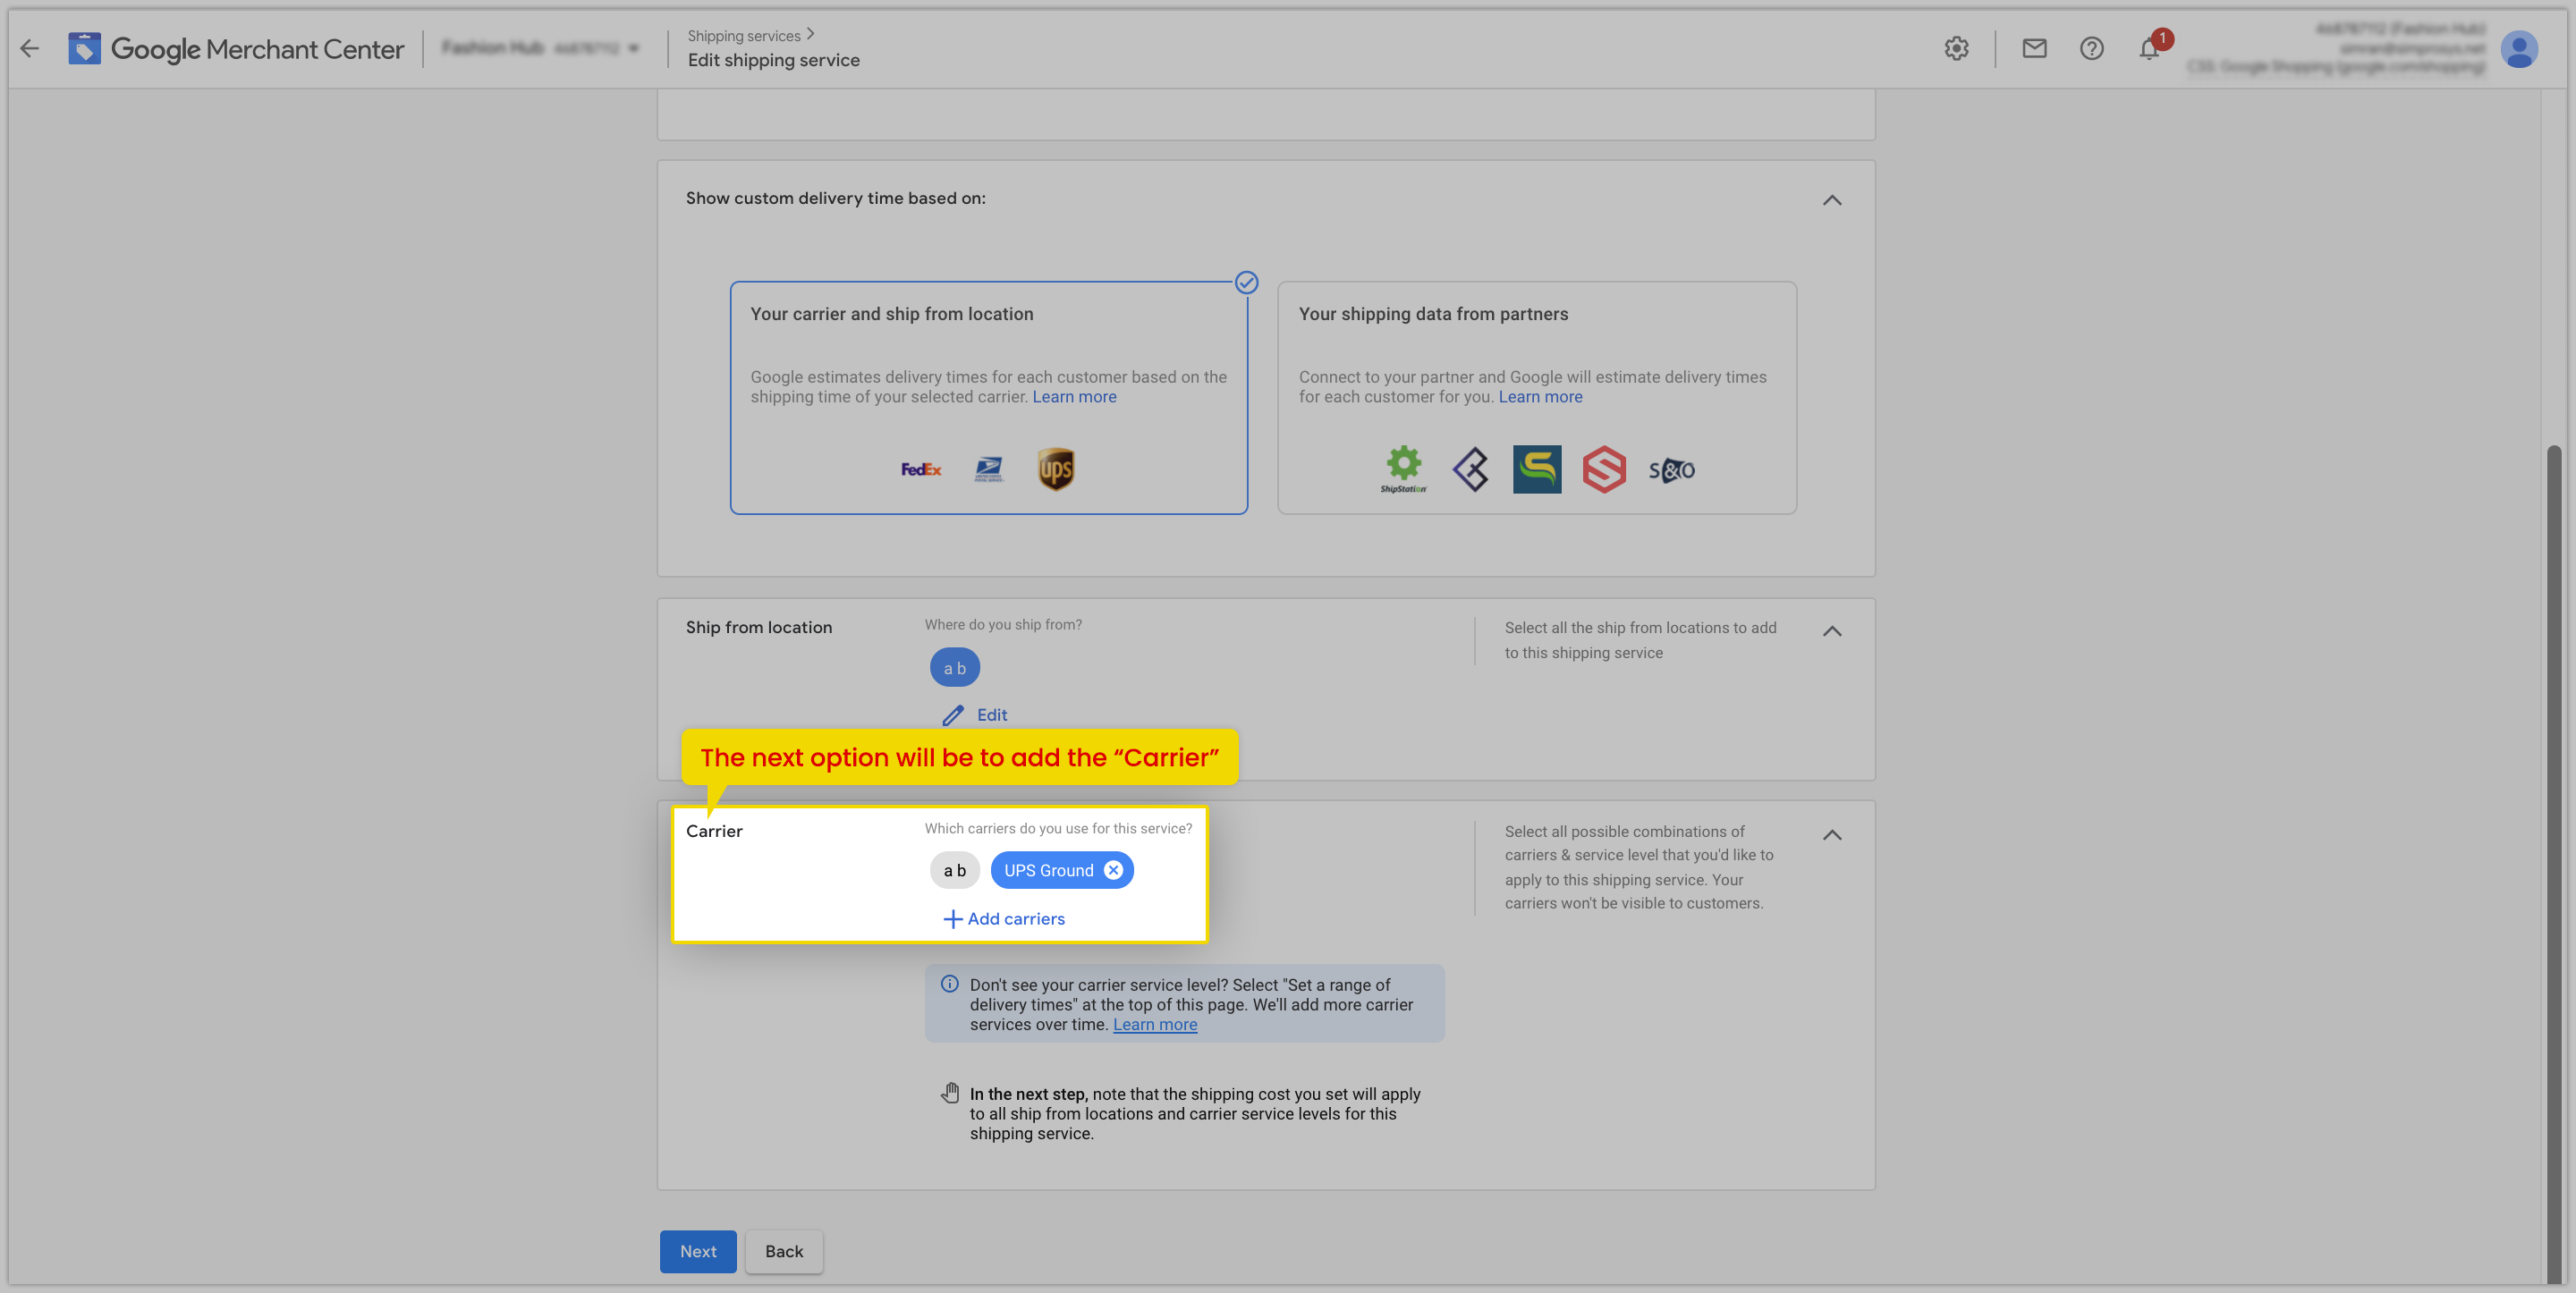
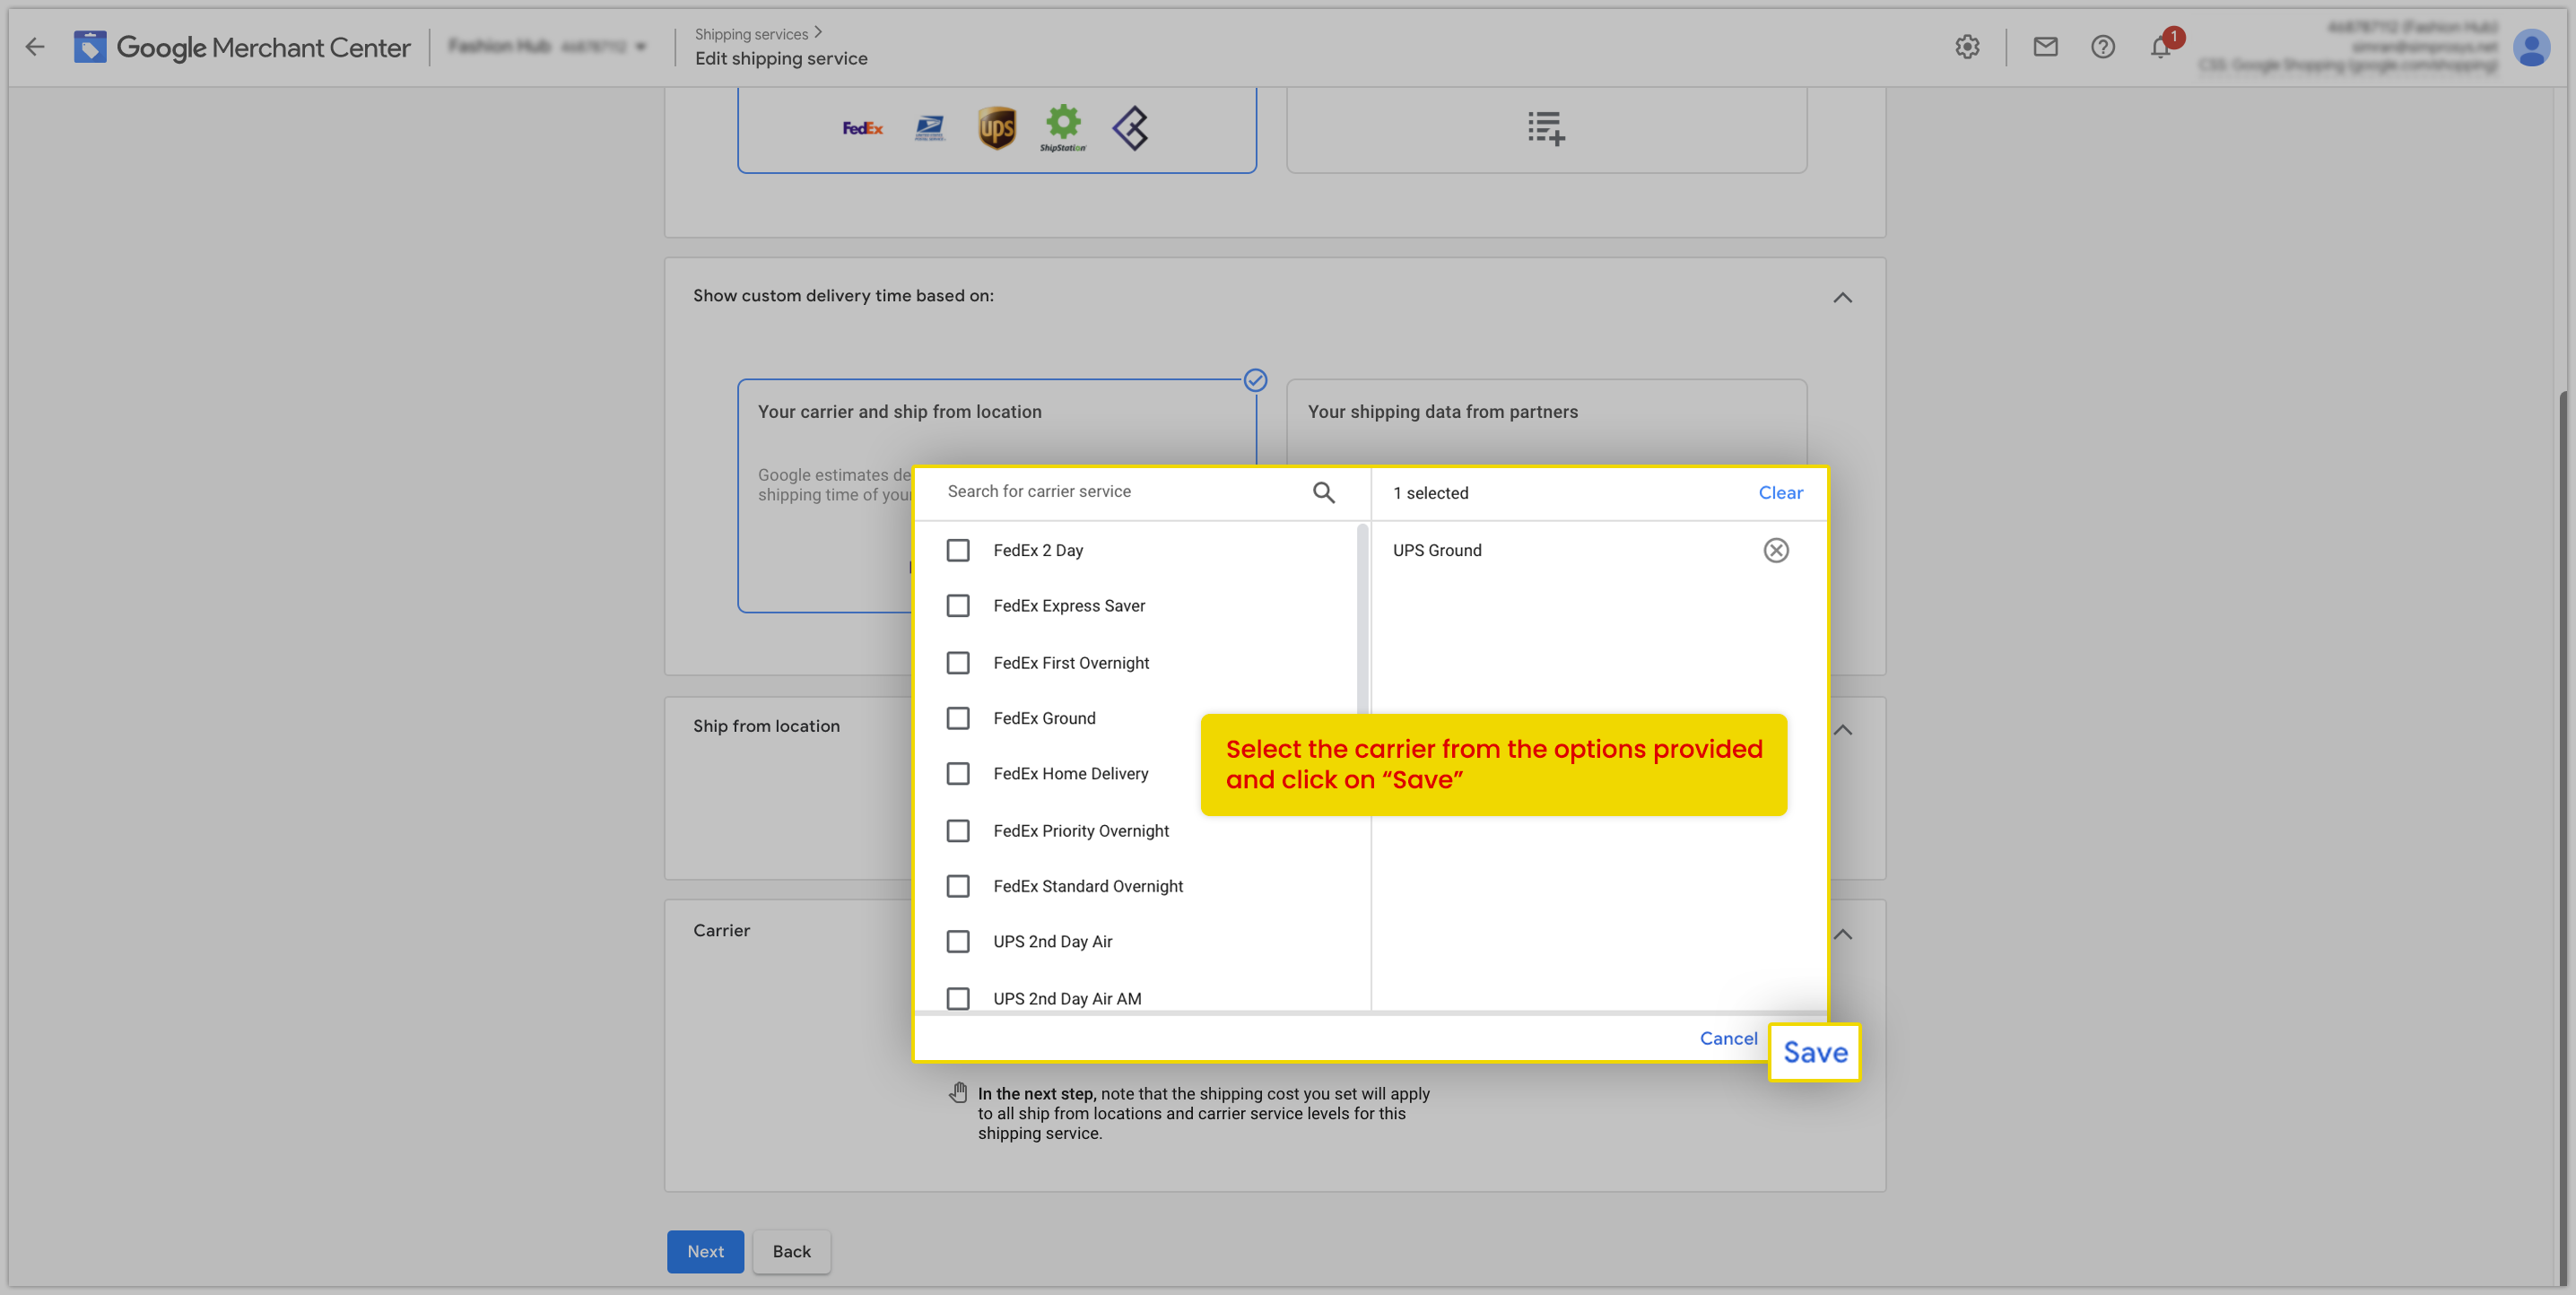
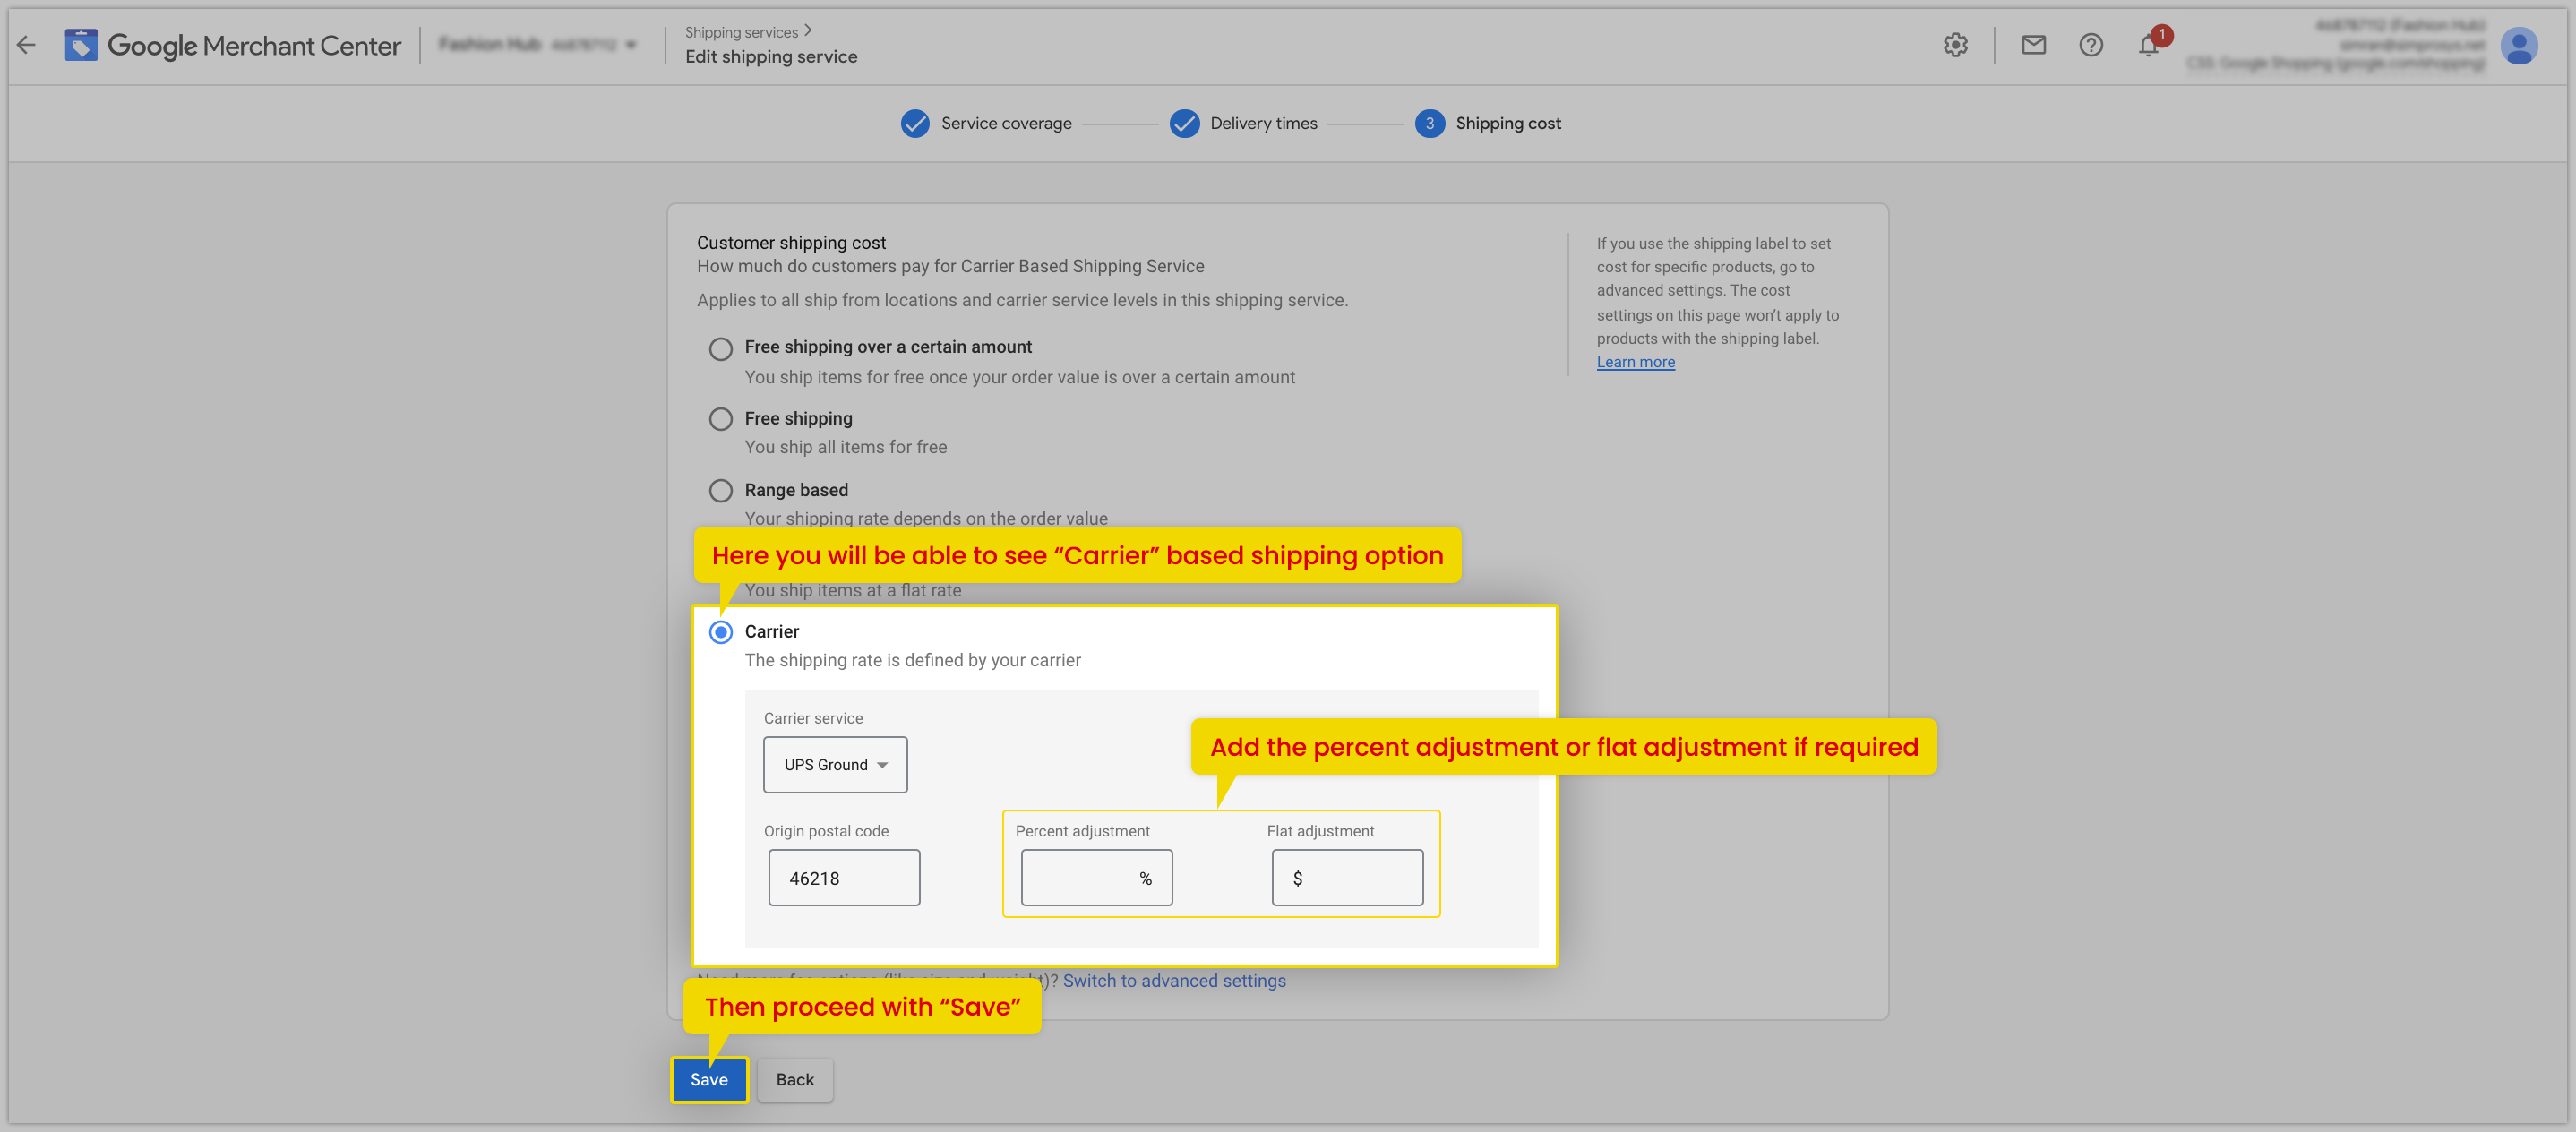
In the second scenario, you need to define Order cutoff time, Handling Time, and Transit time, and based on these settings Google will show estimated delivery time which will mostly be the same for the entire country even if the Order will reach early to the Destination.
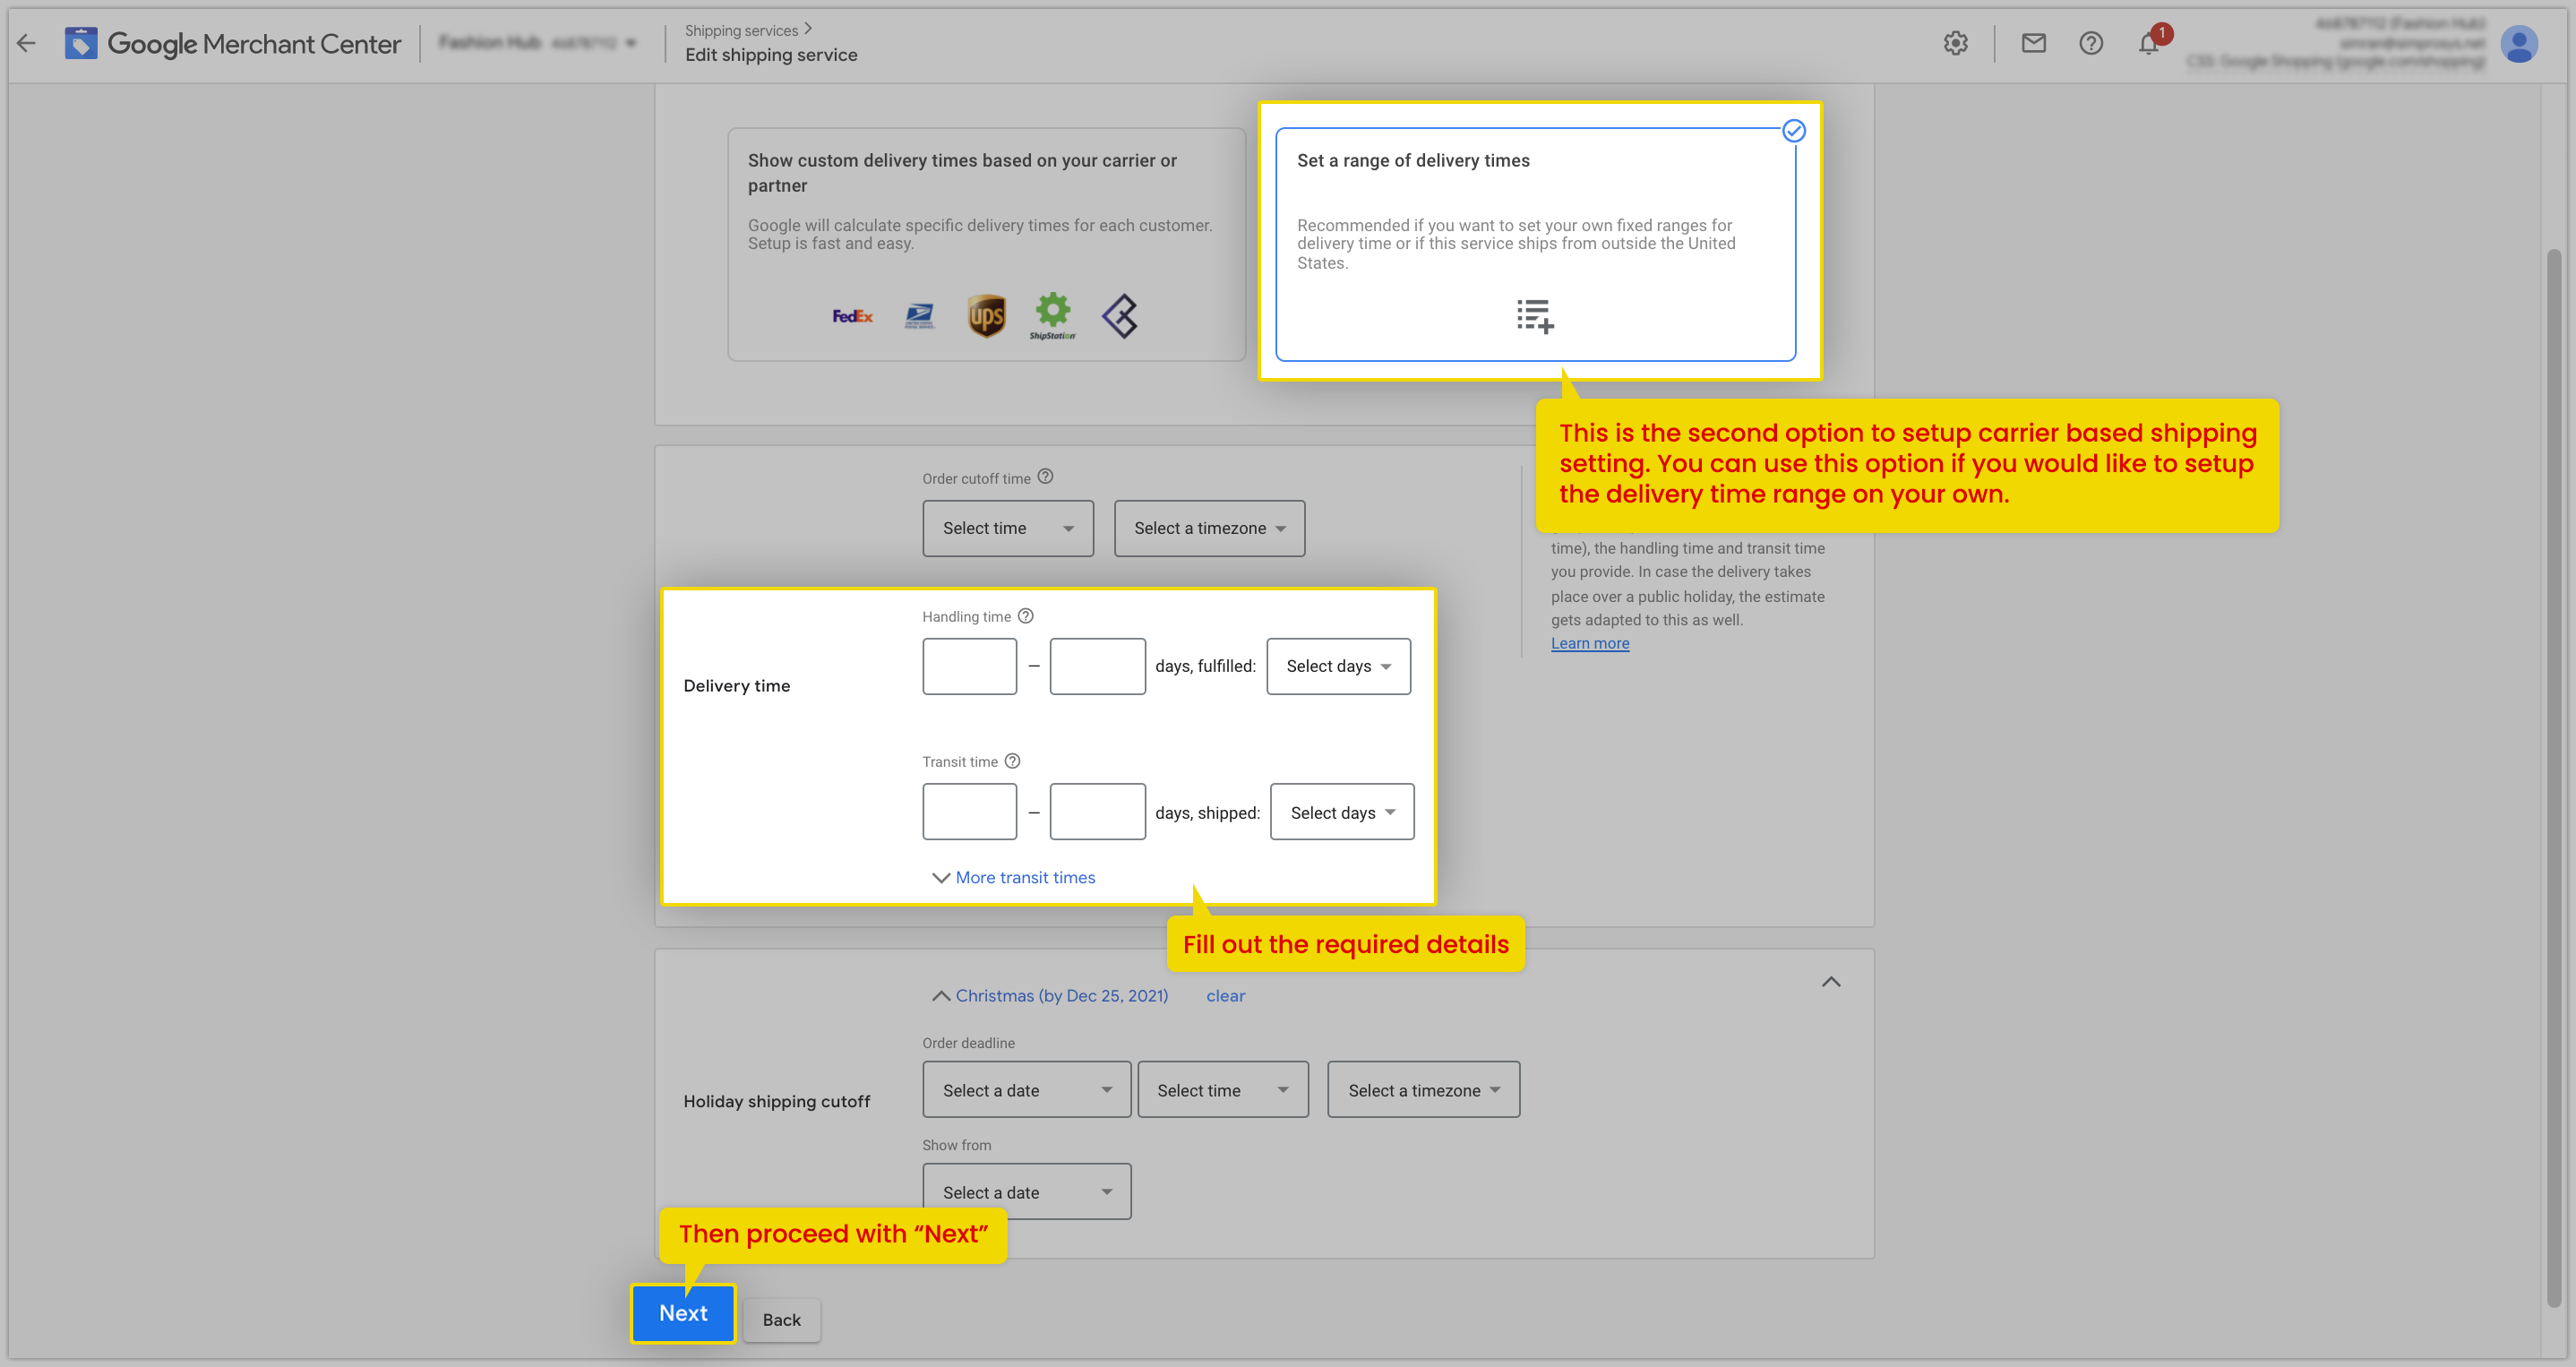
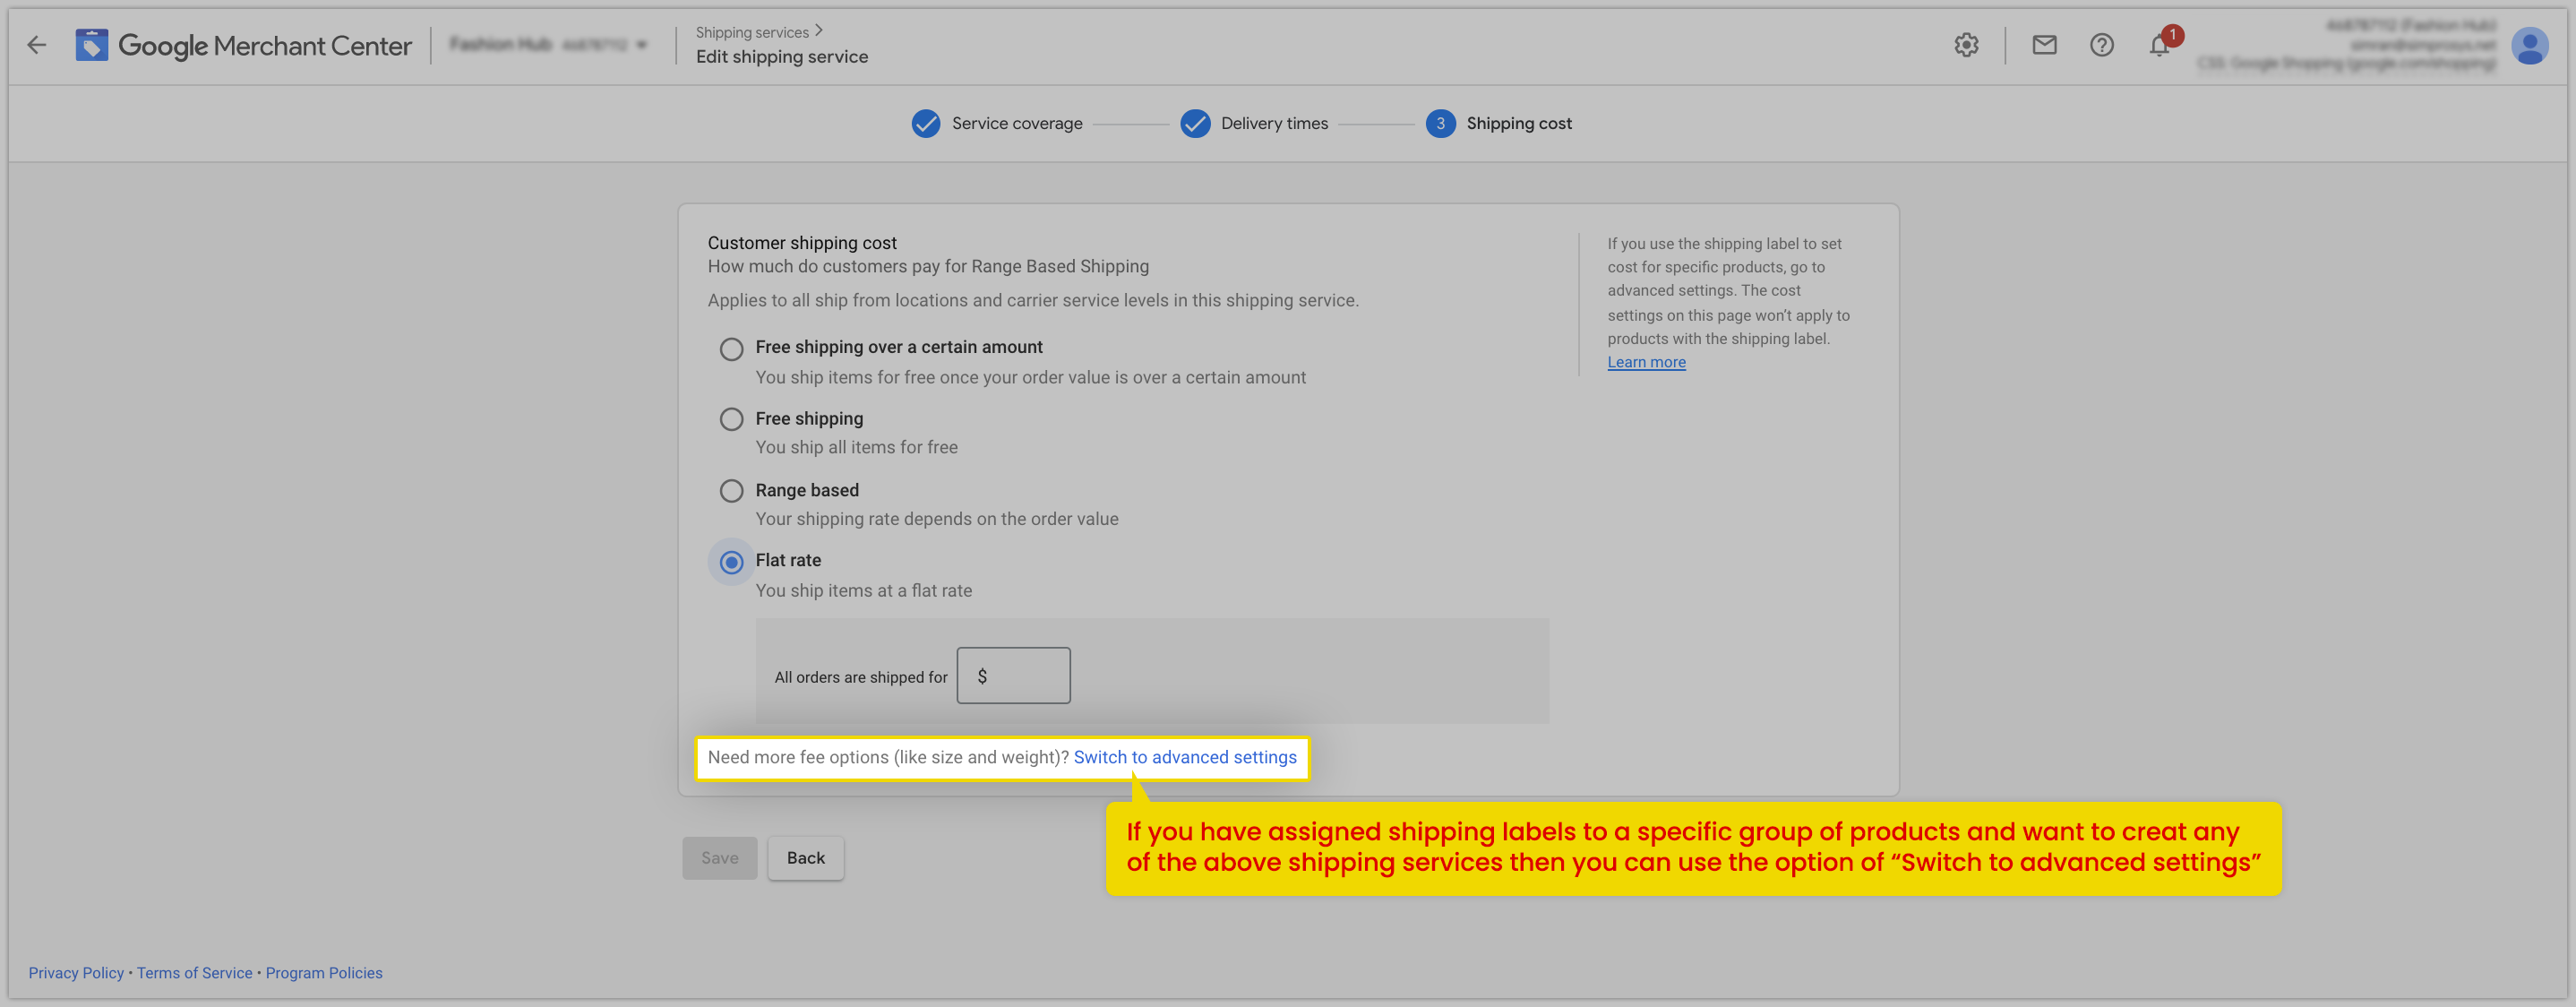
There are more options to explore or filter products on which you want to apply shipping settings.
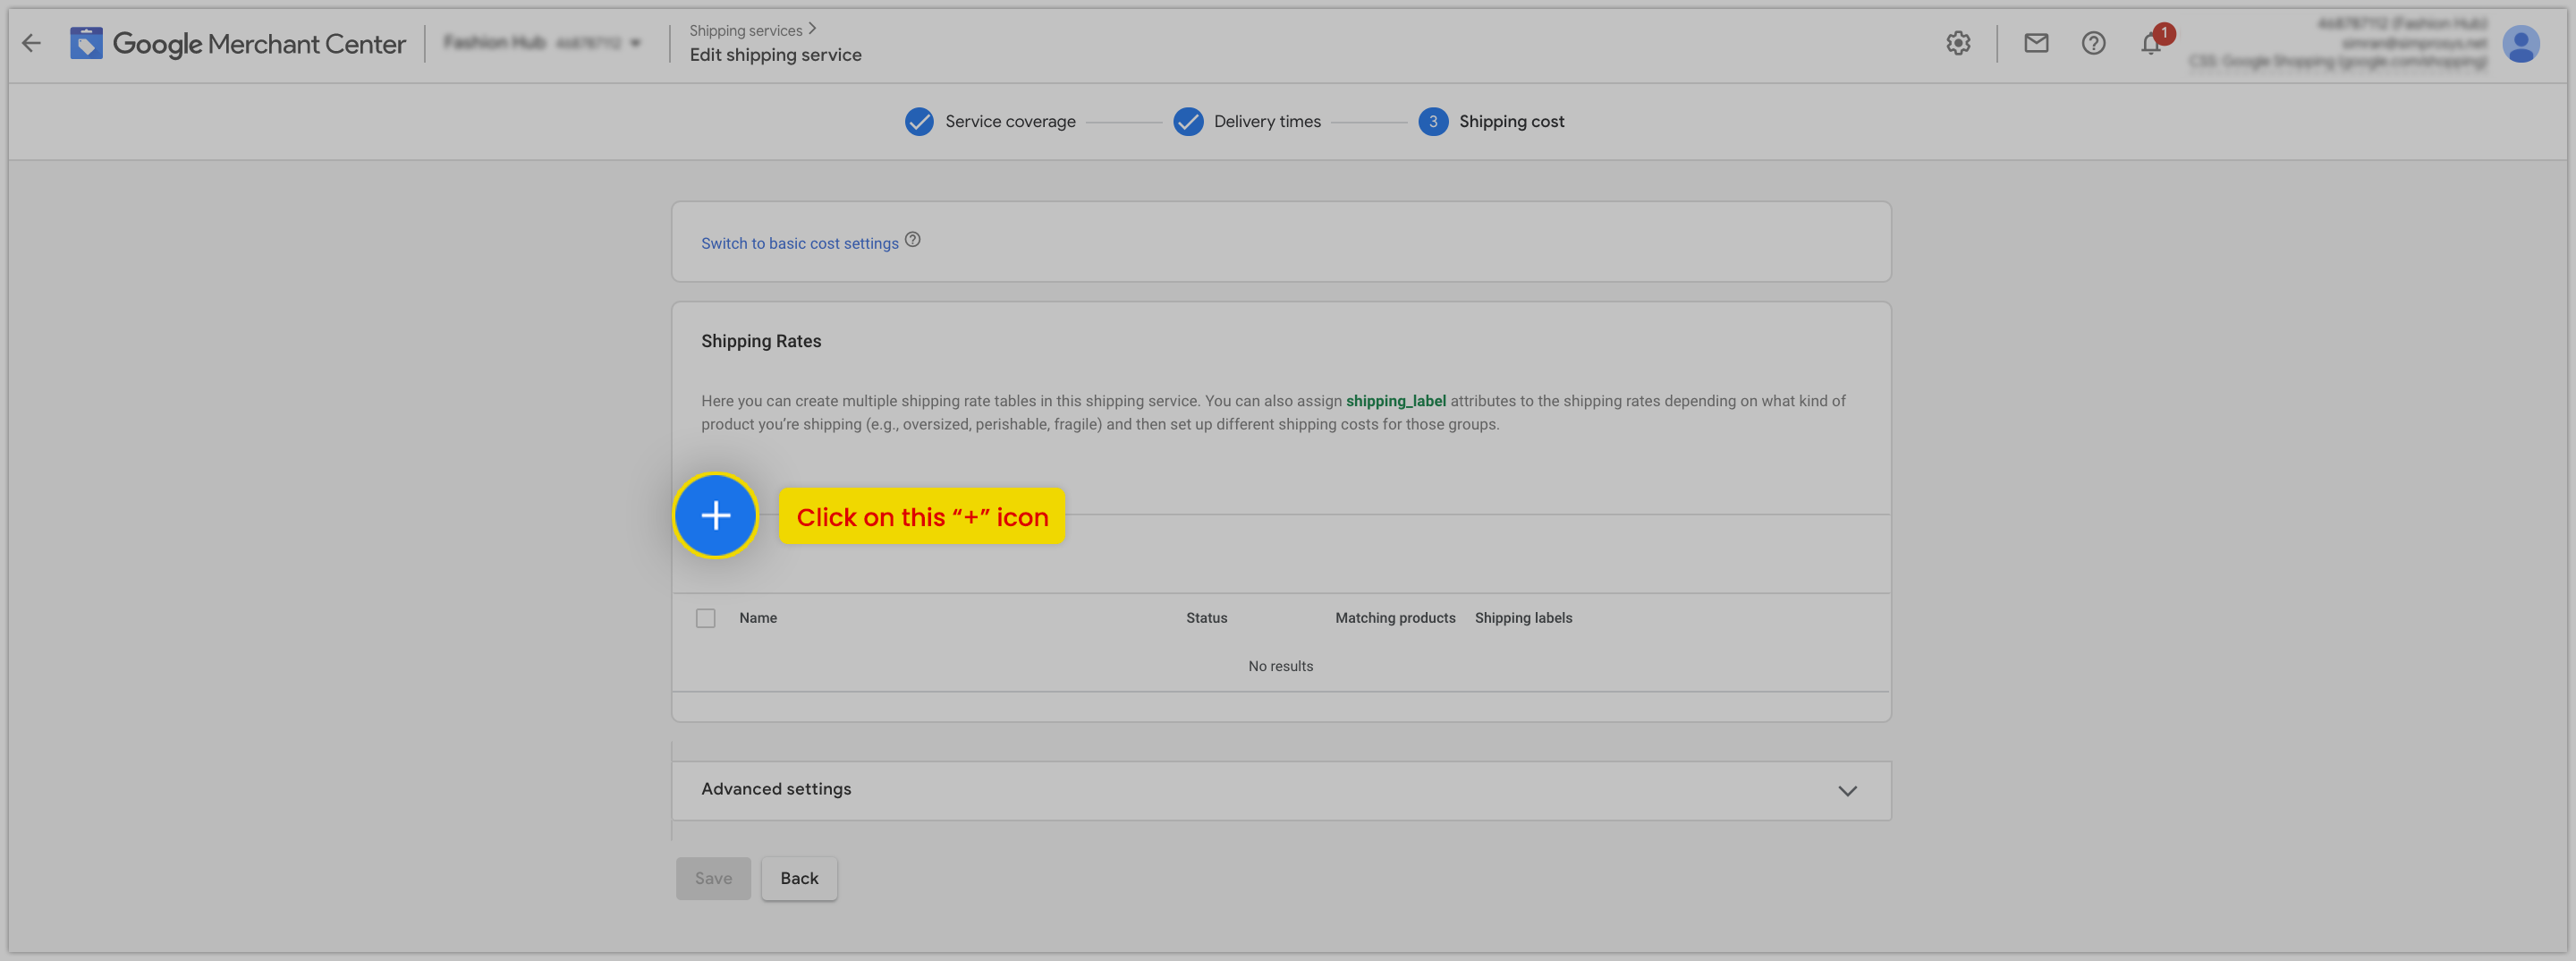
If you have assigned shipping labels to a specific group of products and want to create any of the above shipping services then you can use the option of “Switch to advanced settings”.
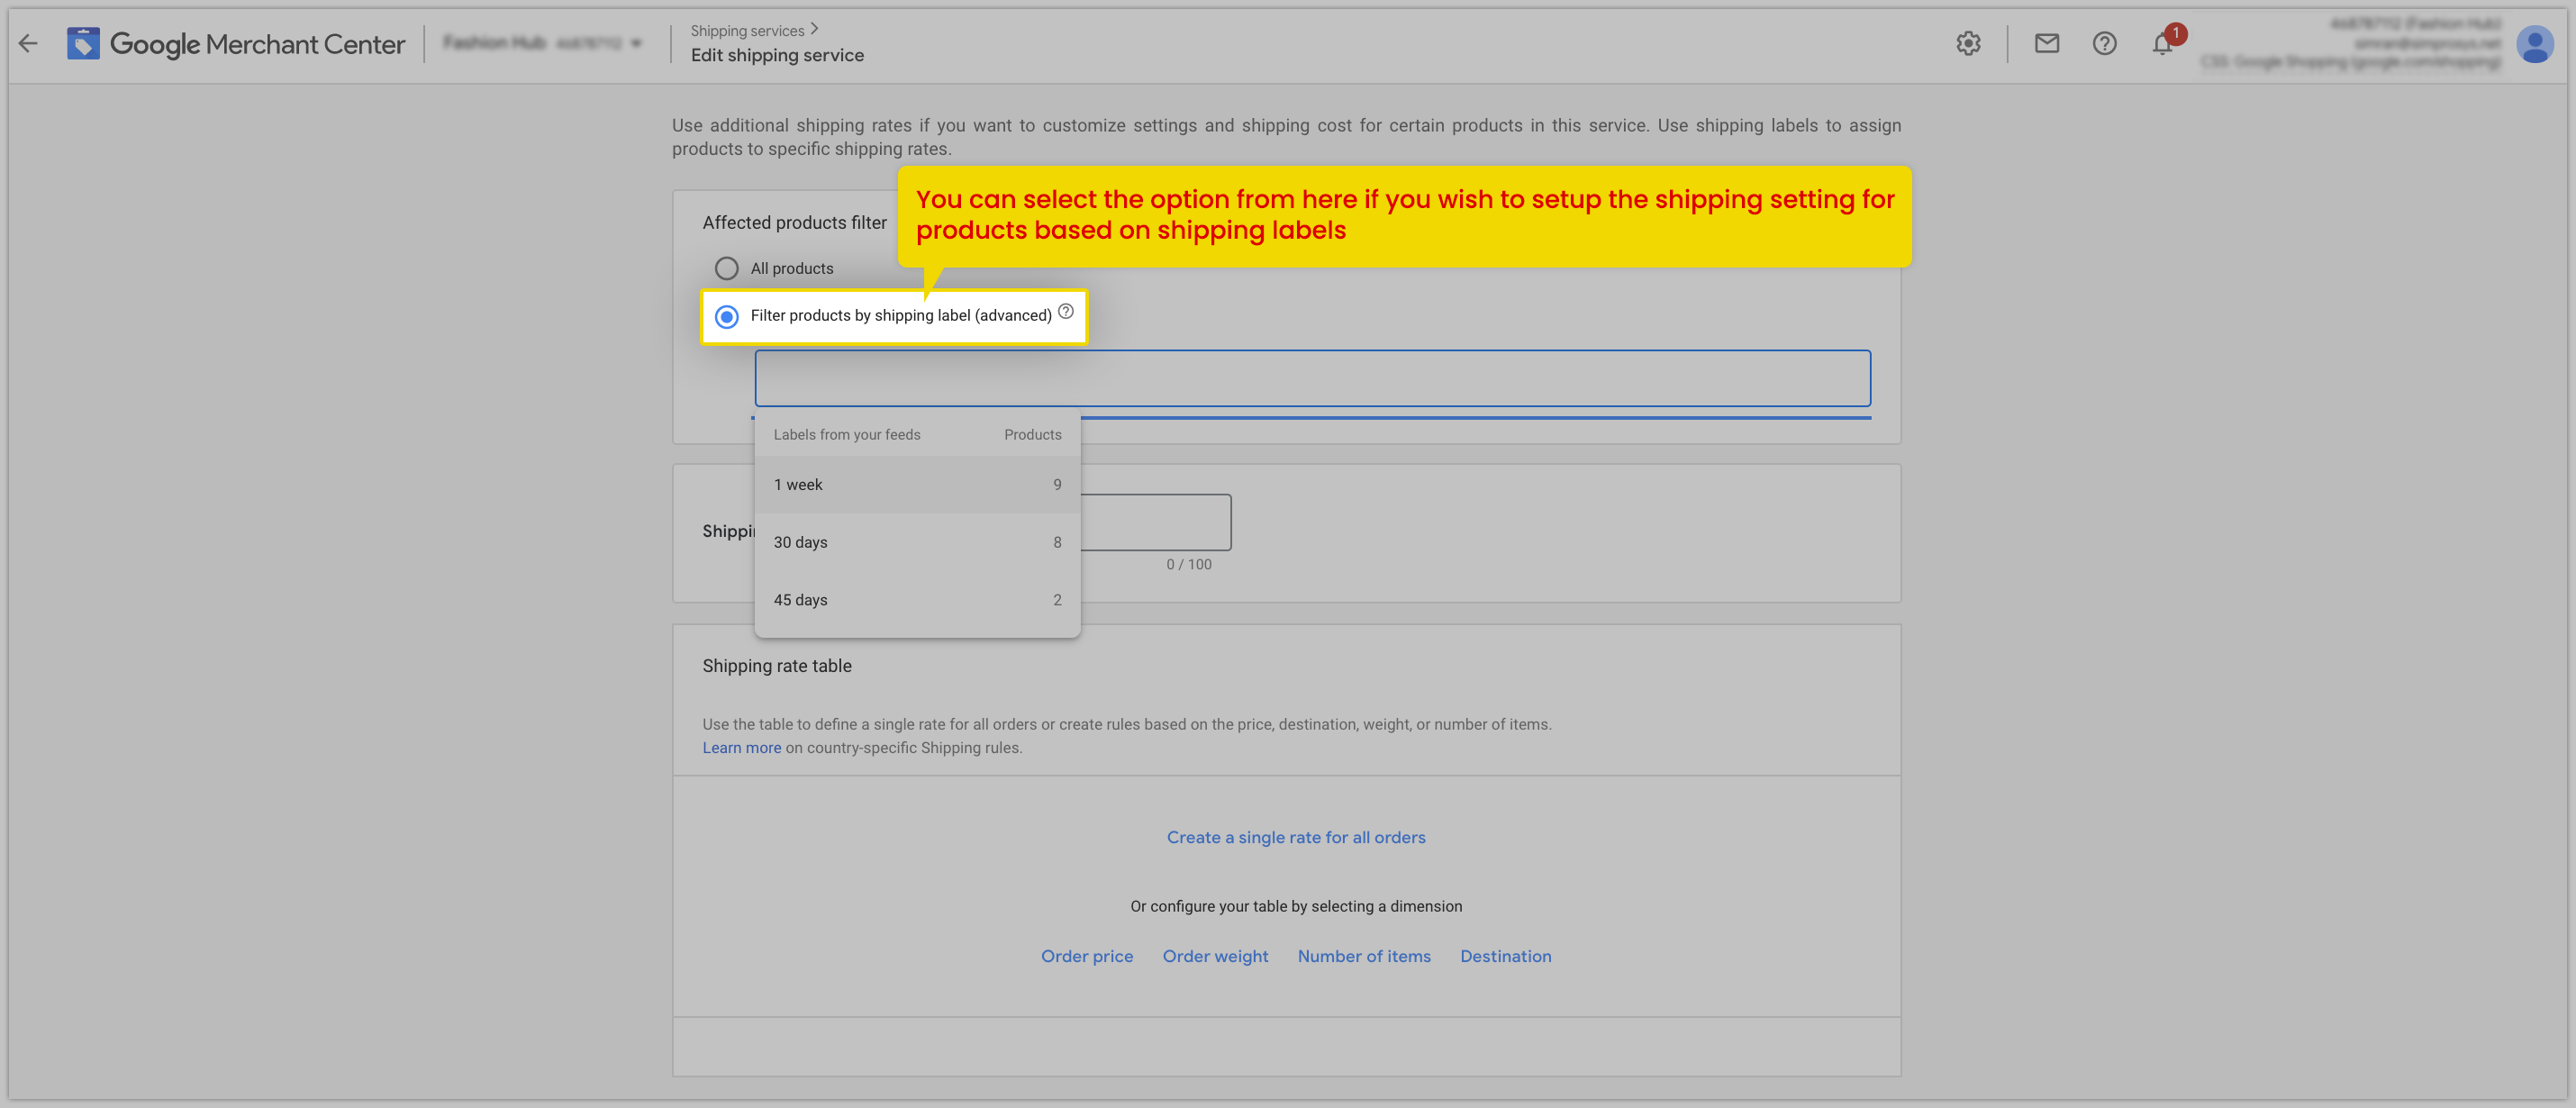
Filter “Products based on Shipping Labels” and then you can assign the shipping settings based on the shipping labels for various groups of products.
We hope this document will be helpful. If you have any queries, you can write to us at support@simprosys.com and we will definitely help you.
Simprosys Google Shopping Feed
Initial App Configuration

Troubleshooting & Issue Fixes

Tracking Tags Setup (Google Ads & Google Analytics 4)

Product Optimization & Automated Feed Rules

Advanced Setup Made Easy

Legal Pages

