

Simprosys Google Shopping Feed
Initial App Configuration
Troubleshooting & Issue Fixes
Tracking Tags Setup (Google Ads & Google Analytics 4)
Product Optimization & Automated Feed Rules
Advanced Setup Made Easy
Legal Pages
How to Keep Your Historical Google Shopping Product IDs After Migrating to Shopline
Jan 30, 2026
This guide is for store owners migrating their e-commerce store to Shopline. It provides straightforward, step-by-step instructions on how to submit products to Google Merchant Center using your original (historical) product IDs via the Simprosys Google Shopping Feed App. By following this process, you'll maintain continuity in your Google Ads, Shopping campaigns, and Merchant Center data by avoiding disruptions like lost performance history or reset campaign learning.
We'll cover what to do at each stage, why it's essential, and key verifications to ensure everything works smoothly. If you're new to this, take it one section at a time, and don't hesitate to reach out to Shopline support OR Simprosys support for assistance.
The Importance of Retaining Historical Product IDs
During a Shopline migration, your products will automatically receive new IDs. If these new IDs are sent to Google Merchant Center, Google interprets them as new items, which can cause significant issues:
- Erased historical data: Past performance metrics, such as clicks, impressions, and conversions, are lost.
- Campaign resets: Shopping and Performance Max campaigns must relearn from scratch, potentially reducing efficiency and ROI.
- Tracking breakdowns: Remarketing lists and conversion attribution become unreliable, leading to poor ad targeting and reporting.
By sticking with your historical product IDs, Google recognizes your products as unchanged, preserving all prior data and ensuring seamless continuity. This approach aligns with Google's best practices for migrations and helps maintain your ad performance without starting over.
Section 1: Essential Pre-Migration Preparation
Complete this before migrating, and it's non-negotiable. Proper setup here ensures Shopline captures and stores your old IDs, making them accessible to Simprosys later.
1. Study Shopline's Official Migration Resources
- Access and thoroughly review Shopline's official migration guides and documentation.
- Familiarize yourself with the built-in migration tool's features and requirements.
Why it matters: Shopline only preserves historical IDs in dedicated internal fields when you use their official tool. Skipping this could make ID recovery impossible.
2. Perform the Migration Exclusively with Shopline's Tool
- Rely solely on Shopline's integrated migration tool and no third-party apps or manual imports.
- Migrate every product, variant, and related data in one go.
Why it matters: Alternative methods won't trigger Shopline's ID preservation mechanism, blocking historical ID usage in feeds.
Verify: After migration, log into your new Shopline store and spot-check product counts against your old store to ensure nothing was missed.
3. Validate the Migration Results
- Cross-check that all products appear in Shopline with accurate details (e.g., titles, descriptions, prices, images).
- Test a few products for completeness, such as inventory levels and custom attributes.
Why it matters: Simprosys will automatically sample your products during setup to confirm historical ID availability if no issues arise.
4. Centralize Feed Submissions with Simprosys
- Uninstall or disable any other apps, plugins, or tools that submit product feeds to Google.
- Avoid connecting external feed generators or APIs.
Why it matters: Overlapping feeds create ID conflicts, resulting in duplicates, overwrites, or suspensions in Merchant Center.
Verify: Review your app integrations and Merchant Center settings to ensure Simprosys is the only active source.
5. Consolidate All Tracking Through Simprosys
- Disable Google Ads conversion tracking, GA4 tags, and remarketing from all other sources (e.g., apps, sales channels, custom code).
- Remove any manual scripts or third-party implementations.
Why it matters: Duplicate tracking can mismatch IDs, corrupting data and skewing analytics-Simprosys handles this uniformly for accuracy.
Verify: Make sure you’re not using any manual code in your Shopline store or apps for Google Ads or GA4 tracking - this helps avoid tracking issues.”
Section 2: Installing the App and Configuring Your Feed
With pre-migration steps done, proceed to set up Simprosys. This ensures your products sync with historical IDs.
Step 1: Install Simprosys Google Shopping Feed app and Authenticate Google
- Head to the Shopline App Store, search for "Simprosys Google Shopping Feed," and install it.
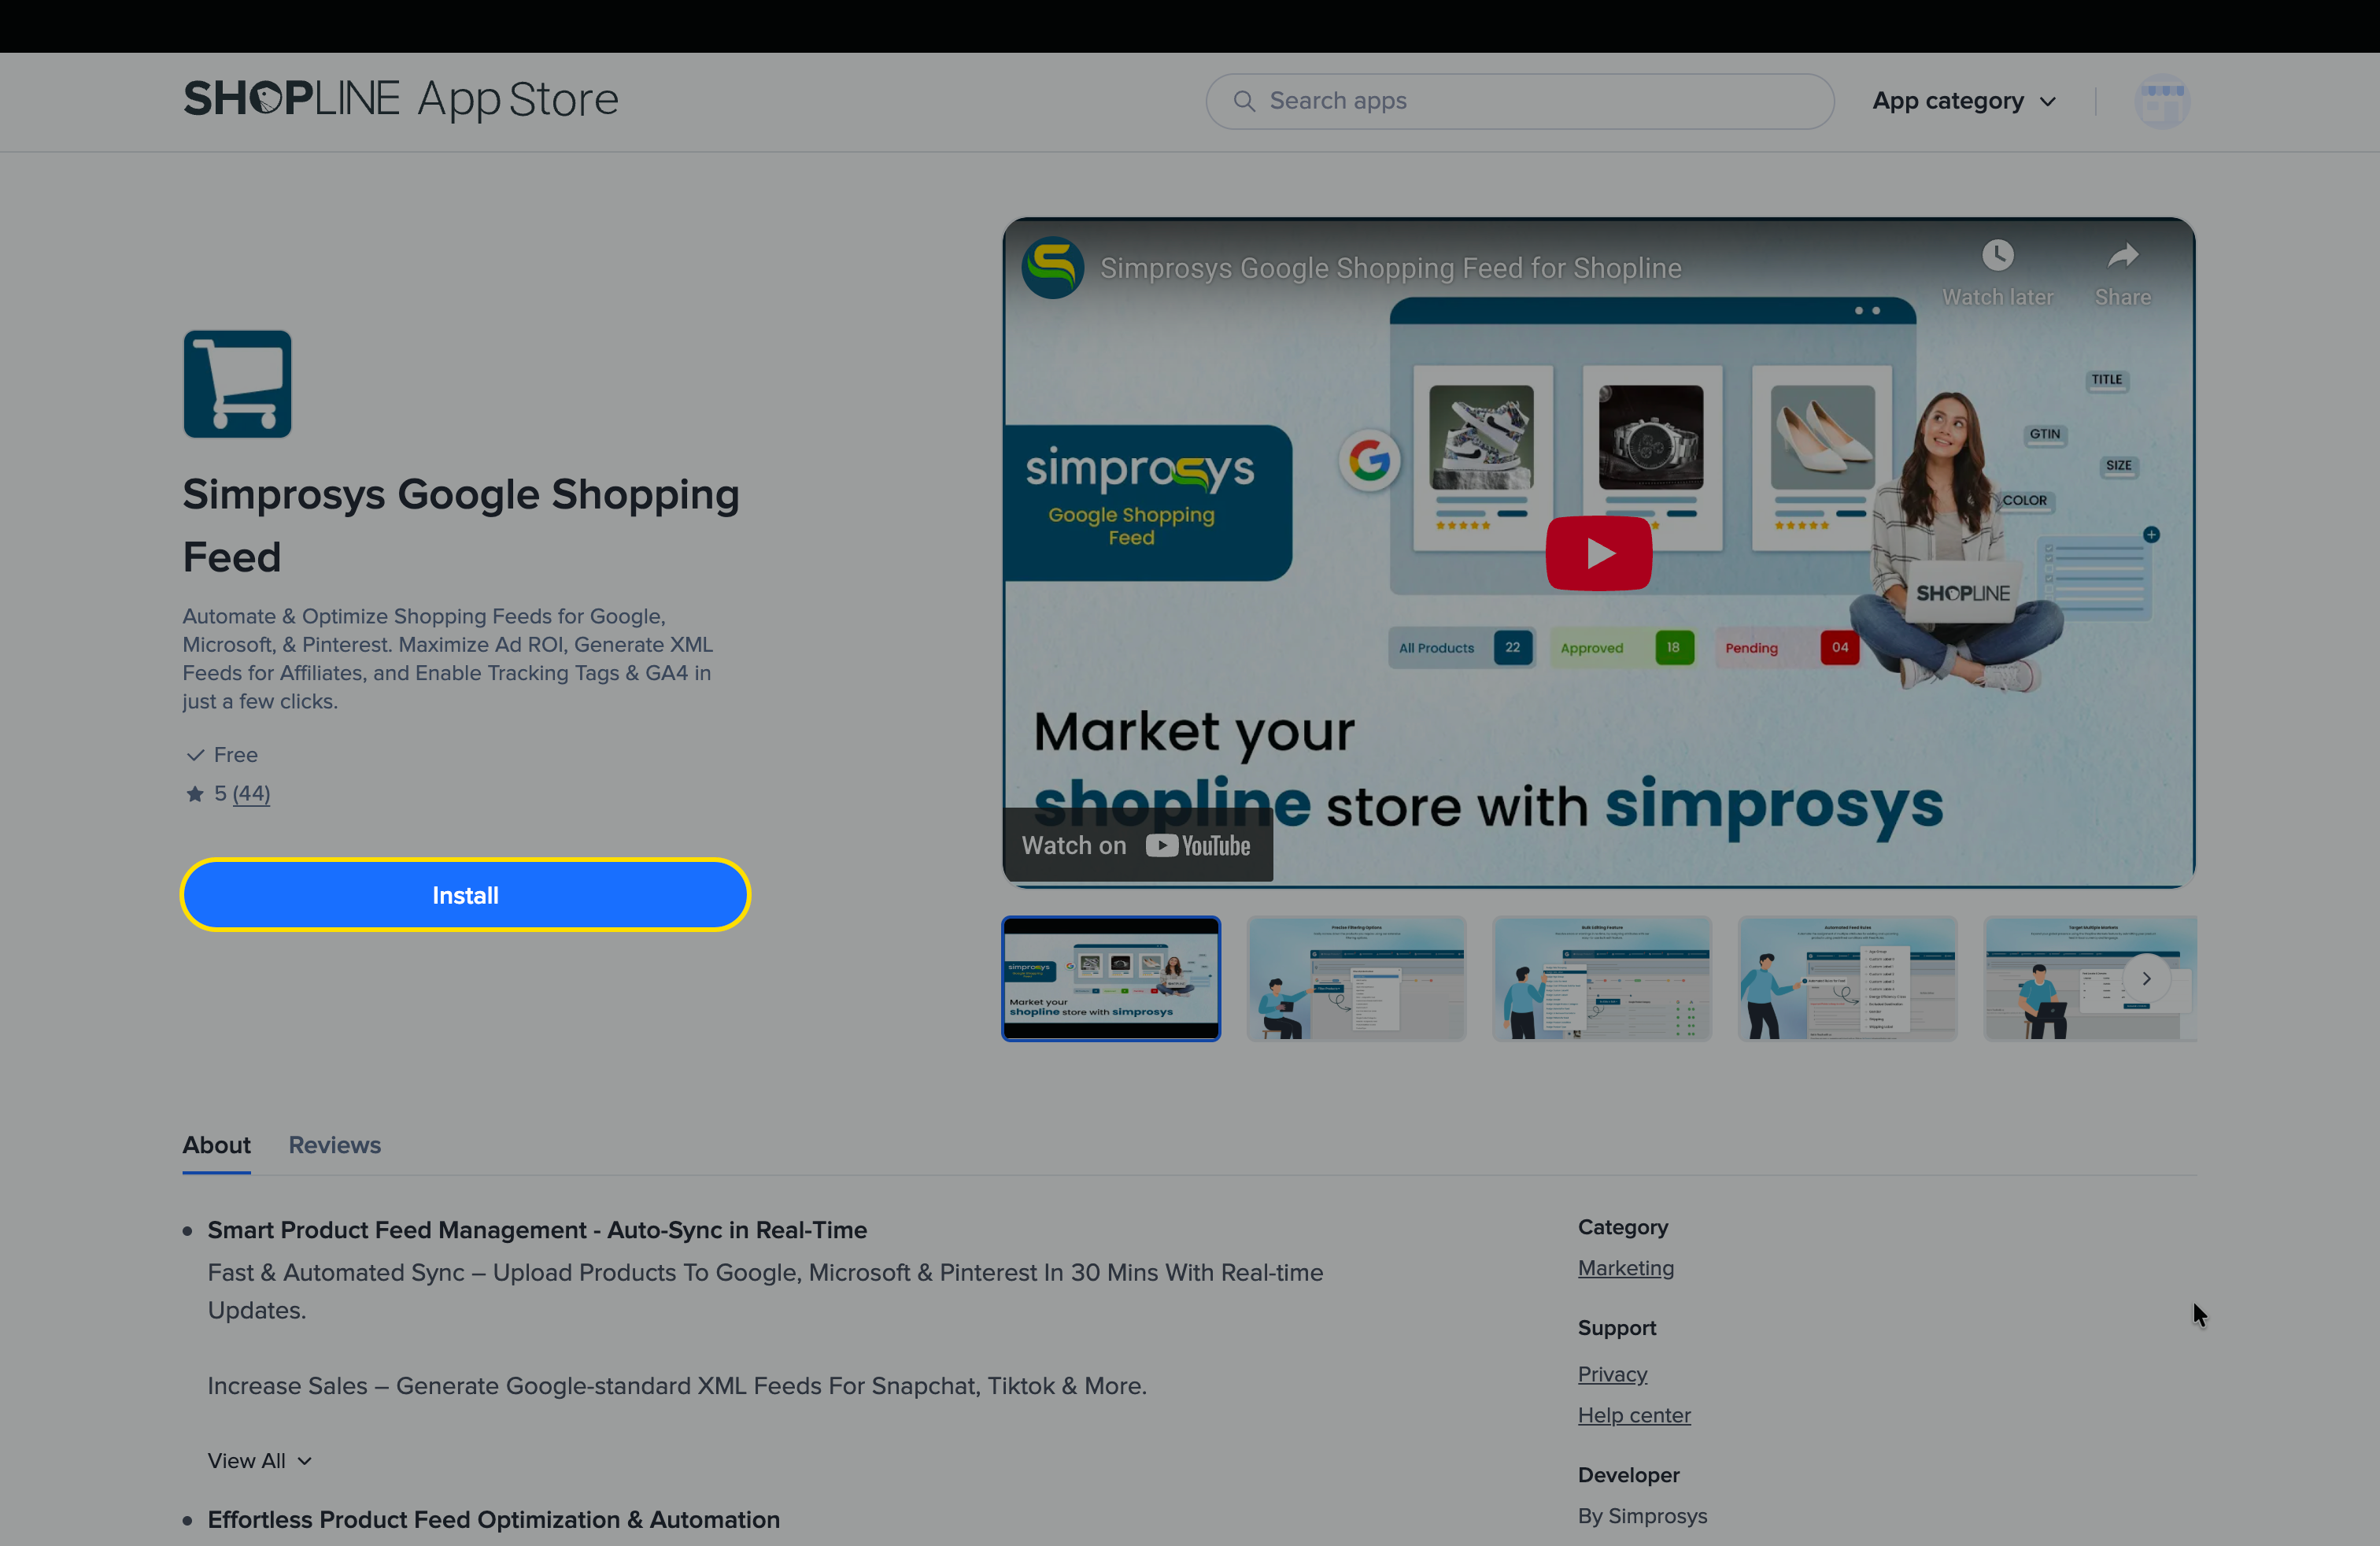
- Launch the app and sign in with your Google account during the initial setup.
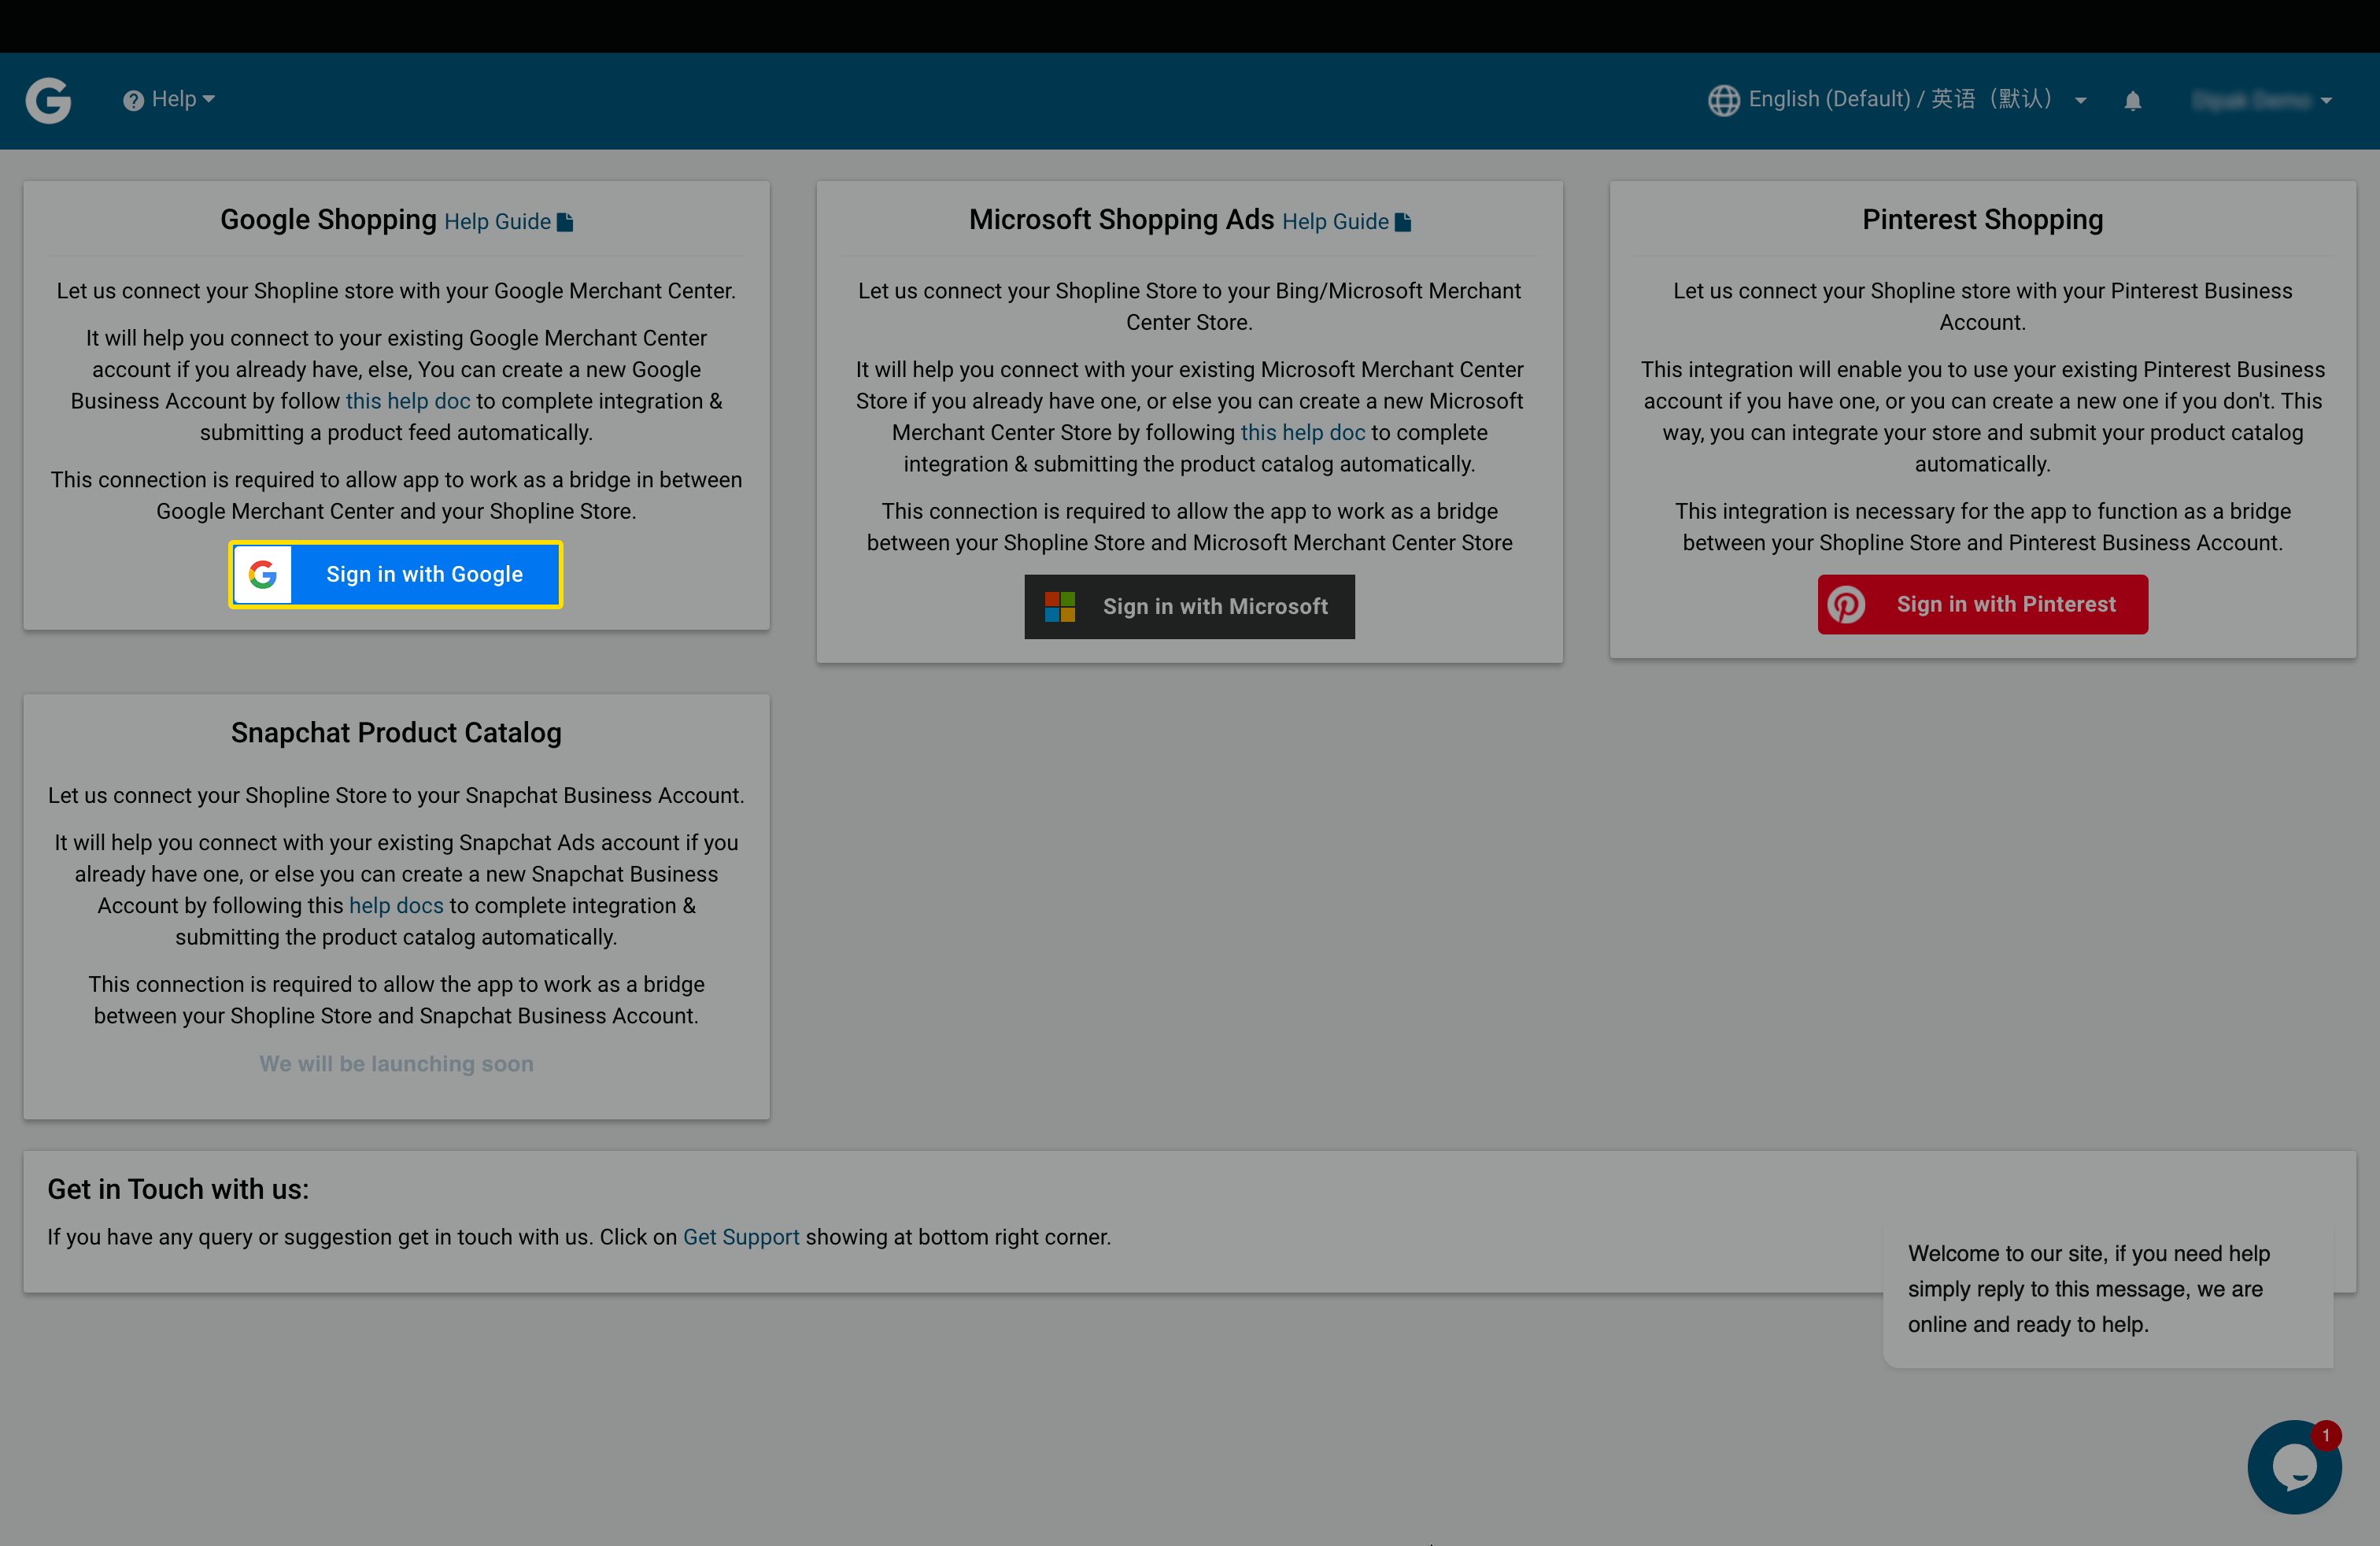
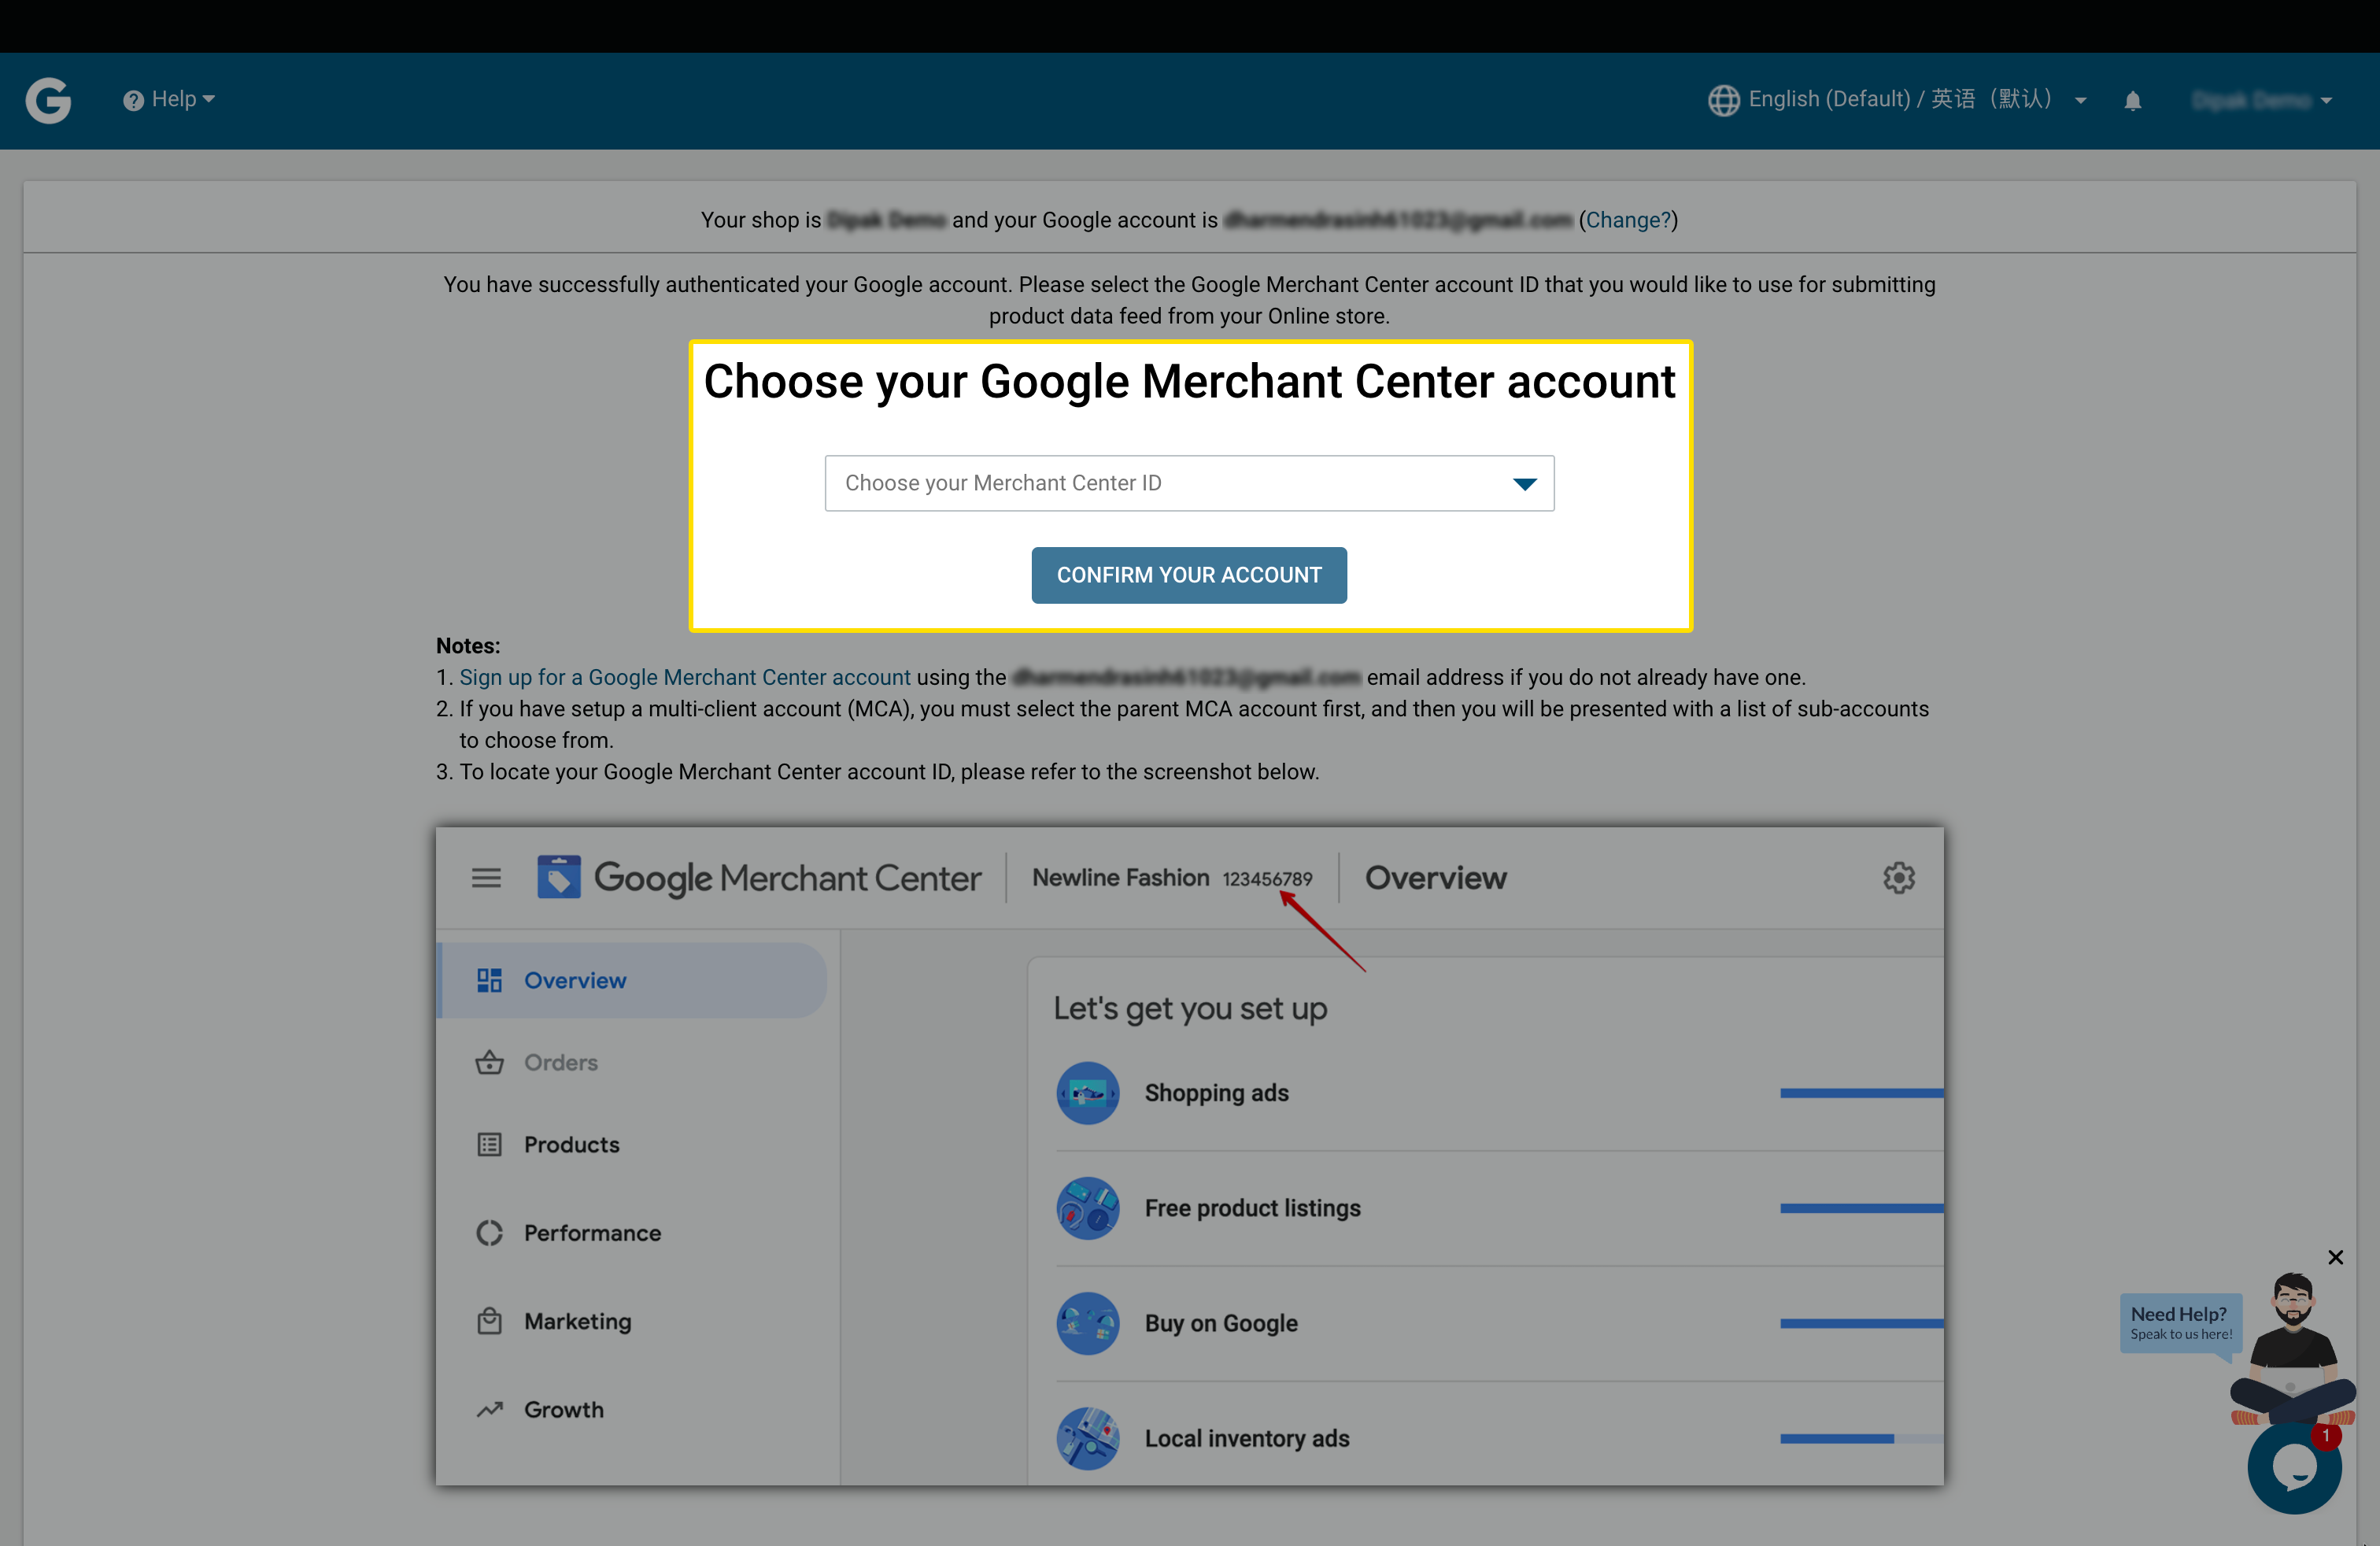
Step 2: Link or Set Up Google Merchant Center
- Connect an existing Merchant Center account connected with the previous e-commerce platform.
Step 3: Choose Historical Product IDs
- In the app's Product ID Format selection screen, pick the "Historical Product ID Format for Migrated Stores" option.
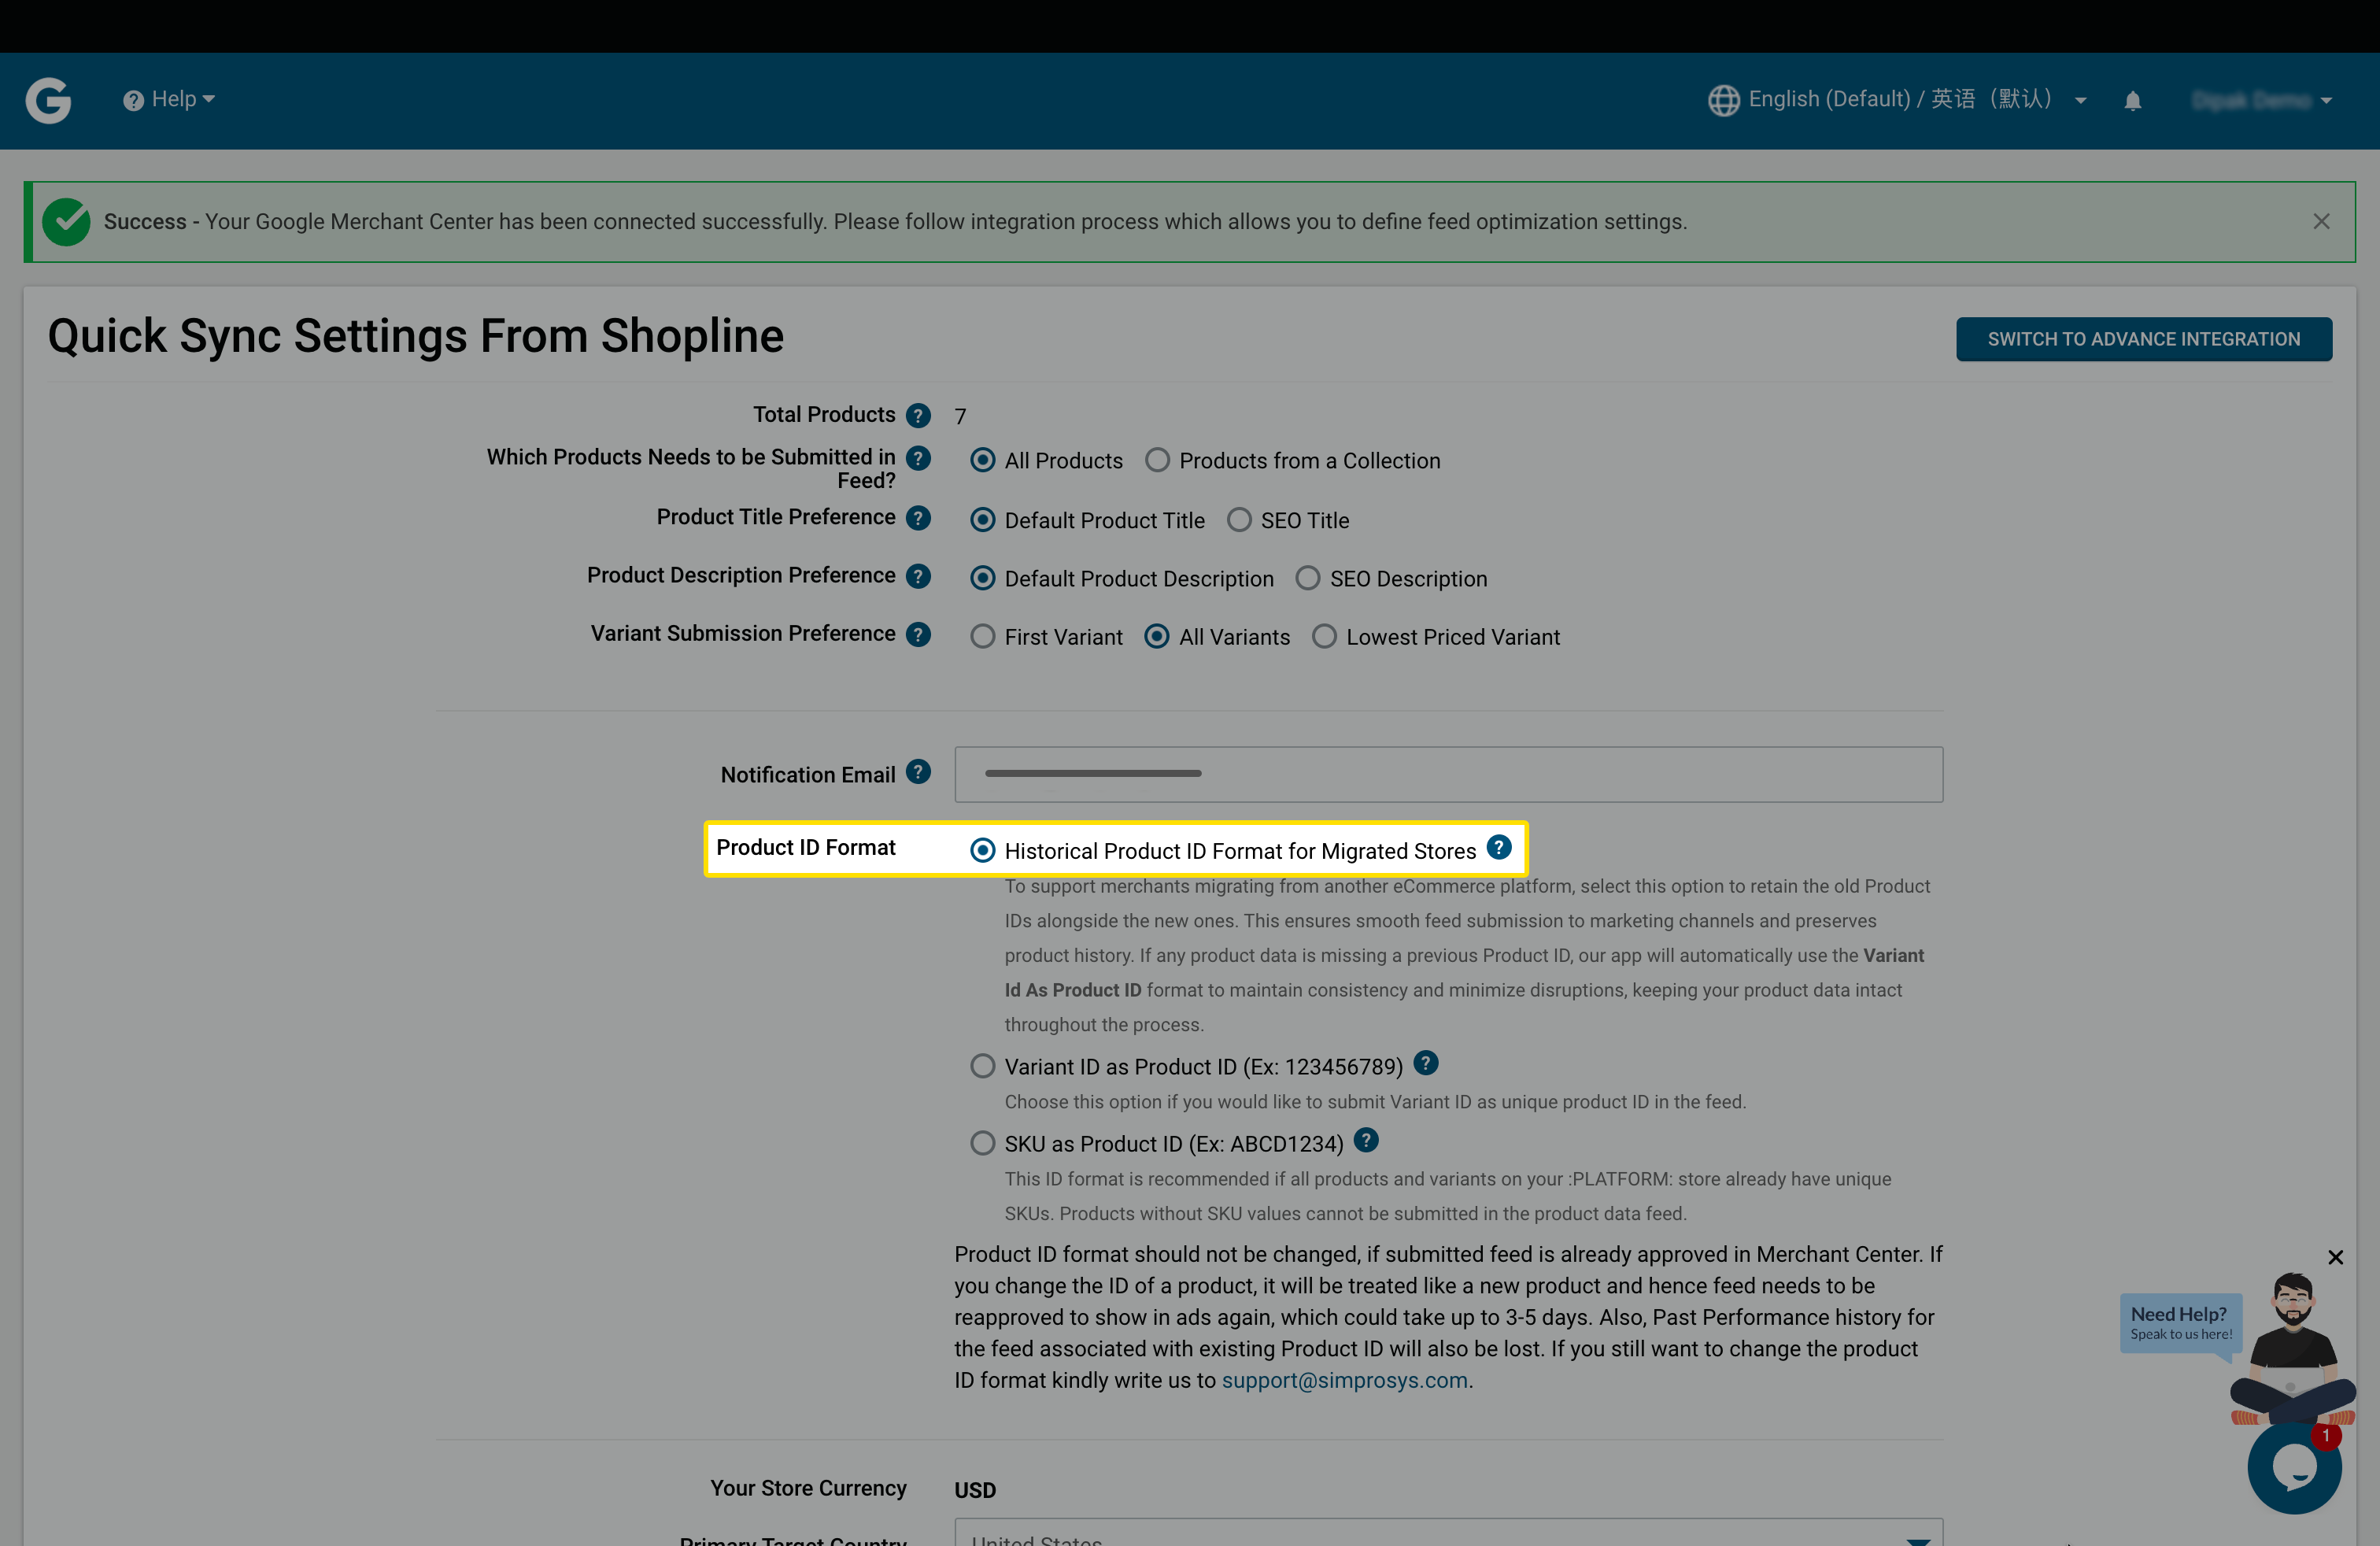
Why it matters: This instructs Simprosys to pull and use your old IDs, maintaining Google's recognition of your products.
Step 4: Customize and Initiate Feed Sync
- Adjust sync settings, optimization rules, and any custom feed attributes as per your needs.
- Hit the "SYNC" button to start submitting products.
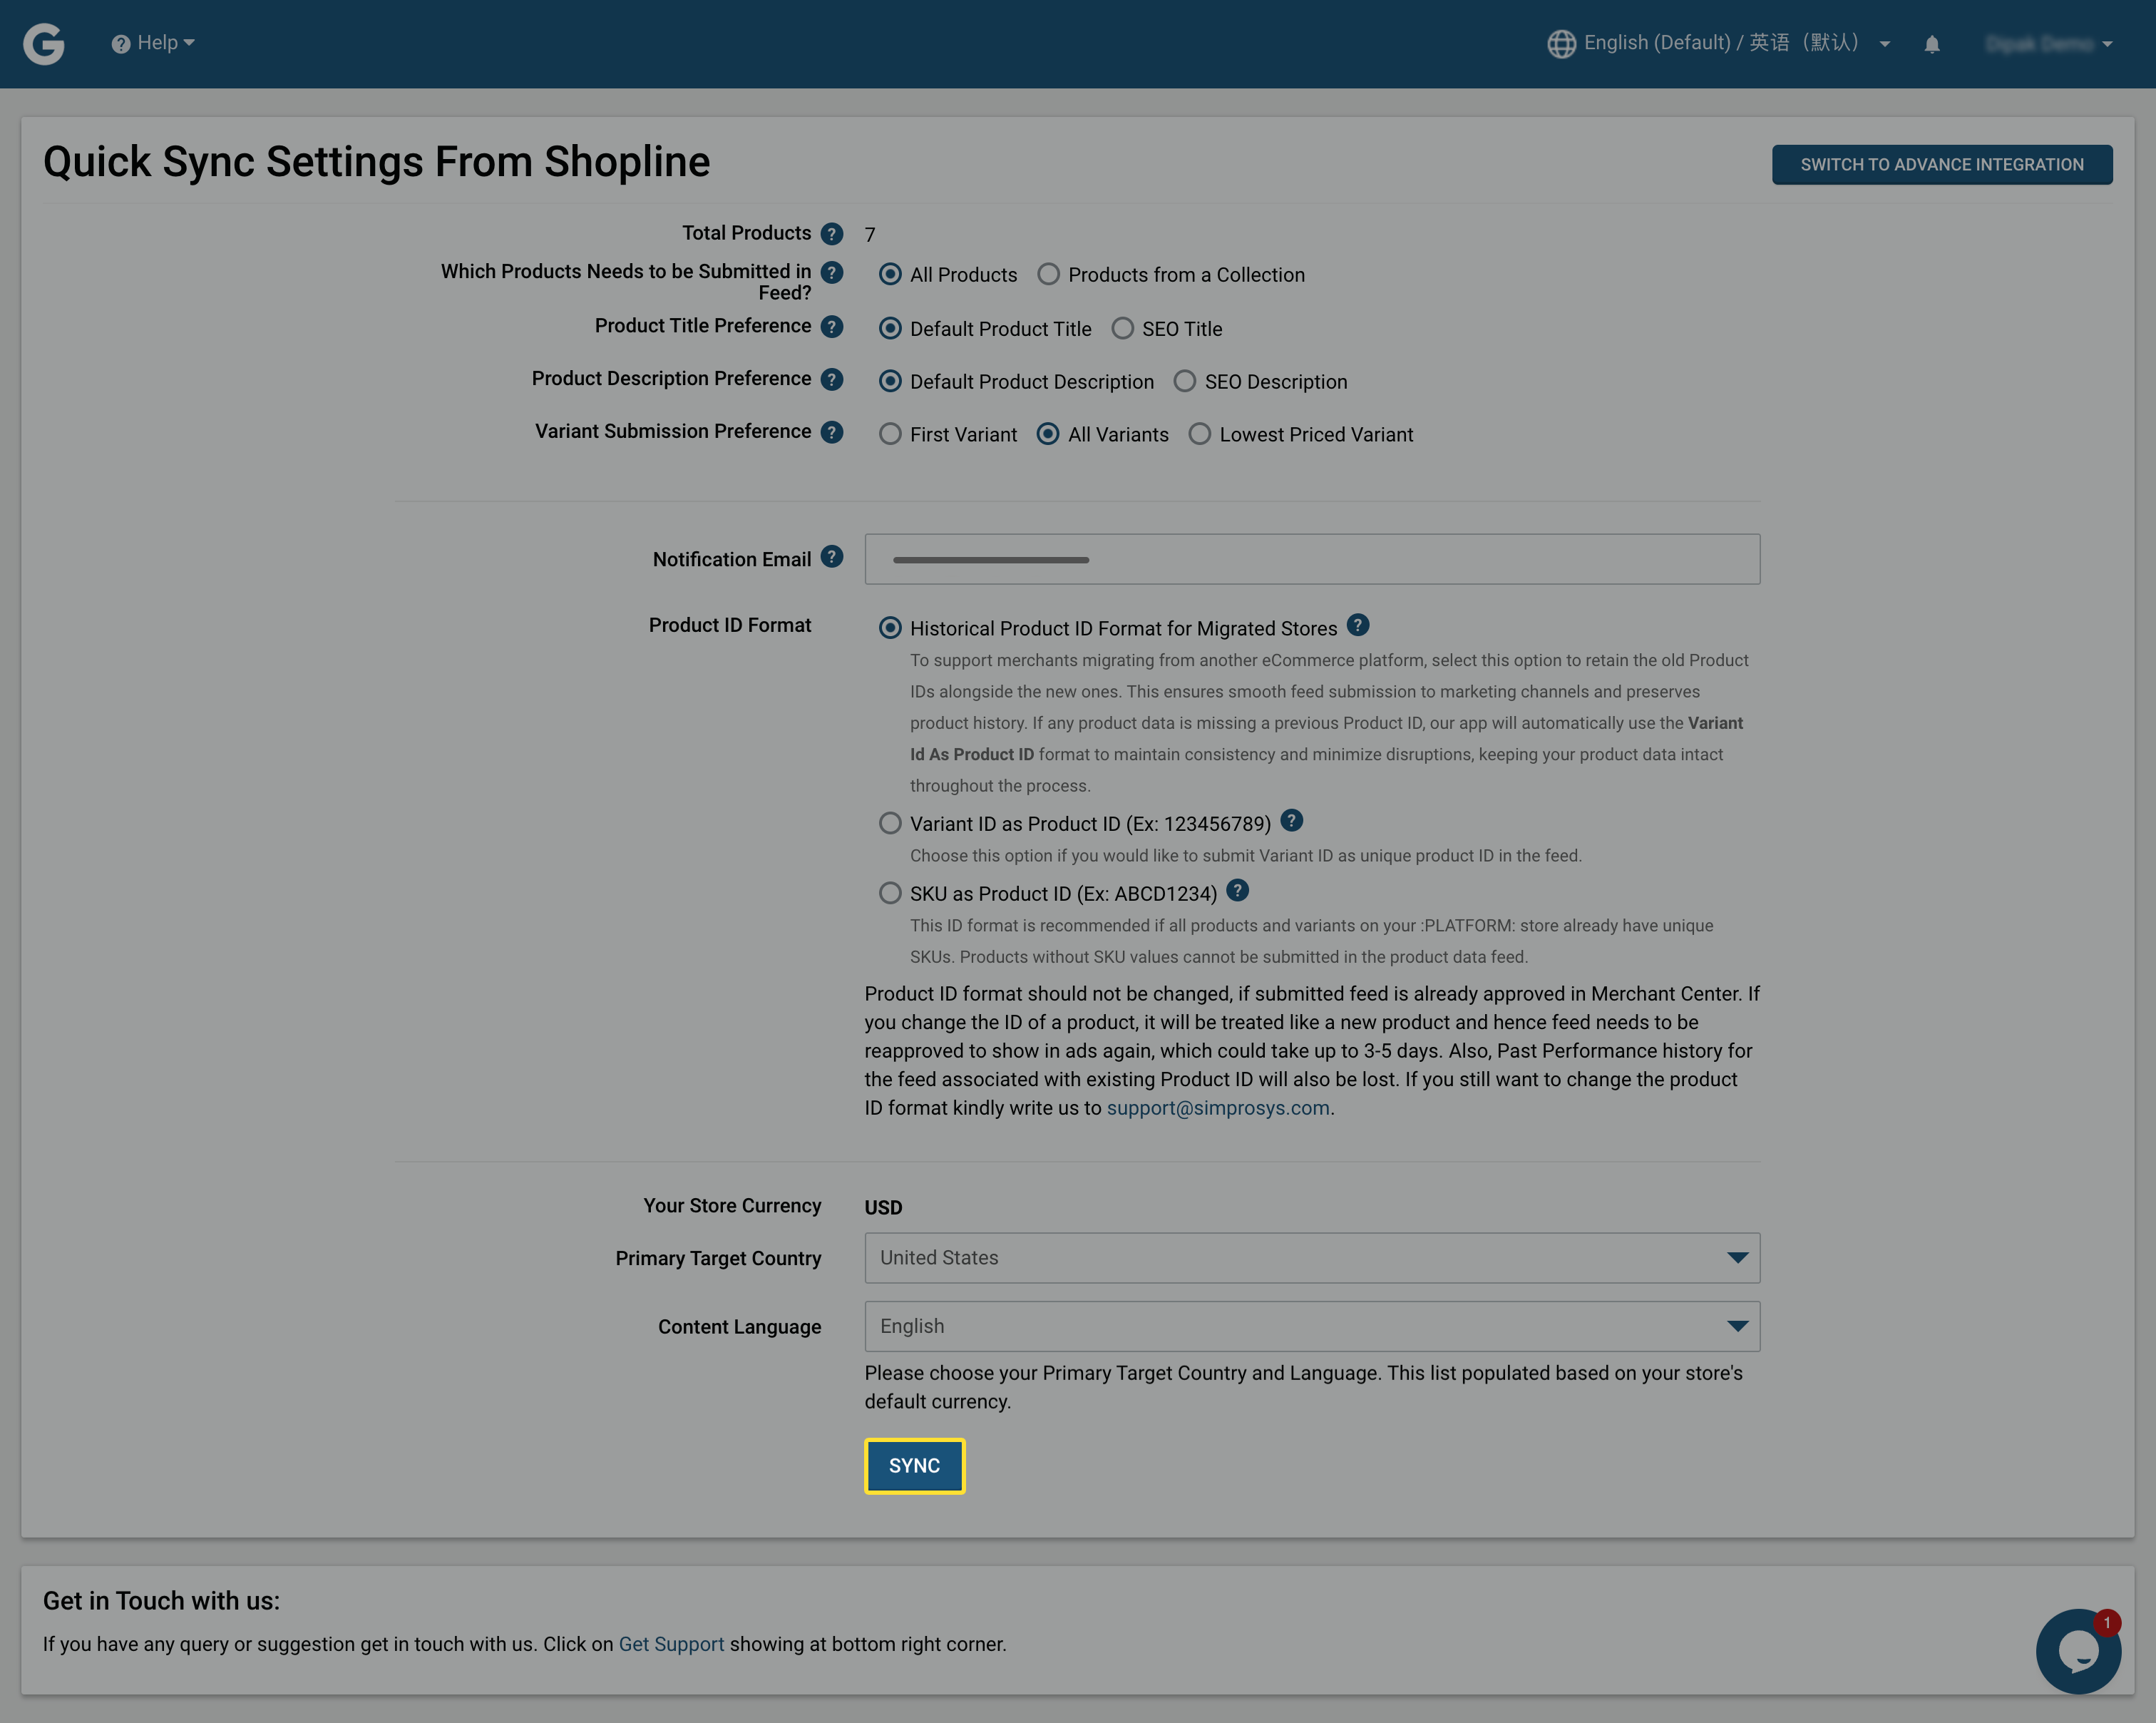
Why it matters: This pushes your data to Merchant Center efficiently, with built-in optimizations for better approvals.
Section 3: Setting Up Tracking and Remarketing
This final phase restores accurate conversion tracking and dynamic remarketing, crucial for post-migration ad success.
Step 5: Access the Tracking Section
- In Simprosys Google Shopping Feed App, go to the "Tracking Tags" navigation menu.
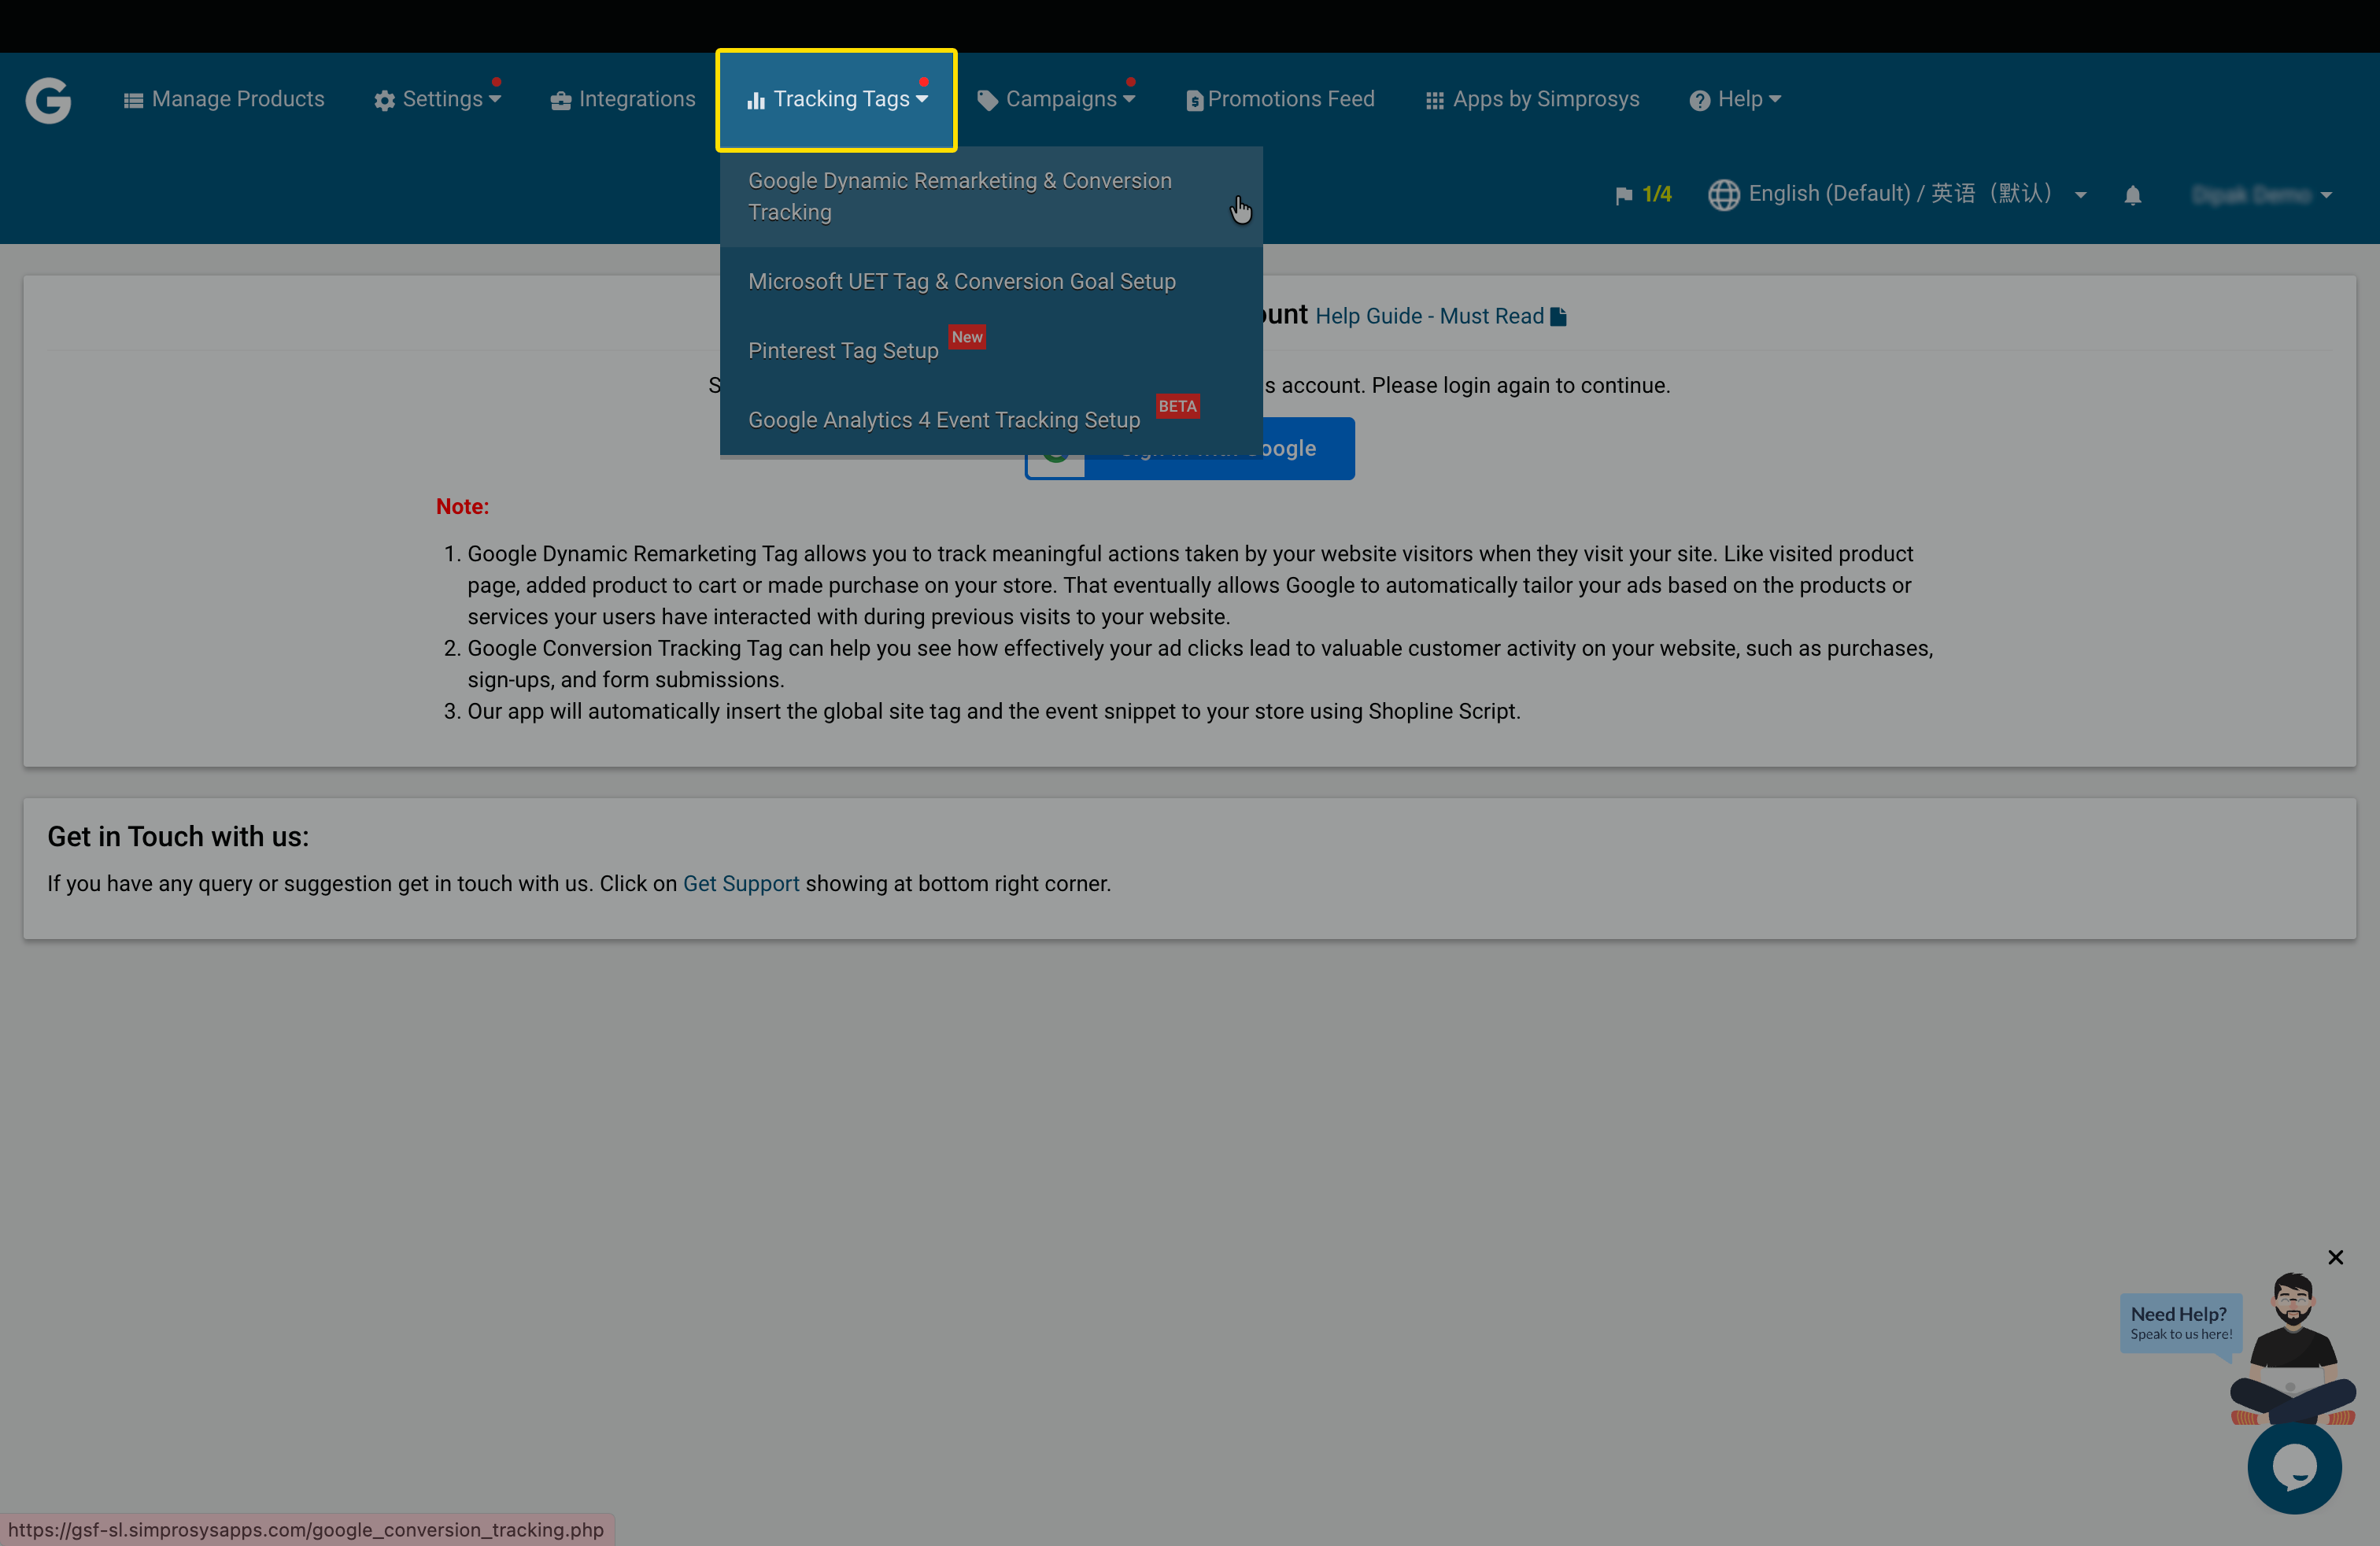
Step 6: Opt for Google Dynamic Remarketing and Conversions
- Select the "Google Dynamic Remarketing & Conversion Tracking" feature.

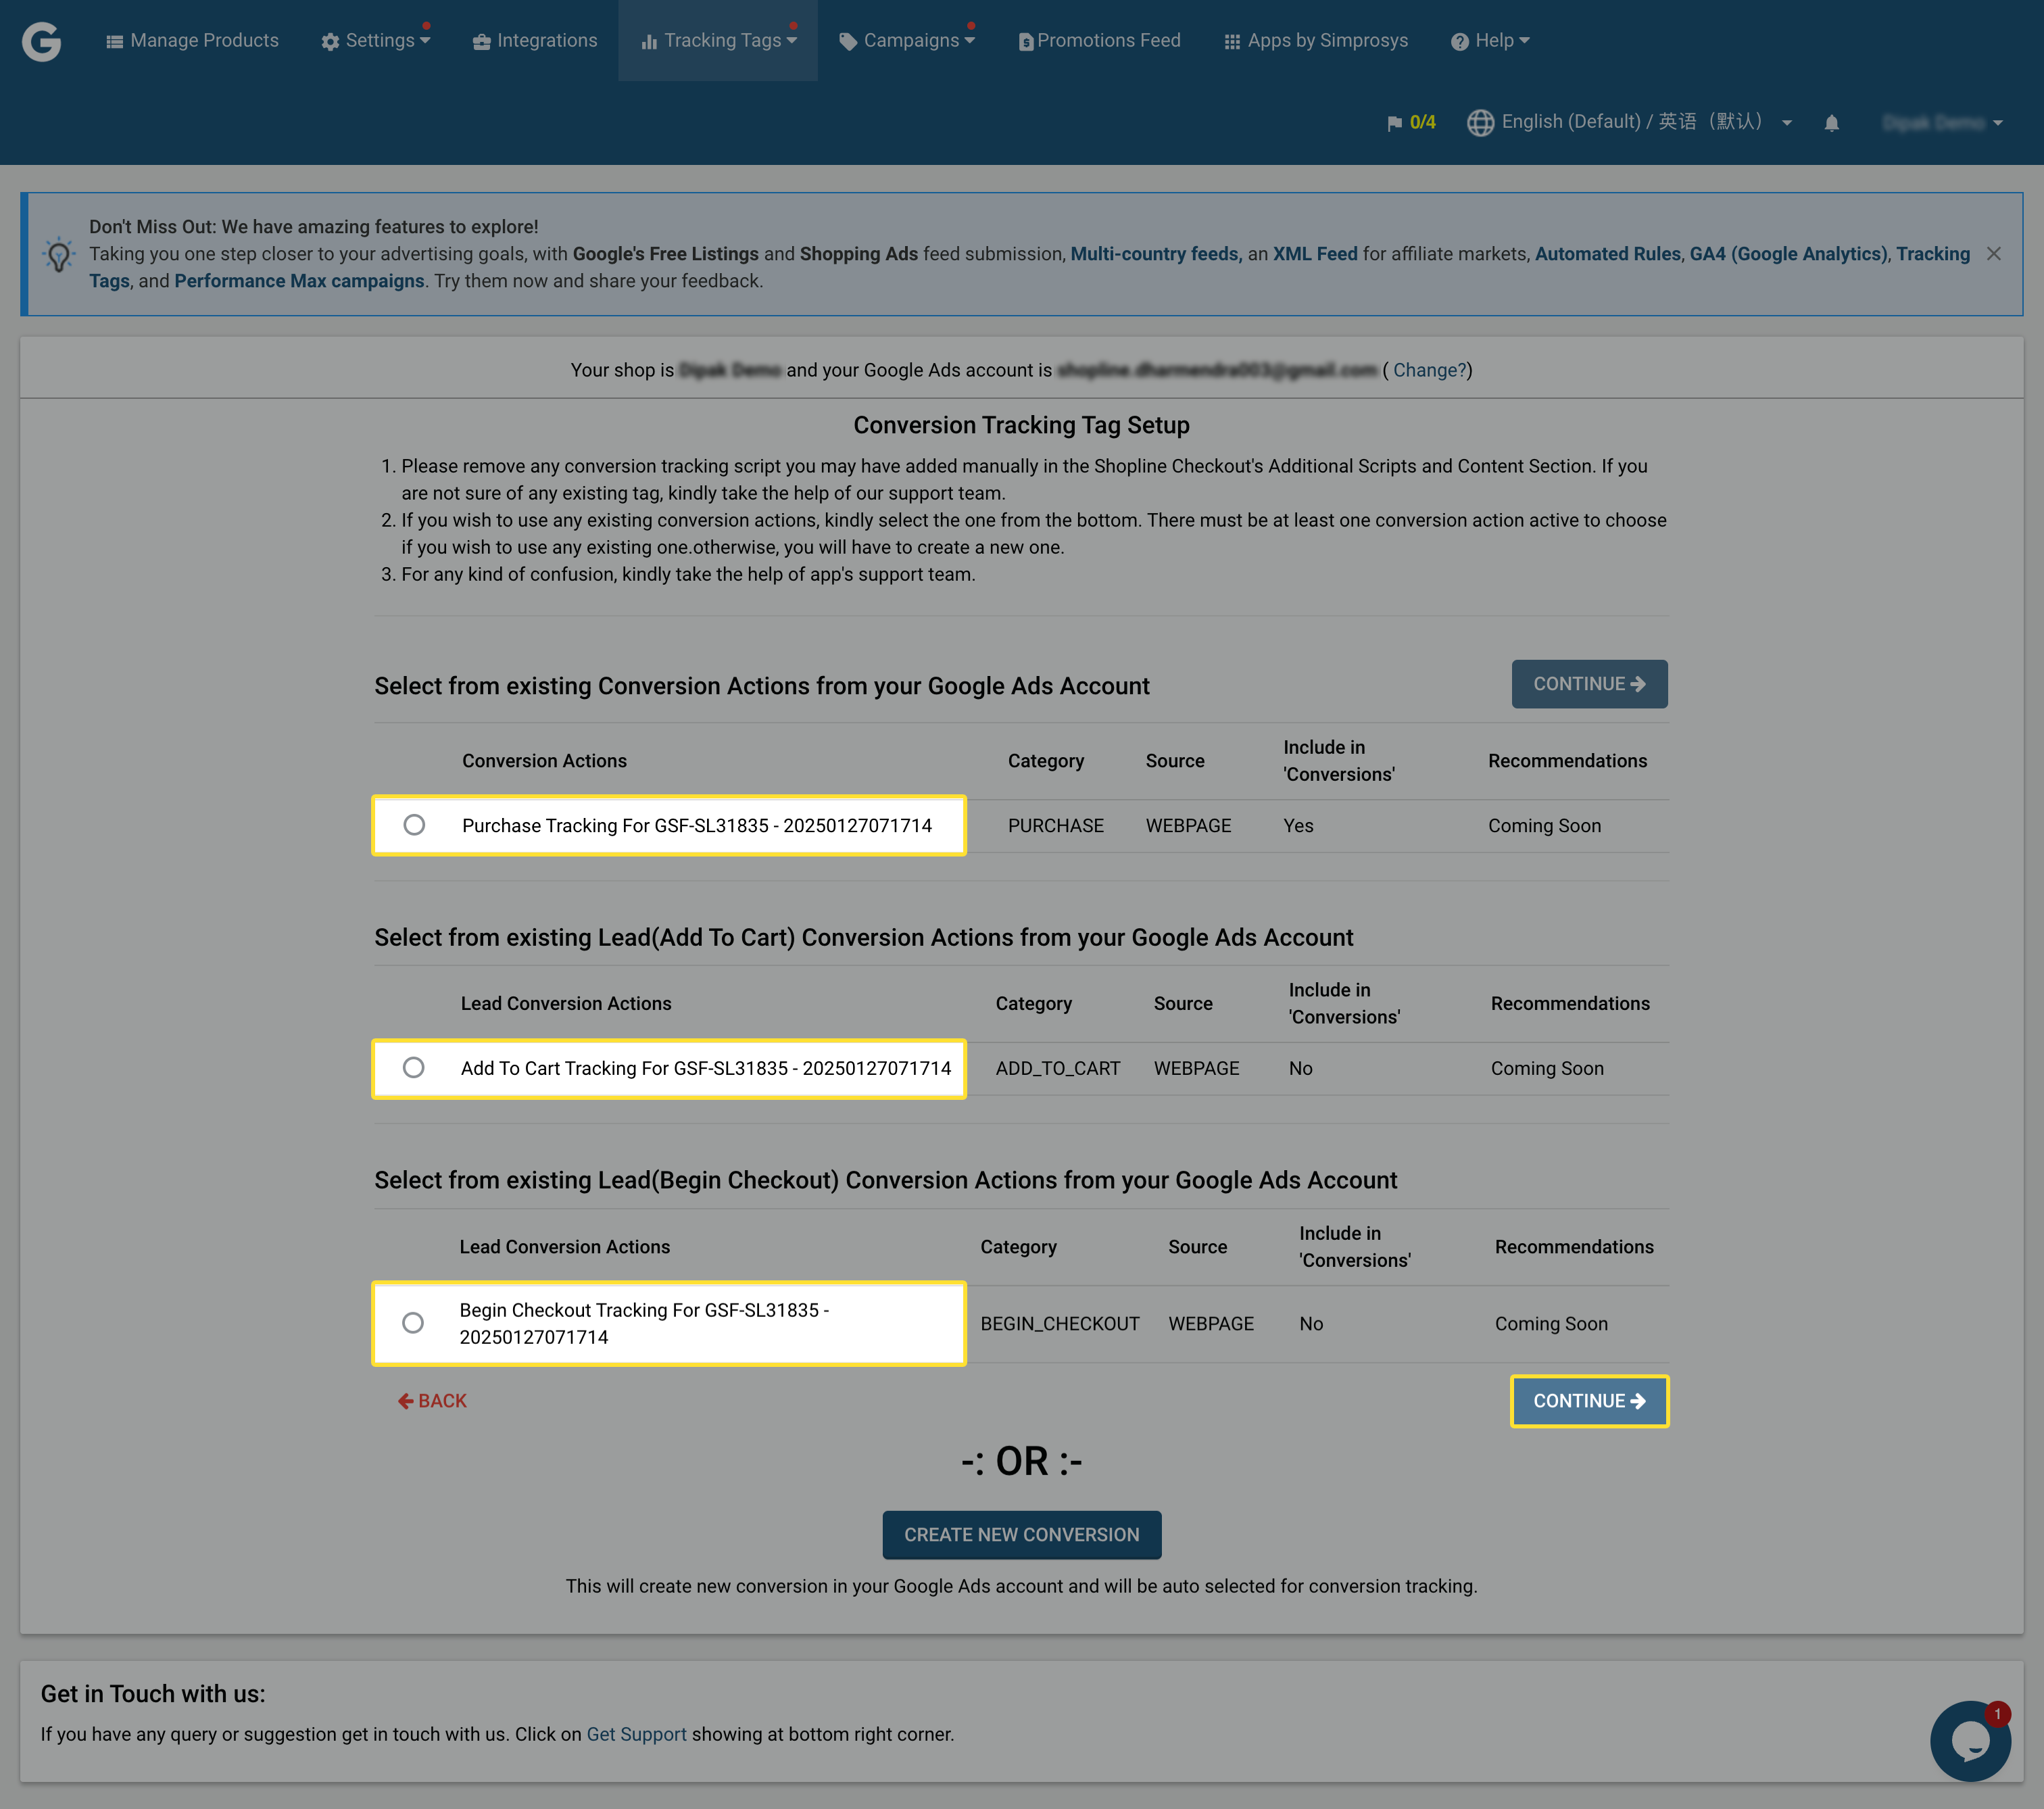
Step 7: Authenticate with Admin-Level Google Ads Access
- Log in using a Google account that has full admin privileges in your Ads account.
Step 8: Activate Tracking Features
- Turn on conversion tracking and dynamic remarketing-the app will auto-redirect you to the Custom Pixel Tracking page.
Step 9: Retrieve the Custom Tracking Script
- Copy the tracking code provided on the Custom Pixel Tracking page.
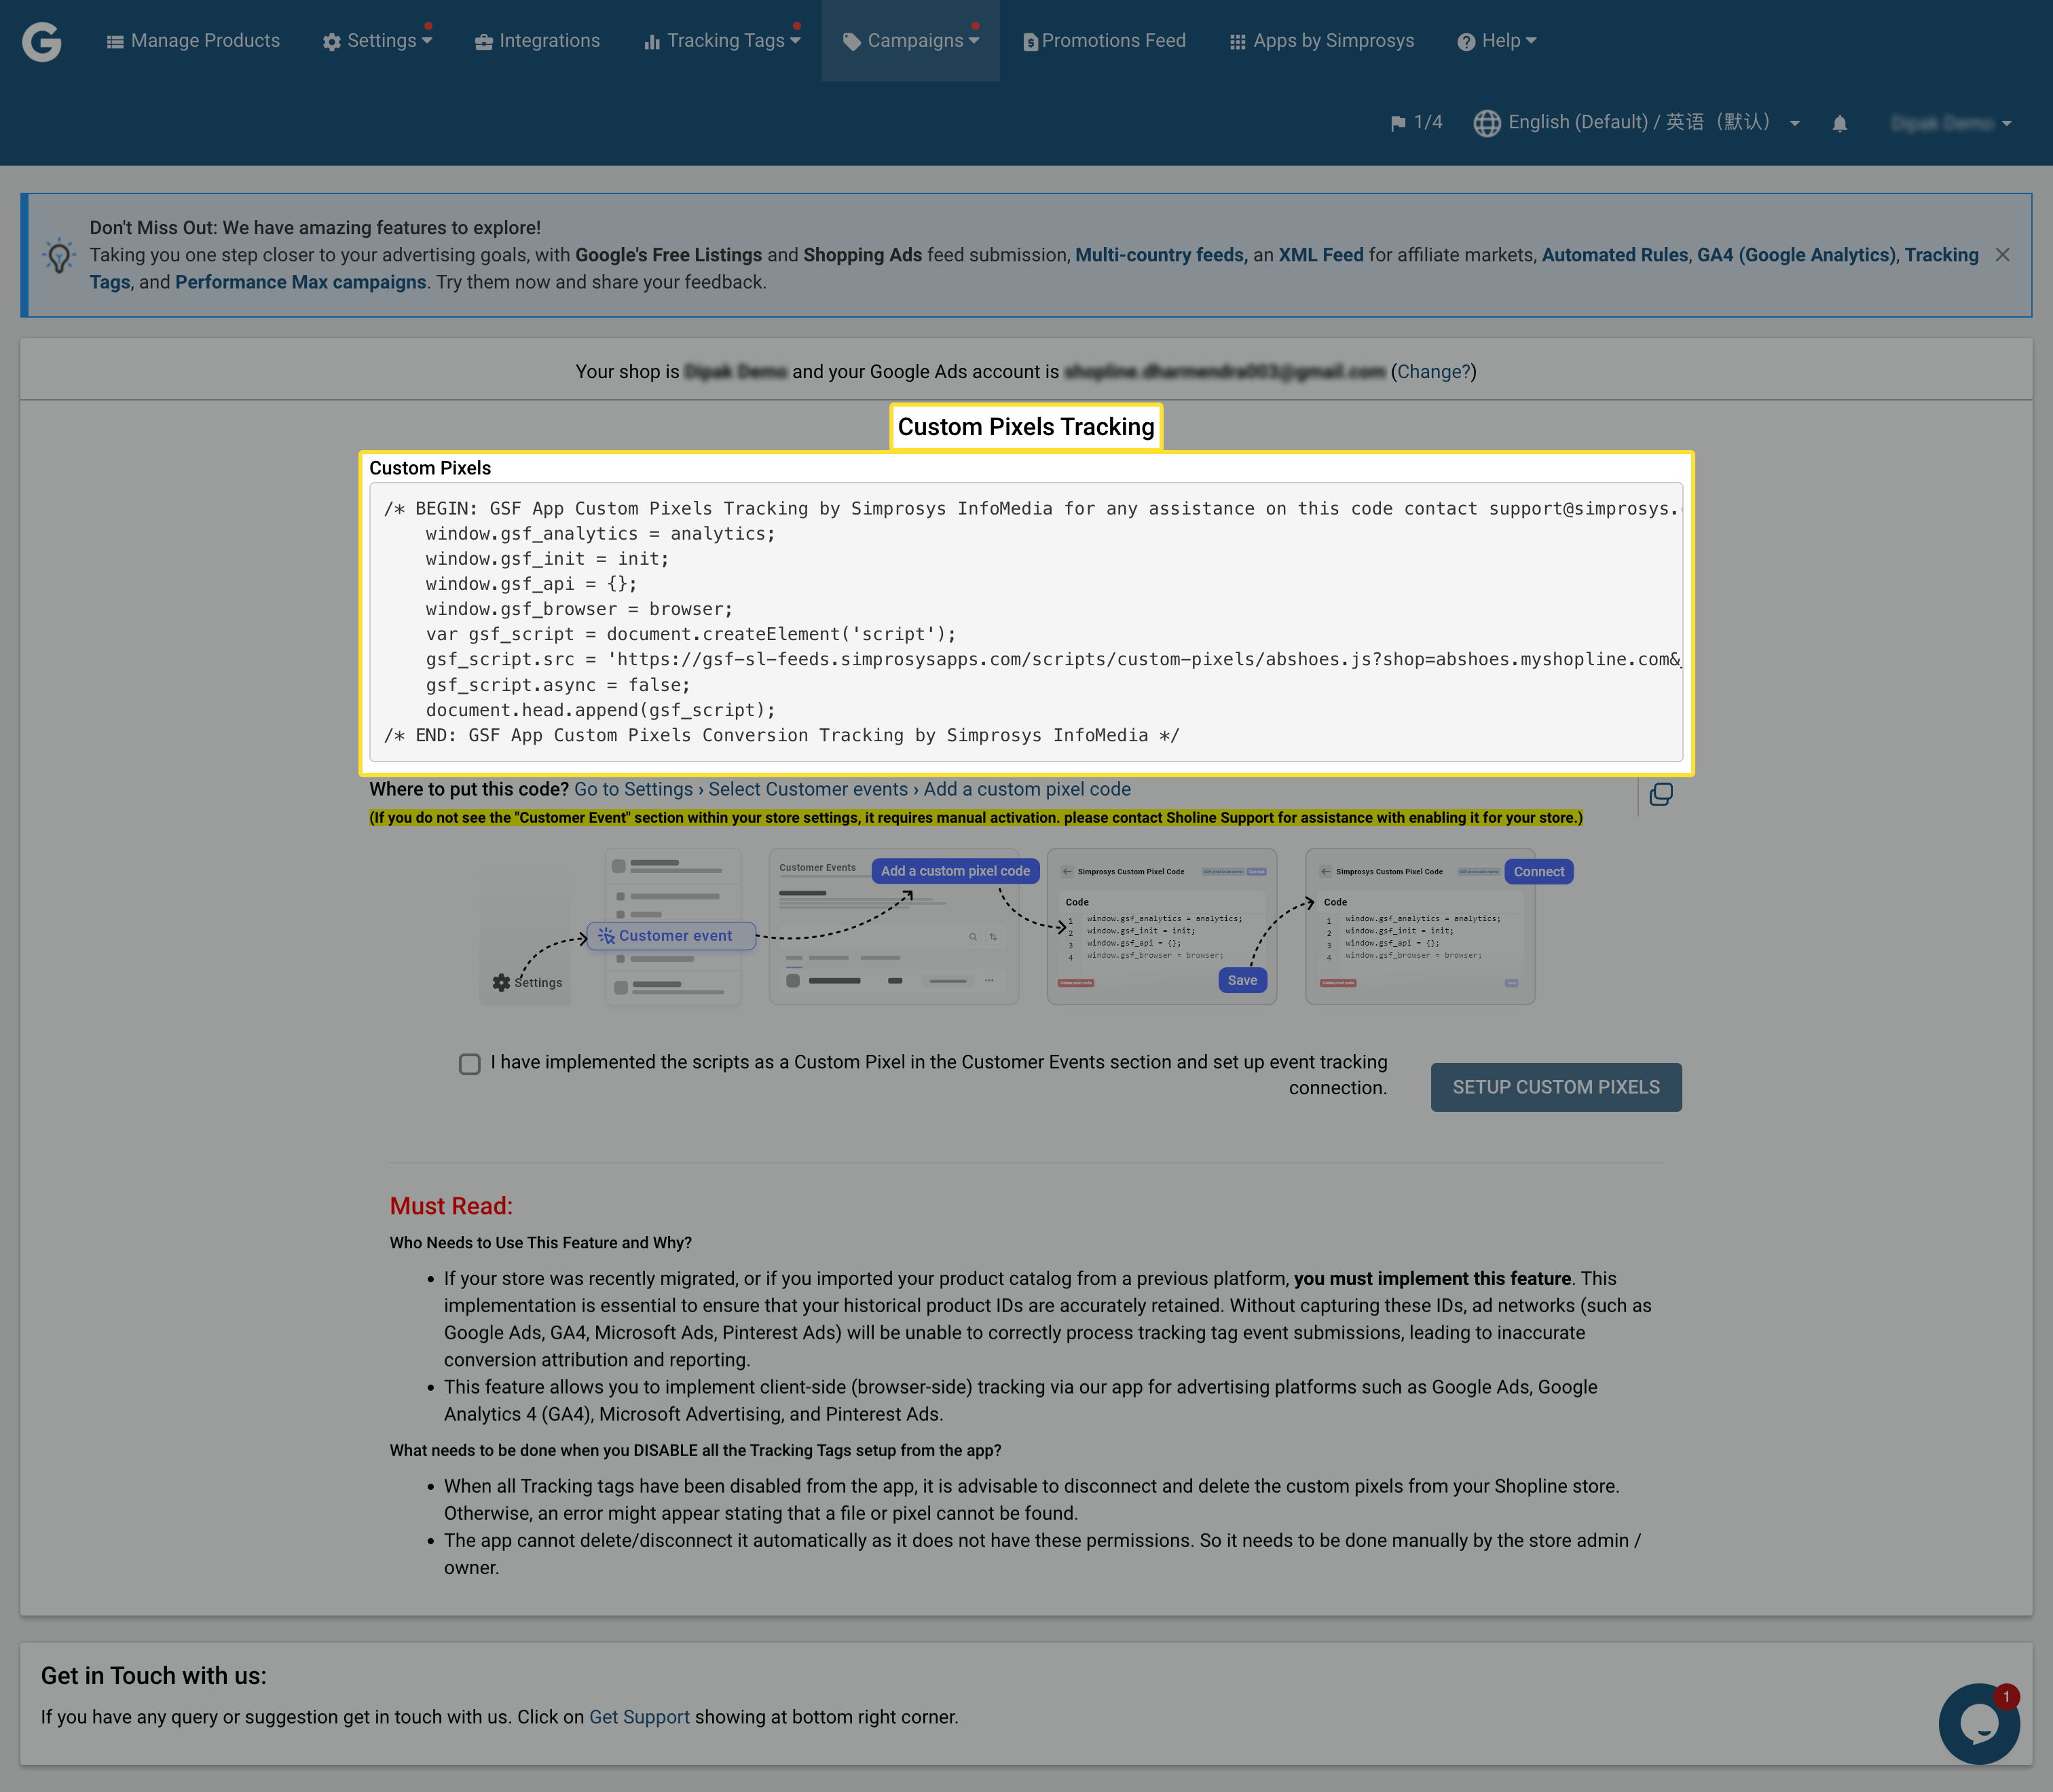
Step 10: Integrate the Script in Shopline
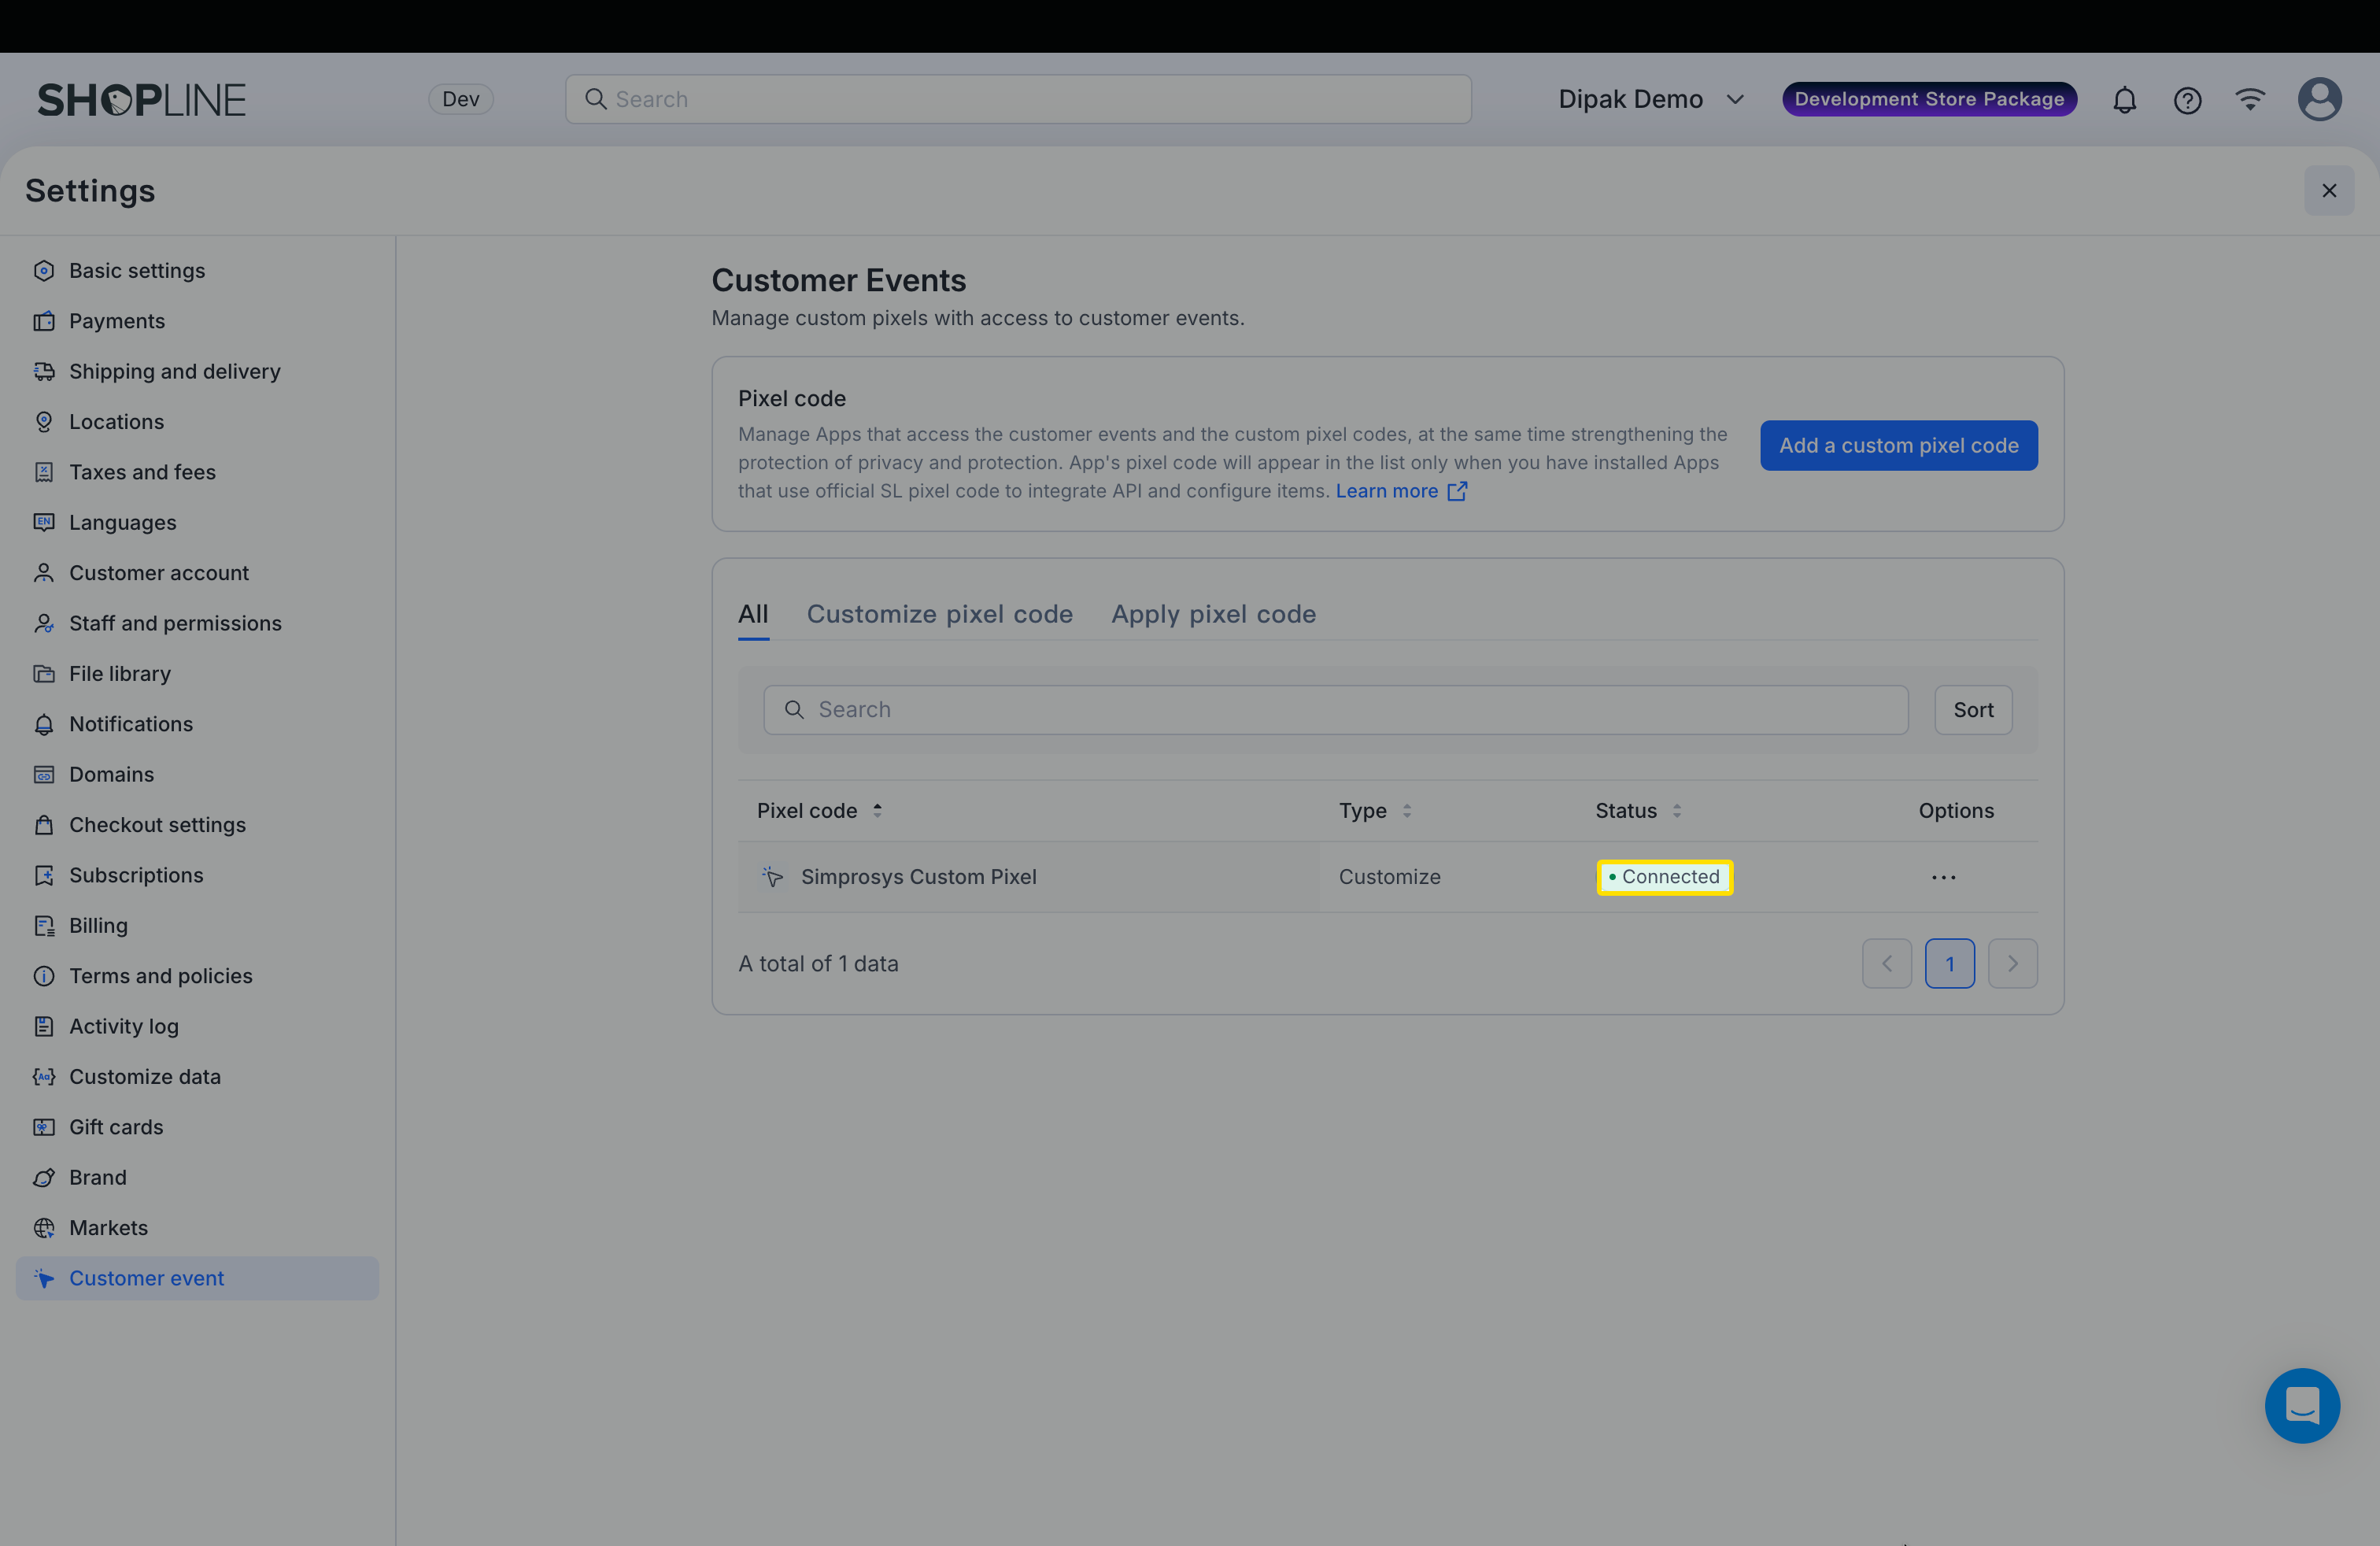
- Navigate to Shopline Admin > Settings > Customer Events.
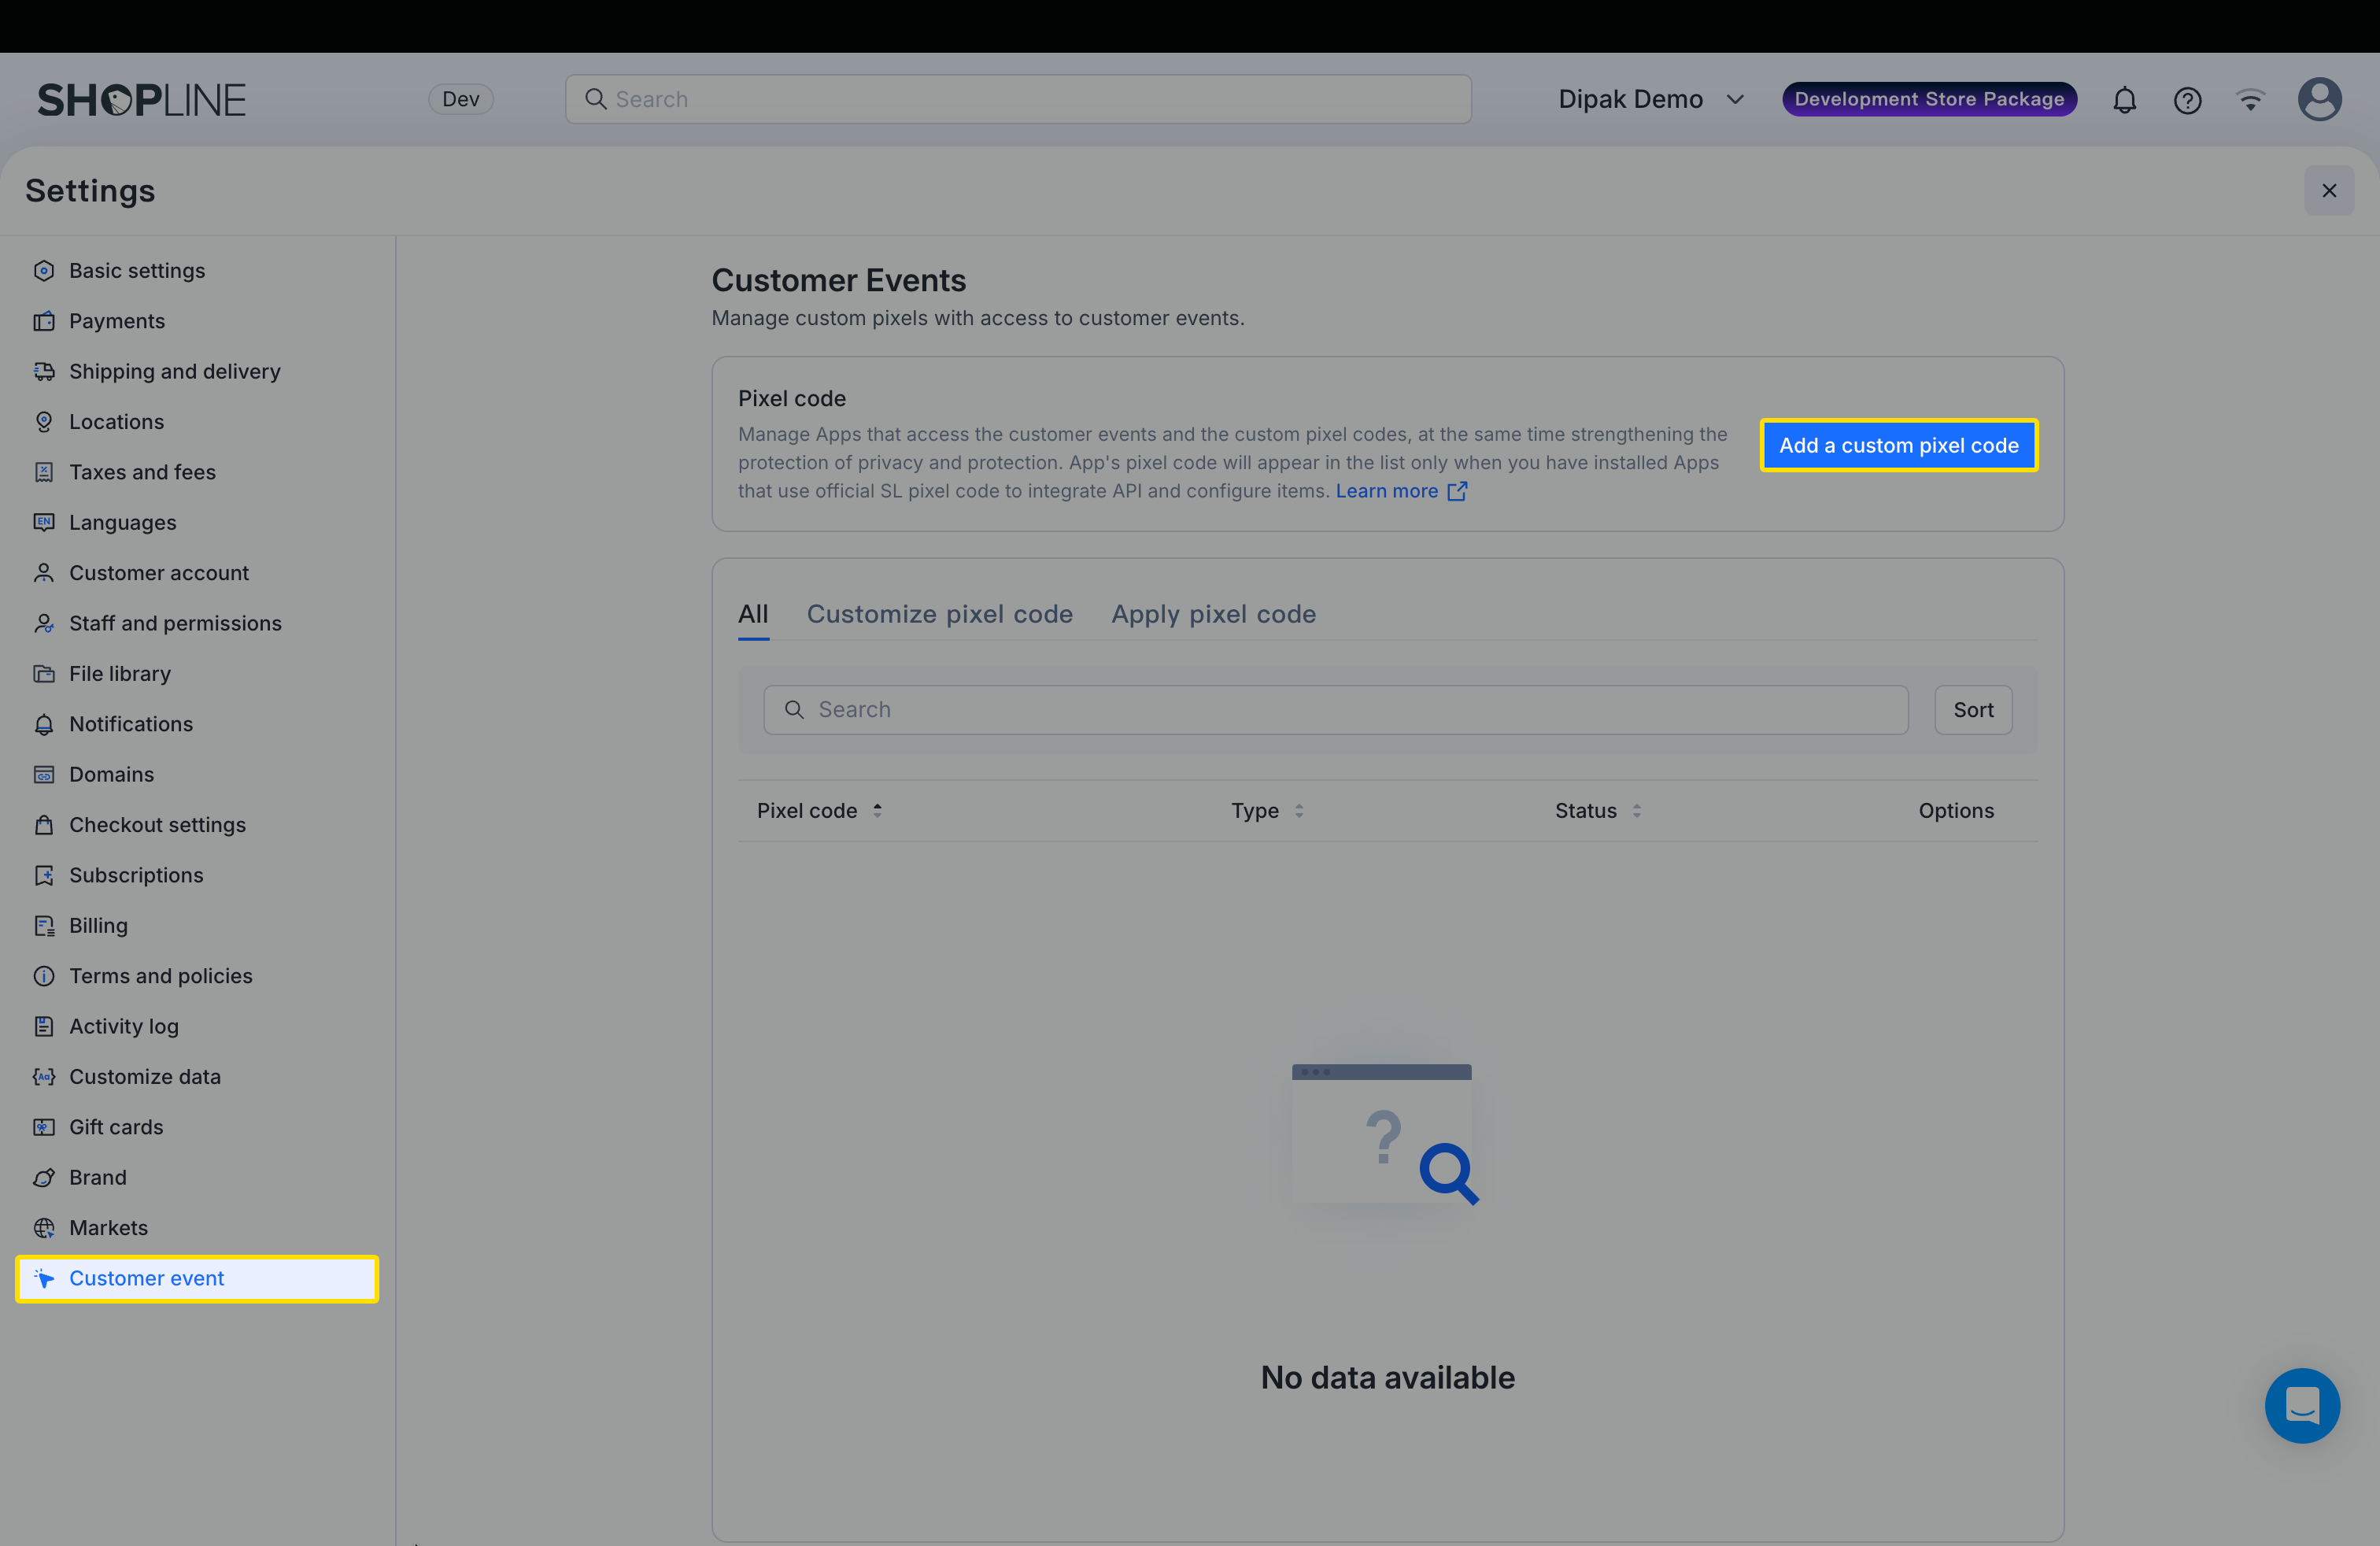
- Paste and save the code there.
- If "Customer Events" isn't visible, contact Shopline support to activate it for your store.
Step 11: Link the Custom Pixel in Shopline
- Complete Shopline's guided steps to connect the pixel to your storefront.
Step 12: Finalize in Simprosys Feed App
- Back in the Simprosys Google Shopping Feed app, tick the confirmation checkbox.
- Click "Setup Custom Pixel" to complete.
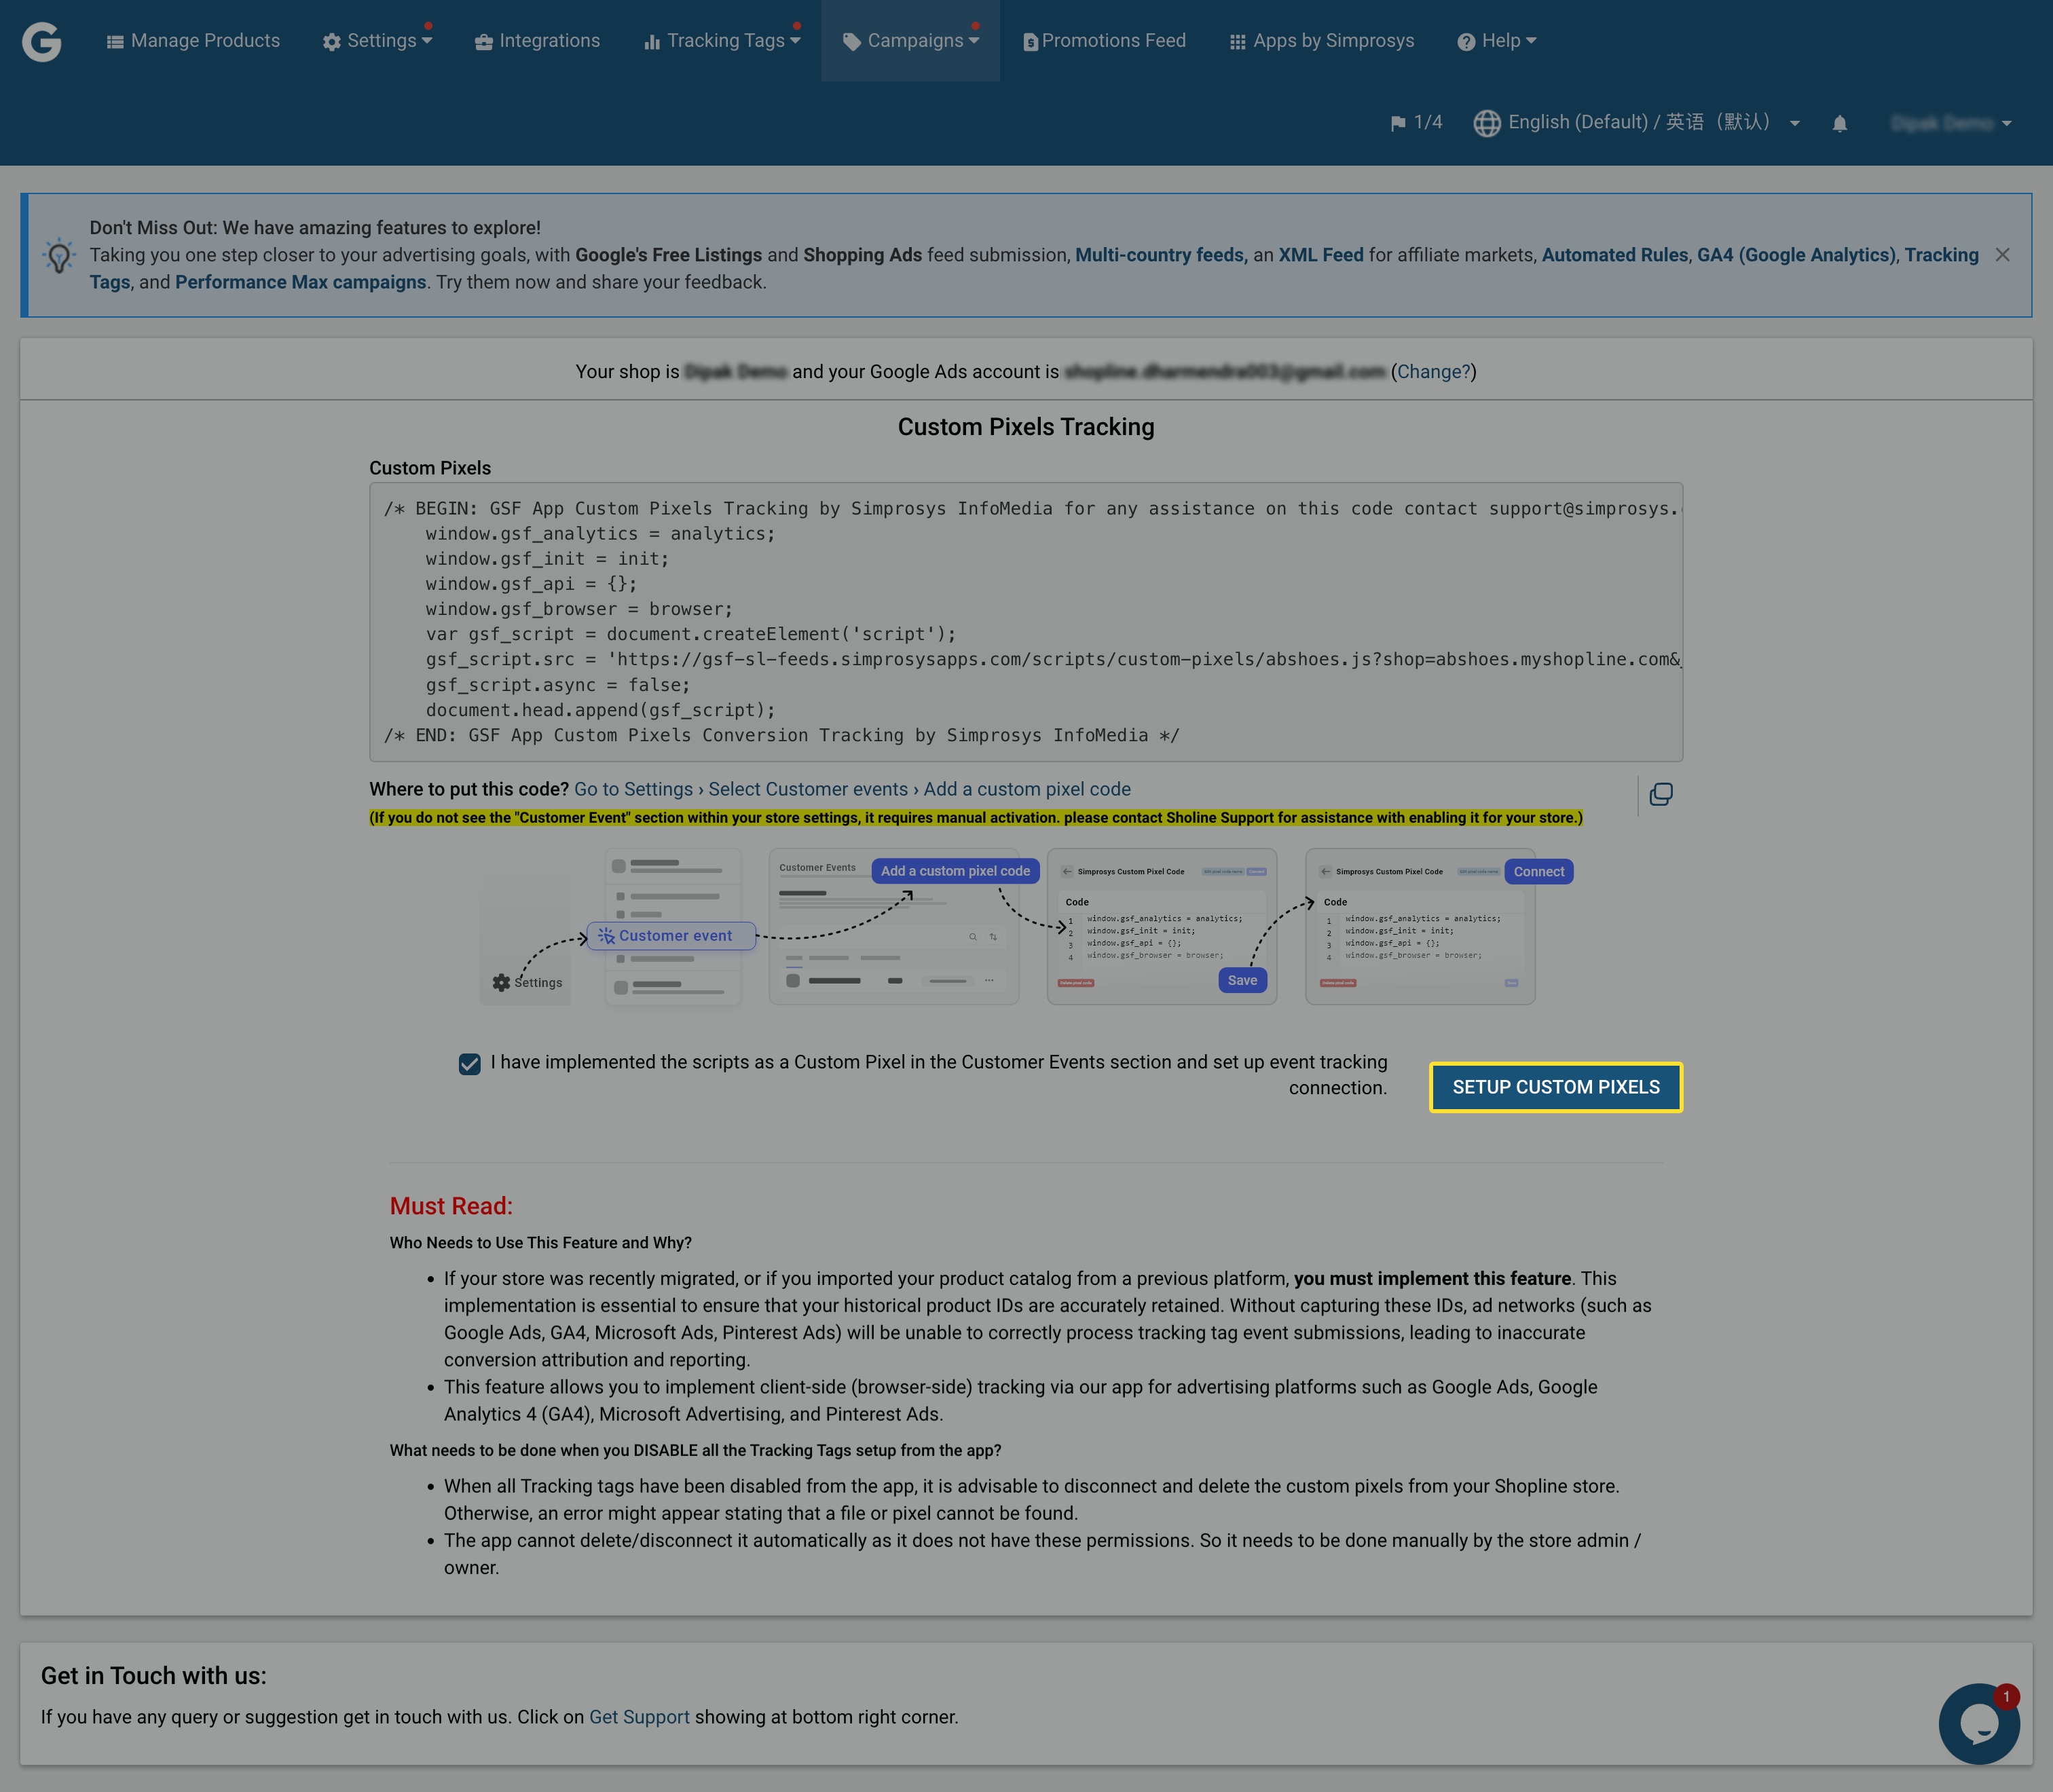
Why it matters: This locks in the setup, enabling full tracking functionality.
Verify: Simprosys shows a success message; monitor Google Ads for initial data inflows within 24-48 hours.
Congratulations! Your migration is optimized for continuity. Regularly review Merchant Center diagnostics and Ads performance. For troubleshooting, consult Simprosys support or Google's help resources. If your store evolves, revisit feed settings to keep everything aligned.
Previous article

Next article
Simprosys Google Shopping Feed
Initial App Configuration
Troubleshooting & Issue Fixes
Tracking Tags Setup (Google Ads & Google Analytics 4)
Product Optimization & Automated Feed Rules
Advanced Setup Made Easy
Legal Pages


