

Google Shopping by Simprosys
Installation Processes
Processes of Google Shopping by Simprosys for Wix
Step by Step Integration Guide to link the Facebook Business Account with Google Shopping by Simprosys for Wix
Sep 29, 2025
Step by Step Integration Guide to link the Facebook Business Account with our app
Social media is a lucrative element of many businesses’ digital advertising strategies especially Facebook which is the social network platform having highest number of monthly active users in comparison to other platforms.
Considering this we have come up with Facebook Catalog submission feature within our app and with this help doc we’ll walk you through the process of integrating our app Simprosys Google Shopping Feed with your "Facebook Business Manager" account.
Begin with the steps below:
A) Once you have installed our app, you will be able to see the screen where it asks for “Login with Google”, “Login with Microsoft Ads” & “Login with Facebook”.
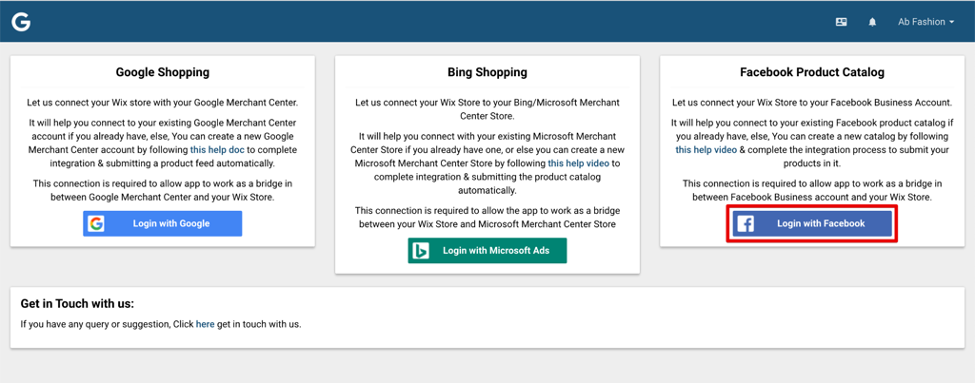
If you wish to integrate Facebook then click on “Log in with facebook” button to proceed further. Next, please enter your Facebook Business Manager account credentials to login.
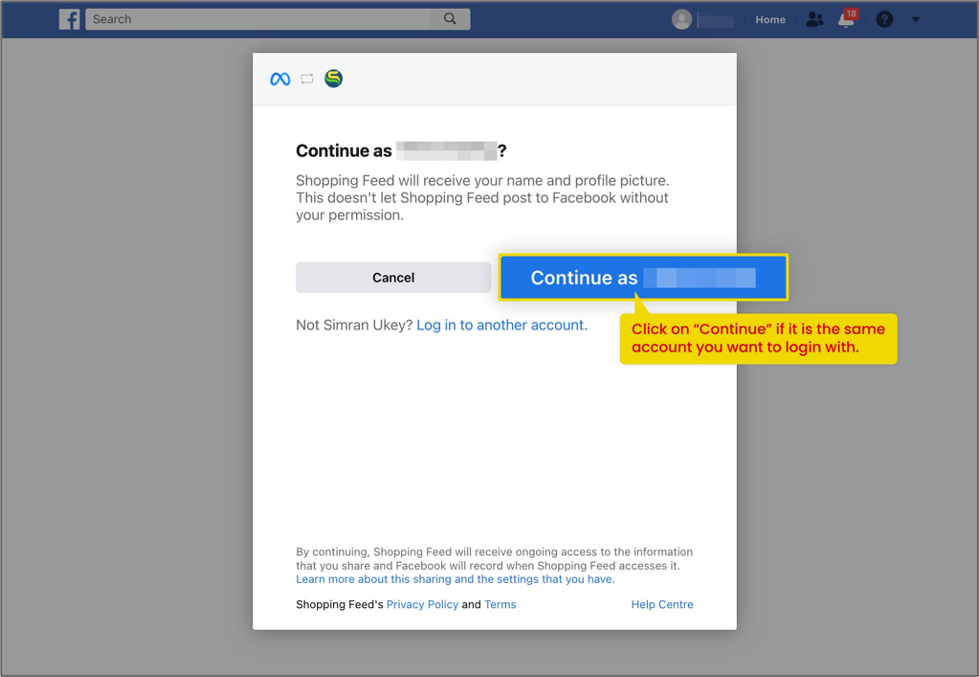
Once you have successfully logged in you’ll get a popup to confirm if you are sure to continue.
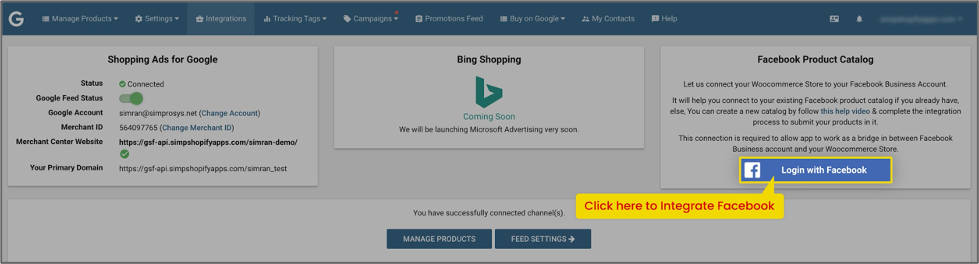
B) If you are an existing user of our app and submitting a feed for the Google or Microsoft platform, now wanting to explore the Facebook platform then please follow the below steps.
1) Login to our app from your Wix store and Navigate to the “Integrations” tab. Here you will be able to see the Facebook Product Catalog section to integrate. Click on “Login with Facebook”
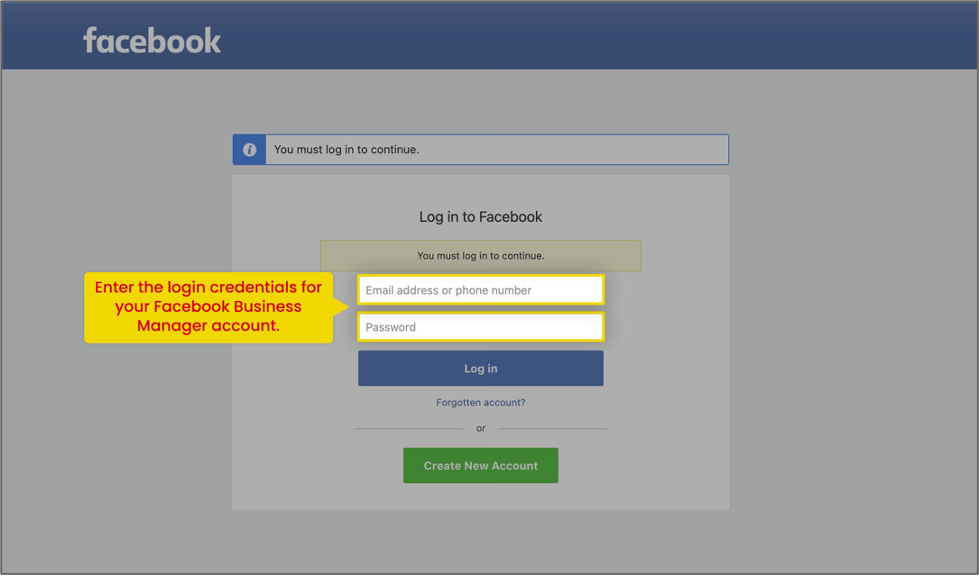
2) You will be prompted to login to your Facebook Business Manager account. Enter the login credentials and continue.
3) A pop-up screen will appear asking to continue with the currently logged-in account, read the details and click on “Continue”.
Here onwards the process remains the same for both first-time users of the app and existing users.
4) Another screen will appear which shows the list of all the permissions our app will require to connect to your Facebook account.
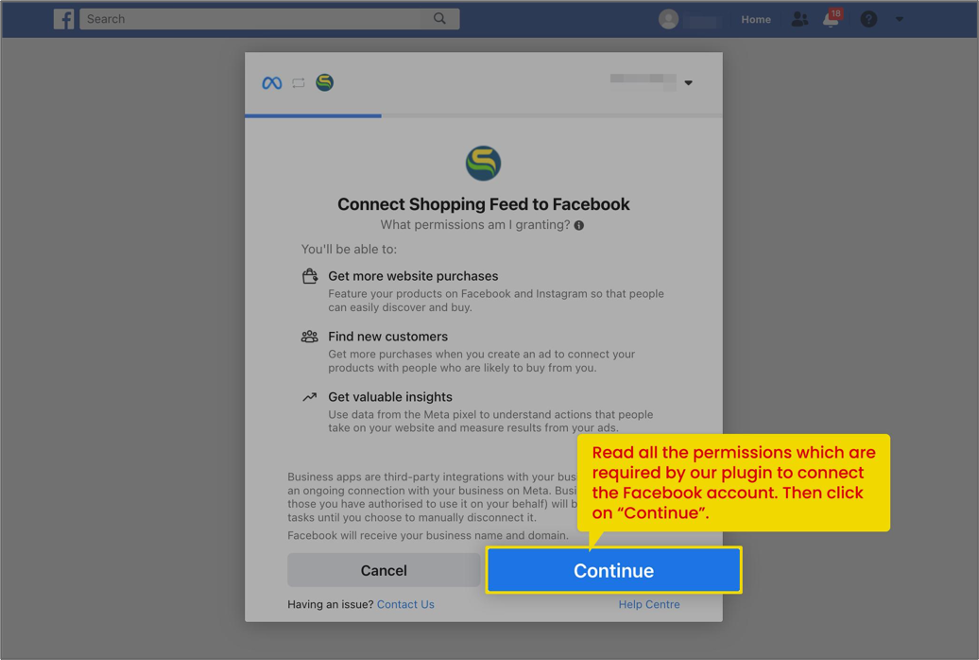
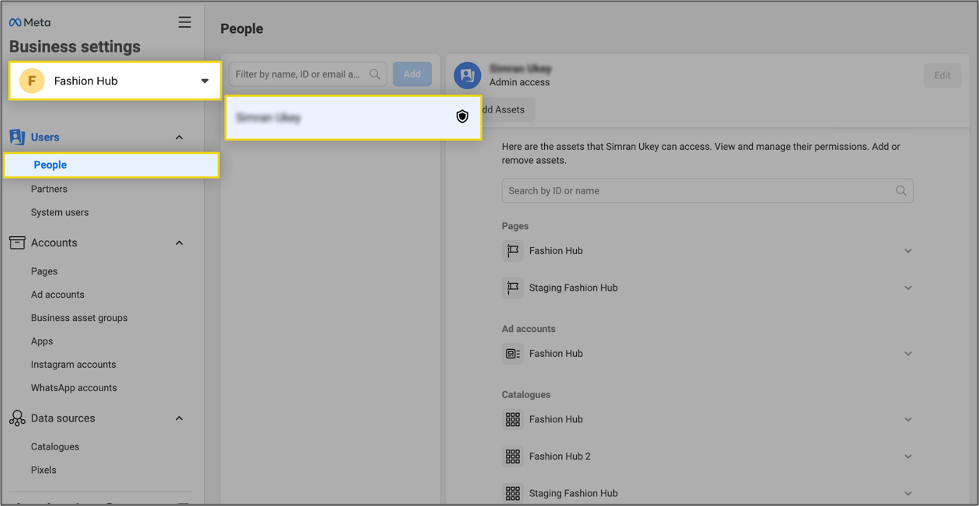
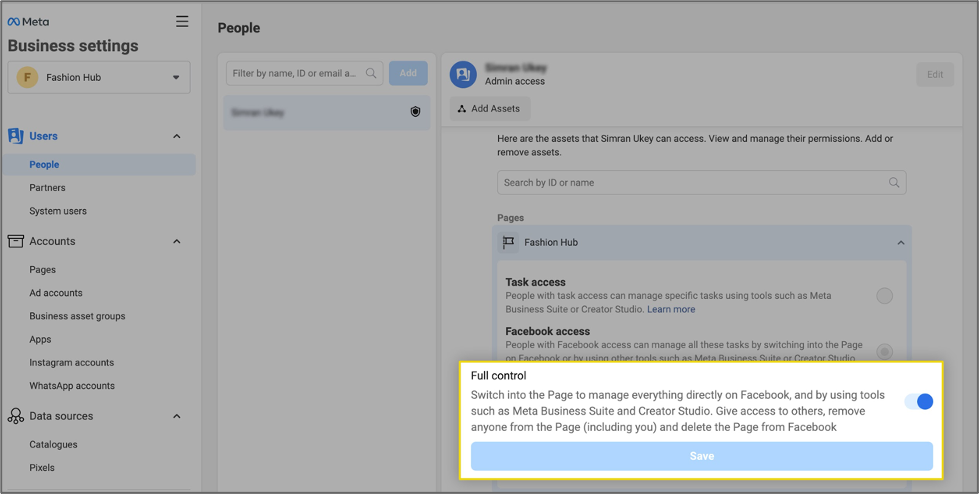
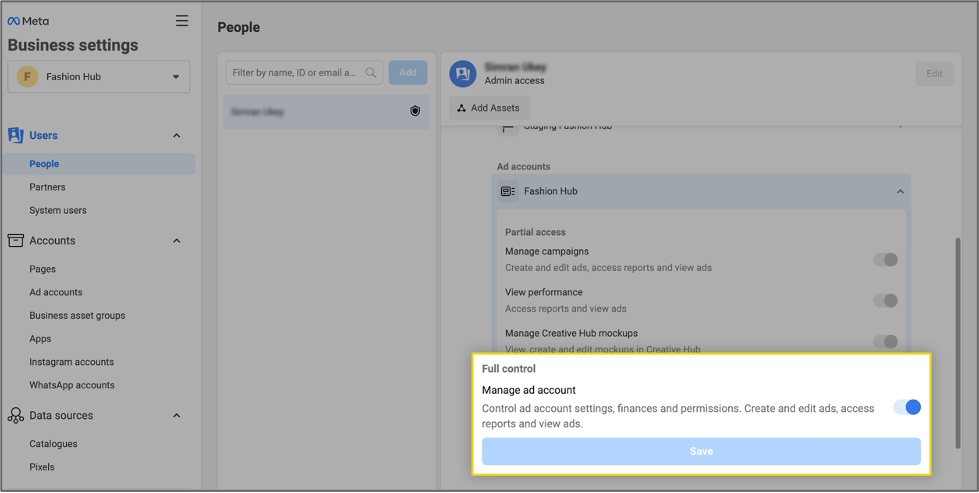
Before moving ahead, please make sure you have the admin or manage permission to all the assets of Facebook Business Manager shown on the next page as it is required to complete the integration.
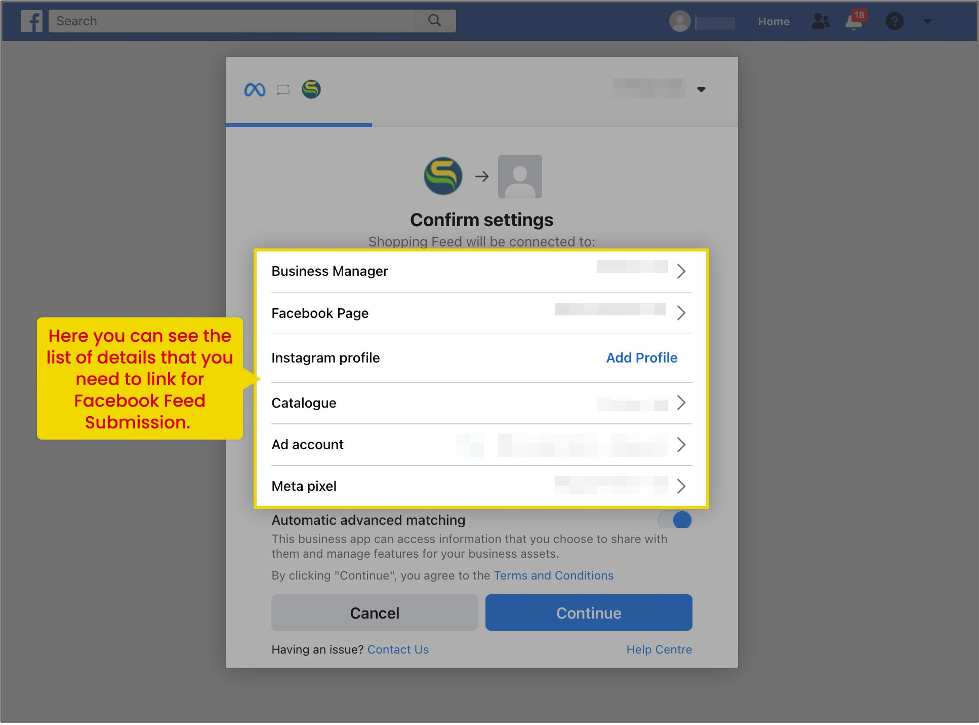
5) In the next step, the settings will be shown to link your Business Manager account, Facebook page, Catalogue, Ads account, and pixel.
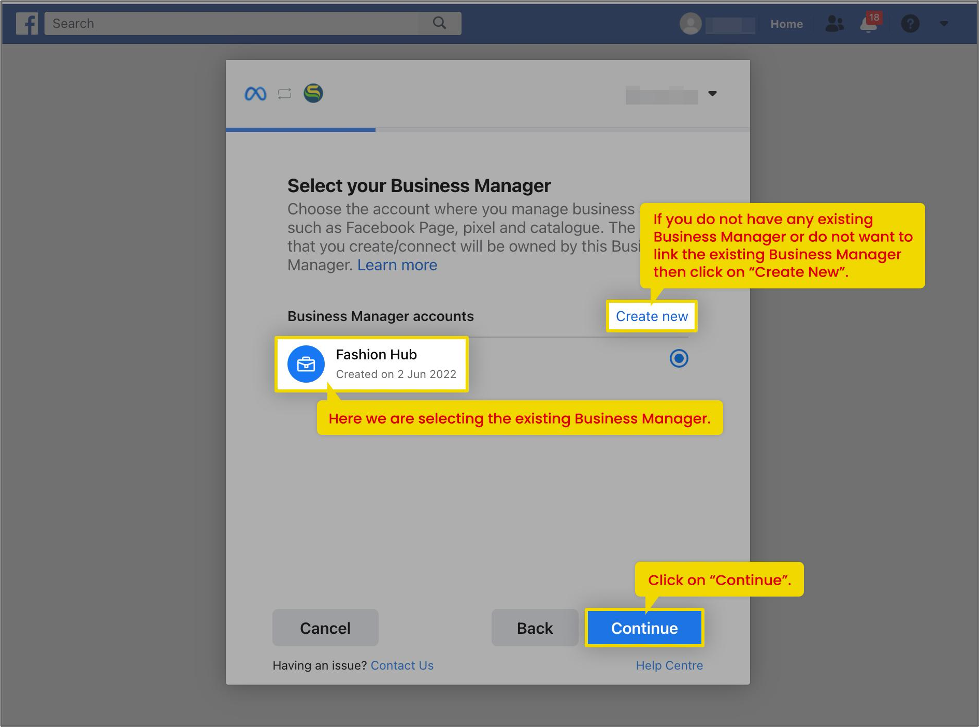
6) First is to link the “Business Manager” account, link your existing Facebook Business Manager account if you have any or you can create a new Business Manager account from the same page and click on “Continue”.
7) Next you have to choose the Facebook page you want to connect to your store. This will be used to advertise products from your store. If you do not have an existing Facebook page then you can create a new one and then continue linking.

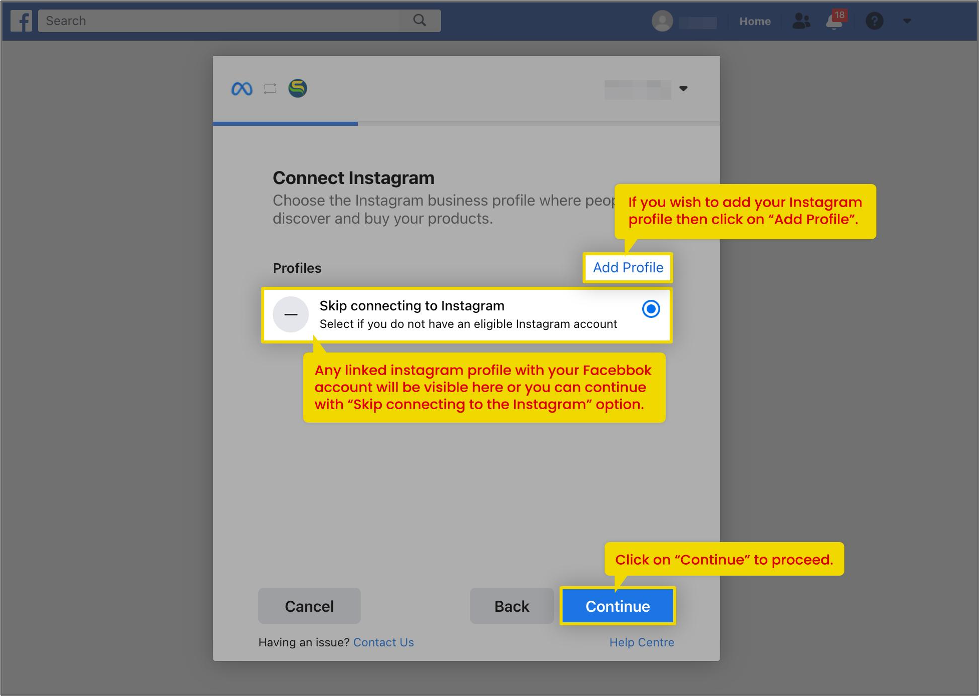
8) Next screen would be to connect Instagram. If you have an Instagram profile, then the profile will be visible here or you can continue with “Add Profile”. If do not have an Instagram profile for your store then you can click on “Skip connecting to Instagram”.
Note: This process is just to link your Instagram profile and will not submit the feed for Instagram. To submit a feed for Instagram, you will have to connect it through the Commerce Manager.
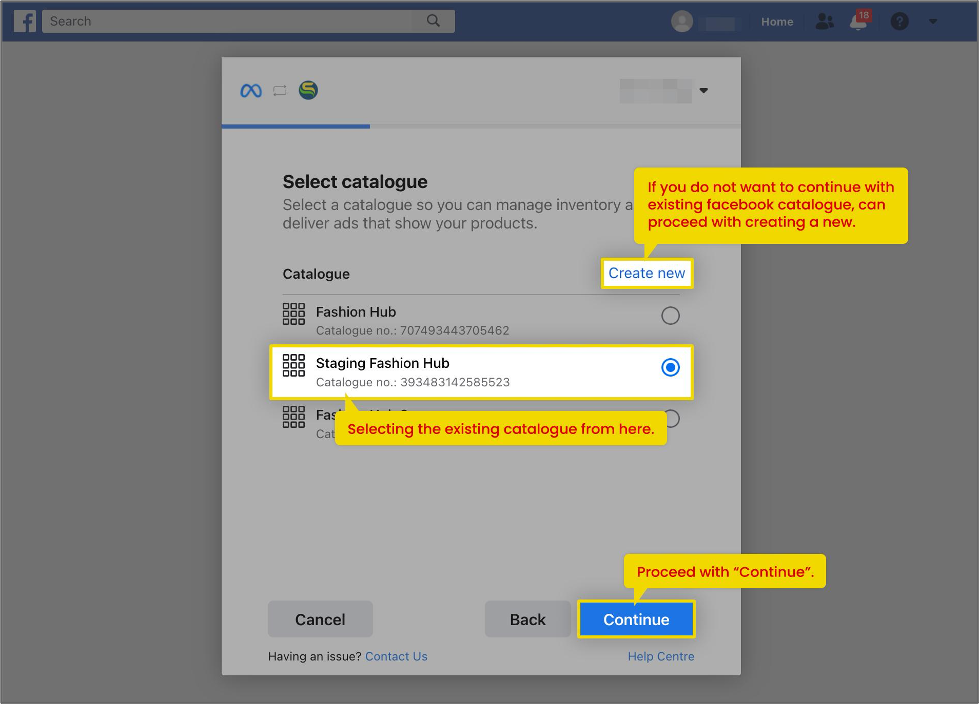
9) Now, select the “Facebook Catalogue”, that you would like to use to submit the products to. You can select any existing product catalogue or create a new one whichever is suitable for you.
• If you are able to see the catalogues which you want to use but Facebook is showing it as Greyed out then there might be two possibilities:
• You do not have the admin or manage permissions for those catalogues particularly.
The catalogue is already being used by other apps or data sources for feed submission.
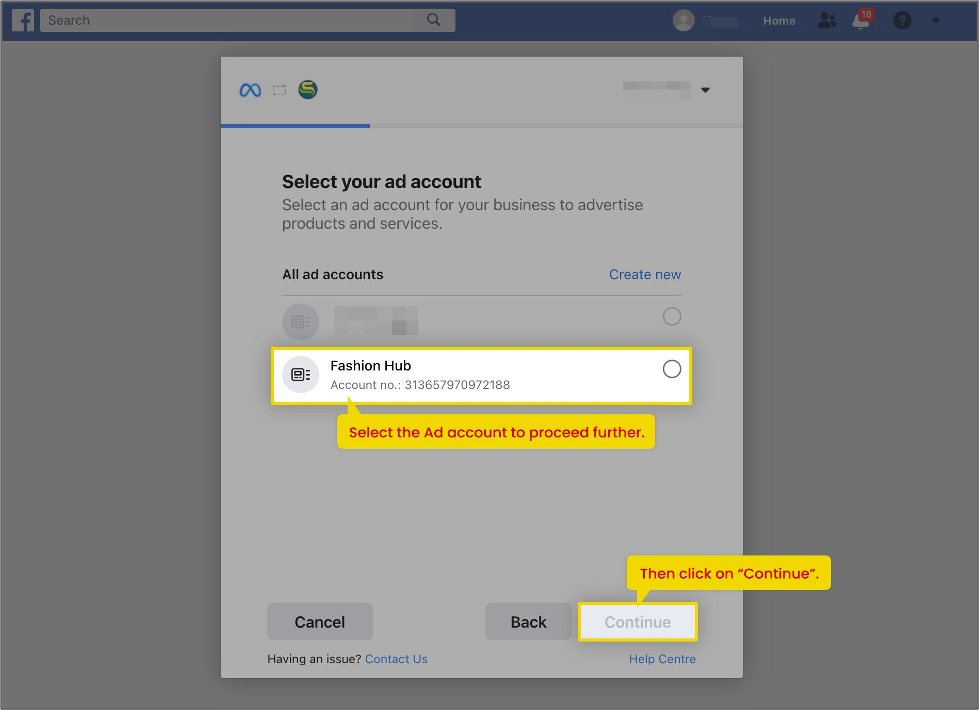
10) Proceeding further, need to choose the Ads account for your products. Select this and click on “Continue”.
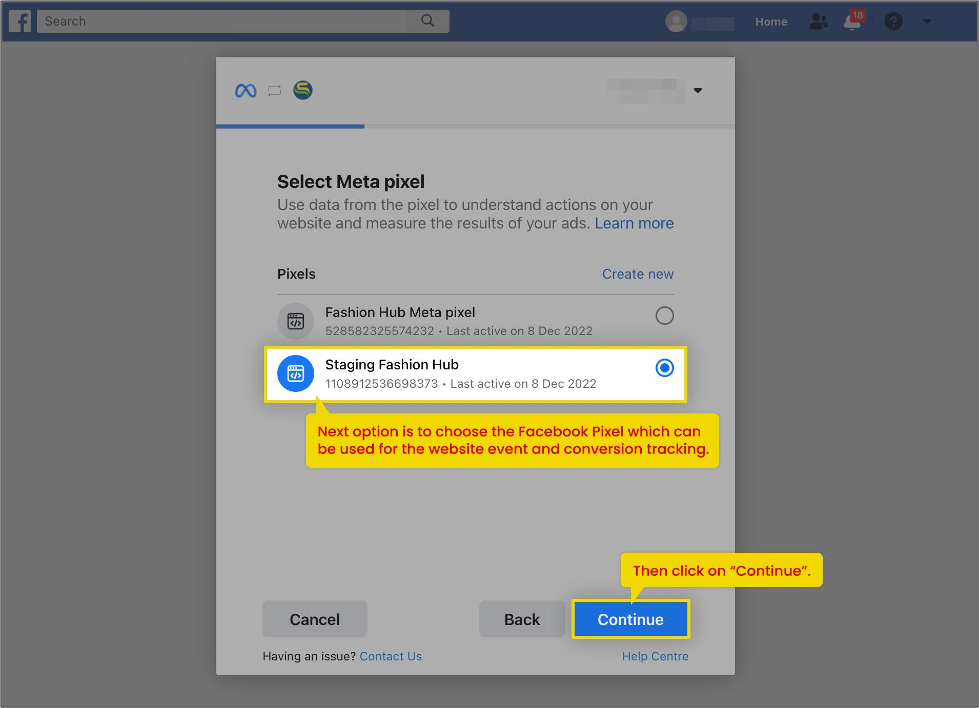
11) Next option is to select the Pixel, which can be used for standard website events and conversion tracking. Here the pixel is available to choose from as it was already created.
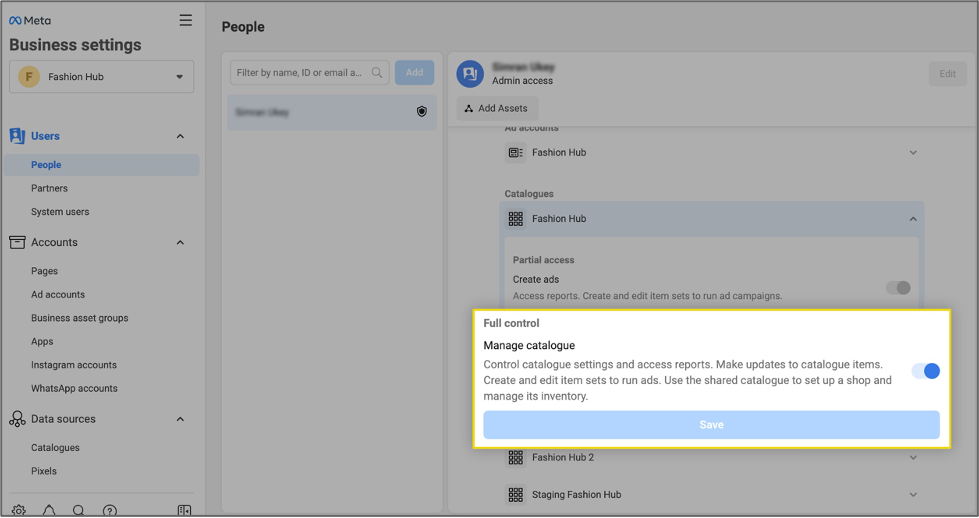
12) Now you can notice that you have picked all assets for Facebook integration. There will be a final option to choose the Automatic Advance Matching feature so that you can choose which customer information you would like to use for customer matching and targeting.
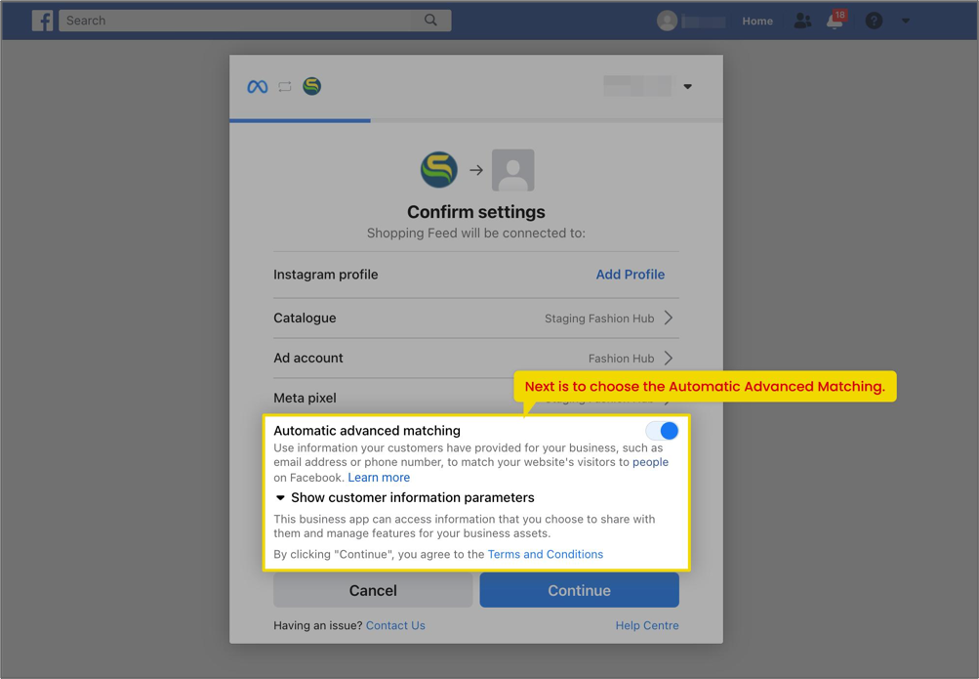
You can expand the “Show customer information parameters” to see the options available to choose from, move forward with all the options enabled for automatic advance matching.
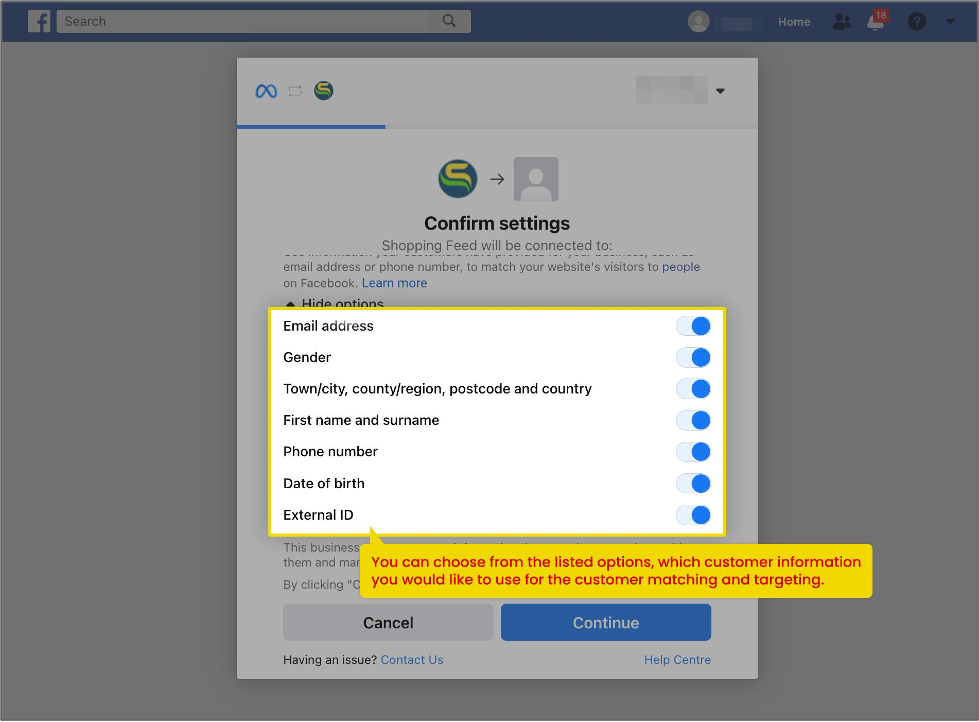
Here, you can turn off any option that you do not want to use, or collecting any of the below information is prohibited as per the rules and regulations of the target market.
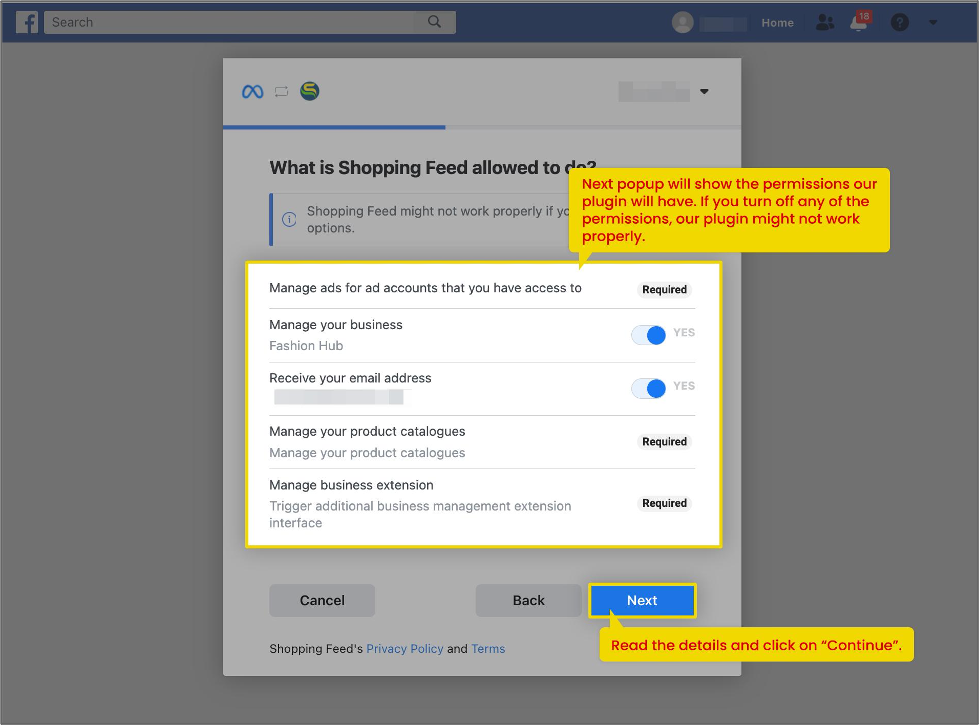
13) Once you complete this process, you will be able to see the permissions our app will have.
If you deny any of these permissions then our app might not work properly. So we recommend you allow all the permissions and then click on “Next”.
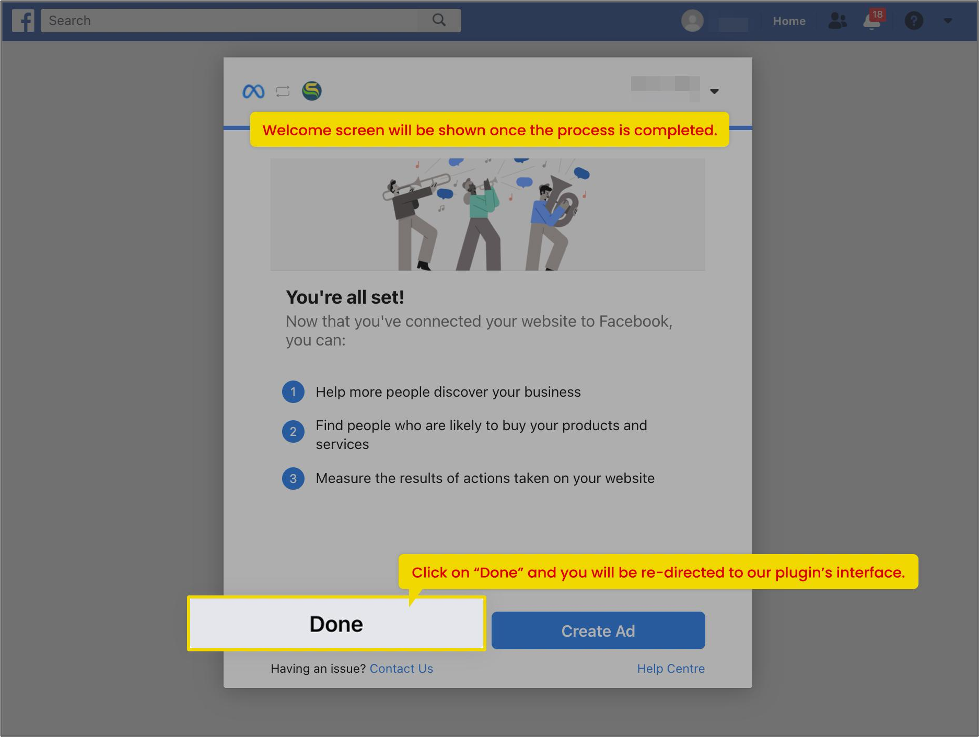
14) We have completed the process of completing the integration and once you click on “Done”, you will be redirected to our app's interface where you can check the settings for Facebook.
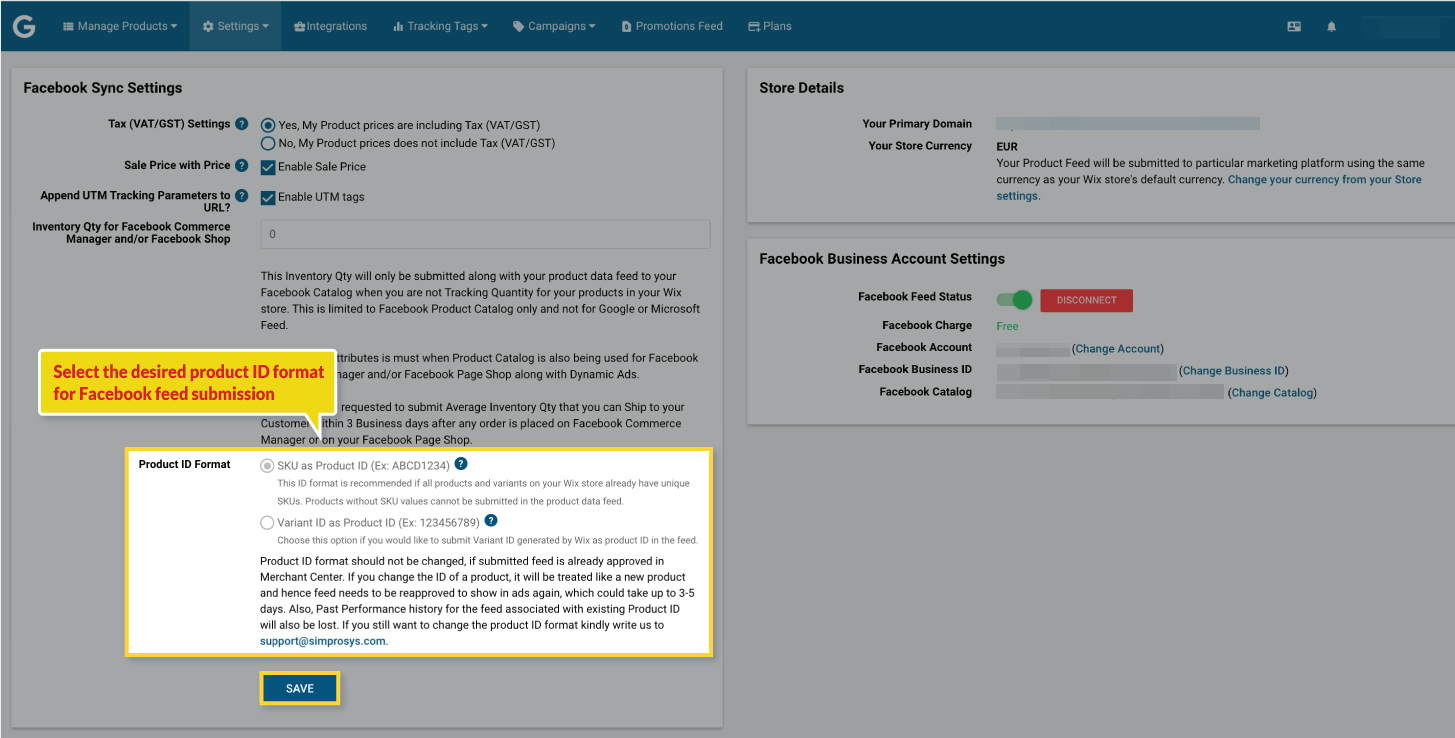
Check the “Sync Settings” here, select the product ID format, and click on “Save”.
As you will be submitting the feed for Facebook for the first time, the products will be shown in “pending” status and it will take approximately upto 2 hrs to submit them.
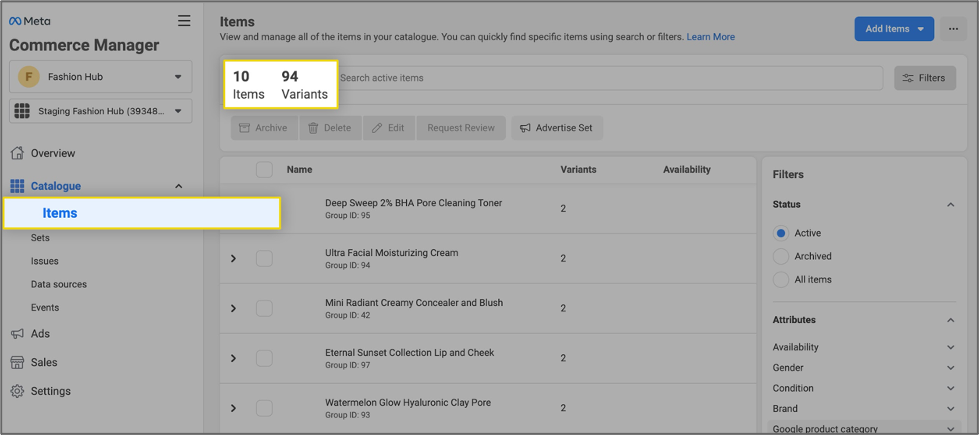
You can check the products in your Facebook Business Manager account under the items section.
You can find comprehensive details on the Wix platform by clicking here: https://simprosys.com/google-shopping-by-simprosys-wix
We hope it is going to be helpful. If you have any queries, you can write to us at support@simprosys.com and we will definitely assist you.
Previous article

Next article
Google Shopping by Simprosys
Installation Processes
Processes of Google Shopping by Simprosys for Wix


