

Google Shopping by Simprosys
Installation Processes
Processes of Google Shopping by Simprosys for Wix
Default Settings Option in Google Shopping by Simprosys for Wix
Sep 29, 2025
In this doc, we will be looking in detail on how to use the default settings in our “Google Shopping by Simprosys” app.
Default settings can be set up in 2 ways:
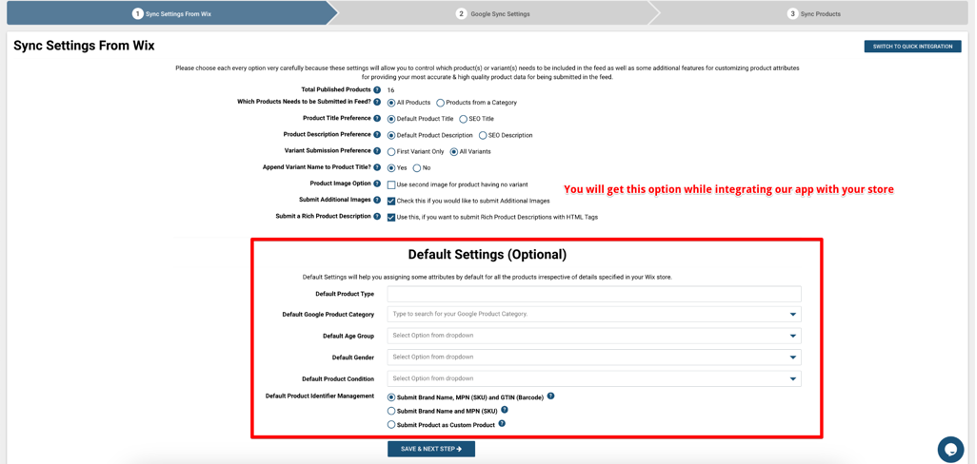
1. While integrating our app with your online store:
• You can choose the Default settings while integrating our app with your online store.
• These settings work when you are syncing the products for the first time and want to assign the default settings.
• These default settings will be applicable for all the products that you will sync within our app as soon as the integration is completed.
2. After completing the integration: Here are a few points that should be kept in mind while using the default settings.
• These default settings will work on the products which are not yet synced within our app.
• These can be used when you want to assign the same value for a respective attribute to a large number of products.
• Changes made in the Default settings will not reflect on already synced products.
• Once you have set up the default settings, it will automatically apply to the newly added products so that you will not have to work on them again to assign the settings which will indeed save your time.
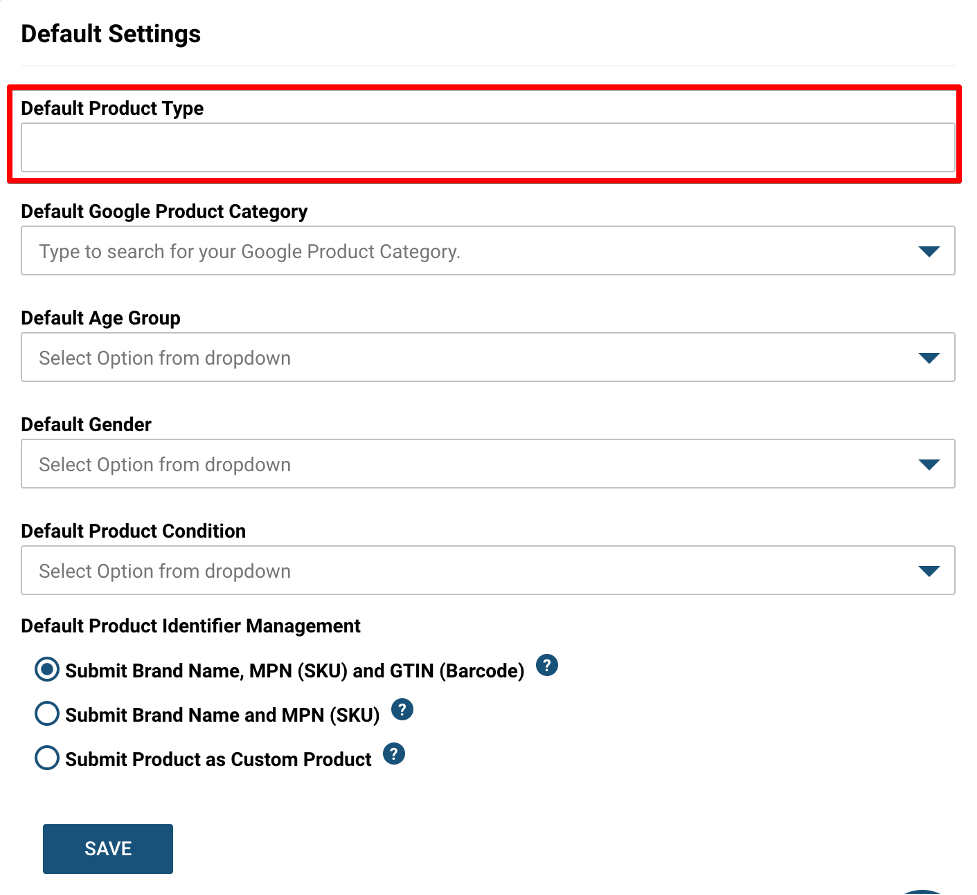
There are 5 options listed under default settings, let’s understand how it can be useful to you.
1. Default Product Type: By default, Wix provides only two options for Product type values named Physical and Digital.
You can assign the desired product type value here, if all of your products are from the same category.
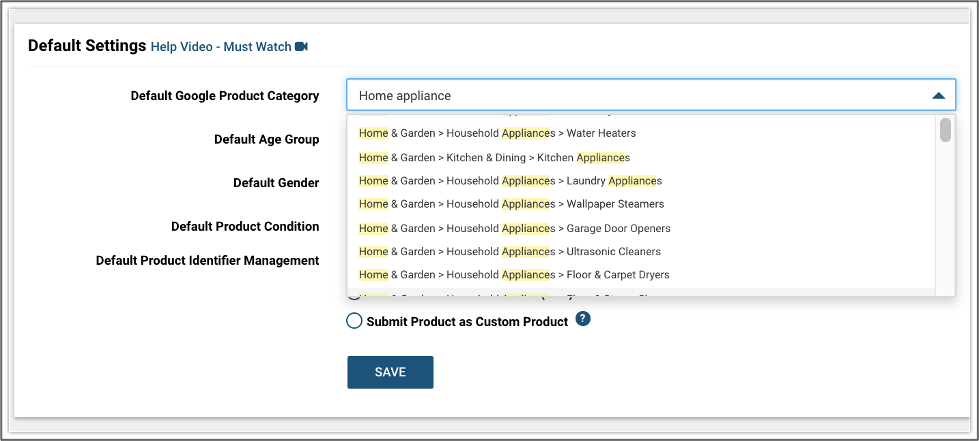
2. Default Google Product Category: If all of your products are from the same product category then this option will be the best to assign the [google_product_category].
For example, you can type keywords related to your product category and you will be able to get the list of the categories, scroll down to select the best suitable [google_product_category].
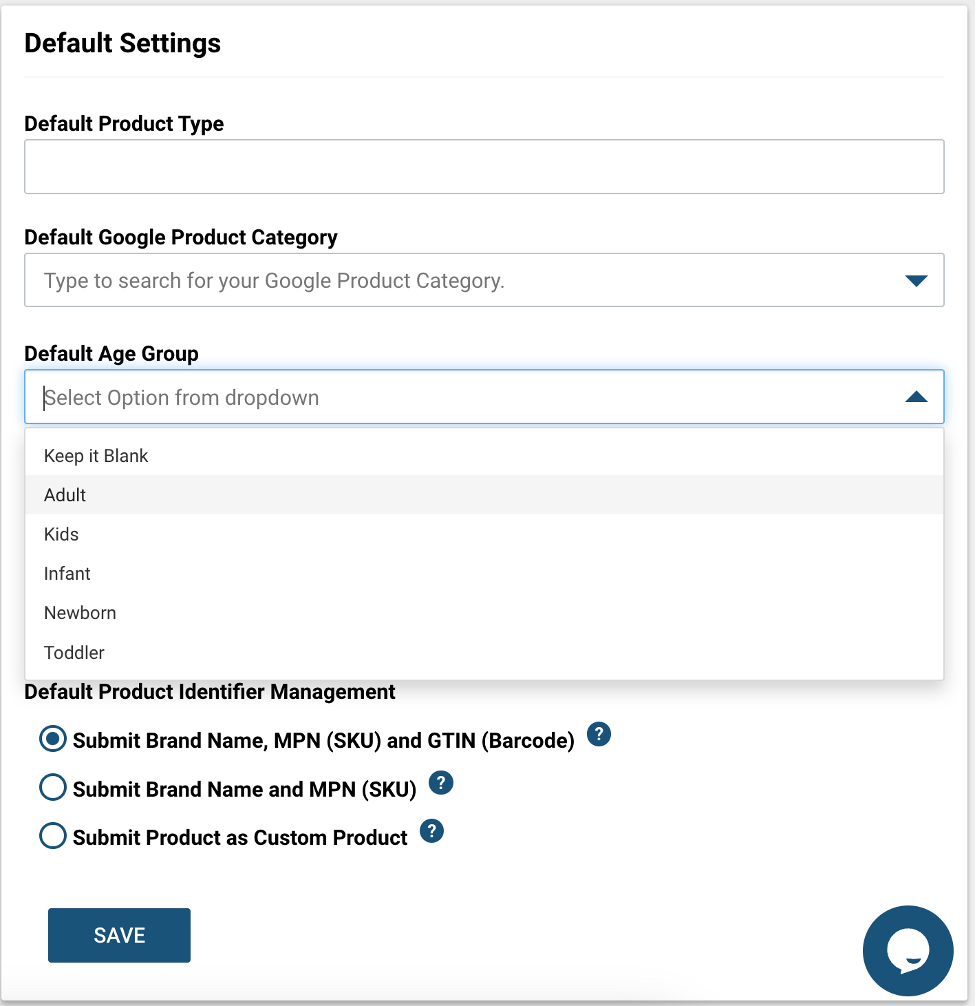
3. Default Age Group: If all the products that you are selling are for a specific [age_group] then setting a default age group will help.
We recommend using this setting only when you are selling clothing or apparel products. You can select the [age_group] from the given list which best suits the products in your store.
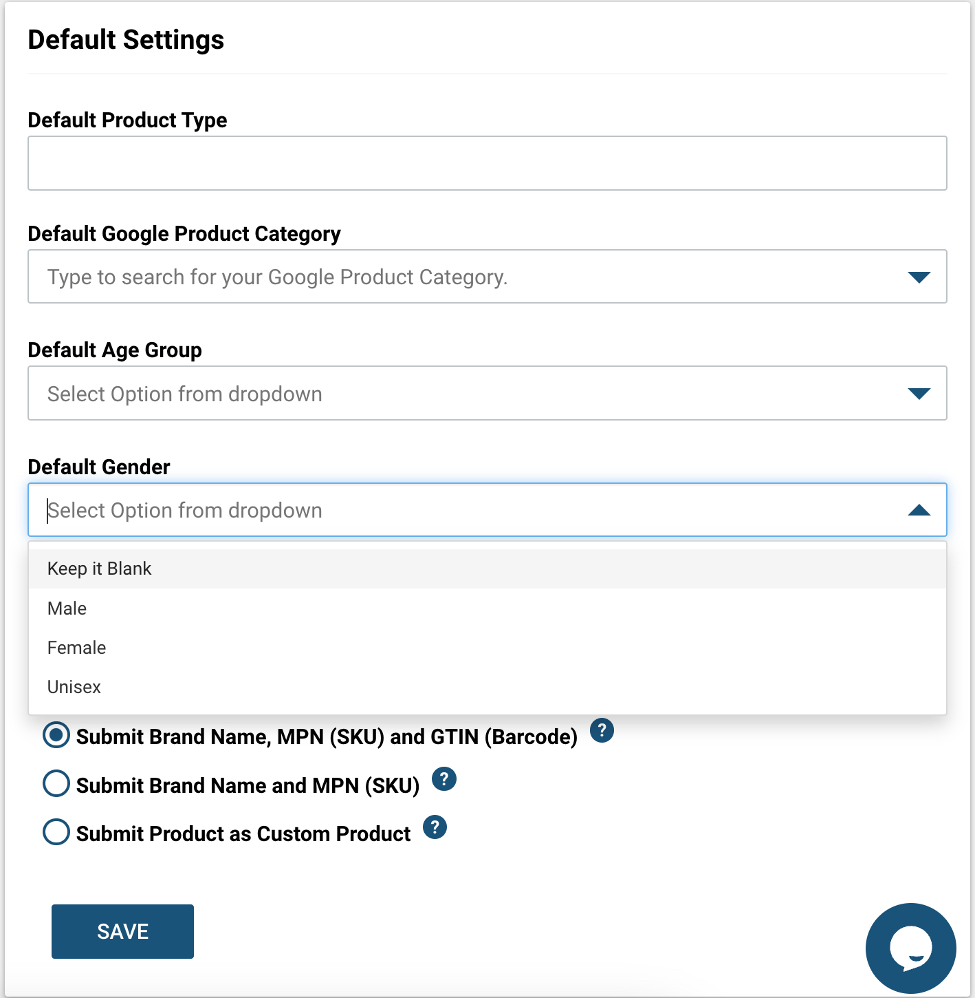
4. Default Gender: This option can be used when all the products on your store are for a particular [gender]. Also, use this when you are selling clothing or apparel products.
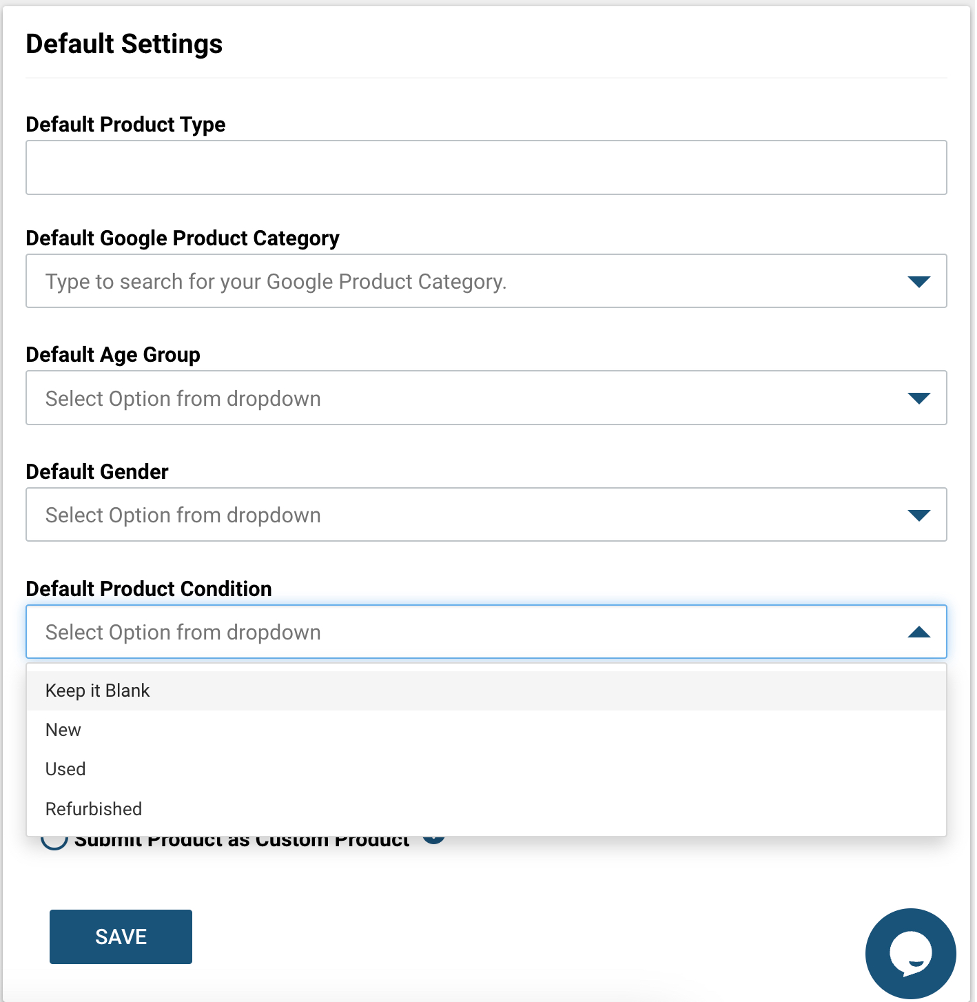
5. Default Product Condition: This option will work when you want to set a default product condition for all the products. Based on the [condition] of your product, select the option from the dropdown as New, Used, or Refurbished.
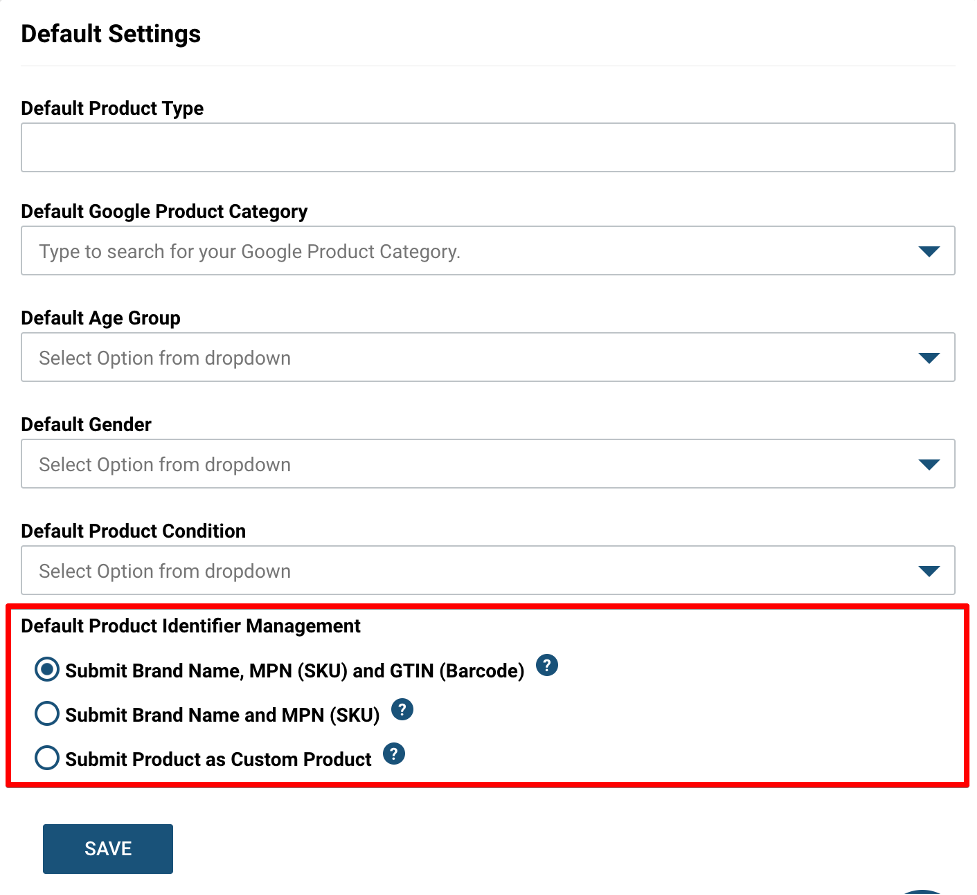
6. Default Product Identifier Management: There are 3 different product identifier options available that can be used according to the product identifiers available for your products.
If all of your products have a valid GTIN and MPN (SKU) then you can choose the first option which is “Submit Brand Name, MPN (SKU) and GTIN (Barcode)”.
Note: GTIN values must be valid and unique for each product or variant.
If you do not have the GTIN values then you can select the second option which is “Submit Brand Name and MPN (SKU)”. However, after submitting the products, if Google finds that the products are from popular brands and have the GTIN values submitted by other sellers then Google will raise a warning to assign missing GTIN values.
If you are the only manufacturer and advertiser of your products then you can select the option “Submit Product as Custom Products”.
Please make a note that while using this option any product identifier will not be submitted to Google Merchant Center and the value for the [Identifier_exists] attribute will not be submitted.
After selecting the options for the default settings, click on “SAVE” and the settings will work for the products you will add or for the products which are not synced yet from our app.
To make the changes with the settings for already synced products, you will have to use the bulk edit feature in our app.
For additional guidance and resources, visit our Wix page: https://simprosys.com/google-shopping-by-simprosys-wix
We hope it is going to be helpful. If you have any queries on any of these options you can write to us at support@simprosys.com and we will definitely help you.
Previous article

Next article
Google Shopping by Simprosys
Installation Processes
Processes of Google Shopping by Simprosys for Wix


