Guide to Setup Custom Pixels in Your Shopify Store via Simprosys Google Shopping Feed App
Shopify has deprecated API calls for the Script Tags insertion feature on Thank You or Order status pages. As per Shopify’s suggested alternative, we’ve developed a custom pixel to surpass this restriction and track all enabled tags from our app.
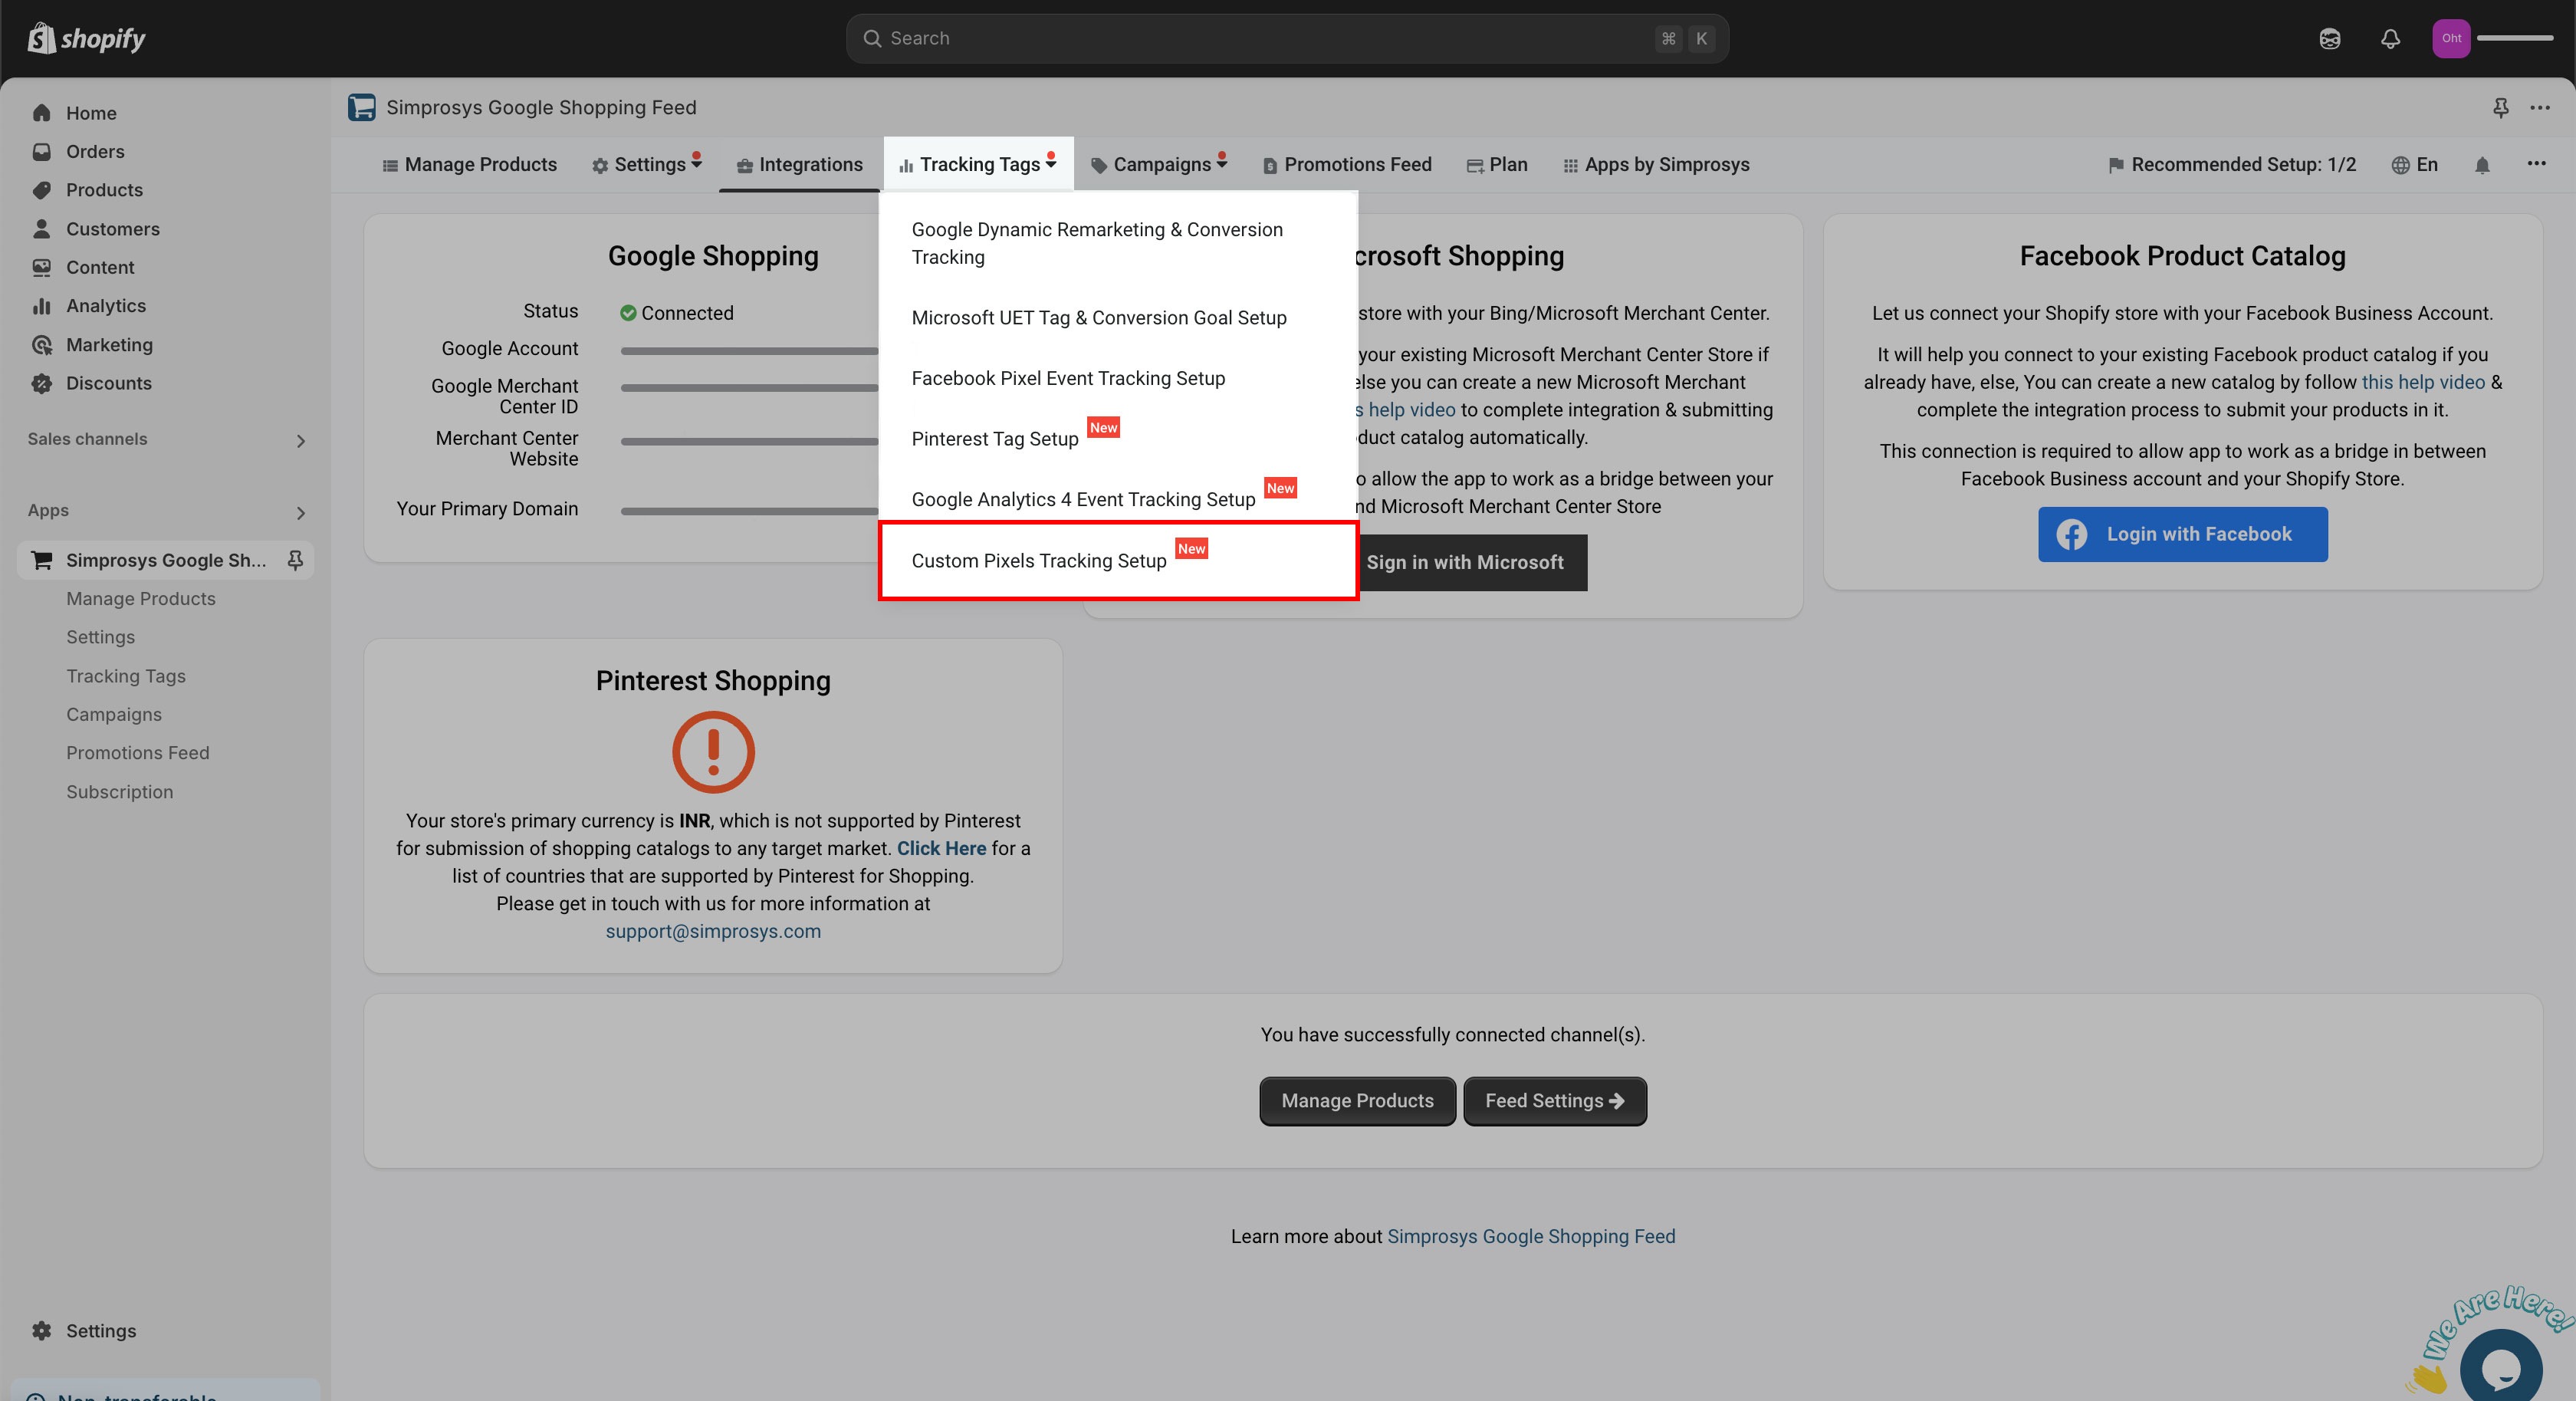
Step 1: To enable it hover over to the tracking tags option and click on Custom Pixels Tracking Setup.
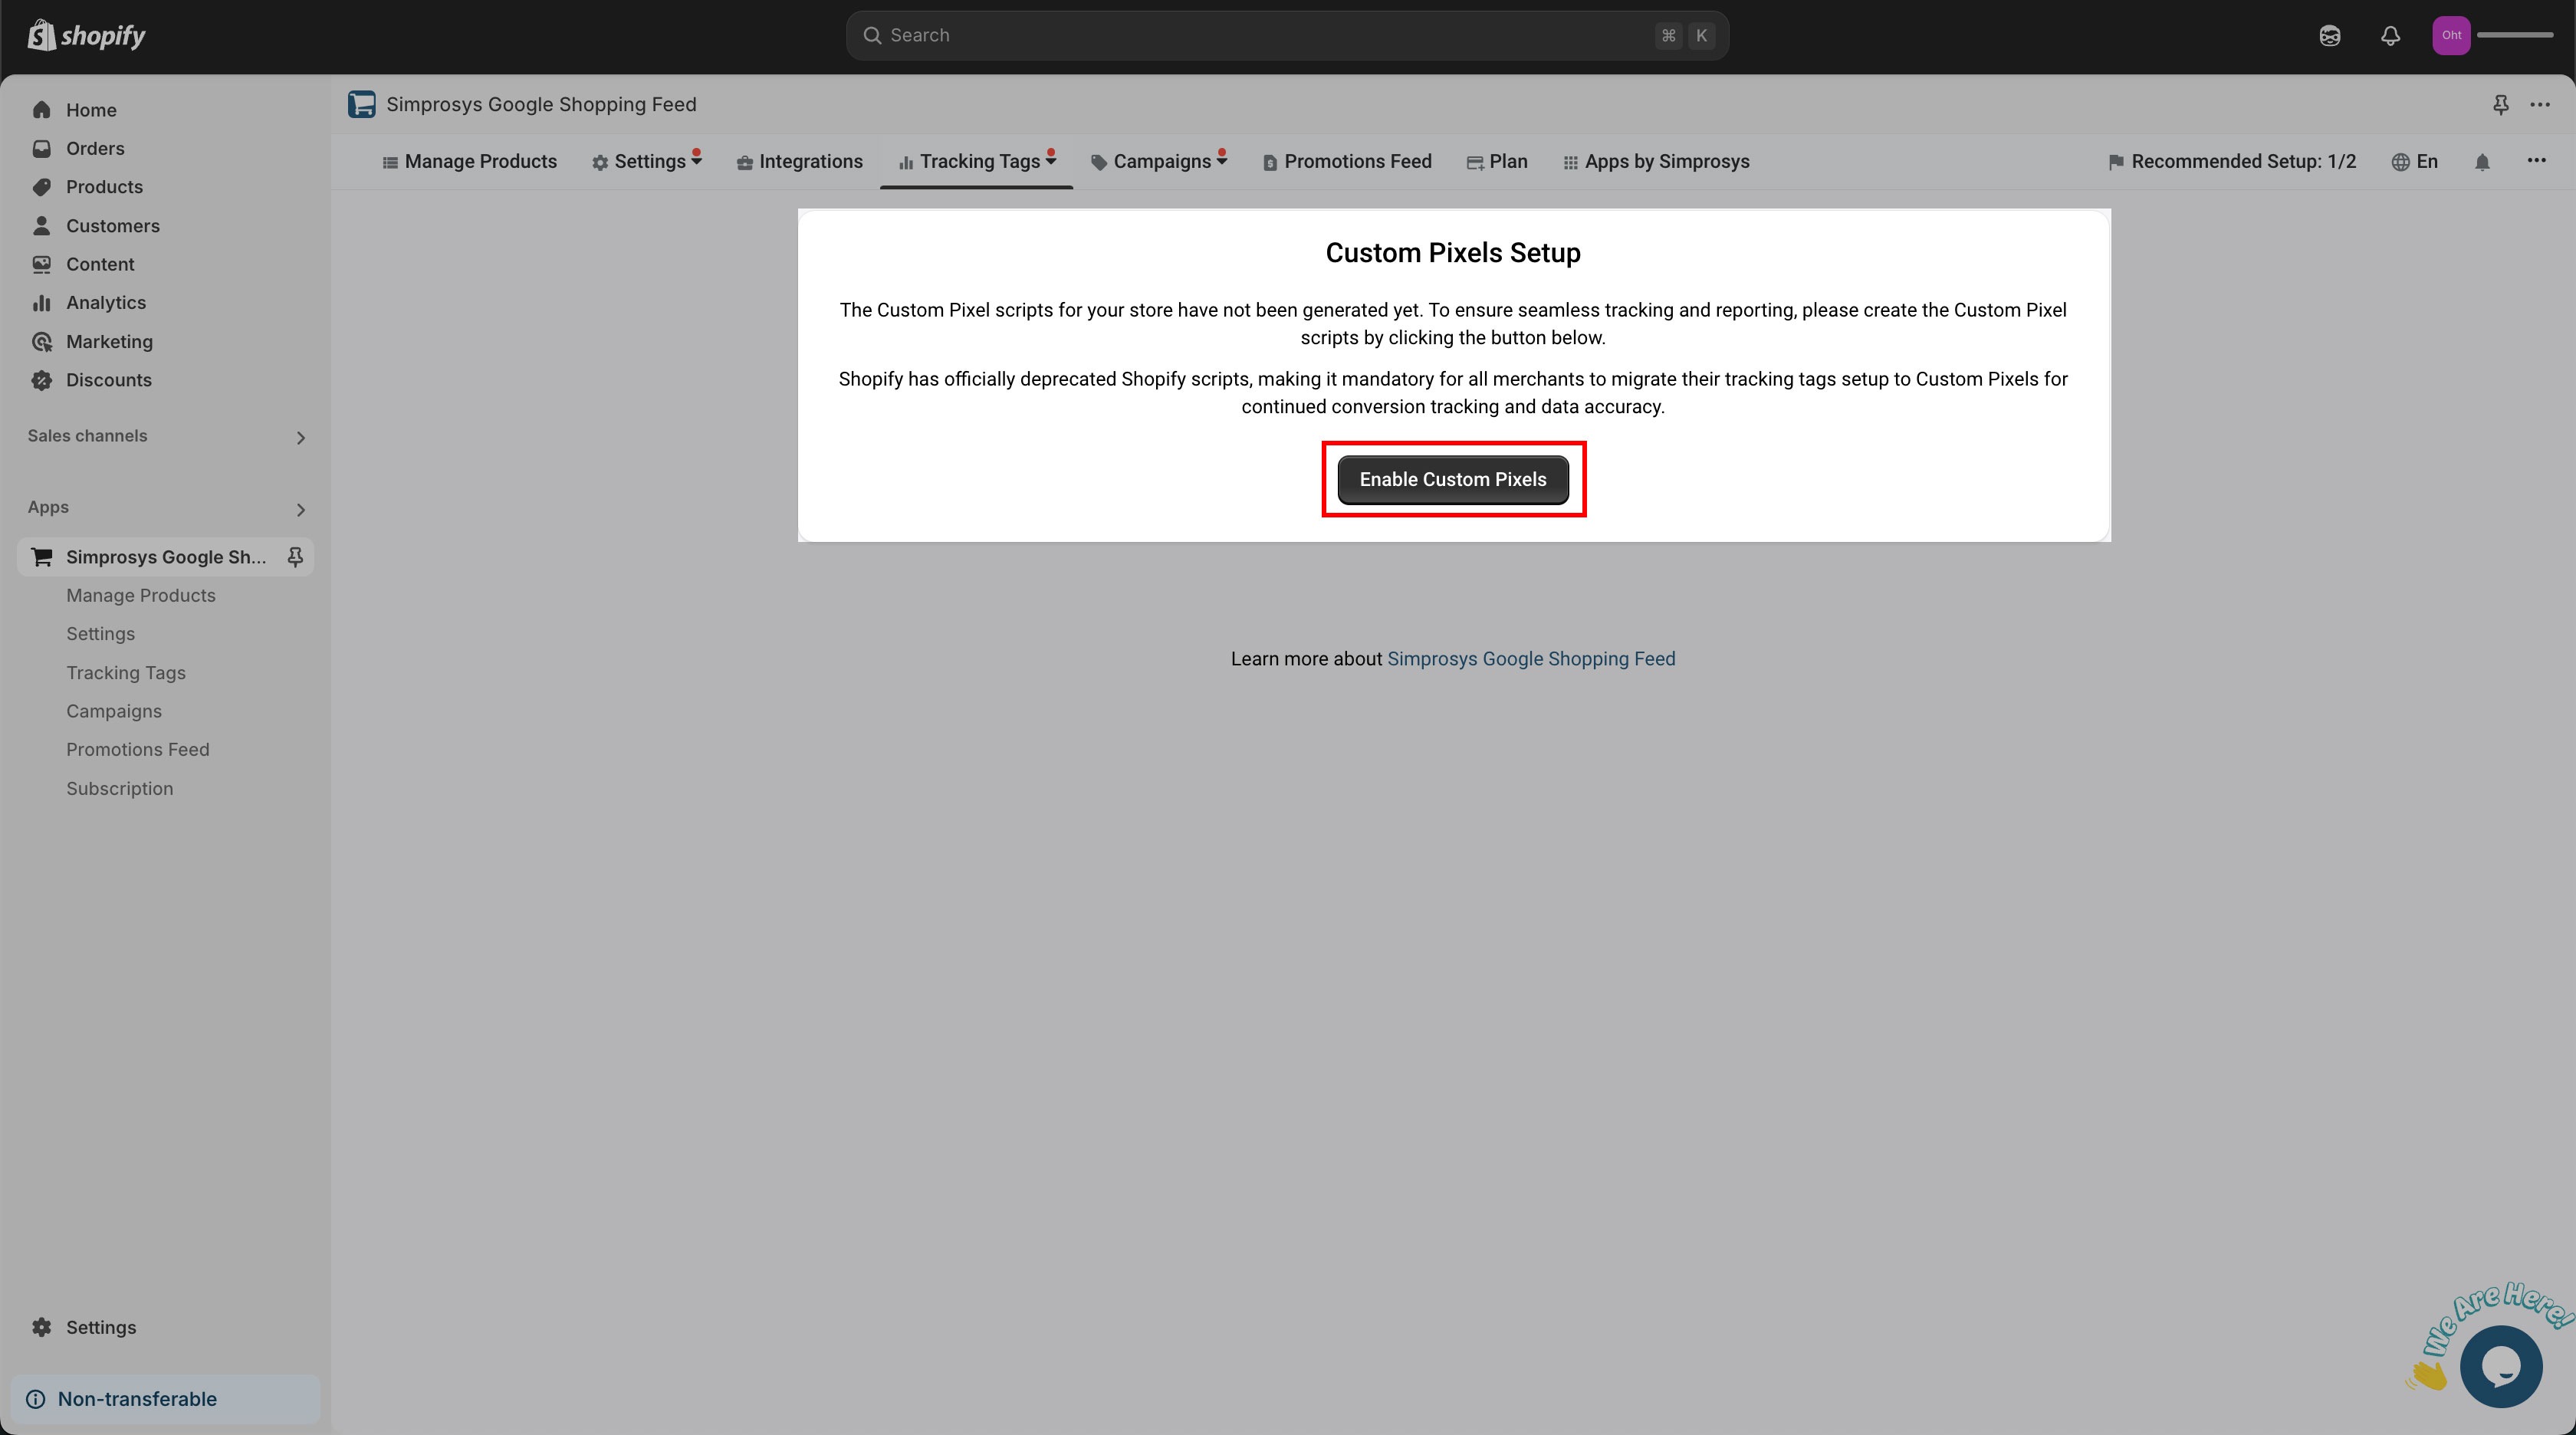
Step 2: Click on Enable Custom Pixels Button
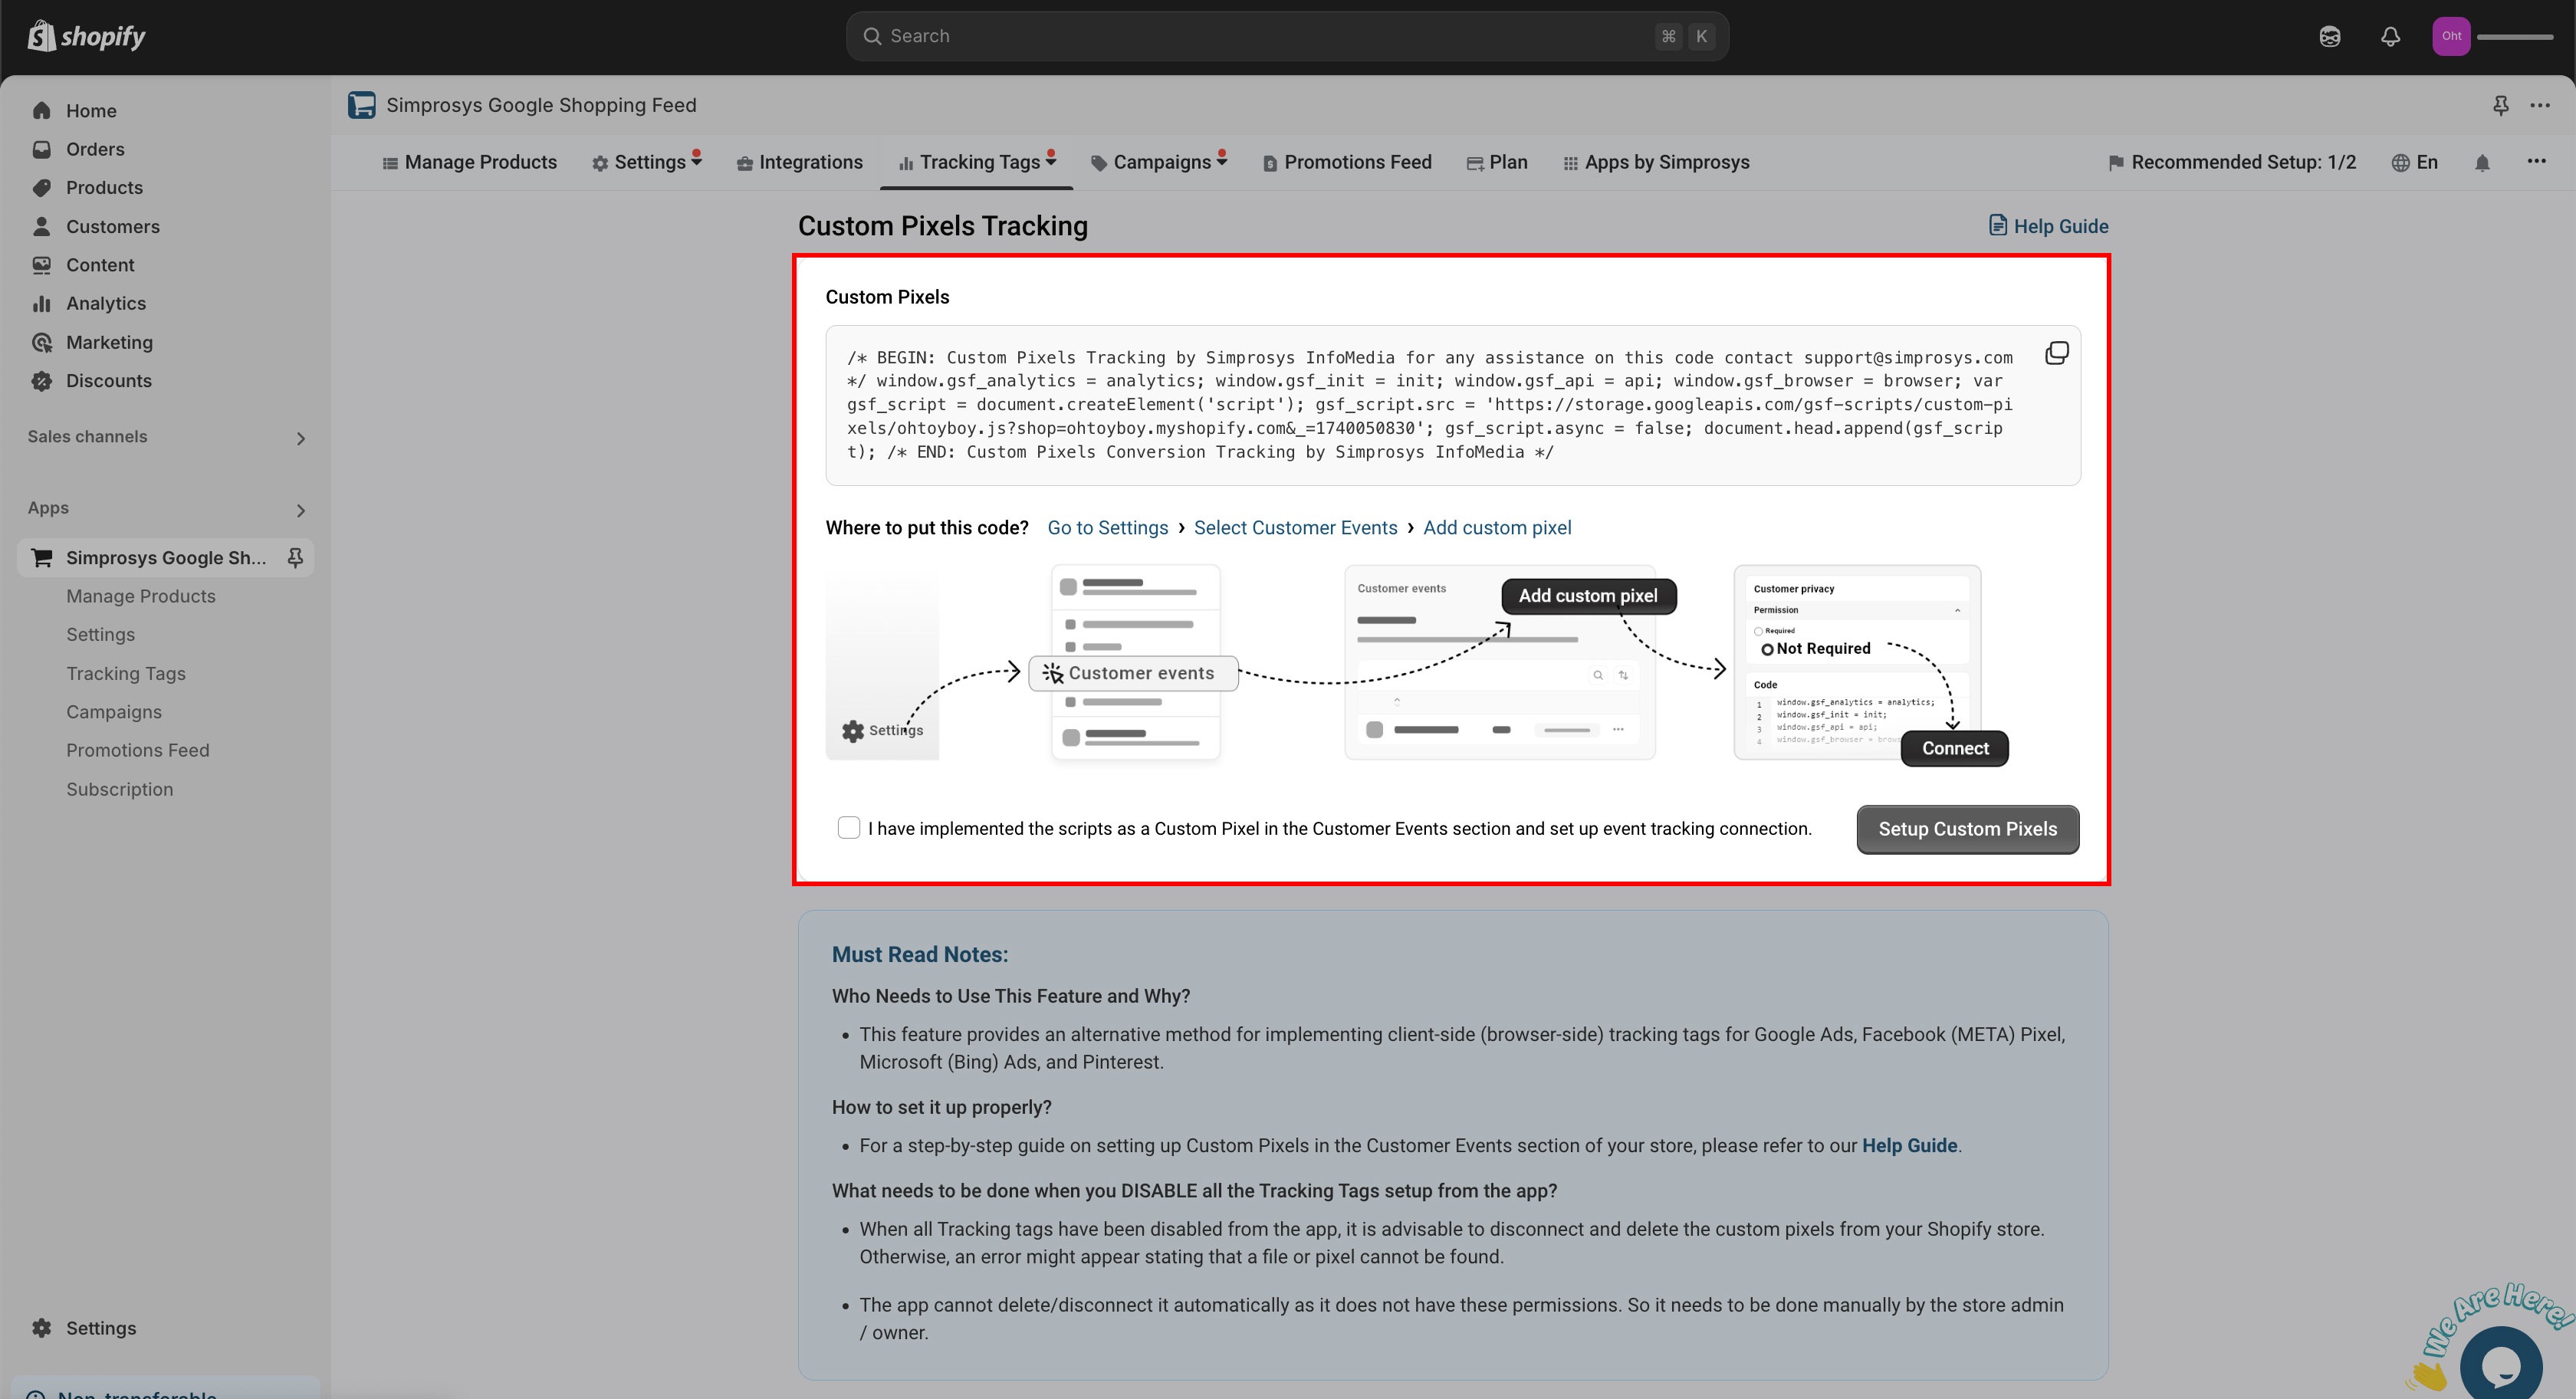
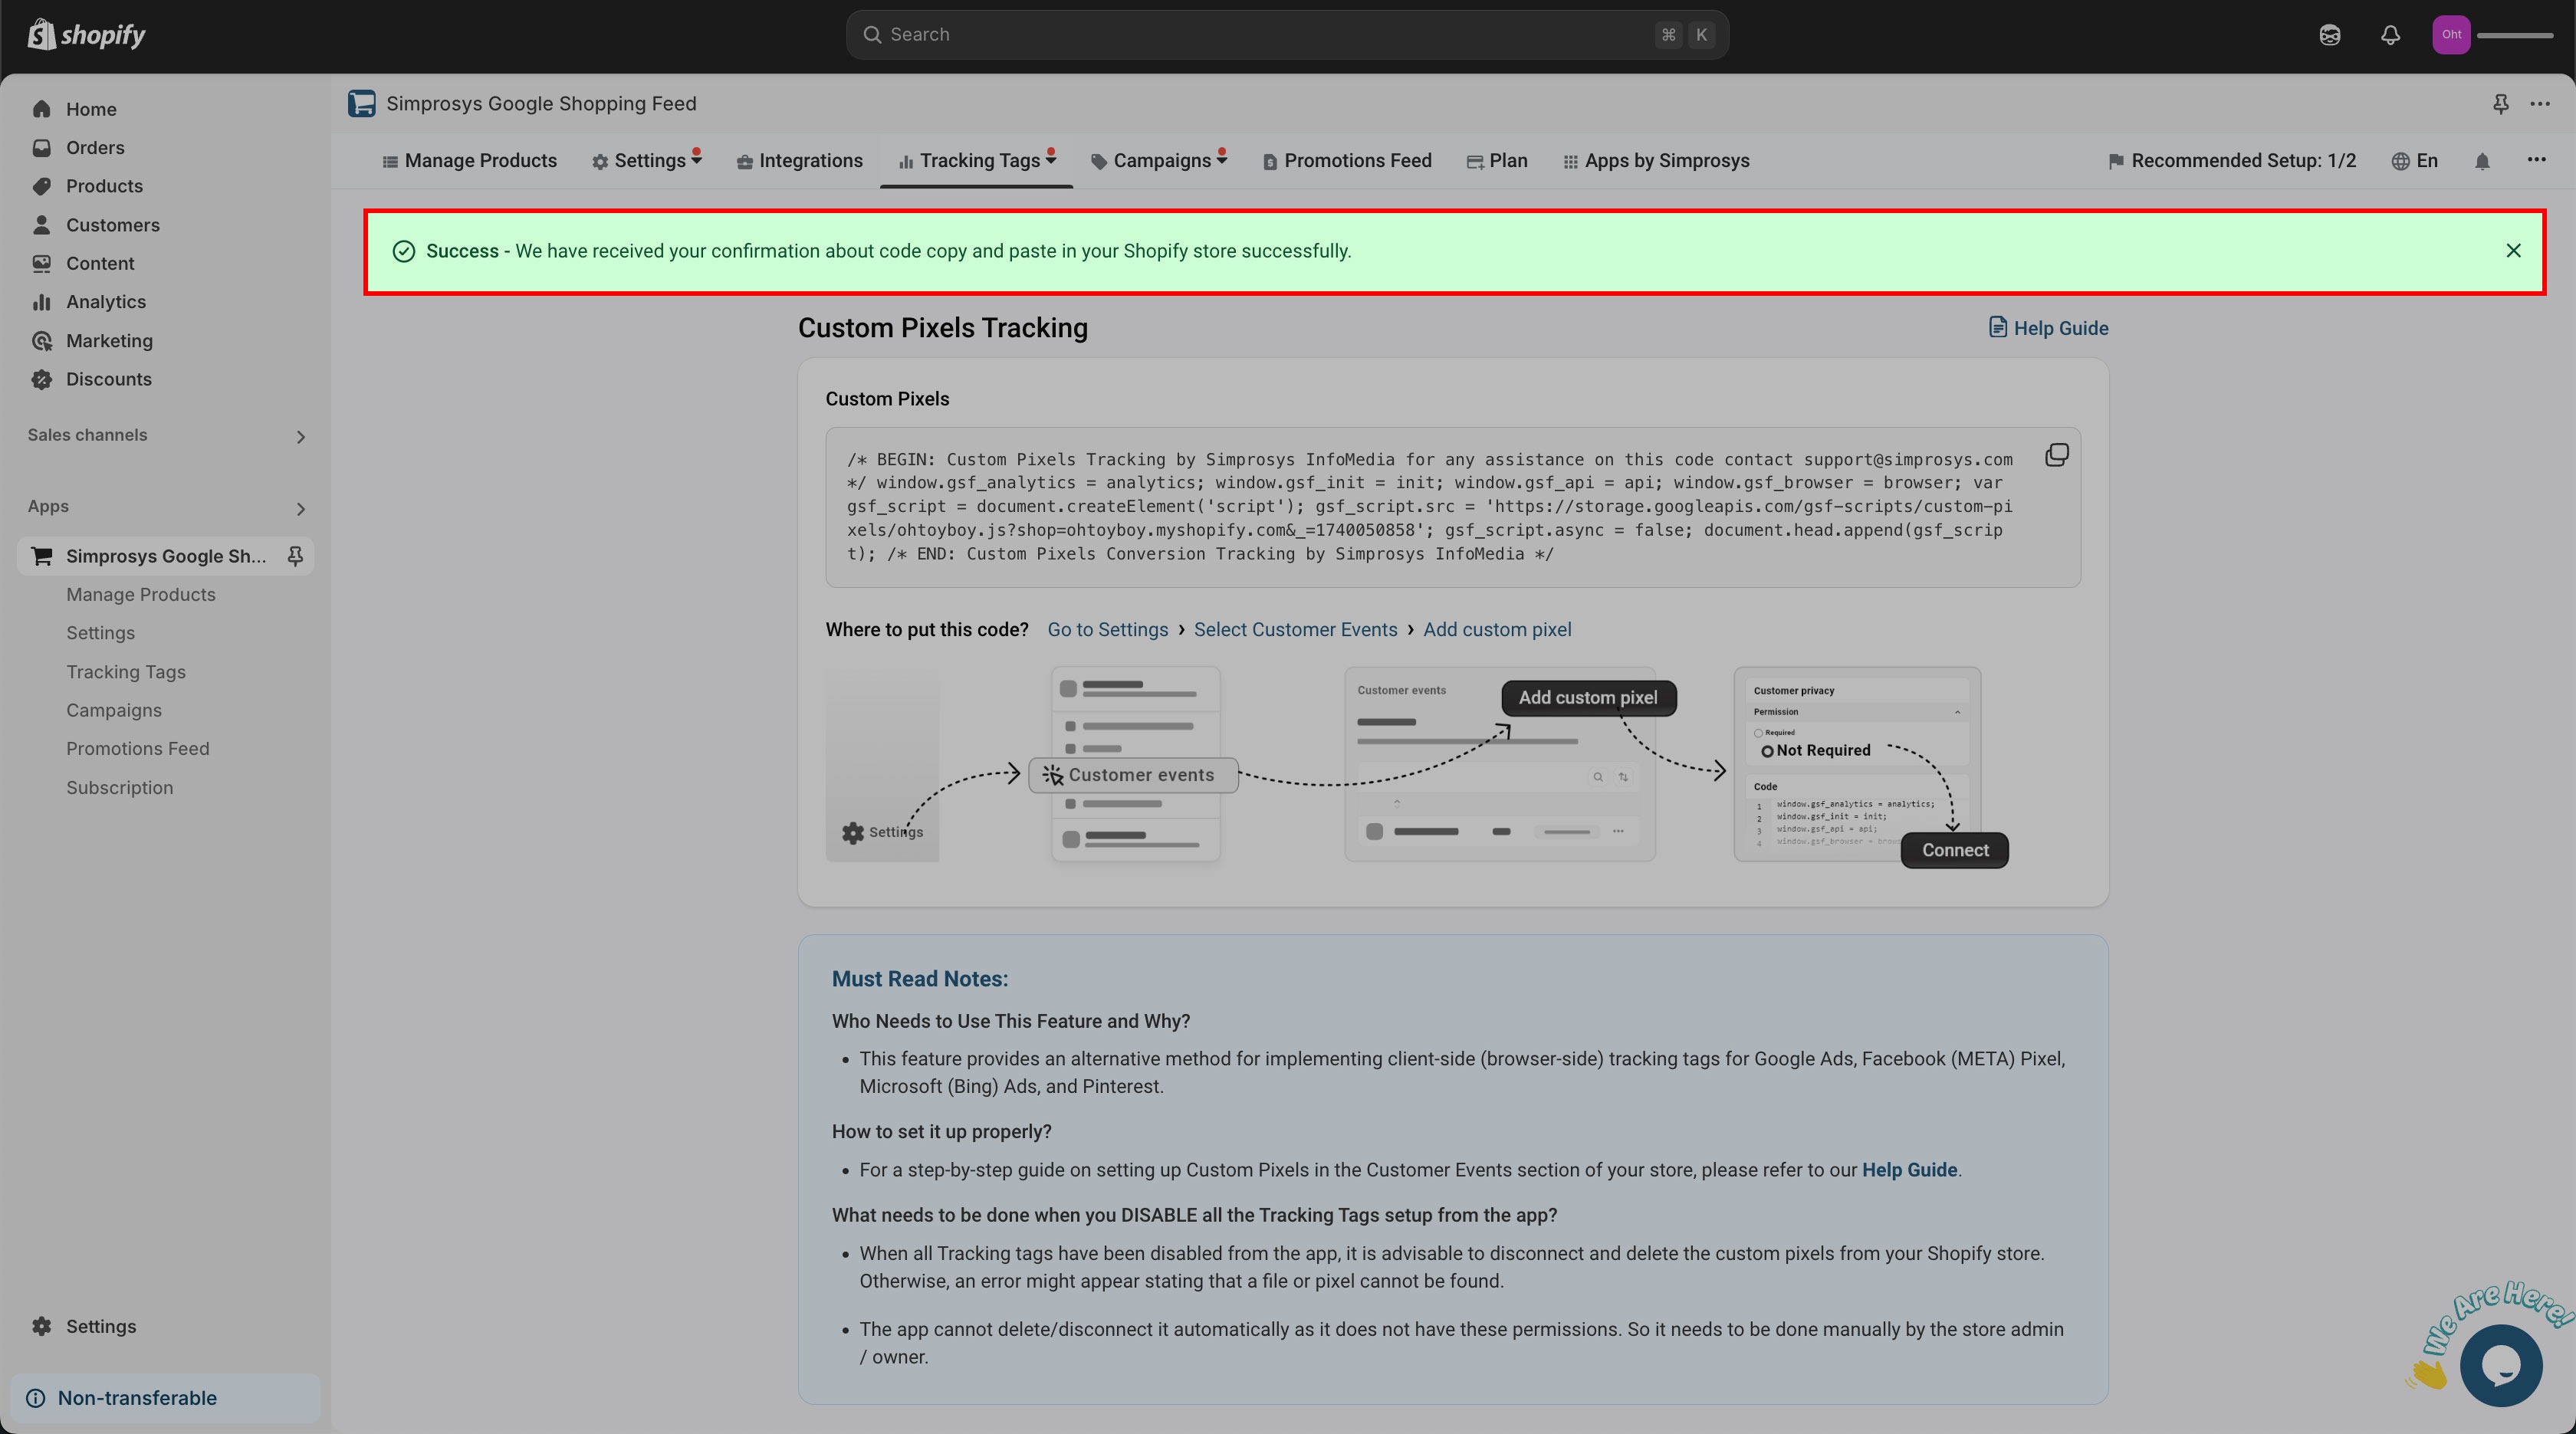
Step 3: Copy the code that will appear after you click on the Enable Custom Pixels option.
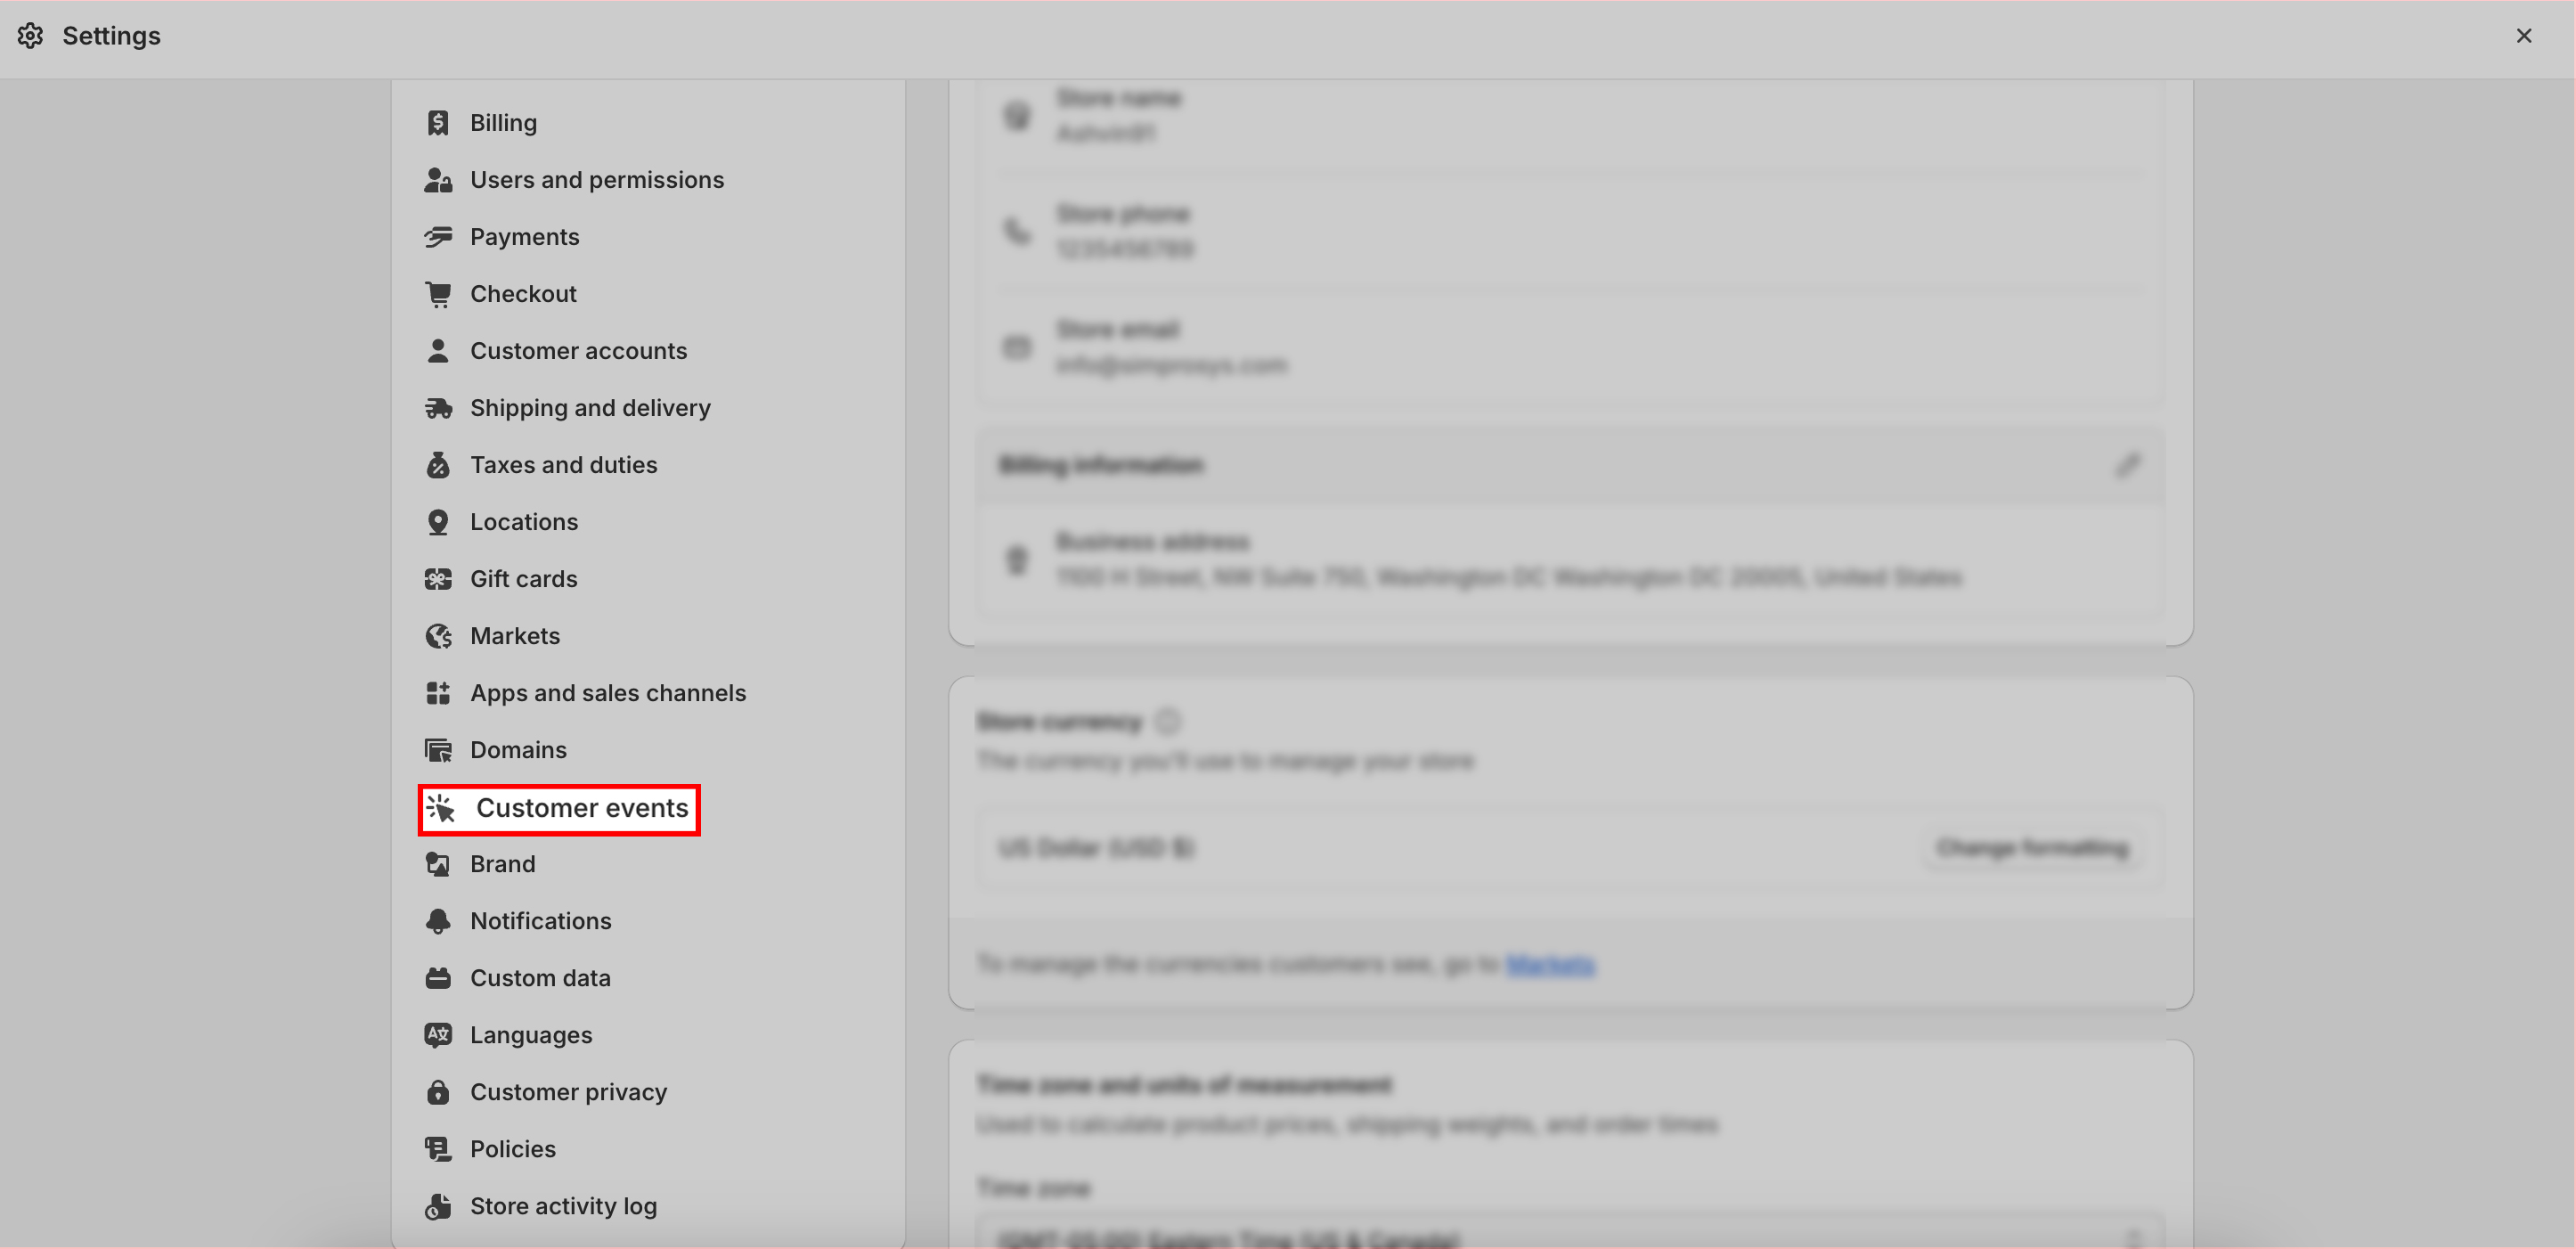
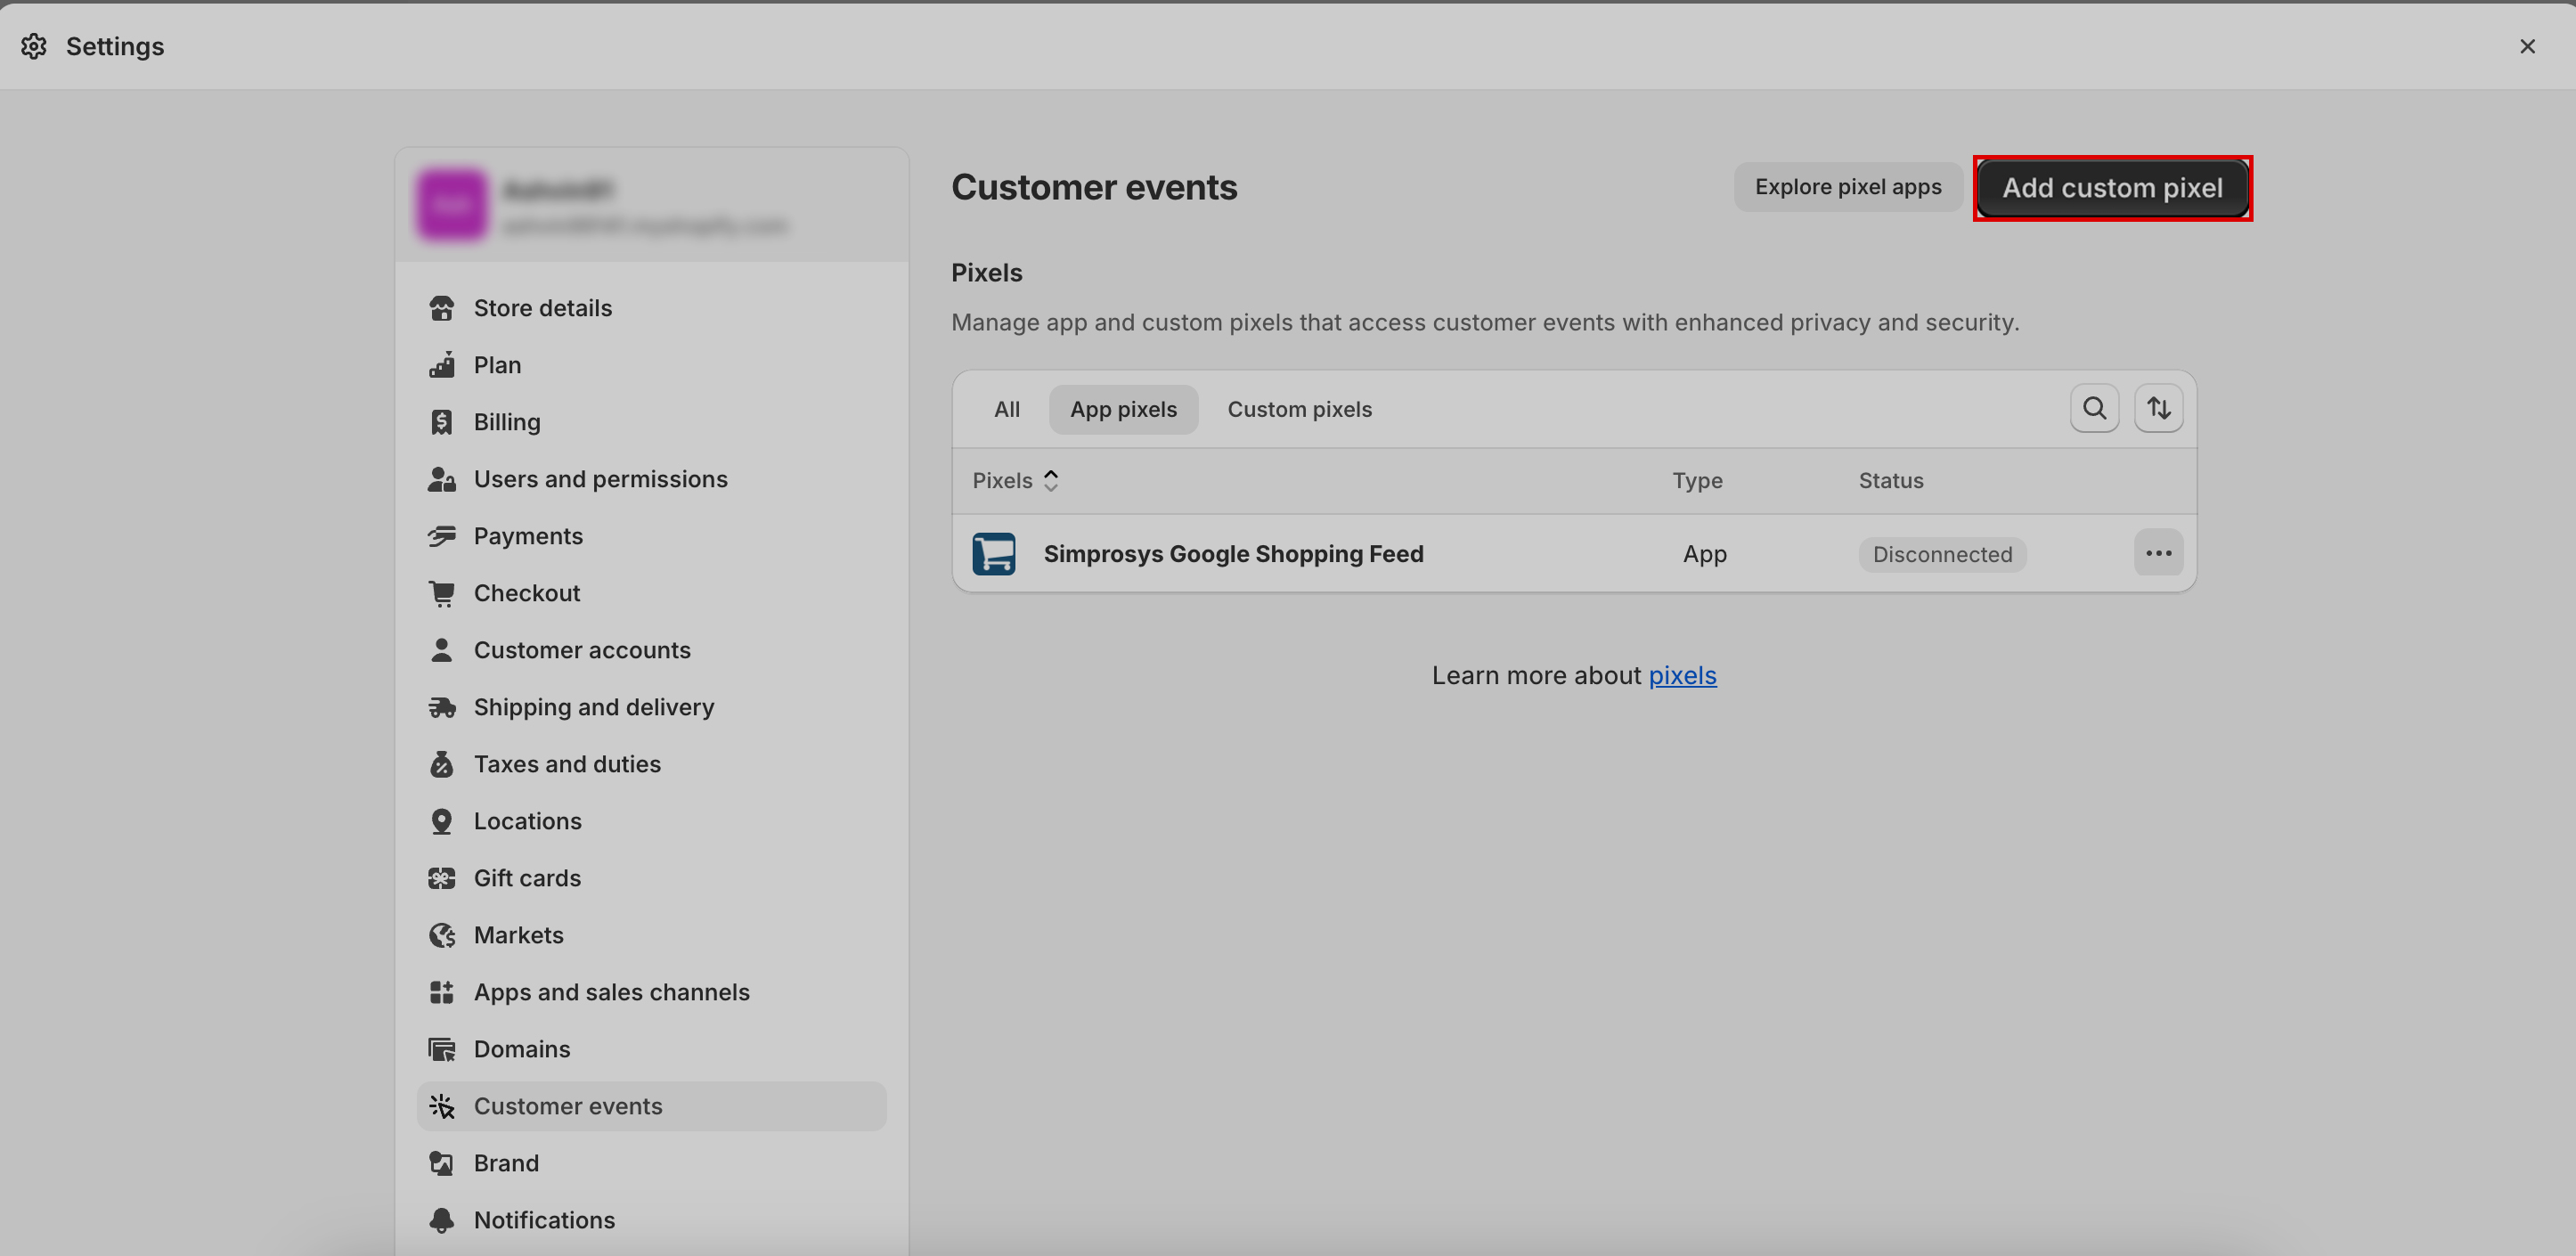
Step 4: Open the Customer Events settings in your Shopify admin panel
Step 5: On this page, click on the Add Custom Pixel option to paste the script that you have copied from our app.
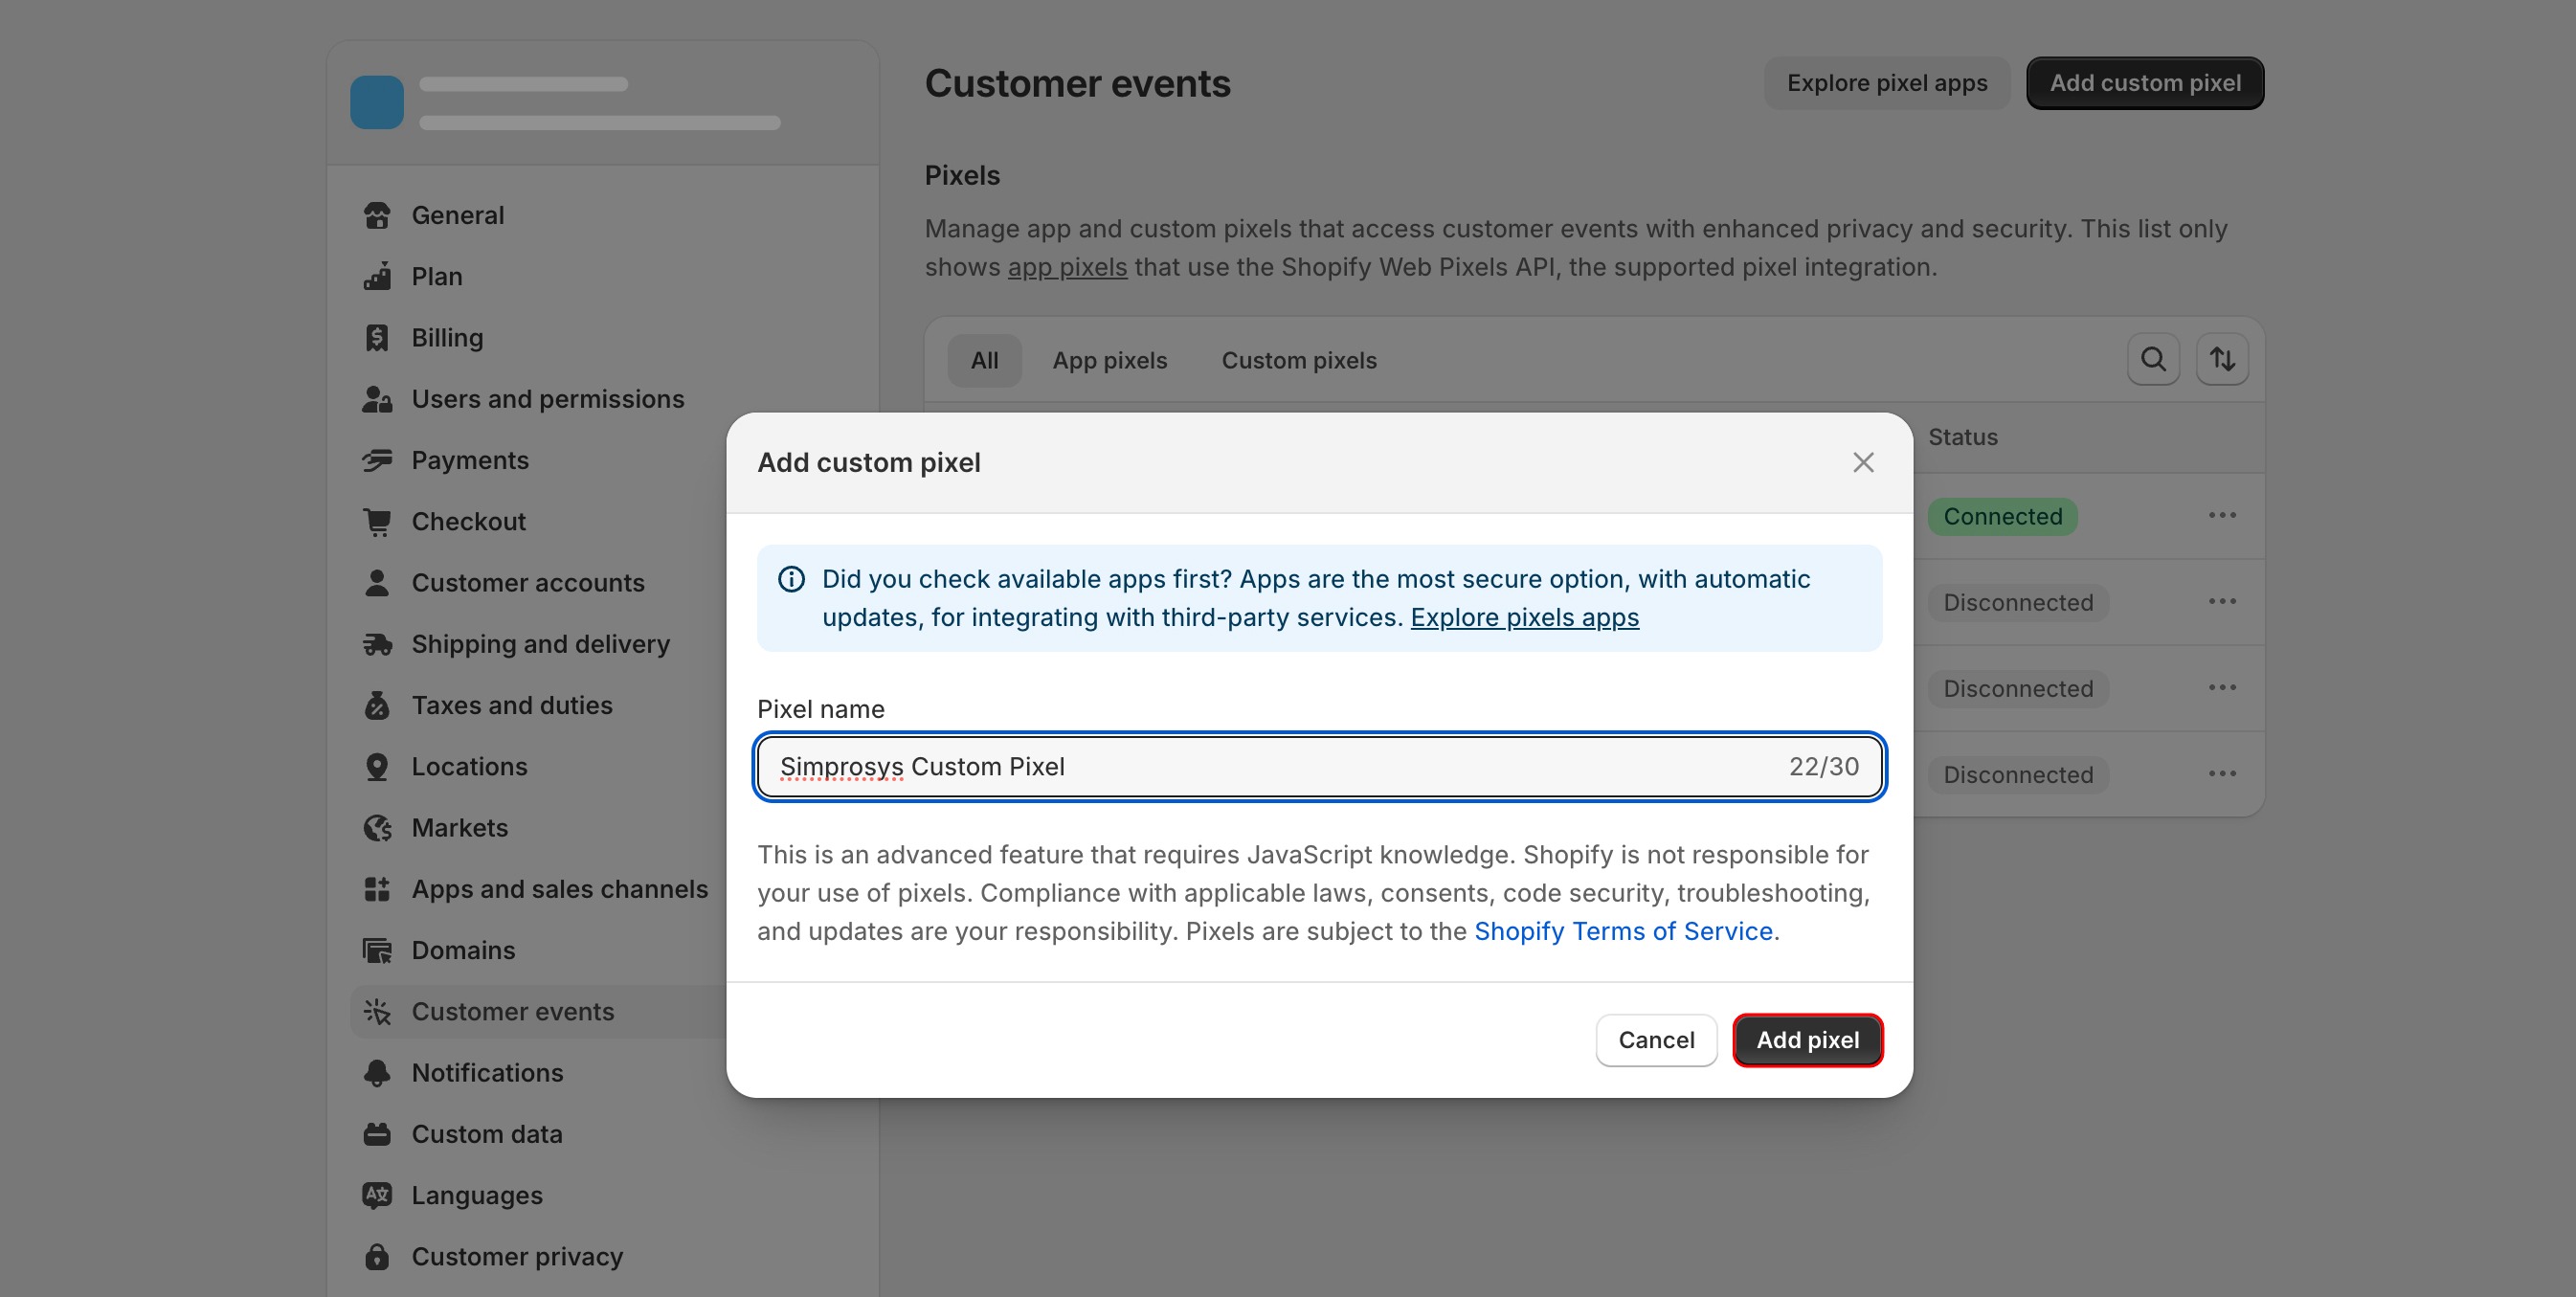
Step 6: Name the pixel as per your convenience for easy reference [Ex: Simprosys Custom Pixel] and click on Add Pixel.
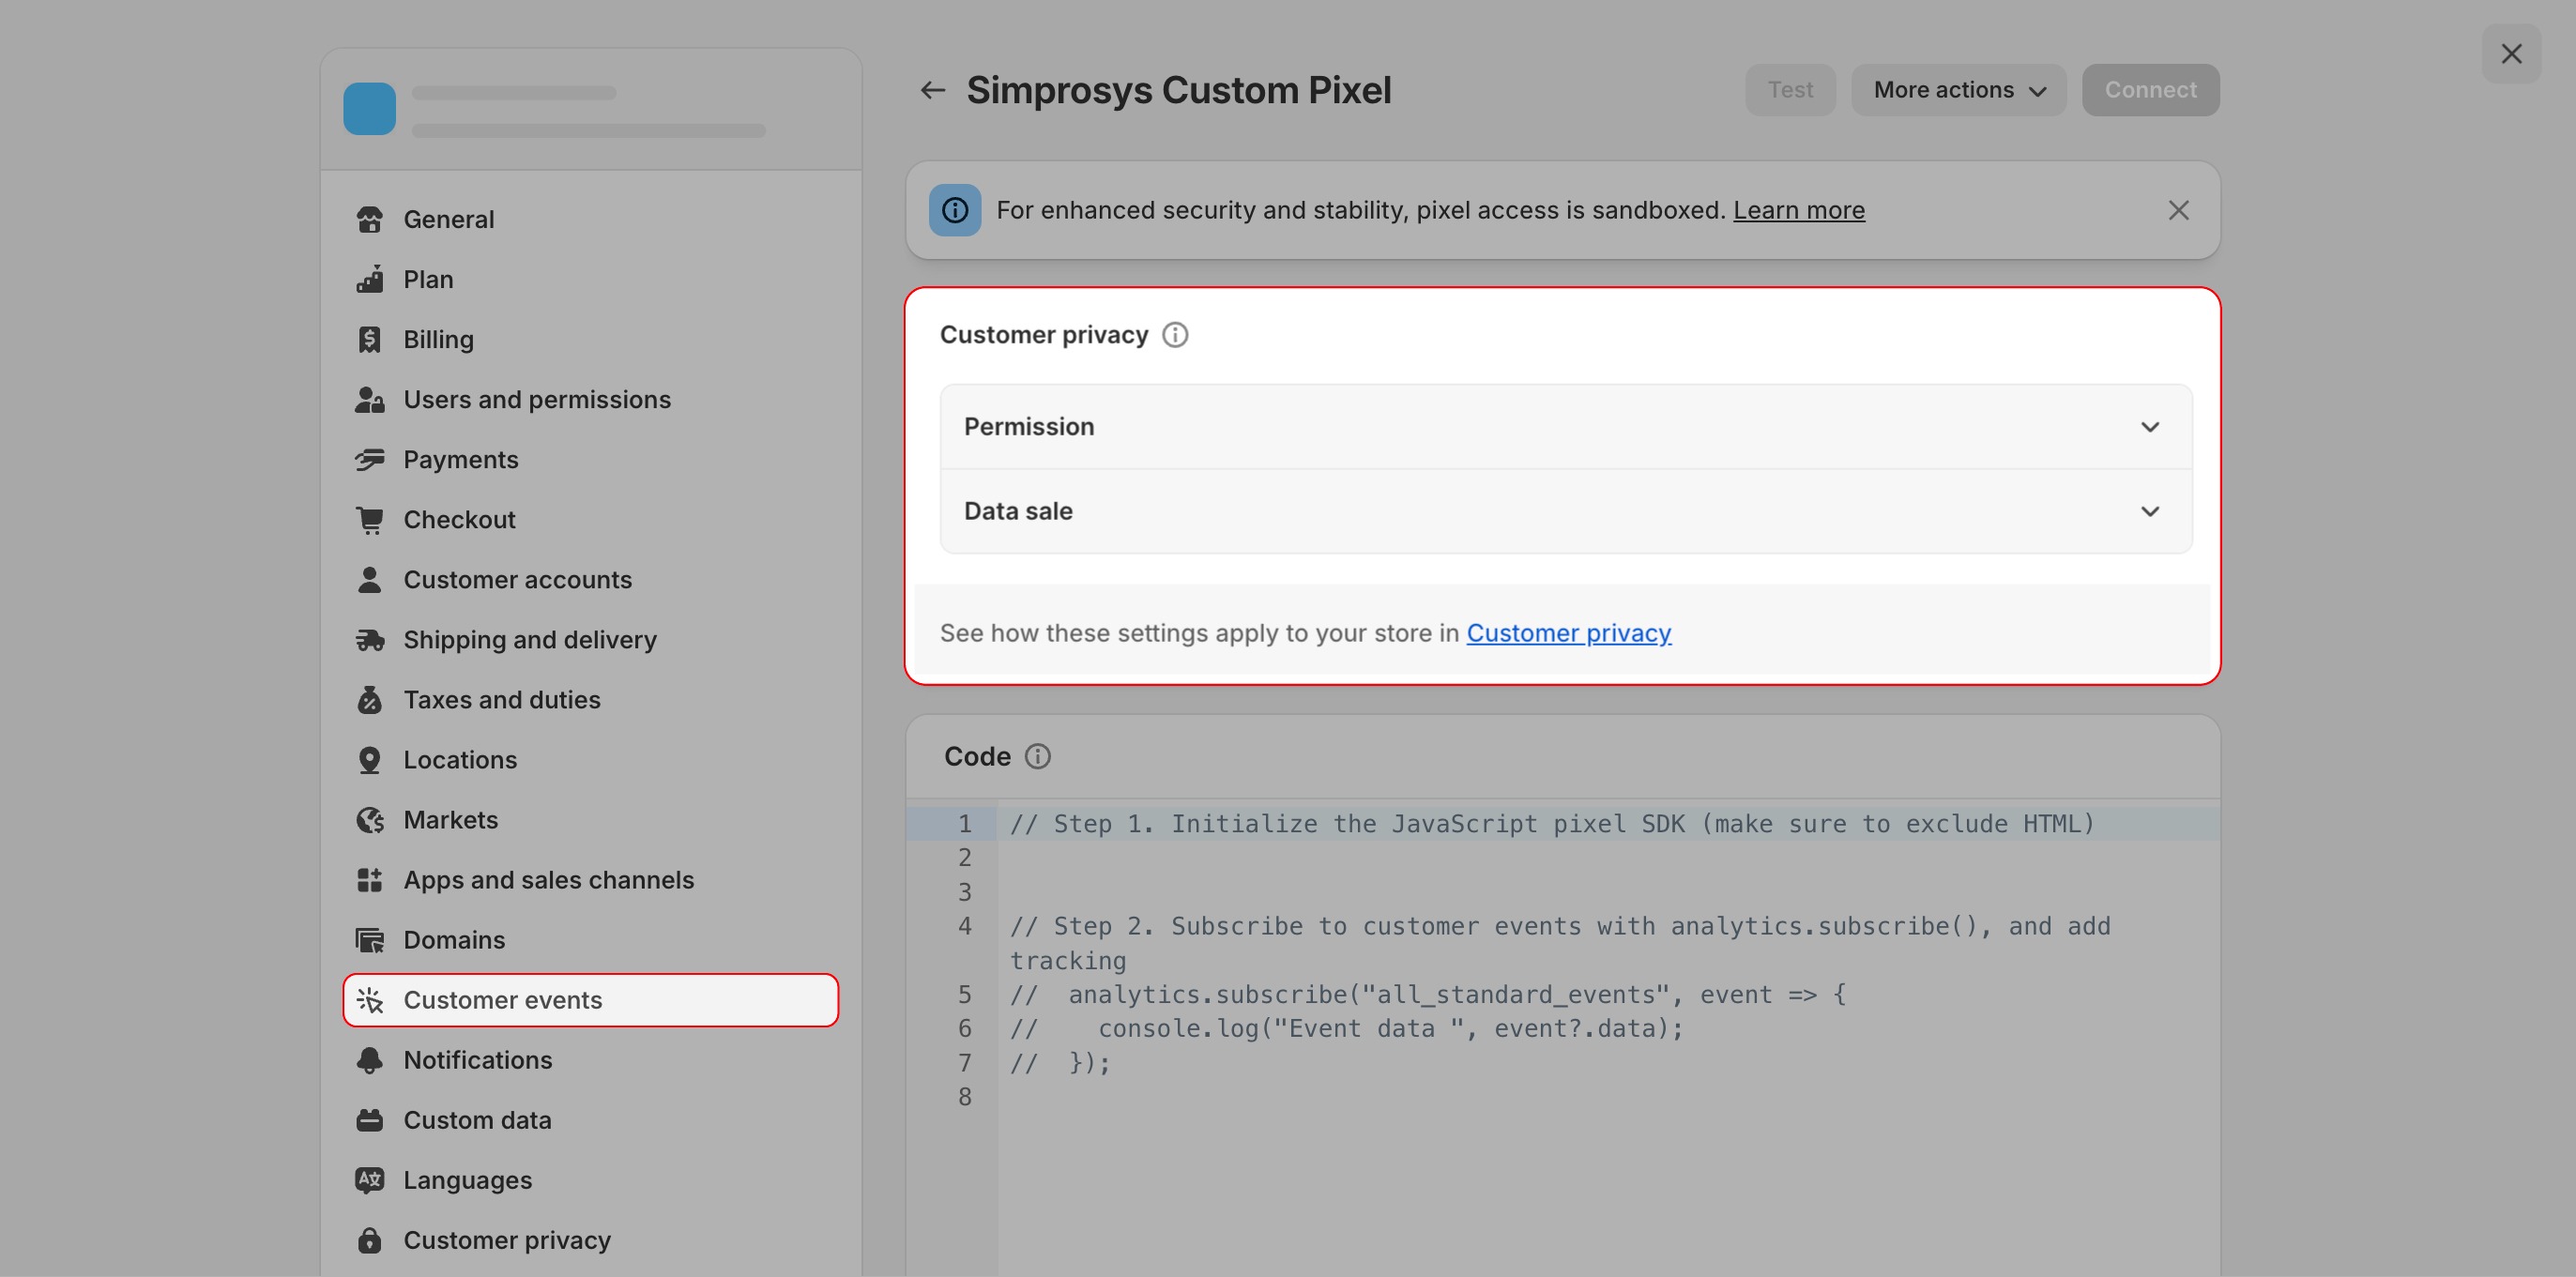
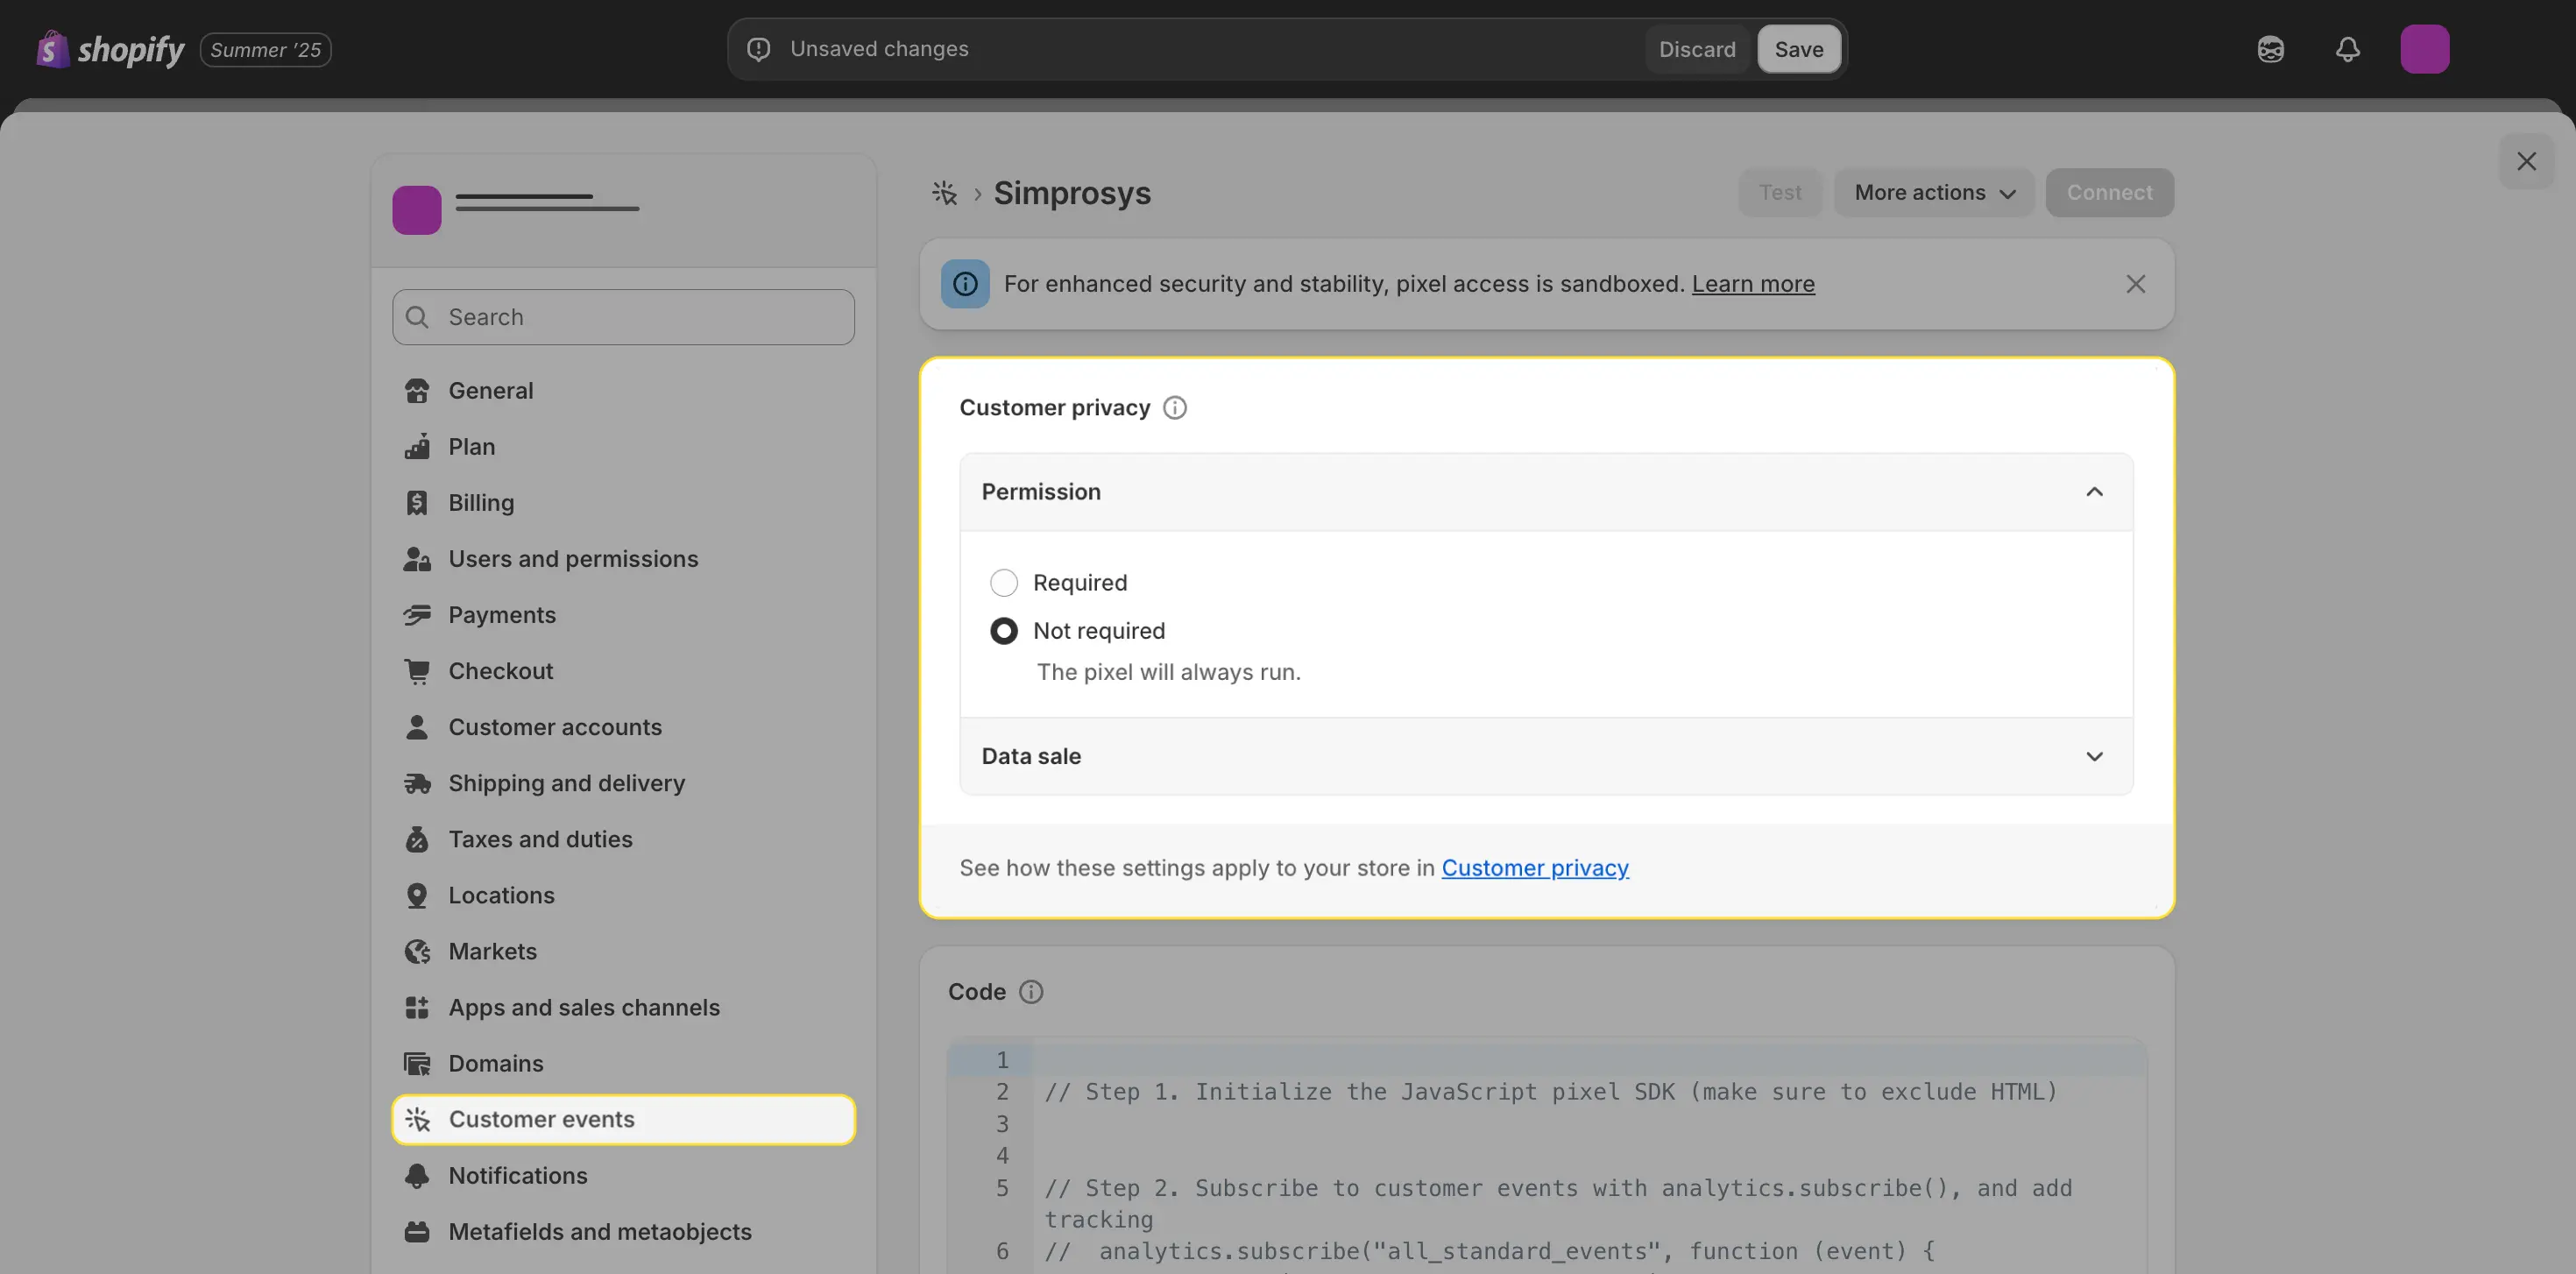
Now, before pasting the script, you will see the permission section with two options:
- Required
- Not Required
Merchants from regions/countries that are required to adhere to any customer privacy regulations like GDPR must select the not-required option. This will trigger the custom pixel tags in all cases irrespective of the consent given by the visitor on your online store.
Further, these merchants must then enable the Advanced Consent Mode for adjusting the behavior of Google Tags for collecting and tracking data based on user consent states.
It can either be enabled from our app or using any Consent Management Platform (CMP). That way they can also adhere to application regulations while tracking and sending data to Google.
Note: By default, the consent state will be passed as “Denied” until the visitor interacts with the cookie consent banner.
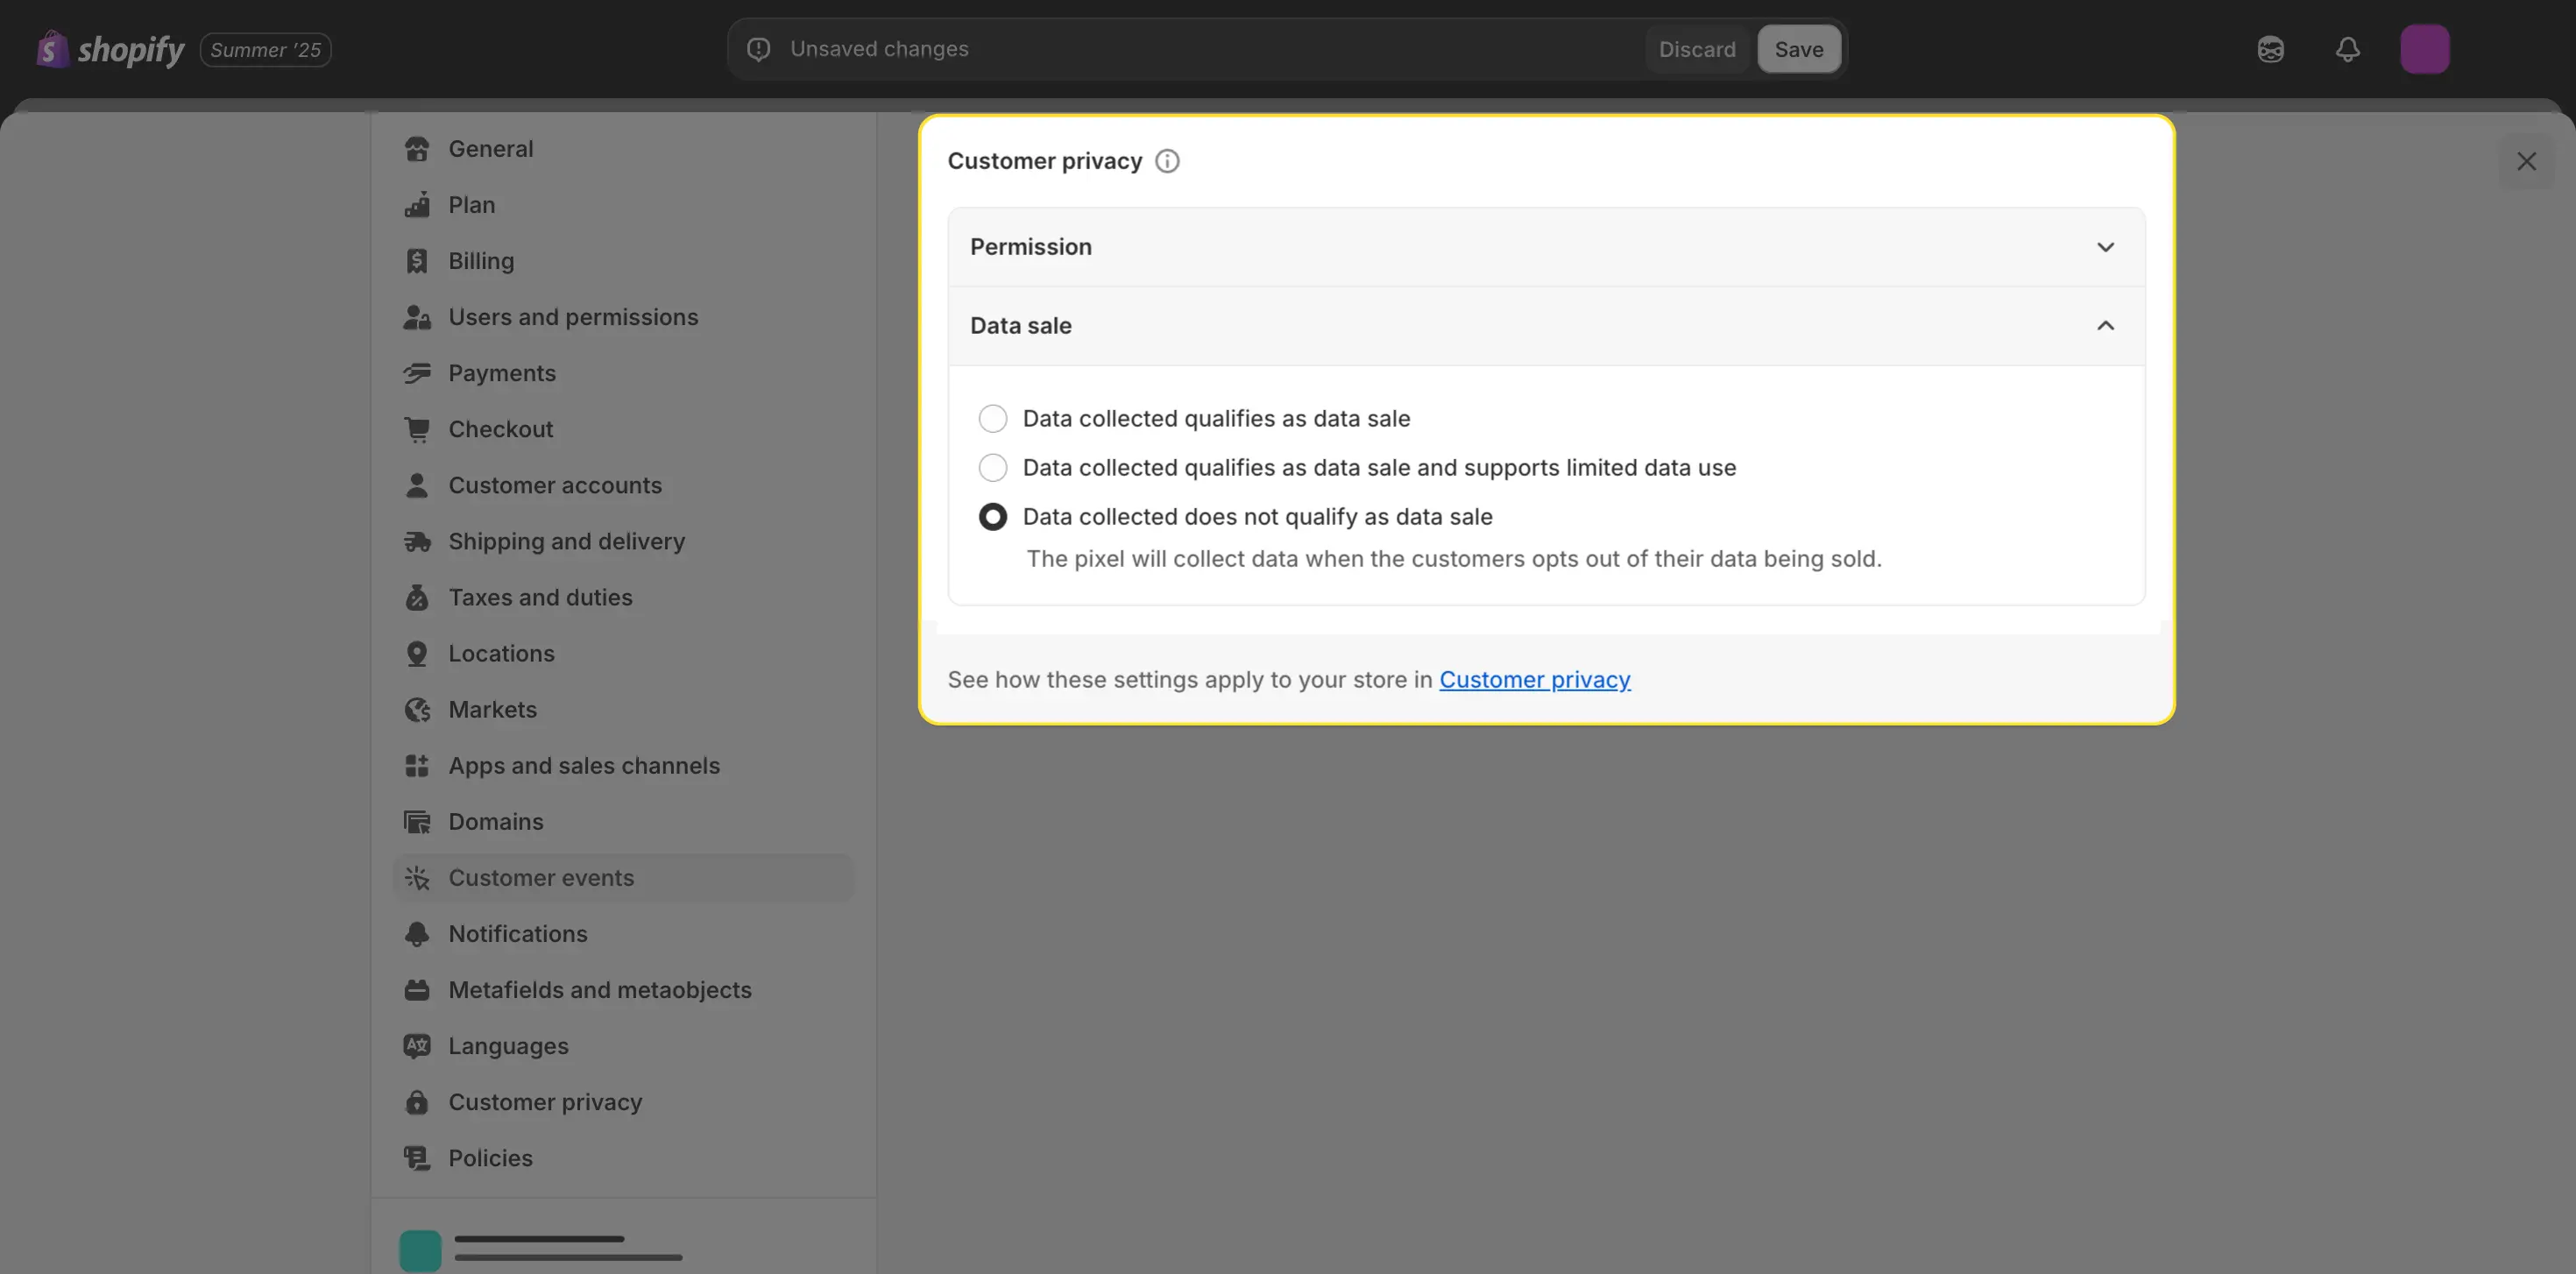
In the data sale section, select the third option, “Data collected does not qualify as data sale”.
It allows the pixel to keep collecting data even when a user opts out of having their data sold, as long as the data use doesn’t legally qualify as a “sale” (e.g., it’s for analytics, not ad targeting). It helps maintain tracking while staying compliant with privacy laws like CCPA.
As a result, the tracking scripts will still run even when a customer opts out of data sale.
Please note: The merchants who are required to abide by the customer privacy regulations, like GDPR can select the “Required” option. In this case, Shopify will not allow custom pixel scripts to fire until consent is granted. This will trigger the tags only when consent is granted by the visitor on your online store for the appropriate parameters.
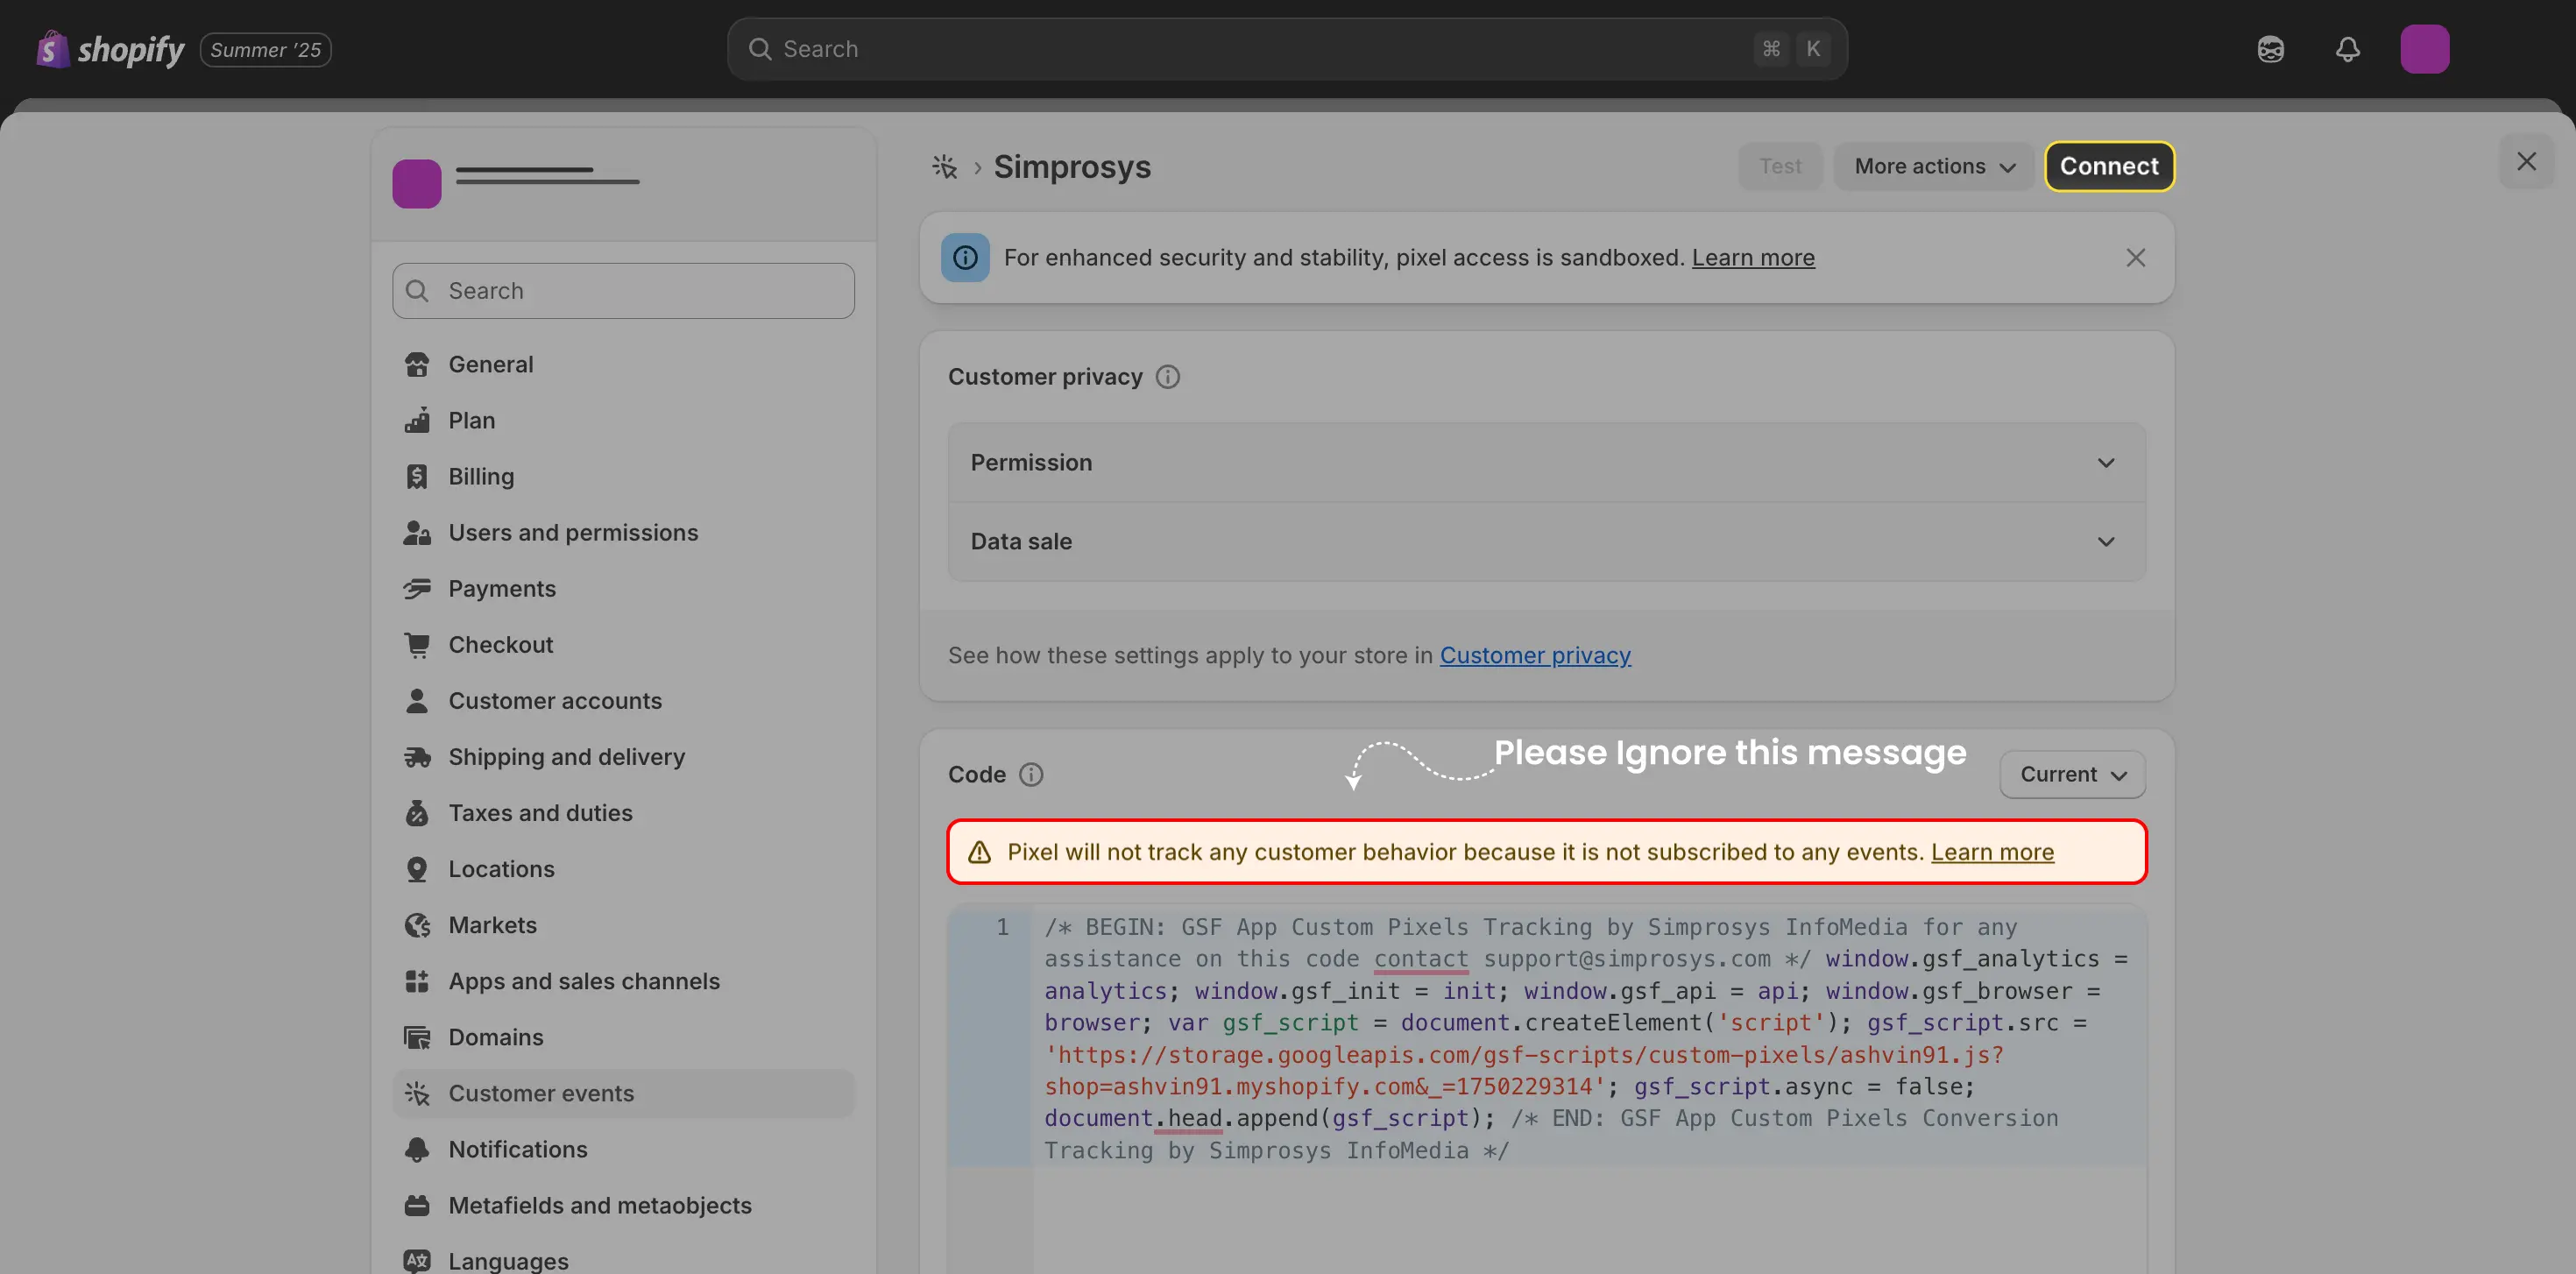
Step 7: Now, delete the existing sample script and paste the script copied from the app.
Step 8: Click on Save and then on Connect.

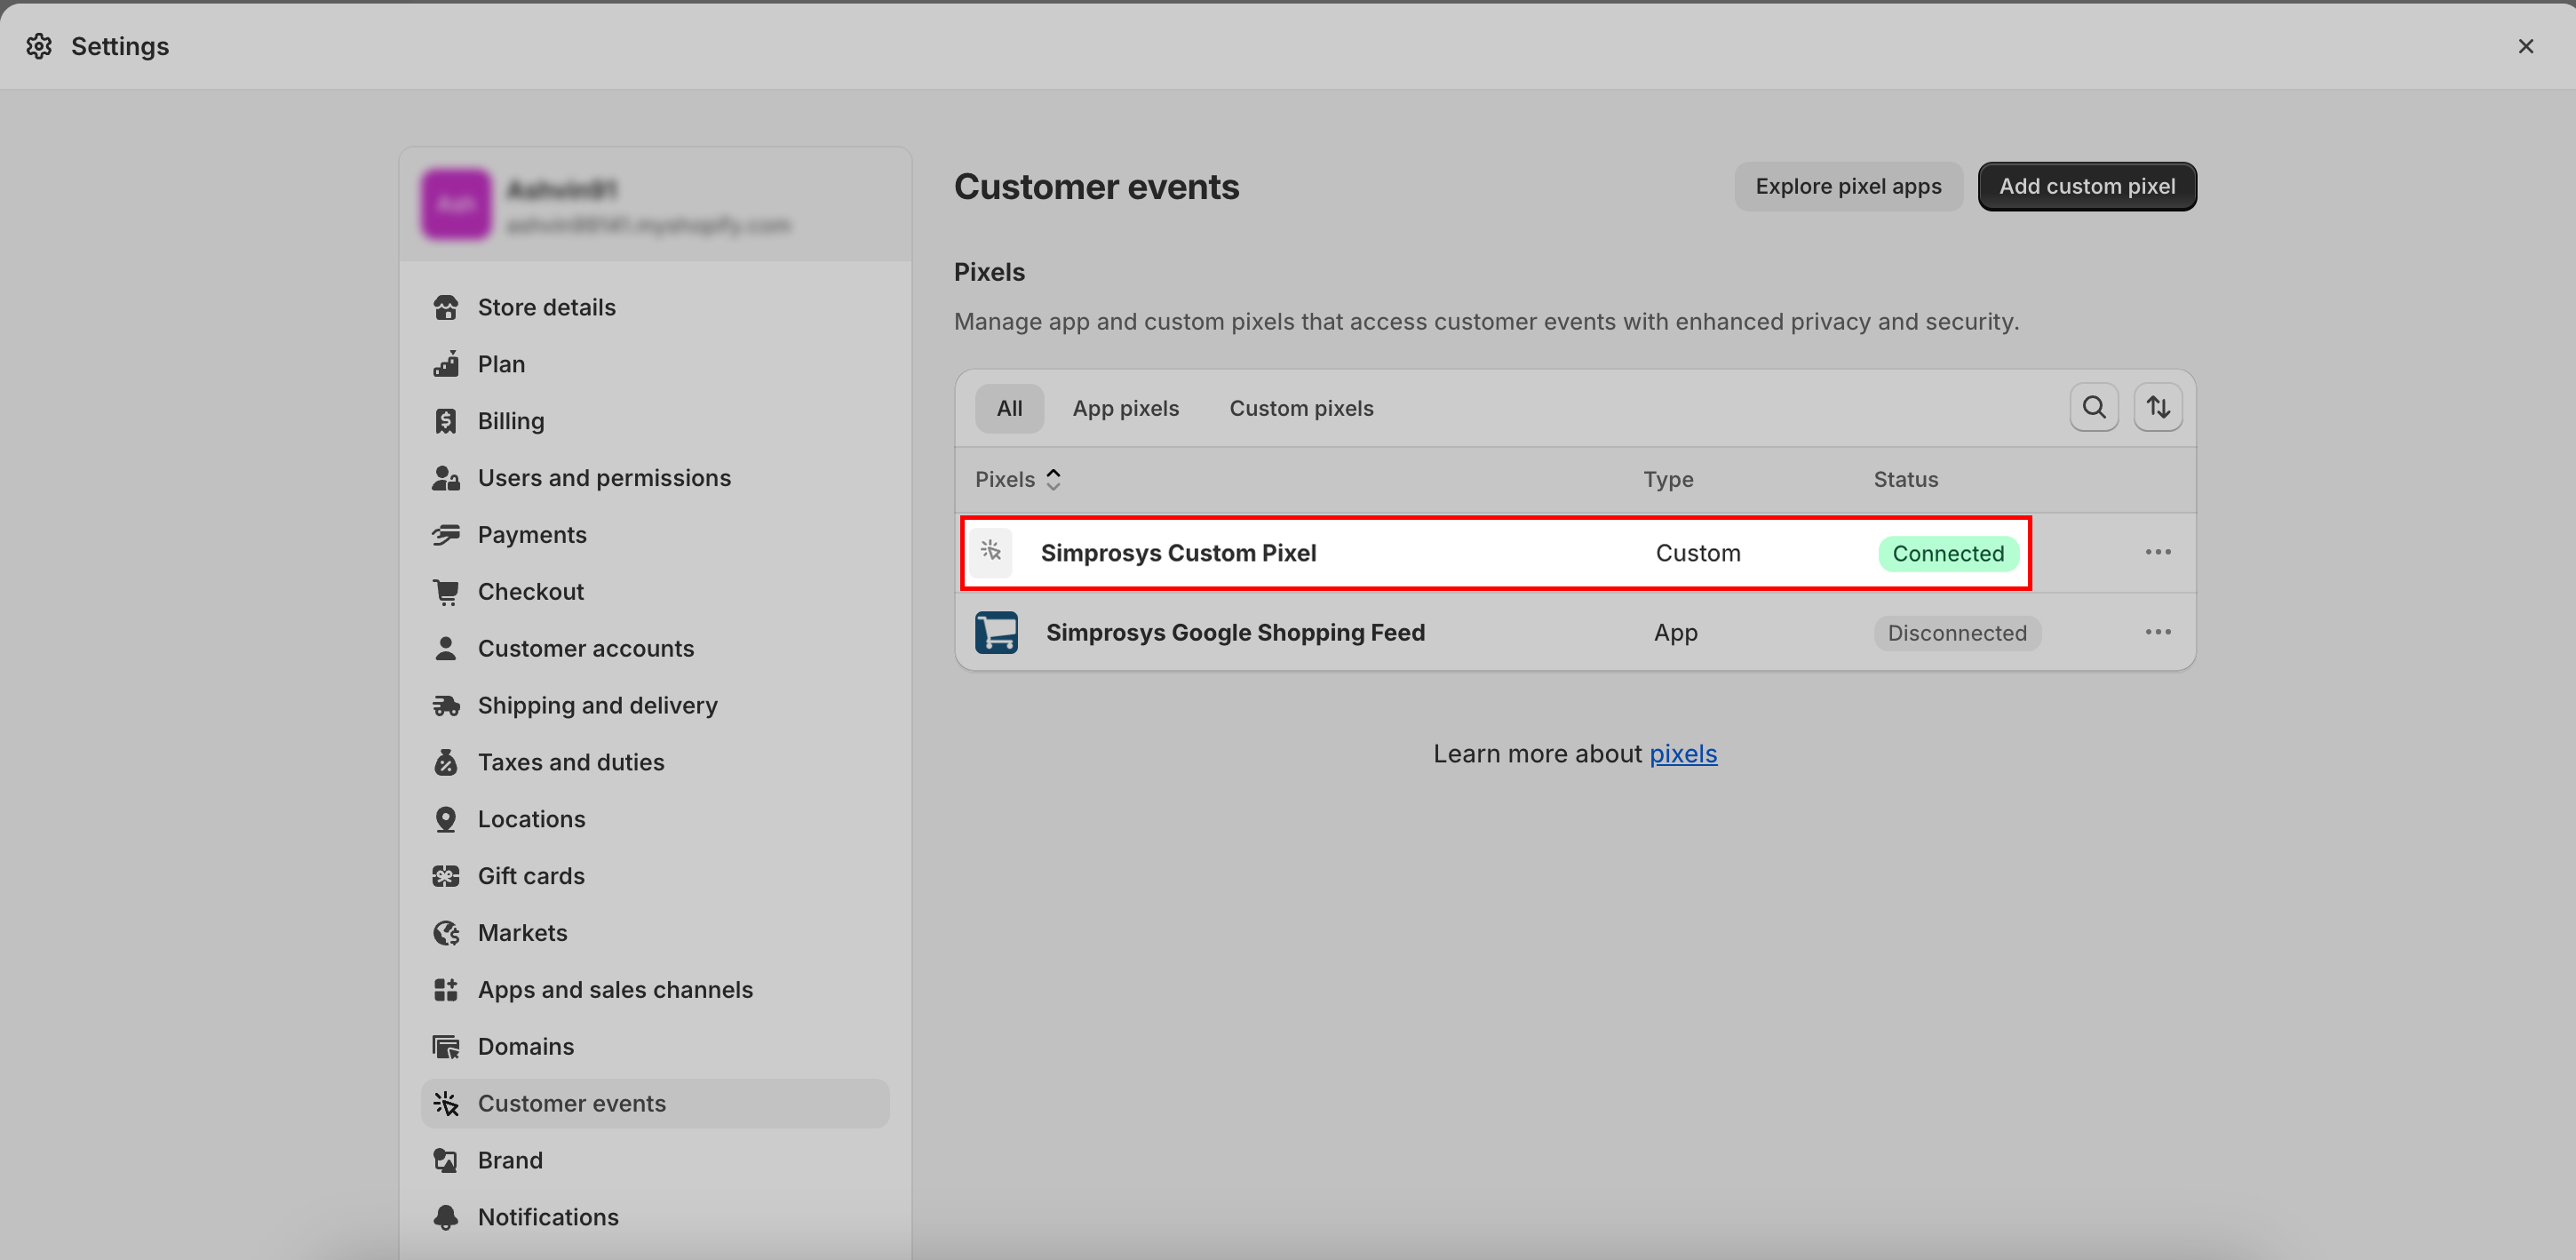
Step 9: You will see that the Pixel added by the Simprosys Google Shopping Feed app is now connected.
Step 10: Once you have updated the settings in your Shopify store, you need to click on the checkbox shown below and click on Setup Custom Pixels
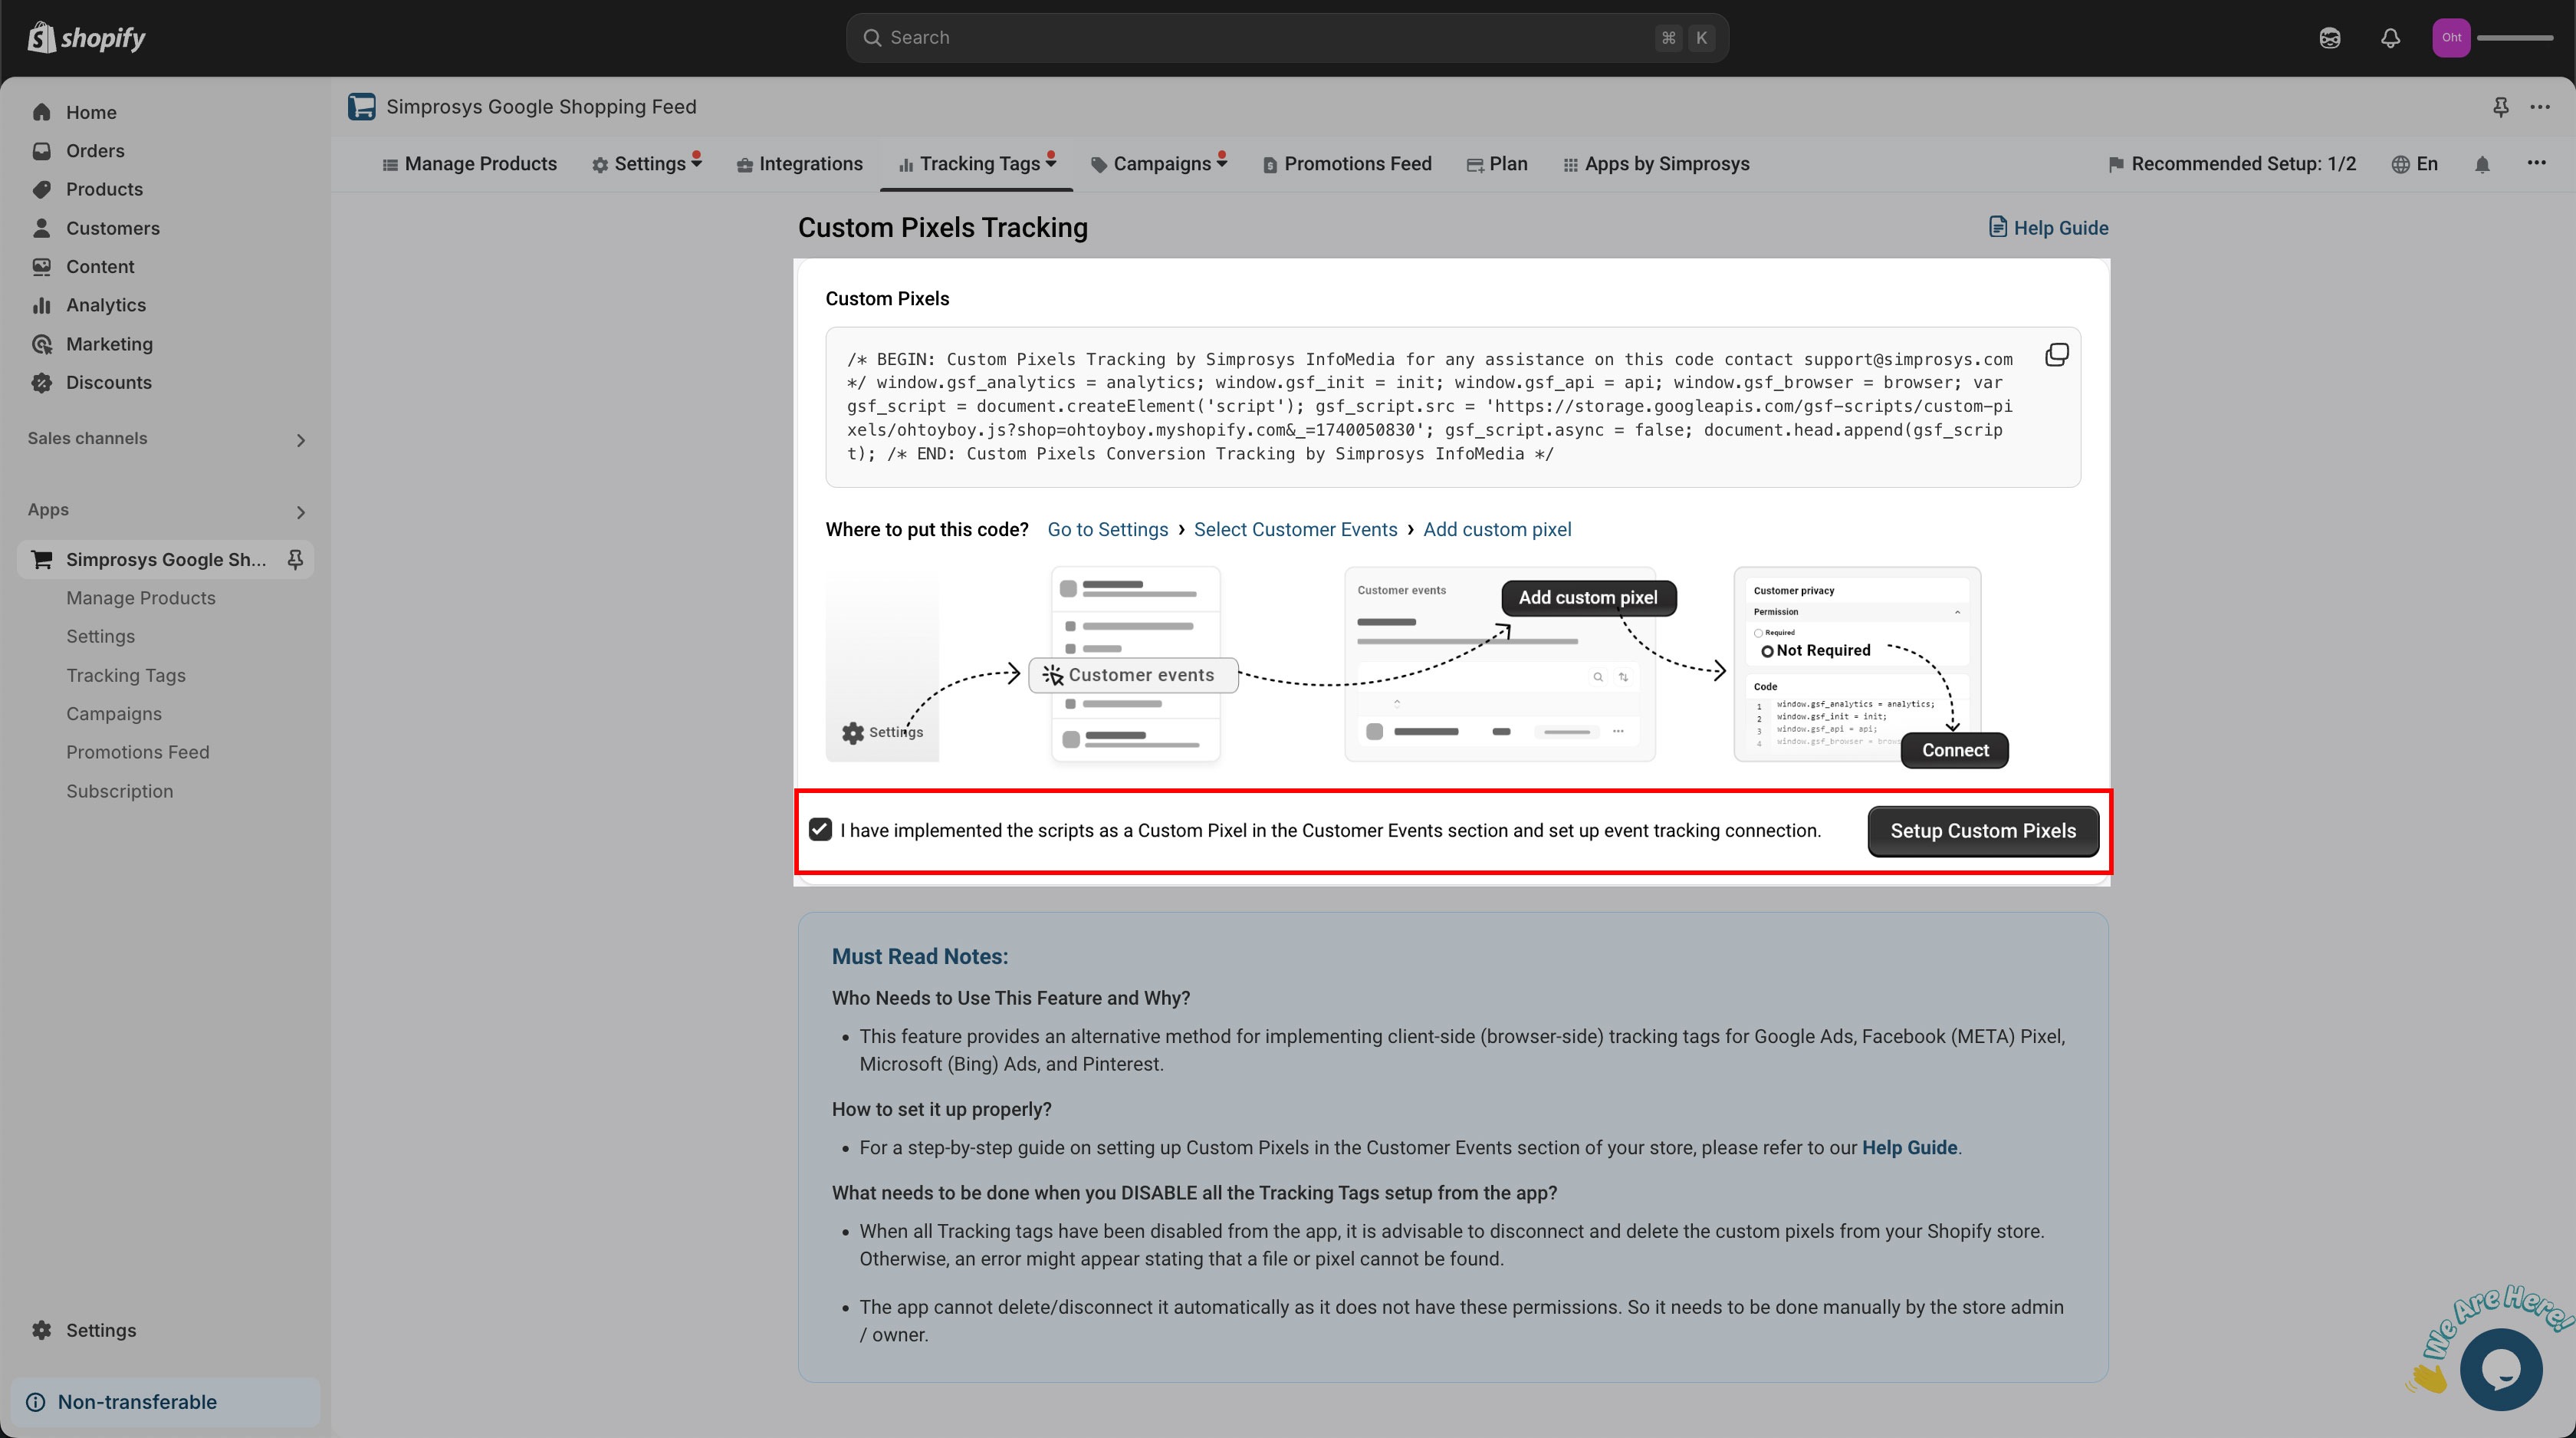
It is necessary to click on the checkbox, or else we’ll not be able to confirm if your tracking tags are working correctly or not.
After you have implemented the custom pixel, the purchase conversion actions received from the Ads will start being tracked in your Google Ads, Microsoft Ads, Meta Ads, or Pinterest Ads.
Kindly note that Google Analytics 4 tracking can be directly enabled from our app. It will connect automatically and start tracking through custom pixels.
Also, if you have enabled the consent mode from any third-party app, please ensure that the default consent settings is selected to no. You may refer to the screenshots below.
For any further assistance required, feel free to contact us at support@simprosys.com