

Simprosys Customer Match Lists
Processes of Simprosys Customer Match Lists for Shopline
Pre-Installation Simprosys Customer Match Lists for Shopline
Step by Step Integration Process for Simprosys Customer Match Lists App For Shopline
Sep 08, 2025
This guide outlines the steps to integrate the Customer Match List App with your Shopline Store and the Eligibility Criteria for the Customer Match program of your Google Ads account.
Let’s get started with the steps:
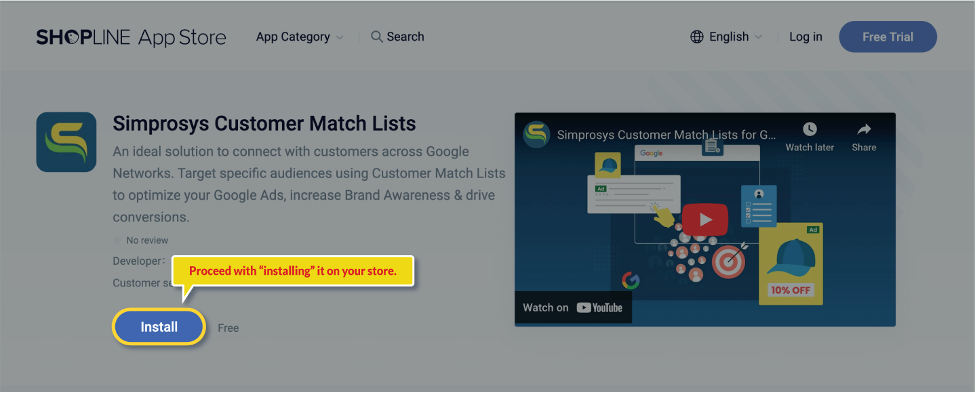
Visit the Shopline app store, and search for the “Simprosys Customer Match Lists” app in the search bar.

Click on the app> and proceed with “Installing” it on your Shopline store.
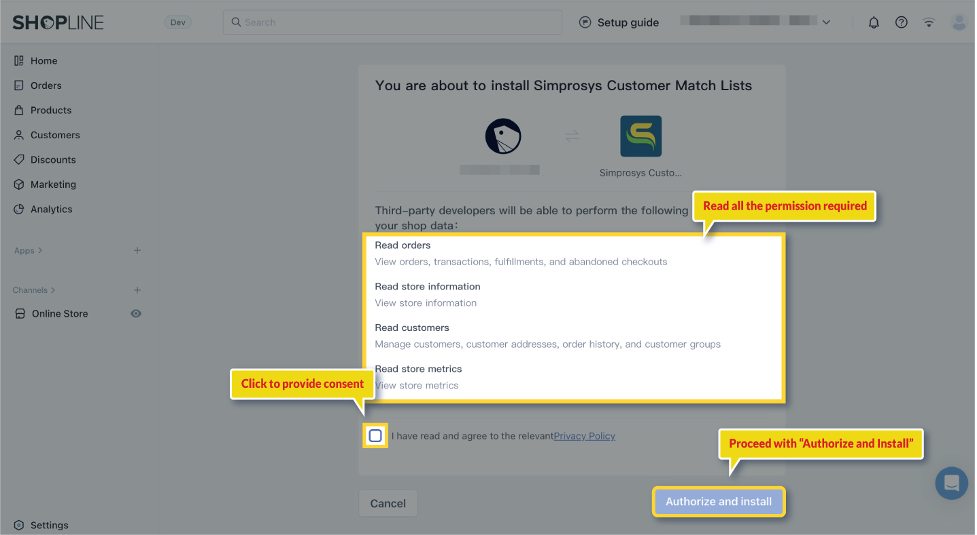
This step will redirect you to the permissions page in the Shopline Store. Please read the details carefully and check the consent box. Then, click on the Authorize and Install button to install the app in your store.
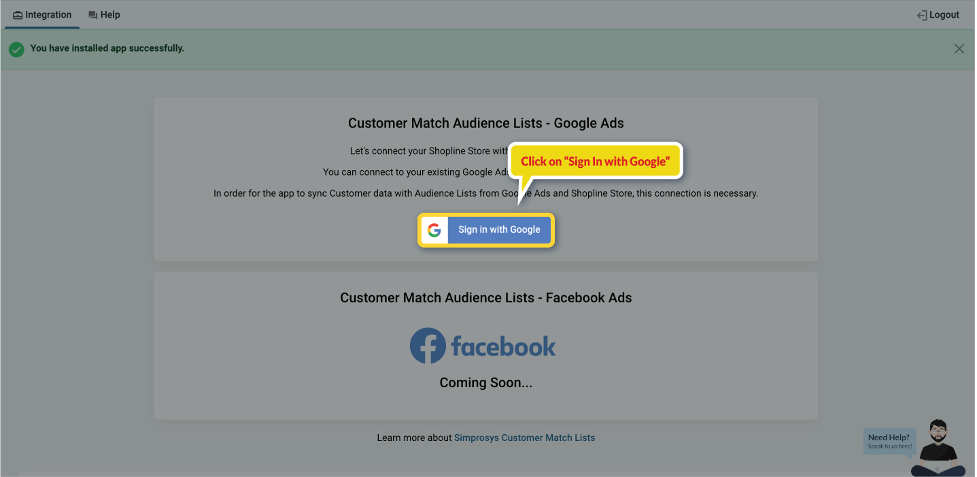
Click on “Sign In with Google”.
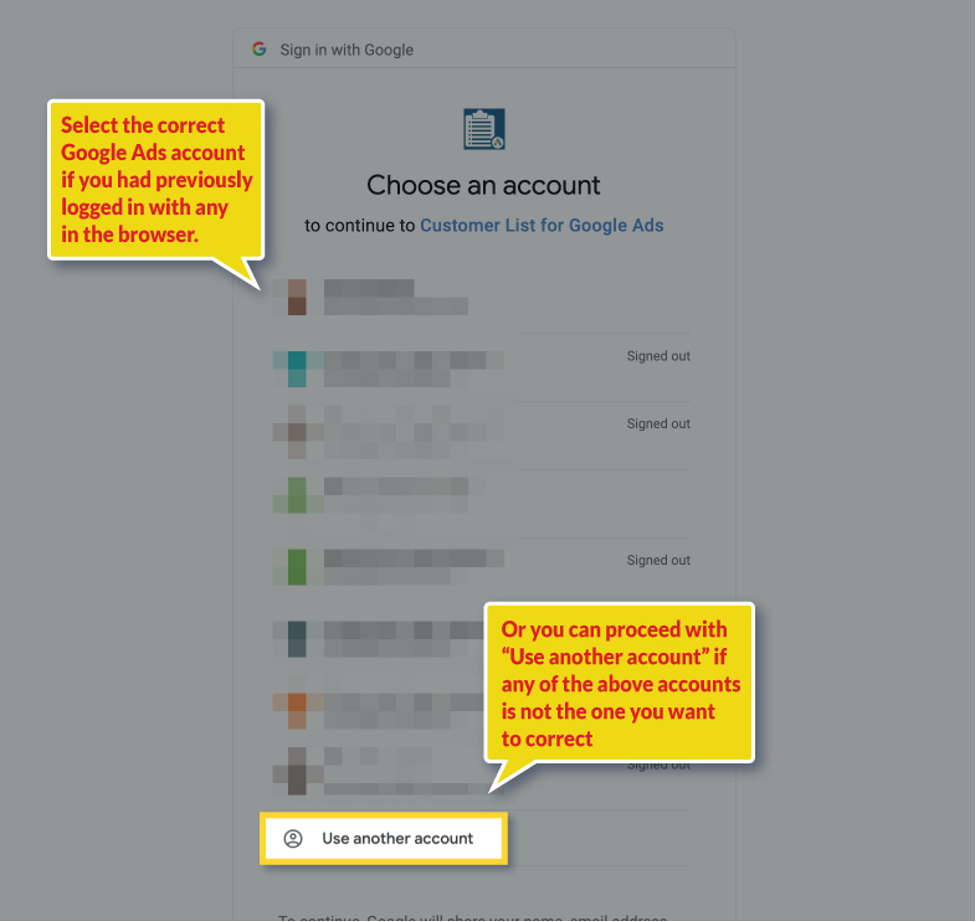
Select the correct Google Ads Account if you have previously logged in with any. If you never logged in with Google Ads account in the browser then kindly add the correct login credentials.
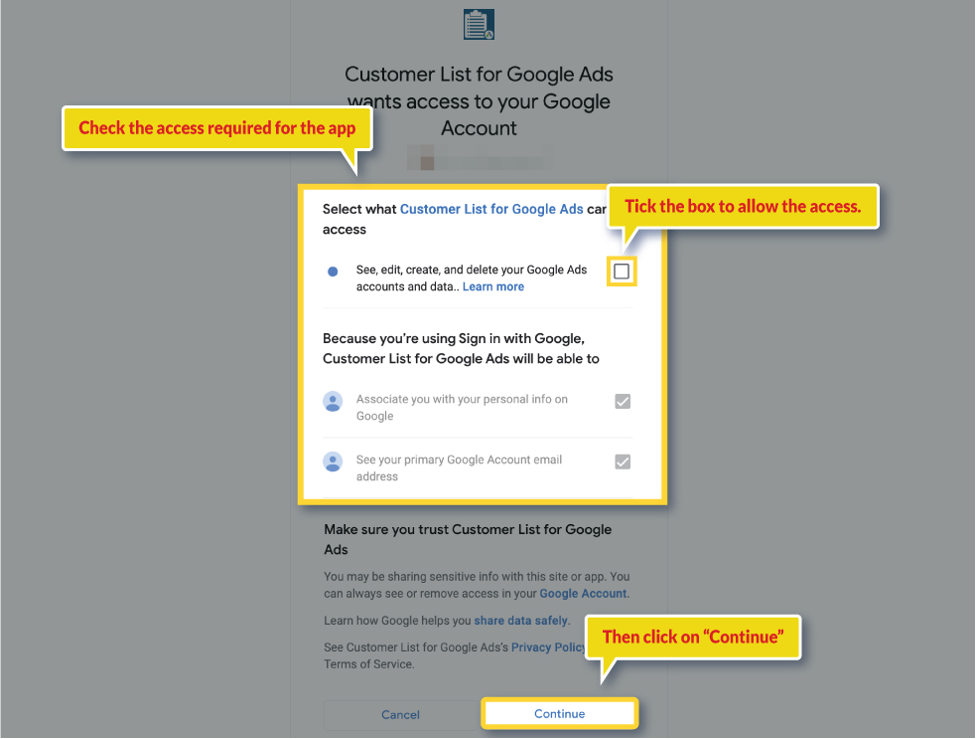
Check the access required for the app, allow and click on “Continue”.
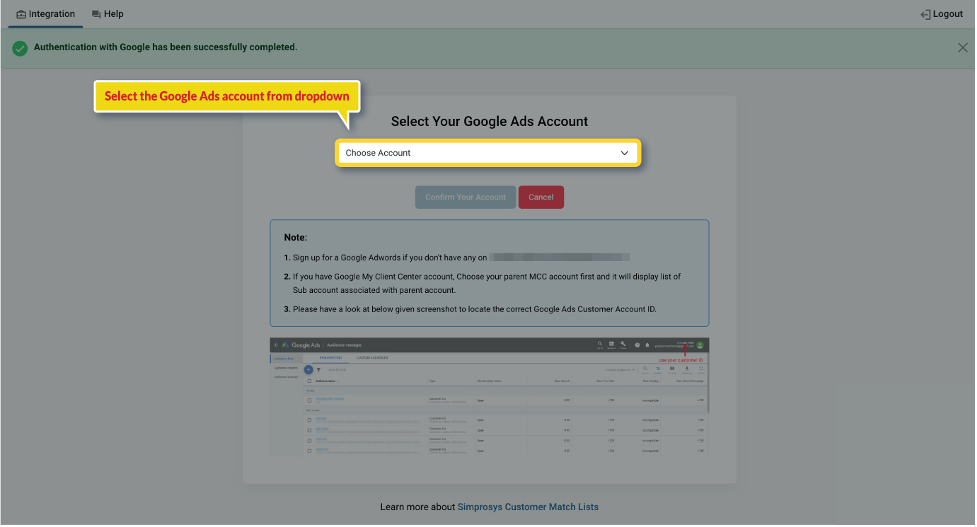
Proceeding further, the next page will ask to select the Google Ads account. Please make sure you are choosing the correct account in case if you have multiple Google Ads account access to the same email.
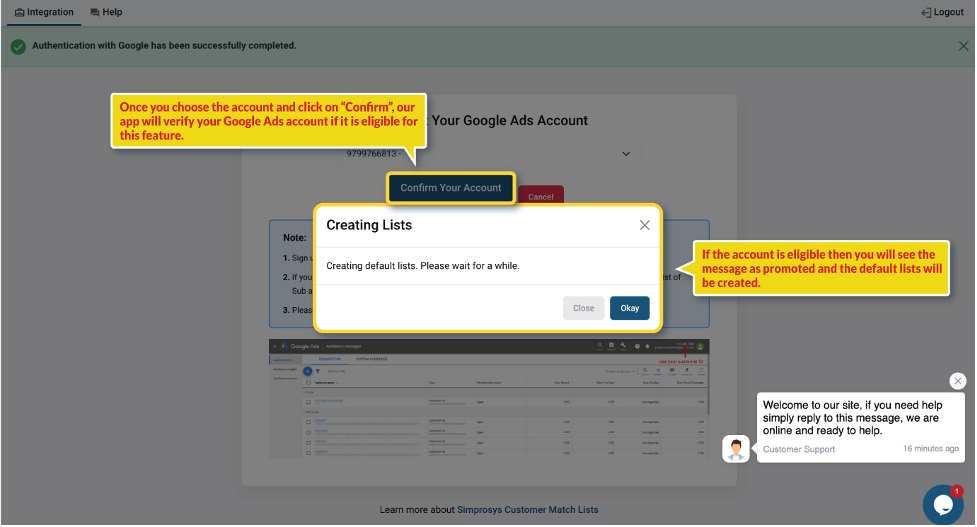
After making the selection, our app will verify if your Google Ads account is eligible for the customer list audience.
Please Note: Customer List or Customer Match is not available for all advertisers.
If the account is ineligible, you will be prompted with a message on the screen “Your account is not whitelisted to use the Customer List feature”
You can refer to the below criterias that your account must meet to be eligible to use the Customer list:
A good history of policy compliance.
A good payment history.
At least 90 days of history in Google Ads.
If you have 90 days of Google Ads history and more than USD $50,000 total lifetime spend, you can use Customer Match and similar audiences for Customer Match in the "Targeting" and "Observation" settings, manual bid adjustments, and Exclusions.
For advertisers whose accounts are managed in currencies other than USD, the spend amount will be converted to USD using the average monthly conversion rate for that currency.
Here is the link to the support doc by Google that you can refer to check all the terms and conditions: https://support.google.com/adspolicy/answer/6299717?sjid=16080296114375114964-AP
If the selected Google Ads account is eligible then there will be a success message prompted on the screen and our app will automatically create the 3 default lists.
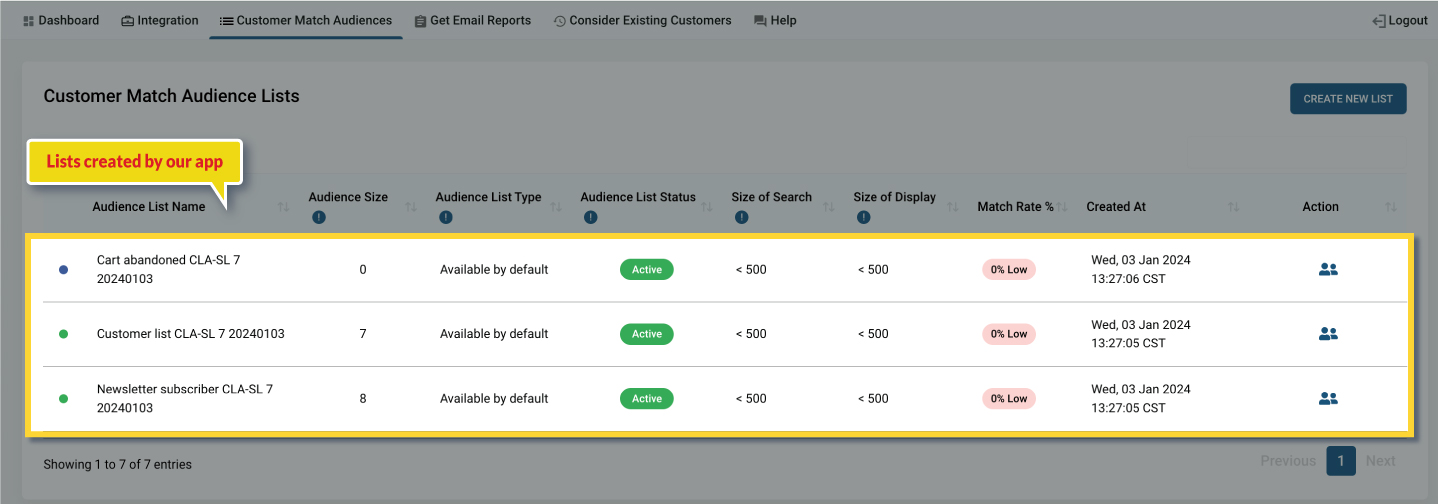
Based on your preference, you can use them in any of your Google Ads campaigns. There will be no issue if they are not being used in any current running campaigns.
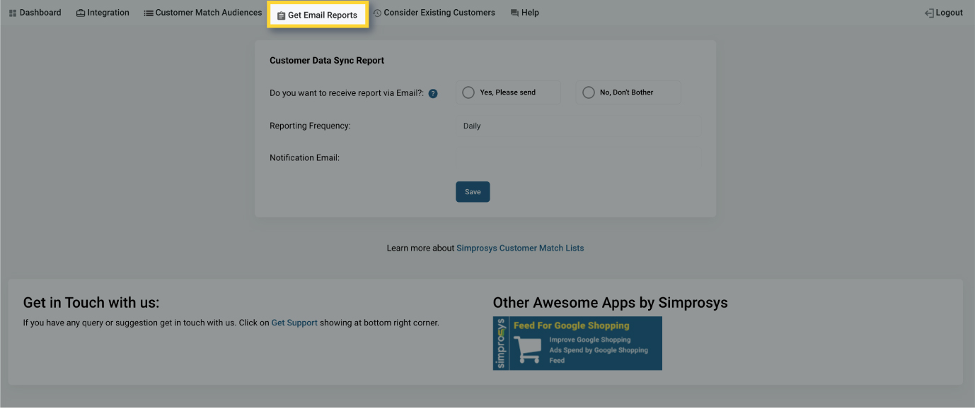
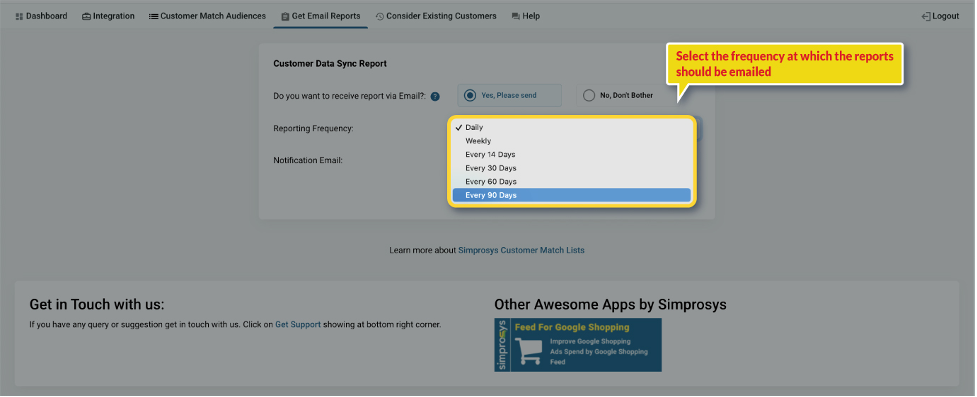
To get the customer data sync over email based on a set frequency, you can set up this from the tab “Get Email Reports”.
Our app will start to sync the customer data of those customers who made purchase on your Shopline store, from the date the app is installed.
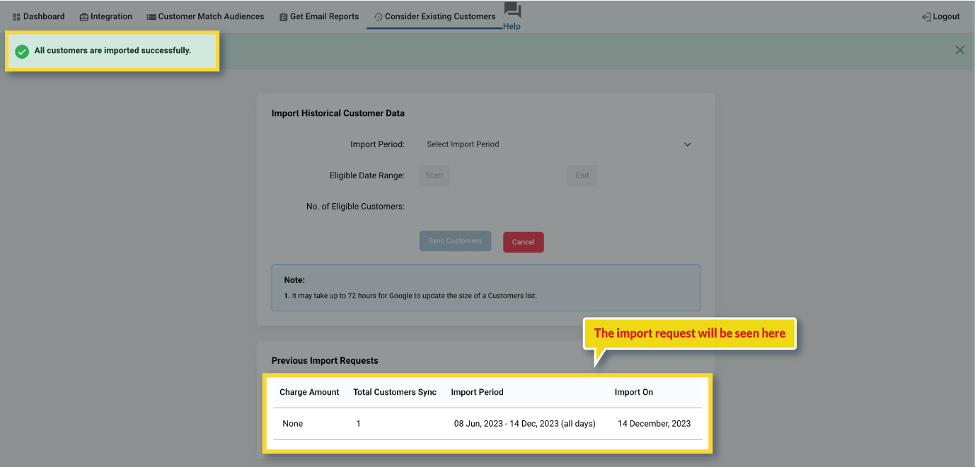
But if you wish to import past customer data, then there is another option you can use: “Consider Existing Customers”
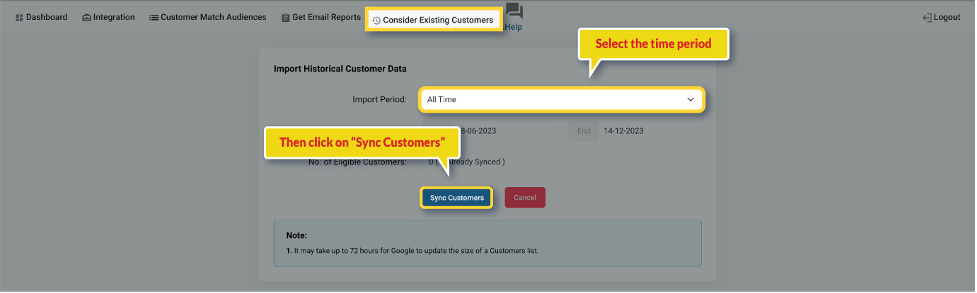
There is a dropdown to select the period from which you want to import the customer data.
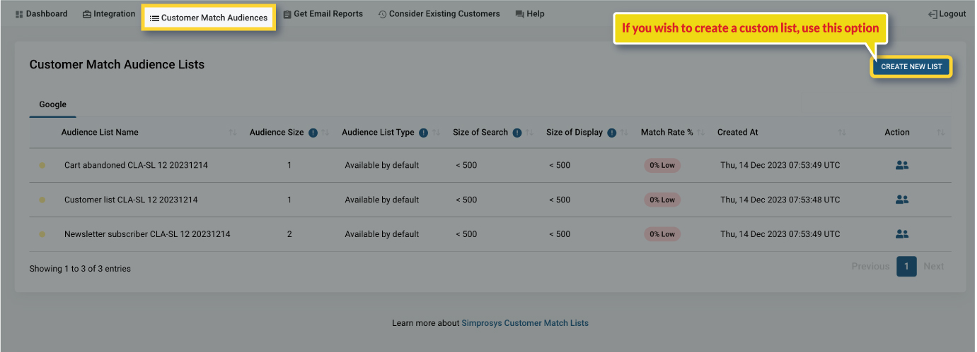
However, if you wish to create a custom rule based audience for any campaign, it can be achieved using the “Create New List” option.
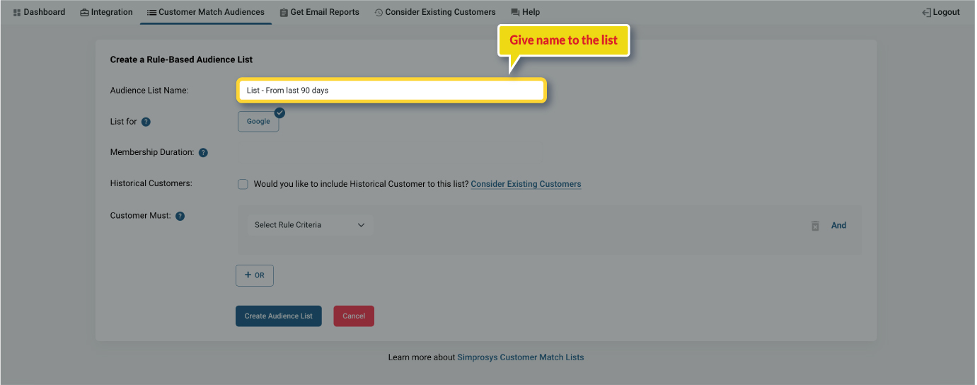
For instance, click on create list then, give the name to the custom list.
Select the duration for which a customer in the list stays for the campaign. The default duration is set to 30 days. You can change it as per your convenience. So, selecting 90 days.
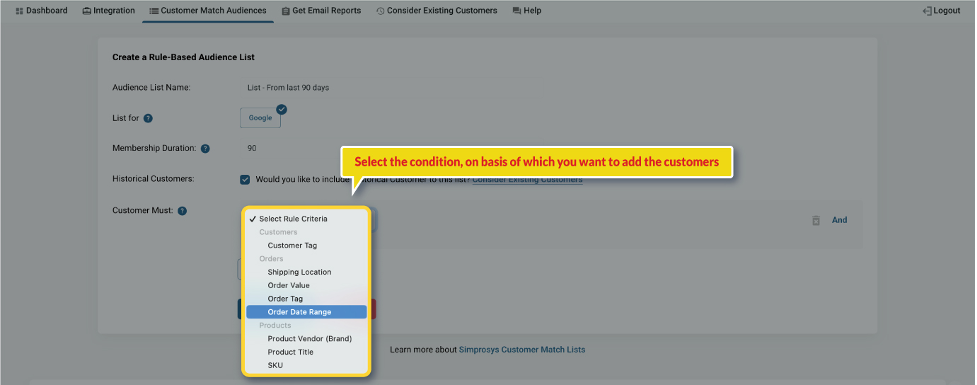
Next select the condition, on basis of which you want to add the customers. You get multiple options to create a condition or multiple conditions at the same time.
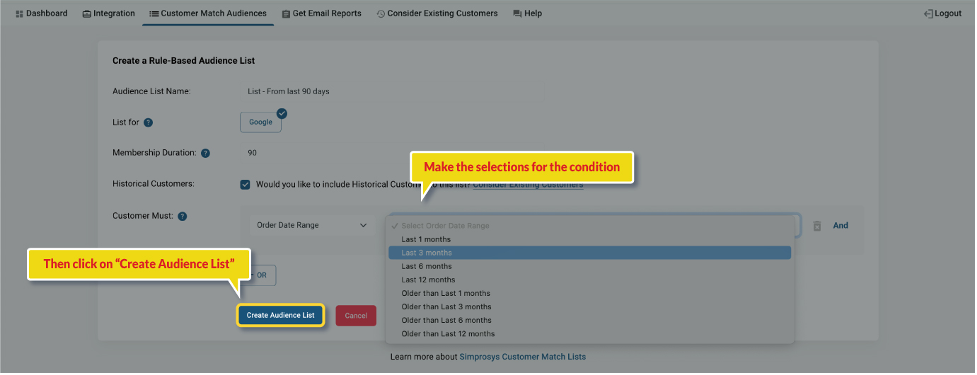
After setting the conditions for customer list, proceed with “Create Audience List” button.
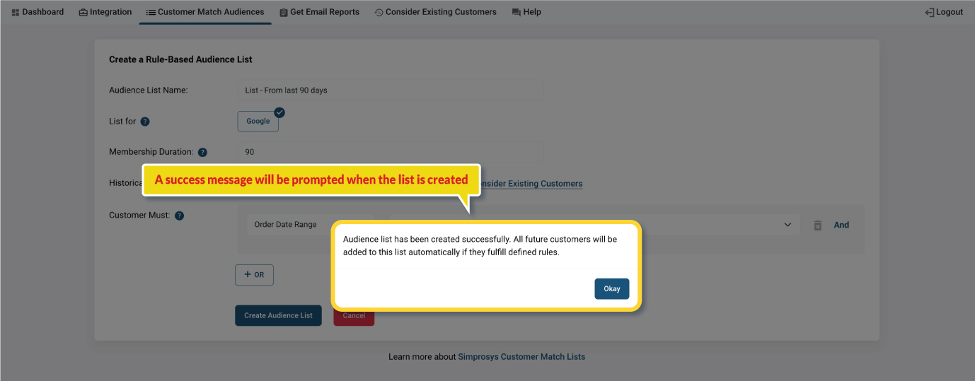
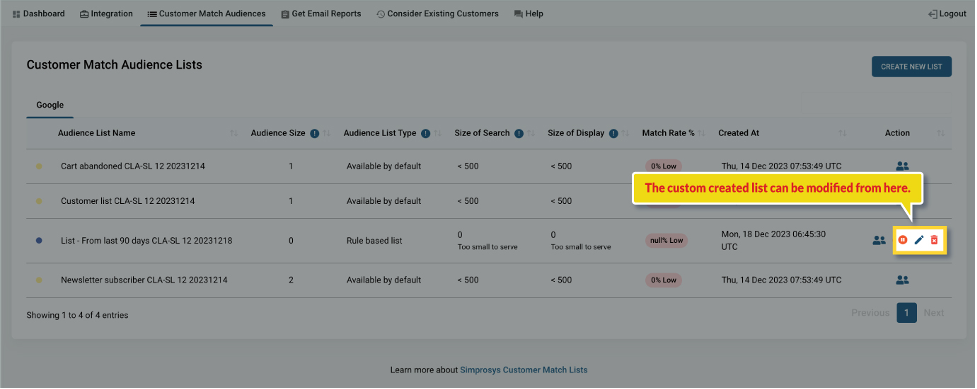
The created lists can be modified. You can pause, edit aur delete the lists using the icons available.
Note: It will take upto 2hrs for the list to appear in the Google Ads account.
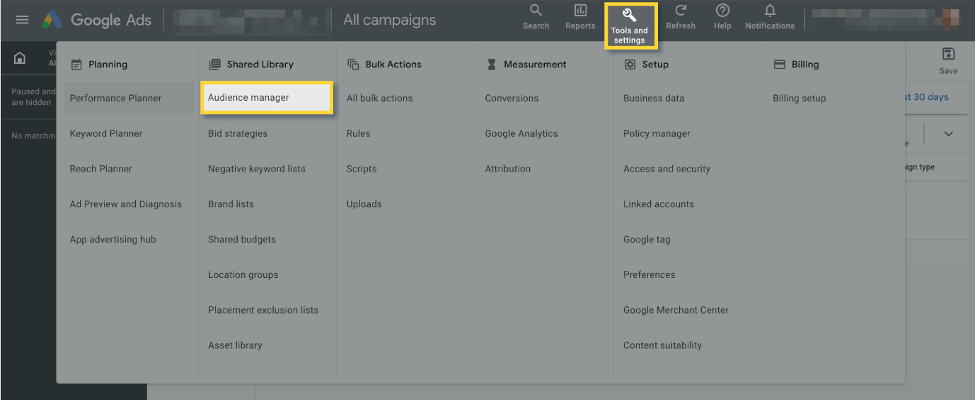
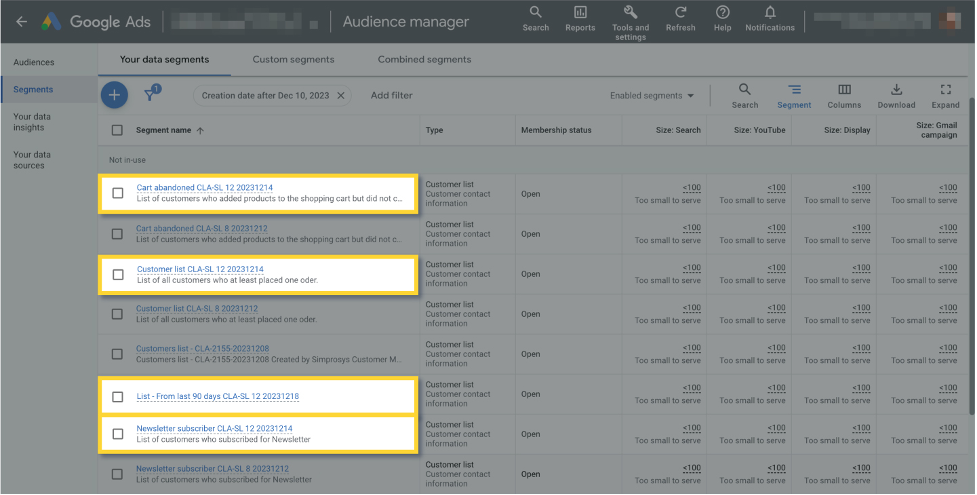
You will be able to see the created lists in the audience manager section of your Google Ads account. You can use that lists once it has sufficient data for the kind of campaign you would like to use in.
Navigate to the “Audience Manager” page of the connected Google Ads account. There you can see all the lists available.
We hope it is going to be helpful. If you have any queries, you can write to us at support@simprosys.com, and we will definitely help you.
Next article

Simprosys Customer Match Lists
Processes of Simprosys Customer Match Lists for Shopline
Pre-Installation Simprosys Customer Match Lists for Shopline


