

Simprosys Customer Match Lists
Processes of Simprosys Customer Match Lists
Pre-Installation Simprosys Customer Match Lists
Step by Step Integration Process for Simprosys Customer Match Lists App For Shopify
Sep 05, 2025
In this help doc, we will show the step by step integration process for Google Ads Customer Audience App with your Shopify Store and Eligibility Criteria for Customer Match or Simprosys Customer Match Lists account. Search Google Ads Customer Audience App in your Shopify App Store. Click on the “Add App” Button to install into your Shopify Store. (see attached screenshot) 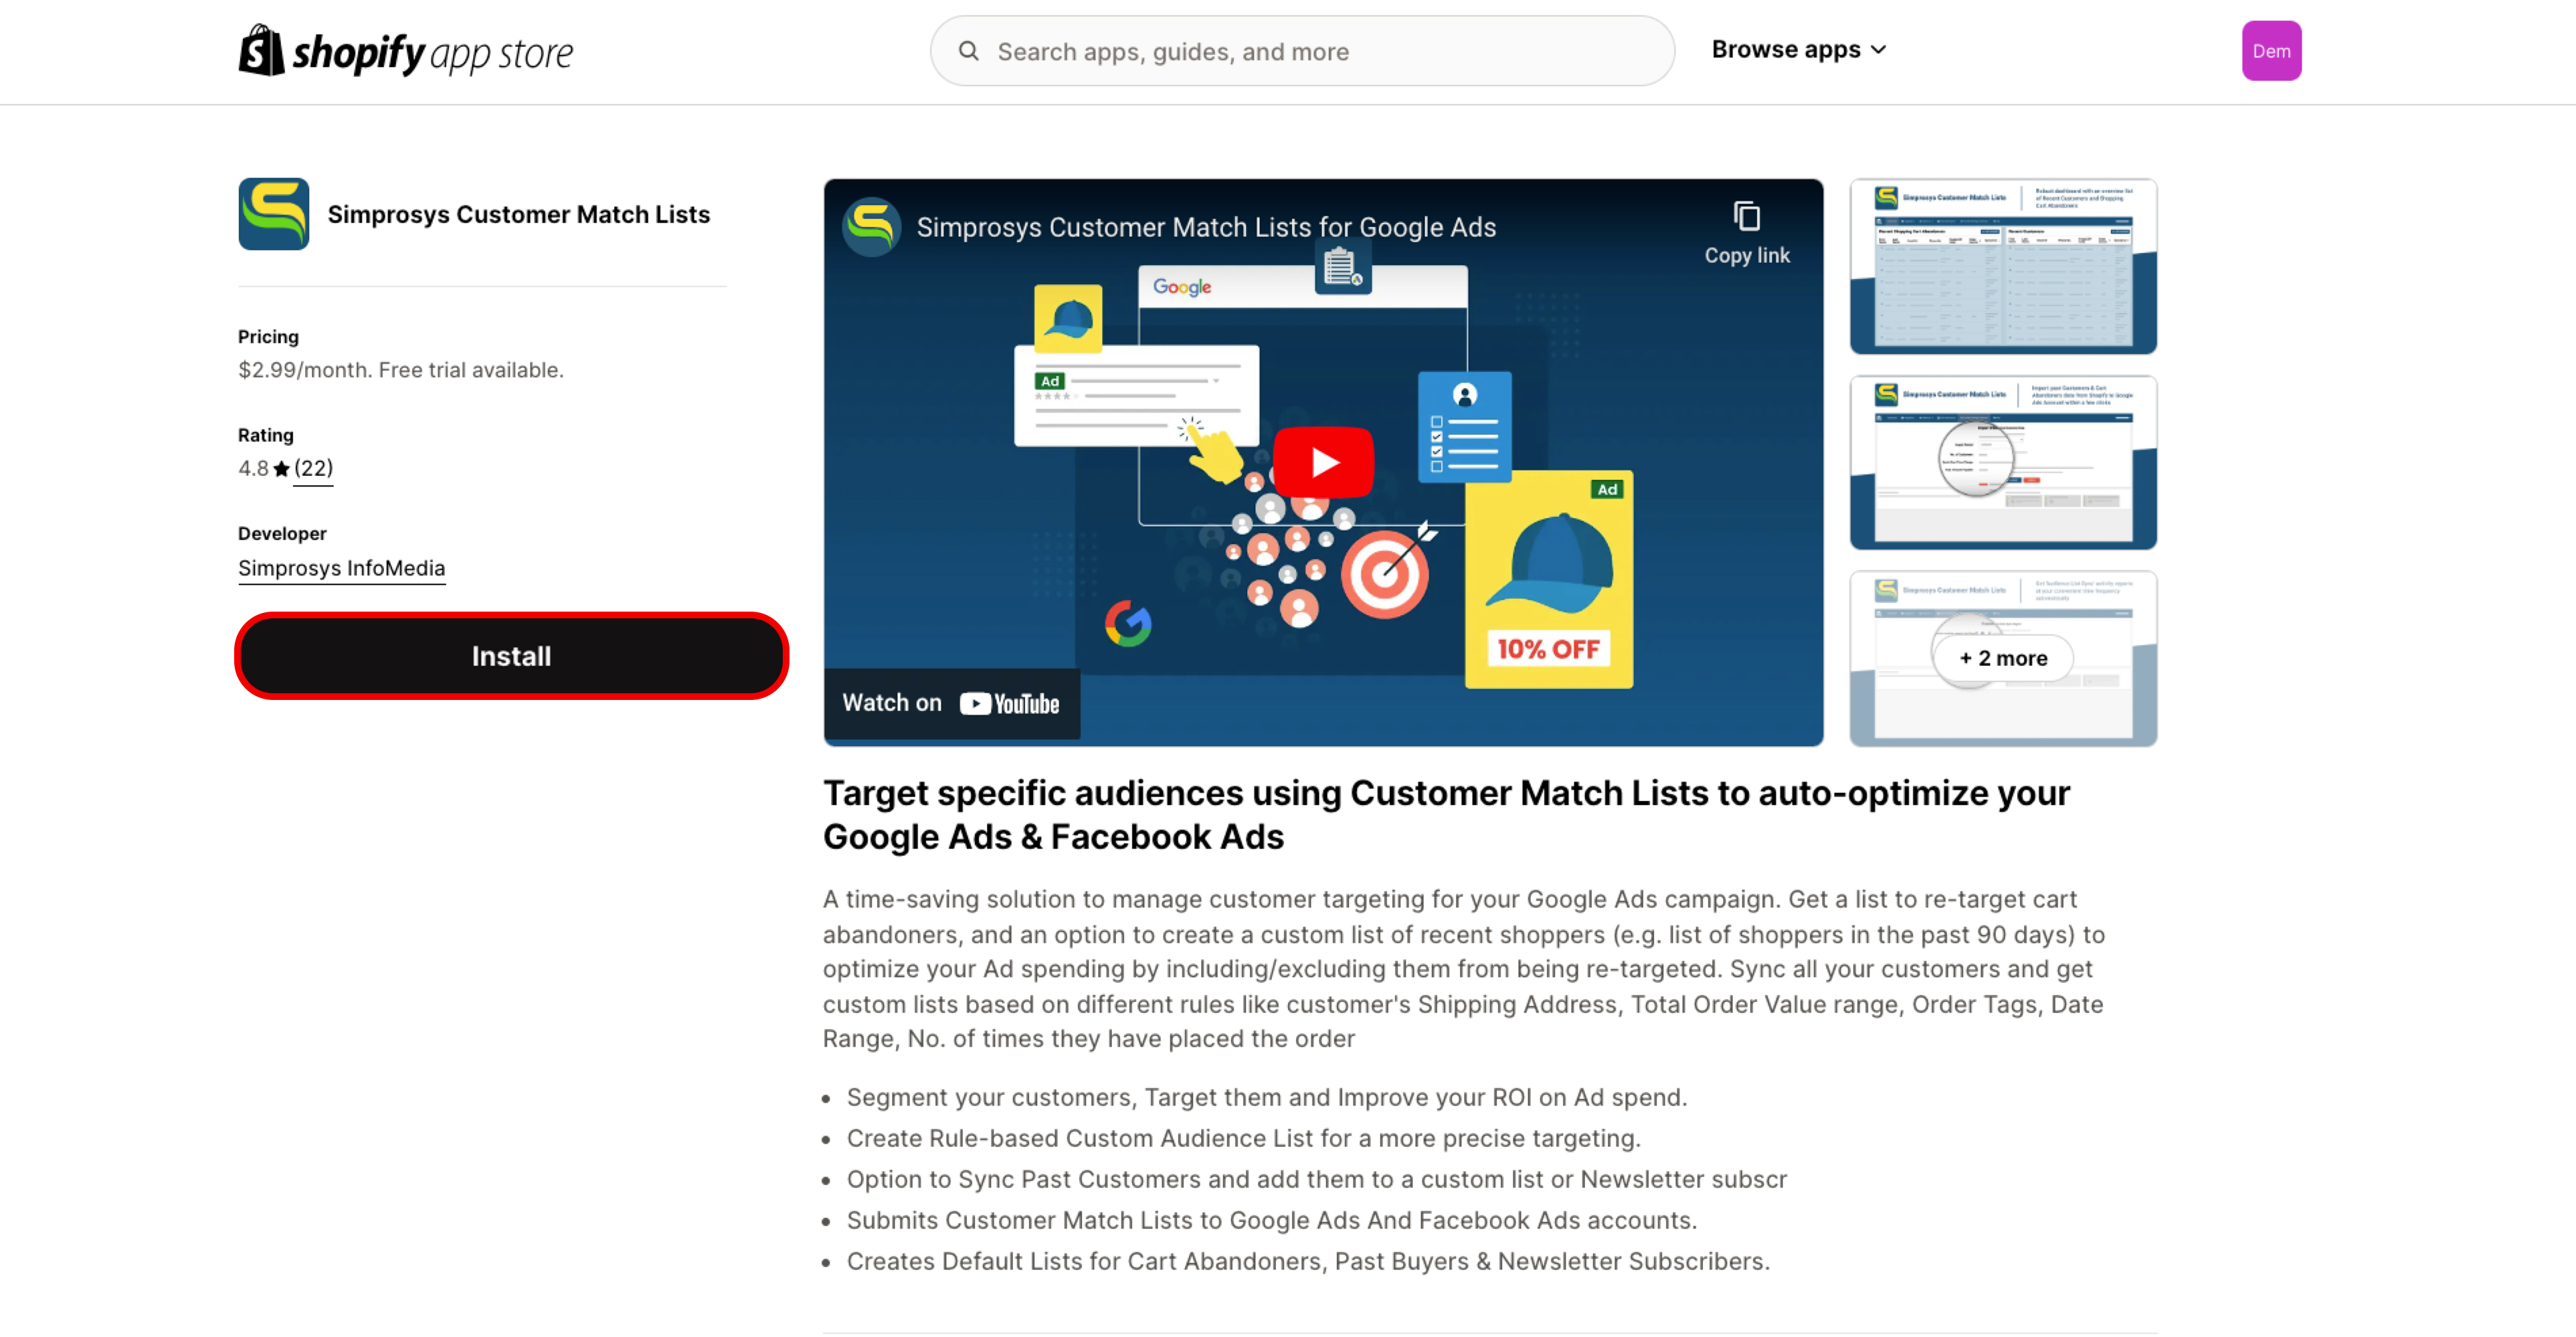
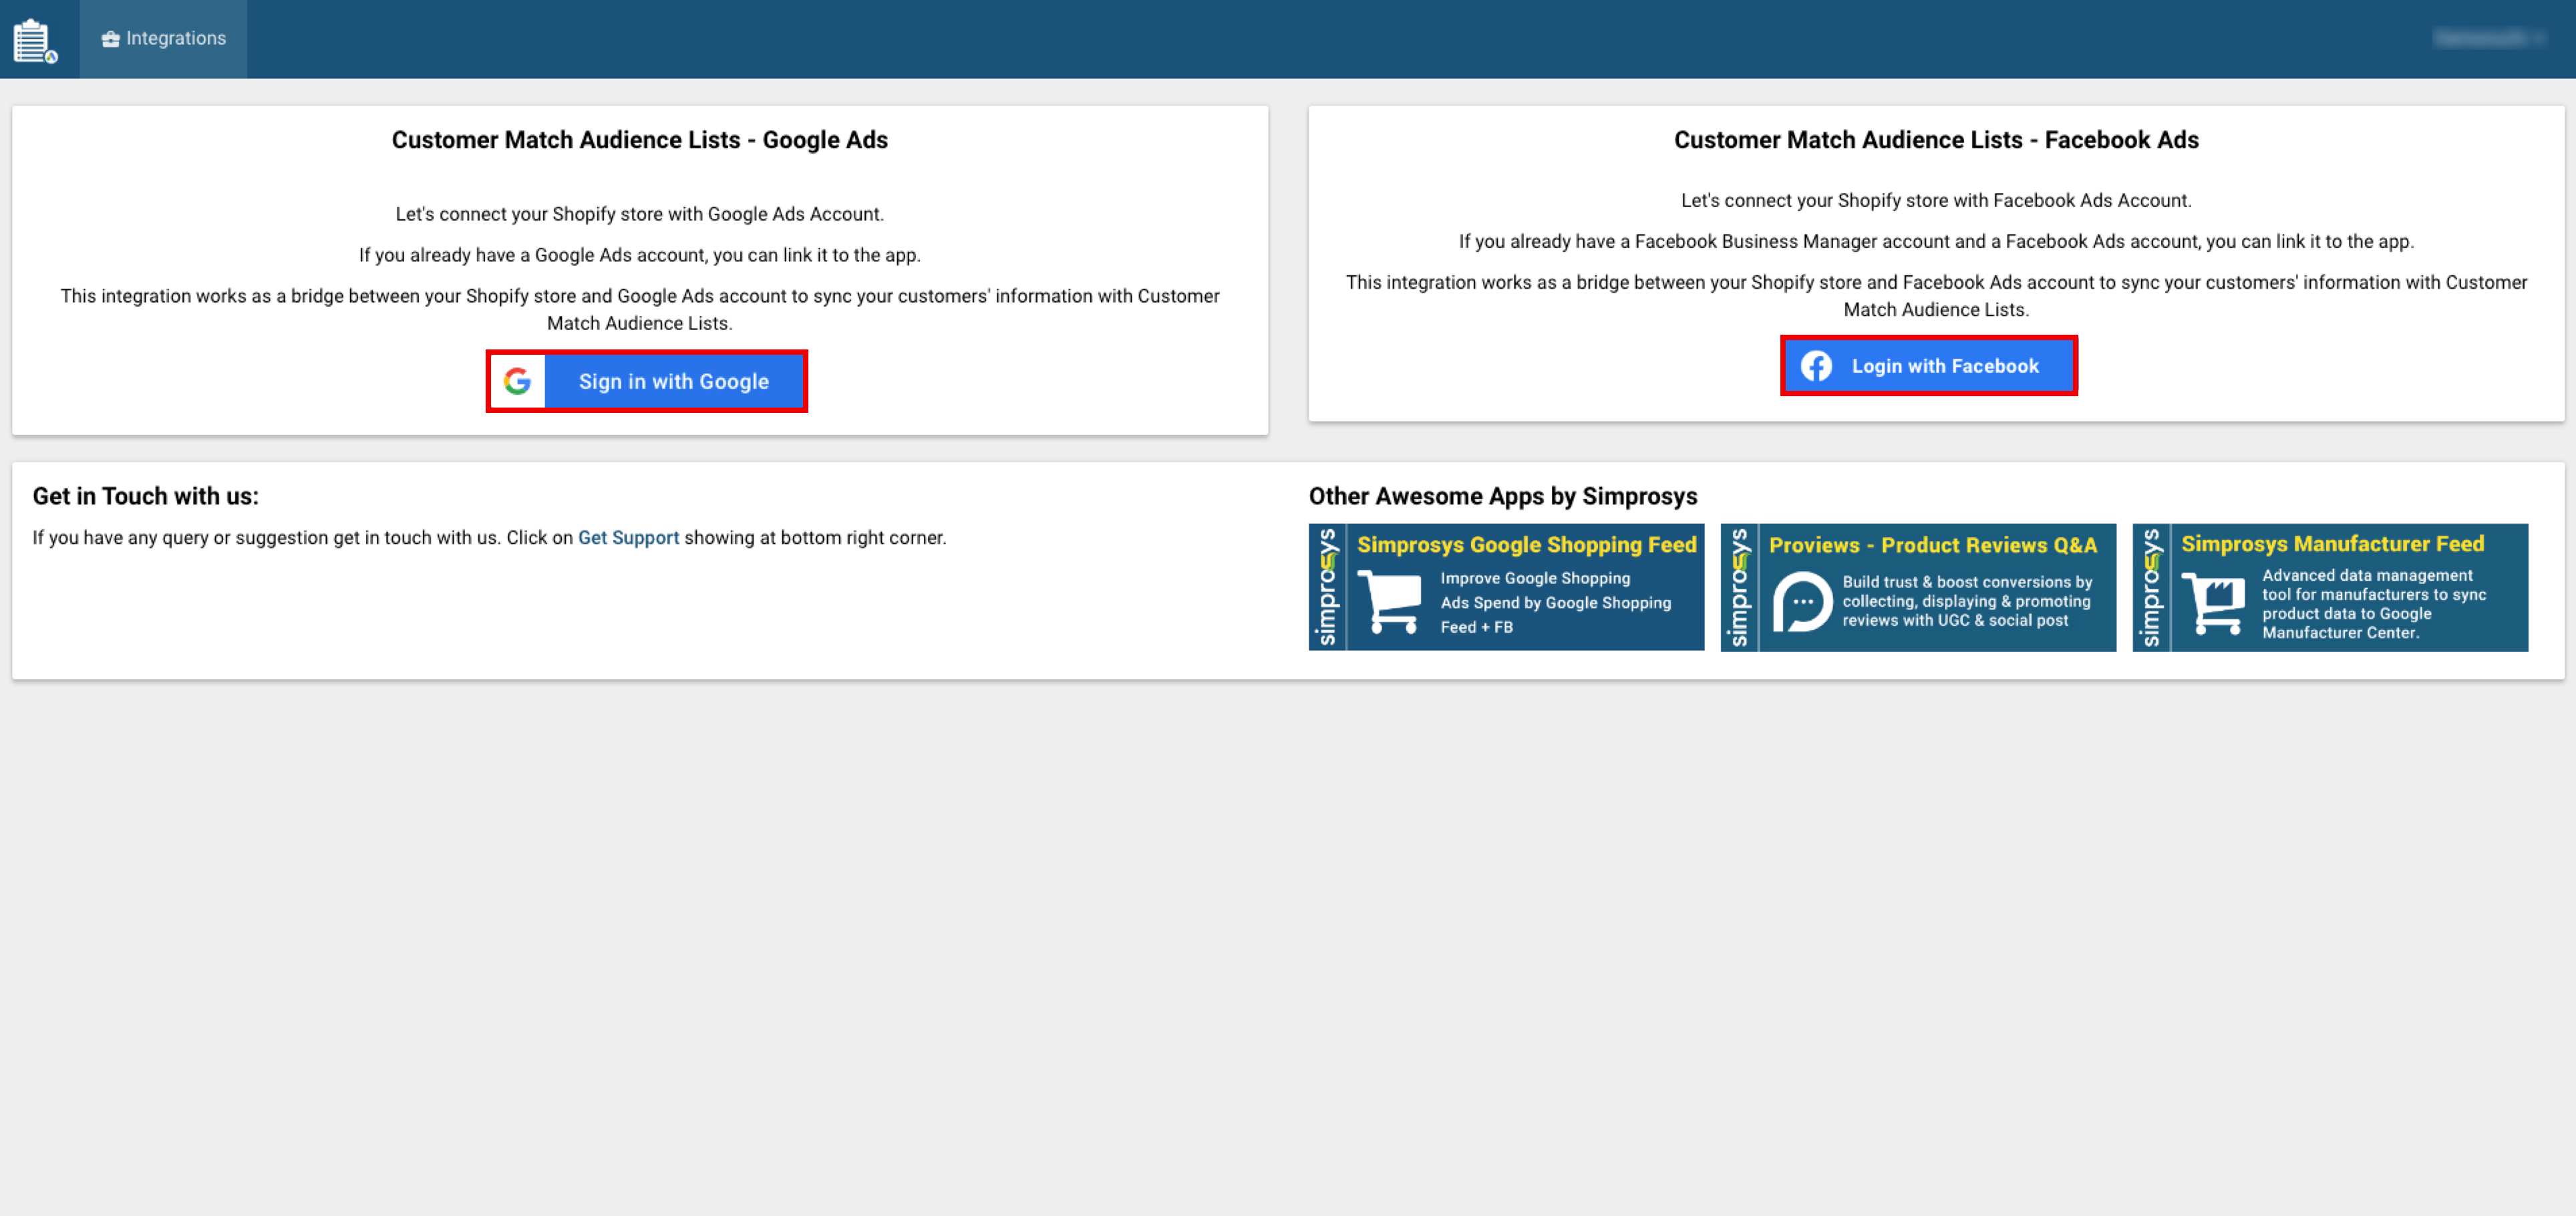
After that, the app is taking you the permission page. approve the permissions requested by the app to work on your store. You will have to link this app with your correct Google ads Account. Click on the “Sign in with Google” button, or "Login with Facebook"
 Please make sure you select the right Google Account If you are not already signed in to the browser, kindly enter the right login details of your Google Ads account.
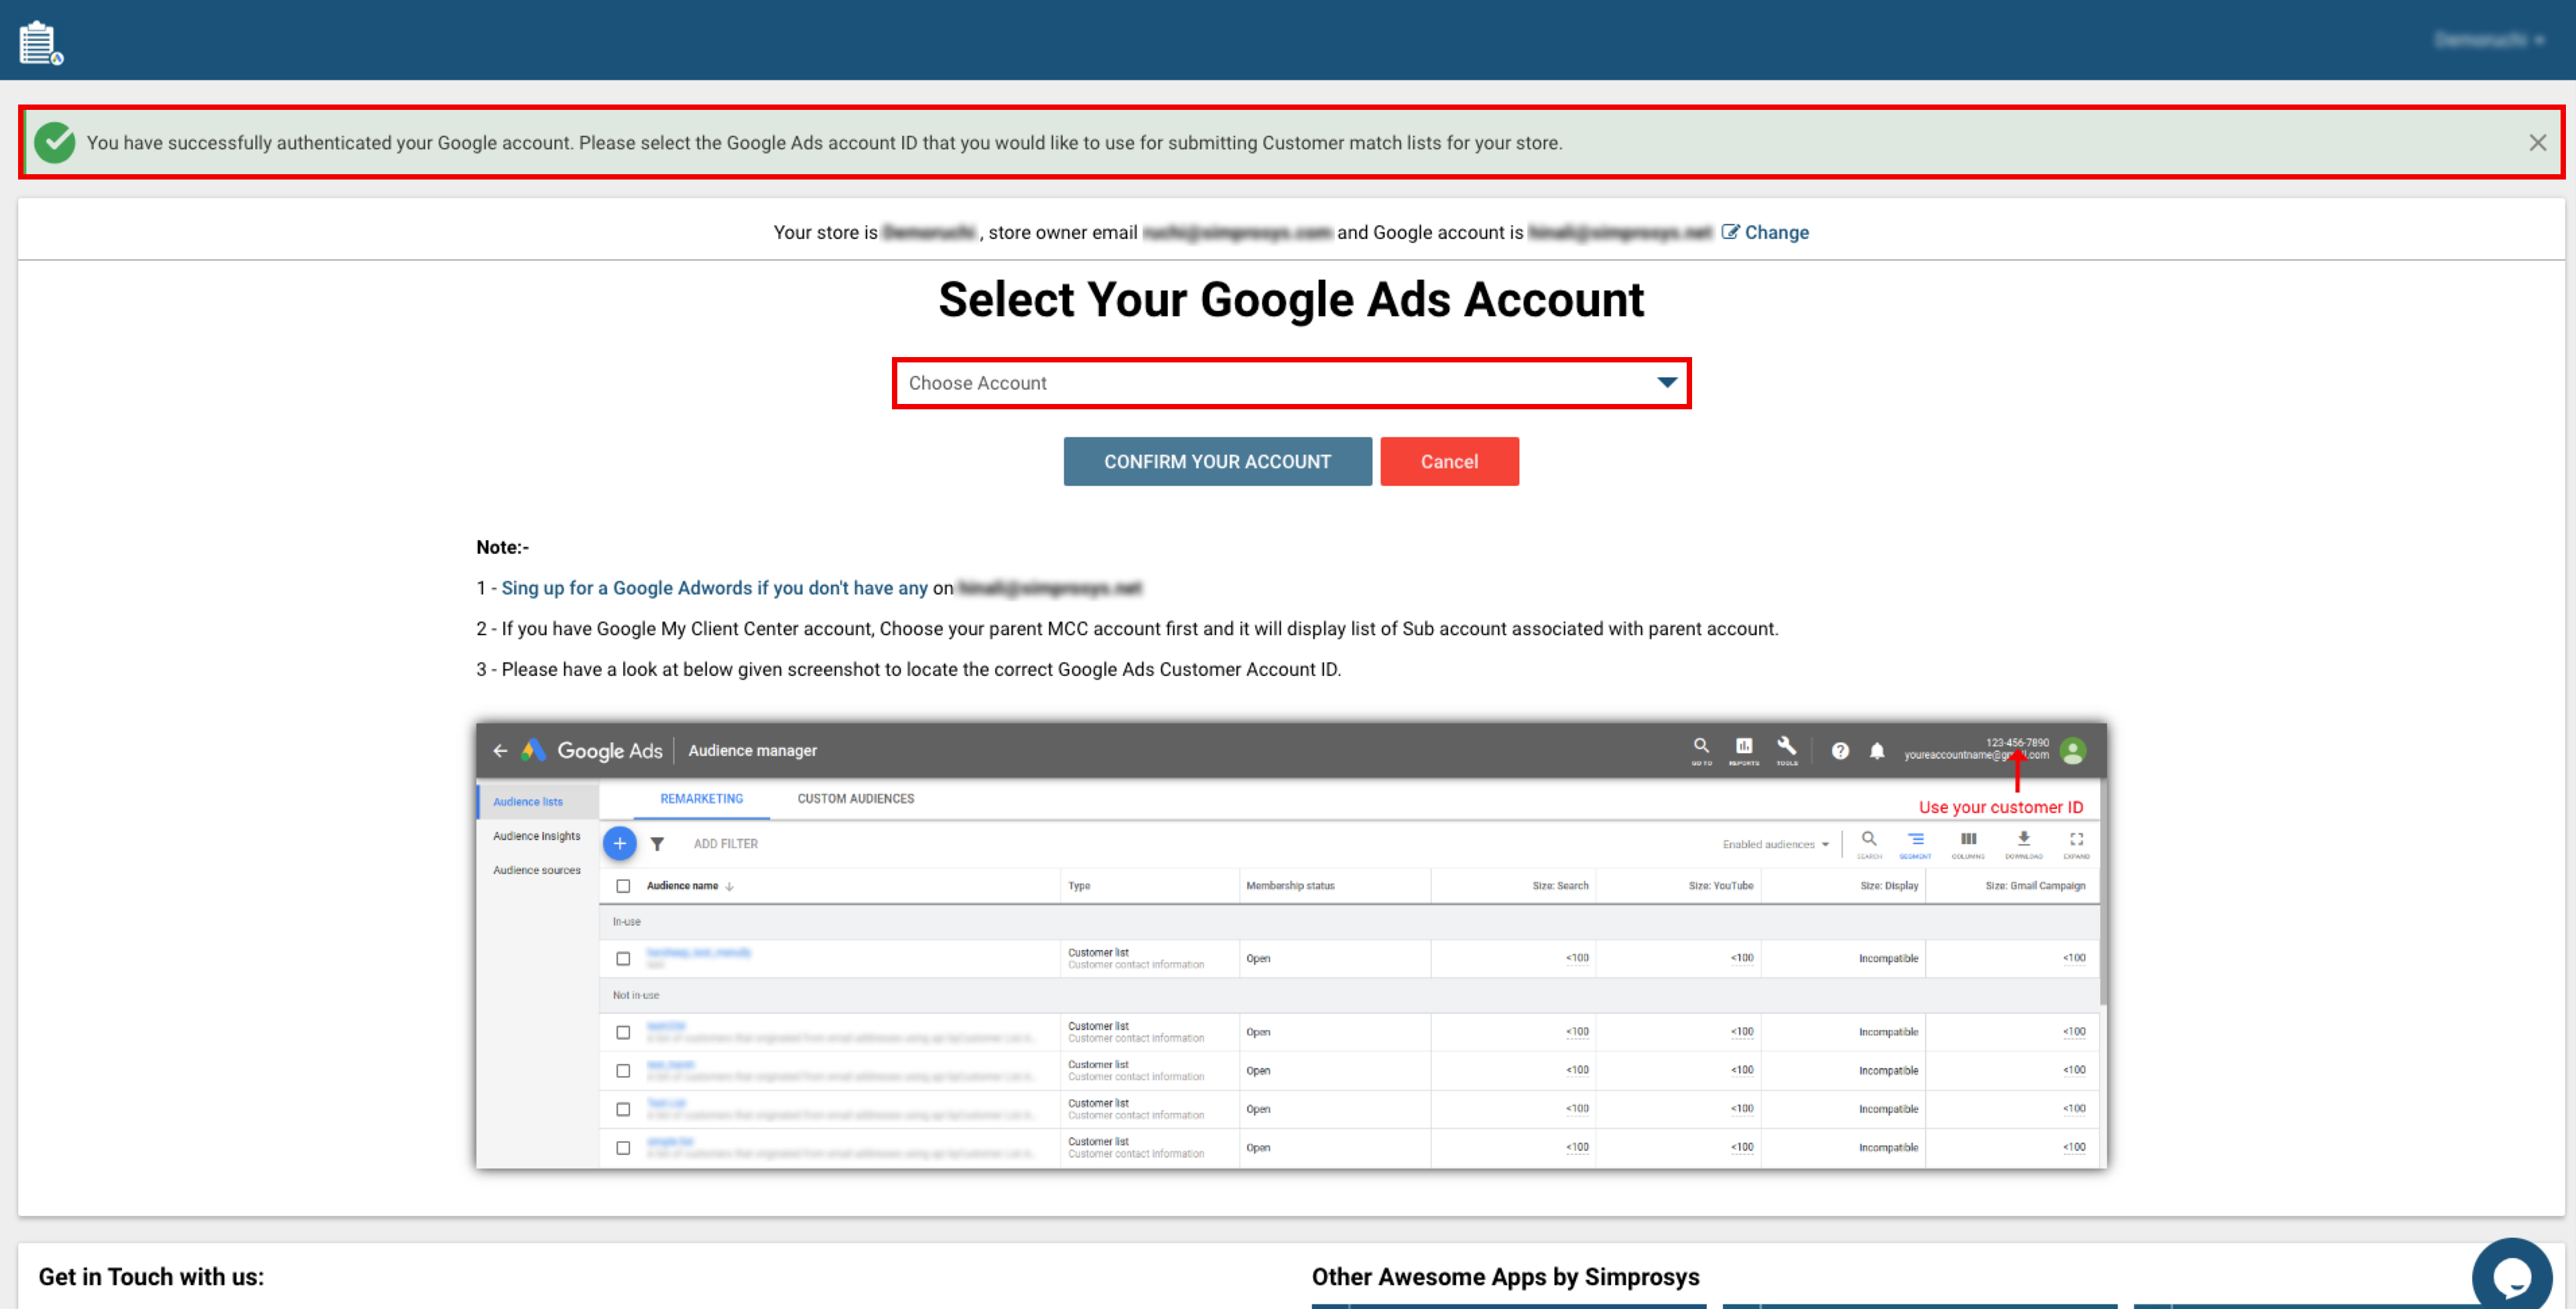 Then on the page make sure you are selecting the right Google Ads account if you have multiple Google ads account access from the same email. If you have MCC access on the given Email ID, make sure you select the right parent account and then correct sub-account. After that our App will check if your account is approved for Customer List Audience or not. If you are not approved for a customer list audience, you will get a message at the top of the page.
Please Note: Customer List or Customer Match is not available for all advertisers. To use Customer List or Customer Match, your account must fulfil the following criteria.
- A good history of policy compliance.
- A good payment history.
- At least 90 days of history in Google Ads.
- More than USD 50,000 total lifetime spend. For advertisers whose accounts are managed in currencies other than USD, your spend amount will be converted to USD using the average monthly conversion rate for that currency.
If you want to start using Customer Match and you meet the requirements above, you’ll need to contact your assigned account manager to request access to Customer Match. Else, we can try it for you.
We do not guarantee that Google shall approve the Customer list feature for your account. But we shall try our best to get you that feature. If the selected account is approved, it must show a success message on top of the page.
By default, our app creates two lists. It is up to your preference if you wish to use them on any campaign or not. But, they don’t harm if you don’t use them in any campaign.
When you click on the Report link you can set report frequency. At the set frequency, you shall get the summary of the customer data sync of the same period. By Default, our app works with your customers who will buy from your store from the time you complete the installation of the app.
If you need to work on Historical Customer Data, kindly click on the “Consider Existing Customers” menu link. It will allow you to select the period, within which you need an app to consider the customers to work with. Our app charges a one time charge of $2.99 per 1000 customers for historical customer data sync. So, based on customer counts in the given period, you will have to approve the charge.
Historical customer data syncing is completely optional.
If you wish to create any custom rule-based audience for any campaign, then click on create list Then, put in the name of the custom list. Then select the duration for which a customer in the list has to be considered for the campaign. Then select the duration for which a customer in the list has to be considered for the campaign.
For example, I'm selecting last month’s customers. But, you get all these options to build the list or multiple lists. So, after setting the rules for customer list and pressing the “Create Audience List” button, you will have to approve the charge.
Note: For each Additional Rule based List we charge an additional $2.99 per month.
If you wish to modify any existing list, please click on Edit Icon and make changes in the rule or rules of the audience. Then You have to click the update audience list button. If you wish to delete any already existing list, you will have to click on the delete icon. It will simply delete the list and allow you to reduce the monthly charge for the deleted list.
Please allow about two hours of time to create new audience lists in your Google Ads account.
Then please go to the Audience Manager page of the connected Google Ads account. You will be able to see those lists created there in the audience manager. Once the list is created and sufficient enough for the kind of campaign you would like to use it, you can use that list in the campaign.
For any query, kindly press this “Get Support” Button and drop your message in the form. Else, if the Online Chat support team is online, you can directly chat with our support from the same button. Also,
We request you to use the “Get Support” Option only to get in touch with us.
Any Direct Email to our Support@simprosys.com may land in Spam Folder. We check and clean our Spam Folder once on the working day only.
Previous article

Next article
Simprosys Customer Match Lists
Processes of Simprosys Customer Match Lists
Pre-Installation Simprosys Customer Match Lists


