Create Microsoft Advertising Feed-based Audience Campaigns Using Simprosys Shopping Feed App for Shopify Store
Want to extend your product reach beyond search? Microsoft Feed-based Audience Campaigns help you promote your products across the Microsoft audience network, like MSN, Microsoft Edge, Microsoft Casual Games, Outlook, and more. At the same time, targeting a rich audience signals to improve ad relevance and better conversions.
Now with our app, you can easily create a feed-based audience campaign for Microsoft Advertising from your dashboard.
Let’s walk you through the step-by-step process.
Start creating a Microsoft feed-based audience campaign

First, open the Simprosys Google Shopping Feed App on your Shopify store and navigate to the campaigns section. Click on Microsoft Feed-Based Audience Campaigns. This will open a section where you’ll manage all campaign settings.
Now, click on the ‘Create New Campaign’ button to begin setup.
Step 1: Budget and Bid Strategy
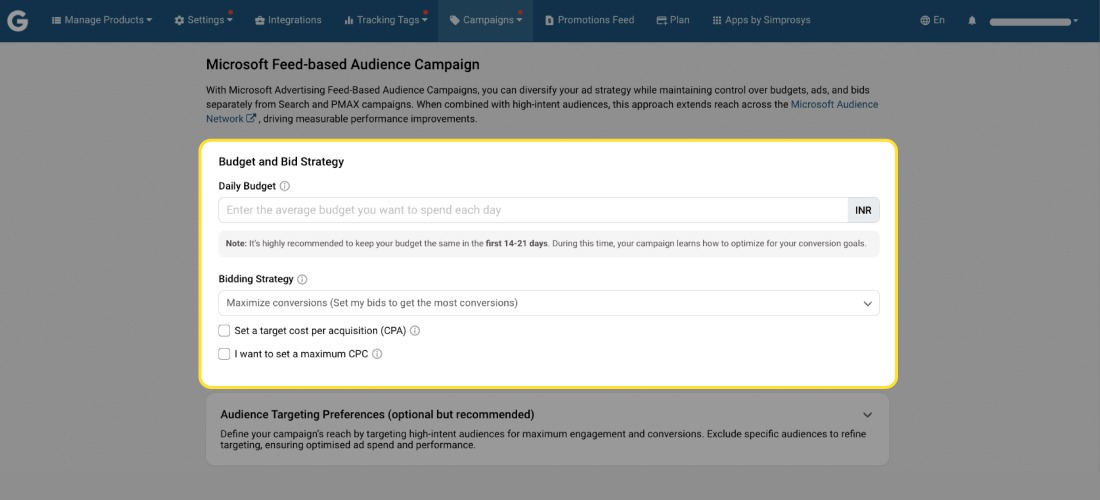
A. Daily Budget
On the campaign creation screen, the first step is to define your daily budget. Enter the amount you’d like to spend per day for your campaign.
Note: The currency displayed is based on your Microsoft Advertising account’s billing currency.
Pro Tip: When you enter an amount, a recommendation value will be displayed for the budget. It’s generally advised to allocate at least 20% of your total ad spend to Microsoft Advertising for better exposure.
B. Bidding Strategy
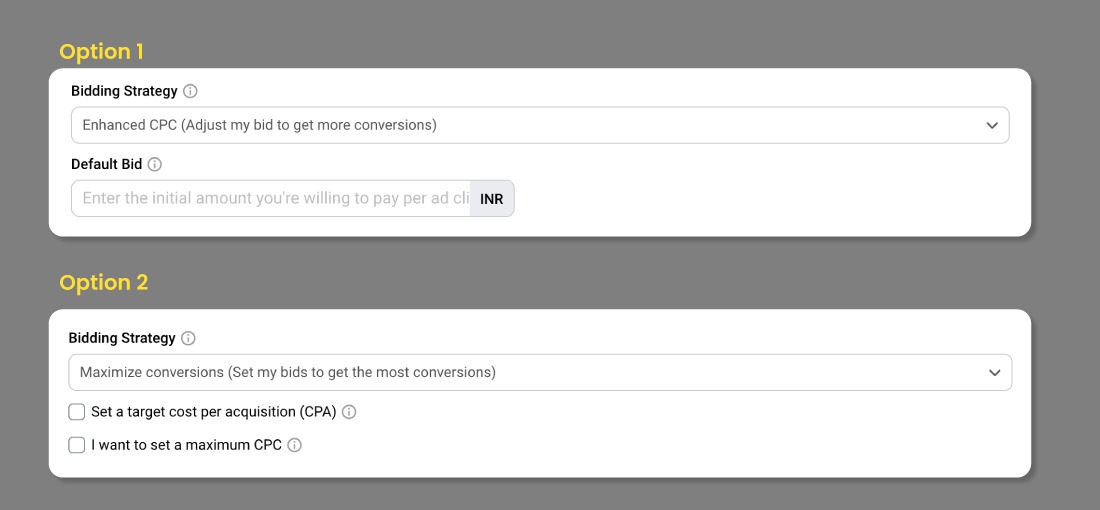
Within the bidding strategy section, you will find two main options:
- Enhanced CPC (Cost per Click) automatically adjusts your bids in real time to help you get more conversions. Enter the average budget amount you want to spend each day, and Microsoft Advertising will increase or decrease it based on real-time data.
- Maximize Conversions helps to drive the most conversions by focusing on audience relevance automatically. You can choose Target CPA, which is the average amount you want to spend per acquisition (e.g., $20), or Maximum CPC is the highest cost per click you’re comfortable with.
Step 2: Select Audience Targeting Preferences (optional but recommended)
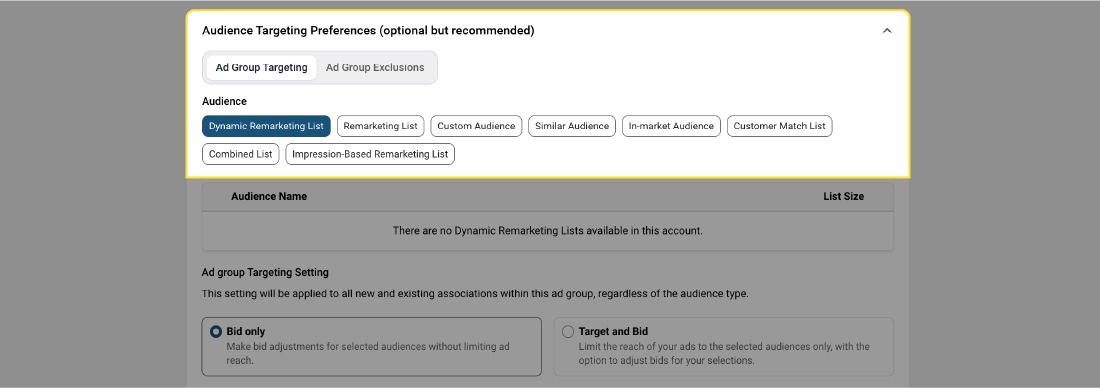
Here, you can define who sees your ads and how your bids interact with that selected audience.
Note: You can’t select the same audience list for both targeting and exclusion. However you can use different audience lists in each to refine your targeting more effectively.
From the predefined list inside the app, you can select audience types like:
- A Dynamic Remarketing List that is based on users who visited your store.
- Remarketing List is better for targeting users from earlier campaigns.
- Custom Audience is a mix of lists for more refined targeting.
- Similar Audience is auto-generated by Microsoft based on your current audience.
- In-market Audience has 1200+ ready-to-use intent-based audience segments.
- Customer Match List, you can upload your customer list for targeting.
- The Combined List contains multiple audience lists targeting.
- Impression-based remarketing helps you target based on store visitor data.
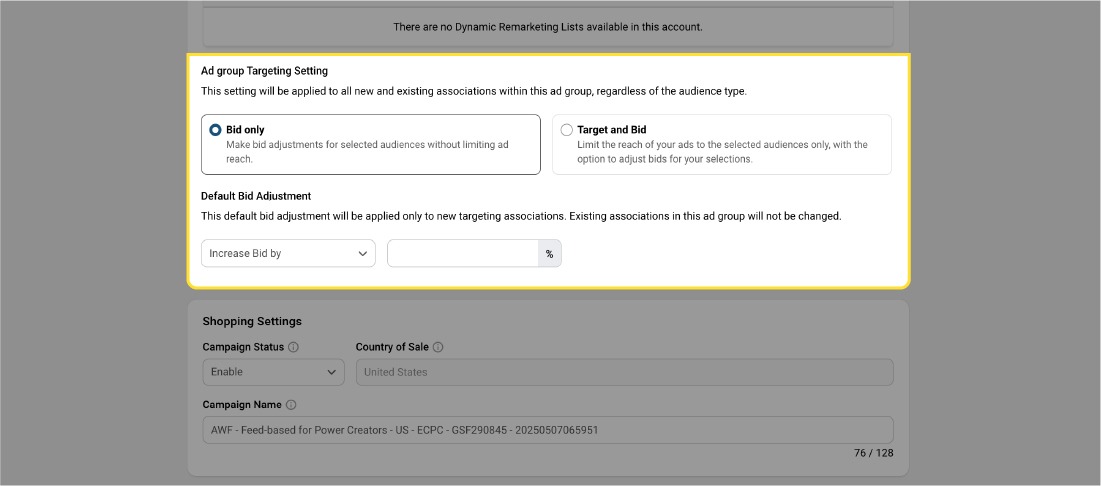
Ad Group Targeting Settings
You now have two audience-targeting strategies to choose from:
Bid Only: Bid only option lets you adjust bids for specific audiences without limiting your ad reach.
Target and Bid: It displays your ads to the selected audience you have placed, while also allowing bid adjustments at the same time.
Default Bid Adjustment
You can further fine-tune your bids by increasing or decreasing the bid by a specific percentage.
Step 3: Shopping settings
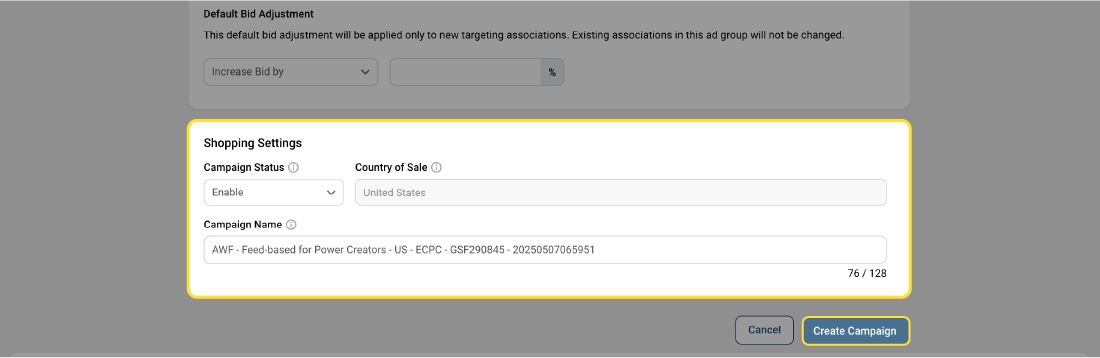
Go to the Shopping Settings section and fill in the details below:
- Campaign Status can be set as Enabled or Paused.
- The country of sale will be set as the default depending on the primary target market you have chosen for your feed.
- You can give your campaign a unique, identifiable name. Make sure the selected country aligns with your product feed and meets Microsoft’s regional requirements.
Launch Your Campaign
Once all the settings are configured, review all campaign details and click on ‘Create Campaign’ to launch your Microsoft feed-based audience campaign.
Monitor Your Campaign Performance After Changes
After your campaign goes live, monitor its performance in the Simprosys Shopping Feed for the Shopify Dashboard:
- Navigate to Campaigns> Microsoft Advertising Campaigns inside the Simprosys Google Shopping Feed app.
- In the campaign actions buttons, select the track key metrics like Impressions, clicks, click-through rate (CTR), and conversion trends
- These insights help you identify high-performing audiences and optimize your strategy over time.
Start small, monitor results, and optimize based on data; that’s the key to driving meaningful performance from your Microsoft Advertising.
Need more help? You may reach out to support@simrprosys.com for more information.